Introduction
This guide details how to retrofit a Connect Nav+ unit into a FIAT Stilo with perfect functionality. The process is also the same for the Connect Nav unit. Detailed here are various options when fitting to save money or have an absolutely original fit; the choices will be detailed and up to you to decide which method you take.
Please refer to the forum thread here for background to the process and opinions / comments by others.
N.B. The installation process requires the vehicle’s roof lining to be dropped, hence a significant amount of interior trim to be loosened or removed. Also, modifications to the vehicle’s wiring loom may be required. Please keep this in mind when considering doing this. Whilst every effort has been made to describe trim removal as accurately as possibly, both I and the FiatForum cannot be held responsible for any breakages / damages occurred.
Flashing Mileage Issue
The Flashing Mileage Issue . . .
. . . has been solved (read this post by my brother, RoopeI
 ). Basically, when you’ve installed the CN+, the mileage will flash on the instrument cluster. This is due to the Body Computer detecting a foreign node on the CAN Line. The way to get around this is to install a time-delay of 4 seconds into the ignition feed; that way, the Body Computer will have finished it’s checking procedure before the CN+ becomes active on the CAN Line.
See the last page, here, for details on the time delay circuit options (if you want them).
Wiring Options
Two Installations, two different methods used
My brother and I have now installed the Connect Nav+ unit to two Stilos; his 55 plate Schumacher, and my 03 plate Dynamic. Since his Stilo was still under full manufacturer’s warranty, he decided to install a whole new dash wiring loom; this required most of the dashboard to be removed, all electrical connectors at the front (e.g. Air Con, Body Computer) to be reconnected onto the new loom, and cost £220! However, the three wiring adaptations listed in this guide were already in.
Since mine is practically out of warranty, I personally considered this irrelevant, and made the wiring alterations manually. It was all quite simple and cost me nothing (I used wires off the old loom, so it might cost you something; however nothing as much as £220, I reckon £15 at most!).
The choice is yours.
Airbag Feed Issue
Something to think about . . .
The factory-fit wiring loom for Stilo’s with Connect Nav+ have a wire coming from the Airbag Control Node going to the CN+ dedicated connector. Due to the sensitivity of the Airbag system, it was decided on the second installation not to install this feed. This feed is a crash input feed; in the event of an accident, it will automatically activate the “SOS” service on the unit (which requires a subscription to use properly).
Required Equipment
What You Will Need
A Connect Nav+ unit! Checking ebay (select European search too) may yield results, if not try breakers yards; the CN+ from FIAT is at least £1500 for a reconditioned unit, and in excess of £2200 for a new one! Remember it is available in three colours; standard black, Abarth grey and the new X-Box/Schumacher silver.
Apart from the unit, you will need the following. Further details of each part will be given in the fitment stages. The parts given below are all original Stilo parts for a factory fit, but some clever options are listed too.
- A new dashboard cage for the CN+ unit; FIAT part number 46790149; approximate price £8.
- The dashboard GPS/GSM wiring loom; FIAT part number 46760222; approximate price £44.
- The second GPS/GSM wiring loom; FIAT part number 51730980 (3dr), 51730981 (5dr), 51730982 (Multiwagon); approximate price £50.
- GPS/GSM aerial base; FIAT part number 51732347; approximate price £130 (N.B. If you are fitting it to a Stilo 3dr with tailgate spoiler, you require a differently angled base; FIAT part number 51732349; approximate price £153).
N.B. If you order a GPS/GSM Antenna from an Alfa 159, it looks exactly the same, but comes with the second GPS/GSM loom already fitted, and is itself cheaper. Doing this will save you £140 for exactly the same look and functionality. Part number for this is 50503289, price £65, but you will have to go to an Alfa Romeo dealer to purchase one. - Antenna; FIAT part number 46772567; approximate price £7.50. If you've gone for the more logical route of the Alfa 159 GPS/GSM base, then you'll need the Alfa antenna - part number 50505287, price £8.50, again only available from Alfa Romeo.
- Microphone; FIAT part number 735303207, approximate price £45.
N.B. I found that the microphone from the Lancia Ypsilon, FIAT part number 735346218, has the exact same microphone as the Stilo but is less than £4 (price error my dealer thinks)! If you just need the microphone and not the plastic, which is a different colour on the Ypsilon (i.e. your Stilo has an alarm or Sky Roof) then this will save you £40!!
Tools wise, some Torx screwdrivers, allen keys, pozidrive screwdrivers . . . nothing out of the ordinary.
Radio removal keys will also be required.
Changing the cage
STEP 1: Changing the dashboard cage.
Remove the original stereo, and you’ll see there are 4 Torx bolts keeping the stereo cage screwed down. Remove these.
Next, remove the two bolts at the bottom of the cage that are keeping the heater control panel fixed down; this needs to be loosened in order to remove the cage.
Choice
Part of the cage goes over a plastic “pole” that comes from the heater panel. Now, our theory is that it is a locator plug used in assembly that might have had a rubber bung in the cage; you’ll notice the hole in the cage is FAR bigger than the pole. So, the choice is:
- Chop the pole off with a sharp Stanley knife as it is serving NO purpose (this is what we did), or
- Remove the centre console, main glovebox and dash support to remove the heater panel and save the pole; this will take a long time and involves removing LOTS of trim!
Either way you choose, the next step is to remove the old cage. This is easiest done by bending it in the middle (i.e. centre top and centre bottom and bending it into the centre).
Now, fit the new one; this might need to be bent slightly to get it in. Once it is, replace all bolts (and trim if you’ve taken it off); you’ll notice even without the pole it is very secure.
Wiring Adaptation (1/3)
STEP 2.1: Installing the Ignition Feed Wire
All of the three wiring adaptations require that the instrument cluster be removed. I would recommend that you disconnect the battery before removing the unit to prevent any problems that may occur.
To remove the instrument cluster, proceed as follows:
- Remove the 3 Torx screws on the lower steering wheel shroud, unclip the lower shroud from the top shroud and remove (it is made much easier by pulling the steering column fully out, and leaving the adjustment lever loose to be moved around whilst removing the shroud).
- Remove the 2 Torx screws keeping the upper shroud on; they are high up towards the column stalks. Remove the shroud.
- Remove the 2 Pozidrive screws securing the bottom of the instrument panel on. Remove the cloth trim that covers the gap when the steering column is at its extremist positions.
- Remove the 2 Torx screws securing the top of the instrument cluster in place, on the lip of the dashboard.
- Adjust the steering column so it is at its most out and lowest position; lock it in place.
- Carefully pull the black trim “blade” at the top of the instrument cluster and use it to lever out the cluster; when you can, undo the connector at the back by pushing in the tab and pushing the red lever to the other side.
- Manoeuvre the instrument cluster away from the dash, paying particular attention to the bottom lugs and the wiring on the steering column.
The wire in Pin 4 needs to be the switched output of your time delay circuit. See here for wiring details.
Now continue to the next page without taping anything up or replacing anything.
Wiring Adaptation (2/3)
STEP 2.2: Installing the Microphone Feed Wires
The microphone feed is taken from the header console to connector D20, which lies on the righthand side of the car near to the Body Computer (RHD). A picture of it is shown below. You can see the microphone feed as they will go into one part of the connector and terminate (i.e. have no feed coming out of the other connector).
 (D20 is the all white connector block)
Now, ideally what you need is 2 pins to put in the white connector to take the feed. I was fortunate in that I had a wiring loom to extract wires from. If you haven't got this, you'll need to either splice or chop the wires going into the connector and use these. Once you have, feed it behind the dashboard, behind the instrument cluster, and round to the back of the CN+ unit. Use an appropriate connector to feed it into Pins 9 & 18 of the white connector on the CN+ (a 2-pin digital audio computer connector, such as the one below, is ideal).
The wiring sequence for the microphone is as follows (the pins are actually numbered on the white connector (P20F) of the Connect Nav+ unit):

Wiring Adaptation (3/3)
STEP 2.3: Installing the GPS/GSM Wires
The first GPS/GSM wiring loom (46760222) goes from the back of the CN+ unit to the junction behind the “My Car” panel. In the previous step (2.2), you would have already had to remove the Body Computer & Fusebox cover trim, as well as the My Car switch control. The instrument cluster should also still be removed.
Now, the best way to do it is to clip the connectors in on the junction mounting (you’ll see the thick black antenna cable already there, and the connectors on the loom are shaped to fit the mount). Feed the cables at the back of the dashboard, and they’ll come out parallel with the dashboard loom. Continue to take it to the radio loom.
The two cables need to be longer than the standard loom, by about 5 inches or so. Once these are in position, start taping all of the loom modifications (power, microphone, GPS/GSM) together, for both security and an original look.
N.B.: The wires at the CN+ are prone to chaffing against the side of the cage, and you’ll notice that the existing loom has a cloth protector around them all. It is strongly advised to break open the cloth “tube”, enclose all of the new wiring, then retape it up.
Continue taping, moving the wires back as if the CN+ was in to ensure they can move sufficiently and will not be damaged. Tape up all the way back to the right-hand side of the dashboard, using cable ties for added security if necessary.
Now, all wiring is done. Refit the instrument cluster. The My Car switch panel and side trim have to be left off for the second GPS/GSM wiring loom installation.
Installing the Unit
Fitting the Unit to the Car
Now that all of the wiring and the cage are installed, the unit can be installed itself. Plug the power and speaker ISO looms in first, followed by the microphone feed connector, then the aerial, and lastly the GPS/GSM wires. Tie down the cables on the unit’s wire traps (these are for the aerial, GPS & GSM cables).
Perform the following test to ensure the time delay circuit is working ok:
With the unit off, turn the ignition on. Make sure the CN+ unit boots up automatically after 4 seconds, and that the mileage on the instrument cluster is not flashing.
- If the mileage doesn’t flash, carefully push the unit in (do it slowly as the space behind the unit is tight and there are a lot of cables to go in!).
- If the mileage is flashing, there is a fault with your time delay circuit, or it might need adjusting to increase the time delay.
Second GPS/GSM Loom Installation
Installing the Second Part of the GPS/GSM Loom
The second part of the GPS/GSM loom follows a different routing than the main antenna cable.
N.B. These instructions are the same as if you've purchased the Alfa GPS/GSM antenna. However, it is recommended that you work in reverse (i.e. take the roof lining down then do the wiring to the "My Car" panel) to ensure cable lengths are ok.
To fit this, you need to remove the side sill trim (kickplate) from the drivers side; this is done by removing the bonnet release mechanism (simply pull it off towards the passenger side, i.e. on the same horizontal plane), undoing the screw by the bonnet release lever, then simply pulling the trim off (best to start from the side at the middle of the car (B-pillar)).
Connect the cables to the dashboard loom connectors you locked down behind the “My Car” panel, then feed them down behind the black carpet and into the grey cable holders along the sill. You’ll notice that a loom is already there; use black insulating tape to tie the GPS/GSM cables down to secure them and make it look original. Now, the “My-Car” switch panel and fusebox cover trim can be refitted.
Now, the next stage is dependent on whether your Stilo is a 3dr or a 5dr:
- For 3door vehicles, you need to either loosen or remove the rear panel. To do this, the bottom squab of the seat needs to be removed (remove the bolt and nut), then the pozidrive screws at the bottom of the panel need to come out also. Unpeel the outer door rubber (peel it from the felt side not the rubber side) to get a gap between the car and the trim panel. Gently pull the trim away (it’ll come quite far so there is no need to give it force) and feed the cable through to the boot compartment (go into the boot, undo the side flap and remove the cubby hole as if you were going to change a lightbulb, and the cable needs to come into this area). Leave the panel away from the car as it is required to do so to drop the roof lining.
- For 5door vehicles, remove the rear side sill trim (kickplate) by simply pulling it. Now, remove the lower B-pillar trim by unpeeling both door rubbers as with the 3door, then gently pulling the trim off. Continue to route the cable into the boot compartment (again as with the 3door); leave the lower B-pillar trim off, as it is required to do so to drop the roof lining.
Dropping Roof Lining
Now comes the fun part! I will try and list the 5dr and 3dr methods, although I personally have only done this on a 3dr. Most bolts for this are Torx T30.
First, remove the front sunvisors (2 bolts, and undo wiring if yours have the lights fitted by the mirrors), the header console (either by pulling it down if you have an alarm or Sky Roof or by pushing in the two tabs and pulling across if you have the sunglasses holder), the front ceiling light, all 4 (3 on later models) grab handles (open handle, use a small flatblade screwdriver to open the cover then remove the bolt underneath), the rear ceiling lamp and support frame (if fitted, the lamp just pulls down, the support frame unscrews and unclips!).
Unclip all door and tailgate rubbers at the top and sides (you can remove the whole rubber as we did, just remember which one is which and where the bends are. Usually there is a painted mark on them as a locator point).
Unclip the top half of each A-pillar trim by pulling it towards the centre of the car; there is no need to remove it.
Unclip the top and middle of the C-pillar trims by pulling them towards the centre of the car, then lift them up to unclip them from the black lower C-pillar trim. Feed them away from the seatbelt. Pull the backseat backrests forwards, remove the cap protecting the seat striker plate, and unscrew the screw behind (if present, it is on the 3dr, but I do not think it is on the 5dr). Unscrew the drivers side lower C-pillar trim, then pull it away and remove the clip. It is best to replace it with a new one (14591887); this can be done at a later date.
Since the rear card is either loose or removed on the 3dr, or the lower B-pillar trim has been removed on the 5dr, you need to simply undo the two screws, at the bottom, then evenly pull the drivers side upper B-pillar trim away from the car. Using long-nose pliers to get at the clips might help. Simply pull the top of the passenger one away gently to loosen the hold on the roof lining; there is no need to remove it as per the drivers side.
Now, go around the roof lining to ensure it is all free and nothing is catching it. At this point it may be starting to drop, so get an assistant to hold the front of it (ensure their hands are clean as the headlining marks quite easily). Now, lower the front seat backrests down as far as they will go (i.e. if you were going to sleep on them).
Gently pull the roof lining away from the back of the car, as it is attached by velcro pads here. With assistance, position it on the dashboard and back seats (with headrests down) as this provides ideal support. Ensure it is not moved unnecessarily.
Now that the roof lining is down, go into the boot compartment and move to the next step.
Installing New Antenna
Once the roof lining is down, you'll see the antenna. Simply unclip the aerial connector, unscrew the nut, then gently pull the old antenna away from the car from the outside. Once it's off, clean the area of the roof where the antenna used to be using a mild polish (e.g. glass polish) to remove all debris and dirt, so that the new antenna has a better seat.
Feed the cables through the hole in the roof (to spell it out, the hole is only big enough to fit one connector at a time, so don't try and force all 3 in!!), and seat the antenna base on the roof. Inside the car, bend the cables at a 90-degree angle (as per the old one), and put the locking nut on the thread. Have an assistant ensure the alignment to the roof is ok (i.e. it is running straight in-line with the trajectory-axis of the car), and get them to firmly hold it in place as you tighten the nut to secure the antenna down.
Now, grab the cables we left in the drivers side rear wheelwell, and bring them up the now removed C-pillar. Clip into the existing wiring clips (you'll notice that the radio antenna wire is already there) and follow the wiring exactly, taping it down to the existing for a perfect job. Secure the clips in the holder tray (where the radio antenna join connector is, just like at the "My Car" panel), and clip in the GPS/GSM connectors.
That's it, it's in
!!!Putting Roof Lining Back Up
Refitting the Roof Lining
This is simply a reversal of the removal procedure. Ensure when you do so that all necessary wiring (e.g. front and rear lights, sunvisor light feeds) are in their correct locations.
When refitting, work from the front of the car to the back, to ensure any minor repositioning will be "ironed-out" as you work systematically backwards and seal the lining with the rear tailgate rubber.
Again, be very careful and very clean-handed!!
One thing not to replace yet is the front header console that attaches to the front ceiling lamp (i.e. replace the lamp, and enusre all necessary wires are fed through, but don't put the console trim back on the lamp unit yet).
Installing Microphone
Microphone Installation
The microphone is located in the header console, which would have been removed to drop the roof lining. If you haven’t got a Sky Roof or alarm, then simply connect the 2-pin connector coming from the roof console into the microphone, and then push it up onto the light fitting.
If you have the Sky Roof, an alarm or both, you’ll need to take the microphone out of the new unit (undo the three small screws on the grey plastic framing, and remove the microphone from it) and install into your old unit. Then, plug back in and push the unit complete with microphone onto the ceiling light.
Testing the Unit
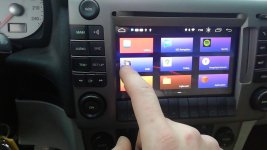
Testing the Connect Nav+ Unit
There are two things to test on the unit to ensure it is working correctly:
- Wiring Functionality: With the unit and ignition on, press the “Setup” button, followed by pressing one of the “Connect” option buttons four times, then the “Enter” button. An option named “Service” will appear; use the right scroll wheel to select that menu, then press “Enter”. You should have green “OK” / “Present” boxes on all options; the only two that might be red are “CDC (CD Changer) Connected” and “Amplifier Connected” if these two optional equipment units are not fitted.
- Microphone: Press the “Tel” button on the unit, then use the right scroll wheel to select “Voice Memo”. Record yourself talking and make sure it is audible by playing it back. If it is, then all is ok
Finishing Touch
Push the Unit In!!
Now that all is working, push the unit in and lock it down into the cage. Doesn't it look pretty!!
SIM Card Holder
SIM Card Installation
To get the onboard telephone, text messaging and WAP services to work, you’ll need a SIM Card in the unit (this will also avoid the “SIM Card Missing or Incorrectly Inserted” message on startup.
If one wasn’t supplied with your CN+ unit, you’ll need to get a SIM Card holder from FIAT; part number is 46831352, price is £13
! Simply insert a SIM Card into the holder and push into the slot on the unit; the system will then logon to your service network.Maps & Setup CD
Connect Nav+ Data Discs
If you require a Map Data CD or English Setup CD, please see the main Connect Nav+ sticky thread in the Stilo section for further information.
Updating Unit to Latest Software
Software Update
A software update has been released for the Connect Nav+ unit, and fixes several bugs and issues that previous software versions had.
Please see my guide here for full information.
Time Delay Circuit
To achieve the time delay on the ignition feed, you need an electronically controlled time delayed relay.
Why electronic and not a C-R (Capacitor-Resistor) network?
A C-R circuit will not be any good due to the voltage the car outputs when the engine is starting being different to when the ignition is on. So, for example, if you were to forget to allow the “Checking” procedure finish and start the engine straight away, the C-R circuit would give a different time delay (most likely smaller due to increased voltage once the engine is running), causing the CN+ unit to boot-up before the Body Computer has finished it’s CAN Line check procedure and cause the mileage to flash.
With an electronically controlled time delay circuit, the time delay is not voltage dependent, hence it will not matter if you start the engine immediately – the CN+ will still boot-up after the checking procedure and the mileage will never flash.
OPTION 1: A Fully-Integrated Pre-Assembled Unit
This is what we did on the first Connect Nav+ installation, to the 2005 Schumacher.
Supplier is Farnell Electronics on: www.farnell.com
Part Number is: 104027 (put this into their search engine)
This is an OMRON 12v relay with variable delay (just turn the dial to 4)
Here are the connection details:
Pin 13 - Connect to 0v earth
Pin 14 - Connect to +12v ignition feed
Pin 12 - Connect this to Pin 14 above
Pin 8 - Output to your CN+
Leave all the other pins unconnected
Connect Nav+ Fitment Details:
If your doing the Connect installation, then you will have added an ignition feed to Pin 4 of the Power Connector (A). Remove this cable, and it goes on Pin 14 (and Pin 12) of the relay. Pin 8 goes to Pin 4 on the Connect ISO loom. Don't forget to earth Pin 13!
This unit is approximately £30 not including postage.
OPTION 2: Make your own Electronic Time Delay
This is what we did on my 2003 Stilo. The unit ended up being much smaller with the same functionality, and less than half the price!
Below is a circuit diagram of the time delay unit:

To build this circuit, I ordered all the parts from Rapid Electronics (www.rapidonline.com). Their part numbers and details are listed below:
11-0015 100U 16V AXIAL ELECTROLYTIC (RC) x2
22-0150 8 PIN 0.3IN DIL SOCKET
62-0604 PACK 100 100K 0.5W CF RESISTOR (RC)
34-0505 64 X 95MM STRIPBOARD (RC)
30-1900 56X31X24MM BLACK ABS BOX (RC)
68-0276 19MM MULTITURN CERMET POT 50K(RC)
82-0336 NE555 SINGLE TIMER (RC)
08-0235 100N CERAMIC DISC CAPACITOR (RC)
47-3130 1N4001 1A 50V SILICON RECTIFIER DIODE RC x2
60-5044 3A PCB FORM A POWER RELAY - 12V (RC)
The list above includes a neat little ABS box to house everything in; you might want to order the next size-up, but we managed to get it all in this box. I would only recommend doing this if you are experienced enough, otherwise it may be worth paying the extra £20 or so to get the pre-assembled unit.
The +12V feed for the time delay is your ignition feed, taken from a location of your choice (the cigarette lighter is recommended with an in-line fuse). It shouldn't draw any major current, so a 3A fuse will be sufficient.
The 0V earth for the unit can be taken from the earth (black wire) on the main ISO power connector for the radio / CN+.