17717052334_1044bd2216_b.jpg

900 Bluebell the 900e Amigo

Introduction

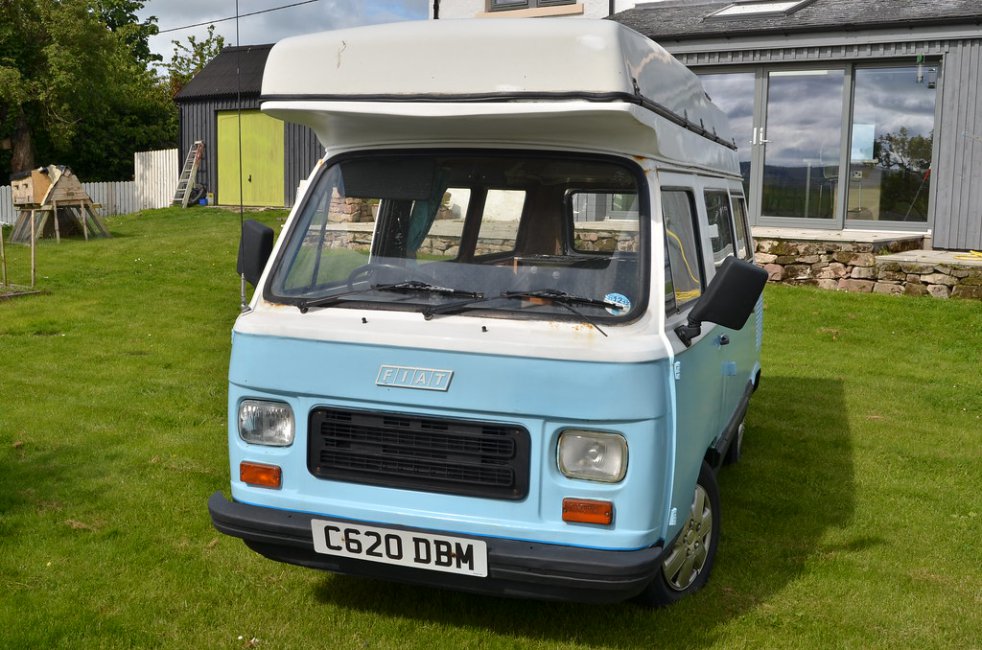
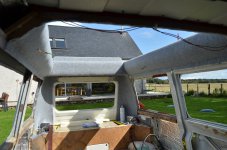
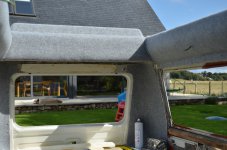
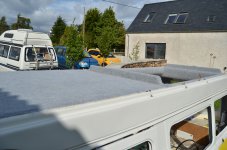
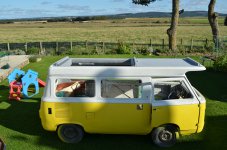
We have just taken on the ownership of this camper from Kelly and Karl and hope to have it on the road within the next six months.
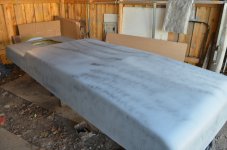
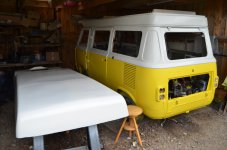
17717052334_1044bd2216_b.jpgDSC_6177 by Peter Thompson, on Flickr
Not only is it a really lovely vehicle, it was also a pleasure to buy it from such a genuine and really nice couple. There was a huge amount of interest in the sale and I am really appreciative that I was favoured to be the buyer ; so many thanks Karl.:)
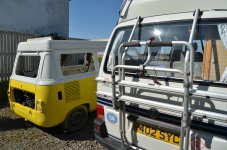
18335728502_1005bcd374_b.jpgDSC_6176 by Peter Thompson, on Flickr
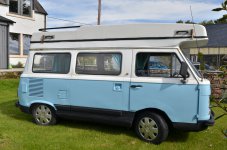
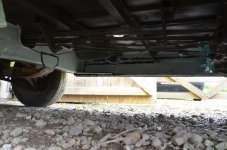
There is a certain amount of essential welding to do underneath, which will add to the welding that has been done in the past. It is currently pretty solid underneath but not as pretty as it could be. I hope to tidy as I go and then work around the bodywork. This has signs of a lot of filler and there is rust poking through in places, but it looks like we will be able to get using it soon.
There are a number of mechanical issue but nothing too onerous and it starts and runs really well.
So a rolling restoration to usable standards.
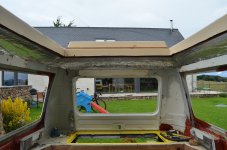
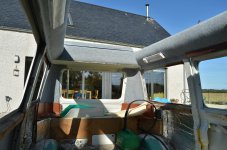
I just need to get the roof open now!
Watch this space as I document my progress.
If you are using an electric fan, can you use the more compact (and possibly more available) Front wheel drive water pump?

I've not heard of the front wheel drive water pump... can you provide a bit more information?

Myy water pump is a bit noisy (whiney). I'm not sure if this is due to not being used for over 13 years or whether the bearings are on the way out :(

I expect that it will need replacing before I take Connie out on a long journey, so I want to investigate alternatives - hopefully cheaper and easier to obtain.
 
A long time ago I saw a photo of a 850T/900T that had small air ducts fitted over the side engine bay louvres. I suspect that these were an attempt to help direct the airflow into the engine bay when moving forward.

Has anybody tried this?
And if yes does it work?
 
I've not heard of the front wheel drive water pump... can you provide a bit more information?

Myy water pump is a bit noisy (whiney). I'm not sure if this is due to not being used for over 13 years or whether the bearings are on the way out :(

I expect that it will need replacing before I take Connie out on a long journey, so I want to investigate alternatives - hopefully cheaper and easier to obtain.

The front wheel drive water pump doesn't have the big extension with the fan on the other side of it. It sits tight up against the engine.

See attached picture.

Cheers

D
 

Attachments

  • s-l500.jpg
    s-l500.jpg
    16.6 KB · Views: 76
Checking on Wikipedia it appears that the Fiat 100 series engine in 903cc version (front wheel drive) was fitted to the 127, Panda 45 Mk1, Uno 45 Mk1 and a few others.

Checking online, although the water pumps are around the £30 mark they all appear to be the 3-bolt variety :( I need the 4-bolt version. Plus Once the bolt pattern is correct the next bit will be to make sure the pulleys line up.

I'll investigate further and let you know how I get on.

and in 899 form in the Cinq and Sei.

D
 
It's been a bit quieter with restoration than I hoped for because I've been chipping away at tidying up my 500 and the summer has brought all sorts of other things to do....not least of which are holidays.

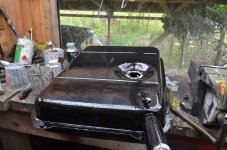
But I've gradually layed four coats of paint on the petrol-tank and I've been sealing the seams under the centre of the van floor and this will be followed with stone-chip paint in the near future, followed by the installation of the tank and pipework.

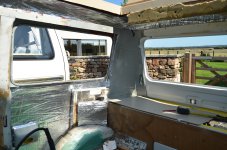
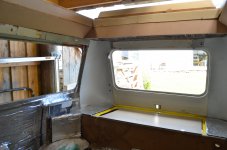
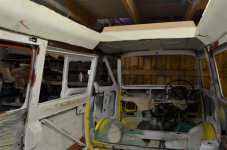
I've completed the fixings for the five hinges on the roof and made a start on insulation. Obviously this wouldn't have been done originally, but I might as well whilst it's stripped out.

I'm running out of time to get the roof back on before the winter but fingers crossed.(y)
 

Attachments

  • FER_3627.JPG
    FER_3627.JPG
    2.6 MB · Views: 66
  • FER_3629.JPG
    FER_3629.JPG
    2.4 MB · Views: 101
  • FER_3632.JPG
    FER_3632.JPG
    3 MB · Views: 109
  • FER_3635.JPG
    FER_3635.JPG
    2.1 MB · Views: 83
...followed by the installation of the tank and pipework.

Don't forget to cut an access hole in the floor above the fuel tank sender unit, it will make fitting all the pipes and checking for leaks later much easier.

I speak from painful experience (I didn't) and now I've got to drop the tank again to try and locate where the excessive smell of petrol is coming from. If I had put in an inspection hatch it would have taken ten minutes... not several hours crawling on my back :bang:

Also, if you have to change the sender unit in the future you won't need to drain the tank, if you can go in from the top.
 
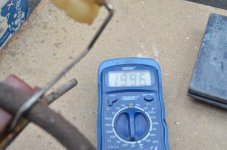
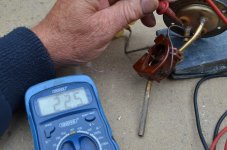
I had a spare sender unit for the fuel tank which is a good job because the body of the original is fairly corroded despite working perfectly. The spare was giving no reading on the multimeter but by carefully wiping the resistor wires and lubricating with some electrical grease I got it working.

To test it the meter has to be set on the 200 ohm range and with the negative probe on the body of the unit and the positive on the terminal to the gauge the resistance increases, in this case from 22 to 199 ohms as the float arm is lowered.

A simple continuity test ascertains that the low fuel signal is working because this is either on or off. :rolleyes:

I also tested the float for any leaks by immersing in warm water.

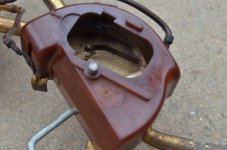
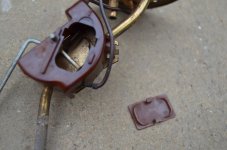
To access the internals there is a litle oblong of plastic which slides and releases two tabs.

You can see the two arms and contacts for the two signals and make out the windings of the resistor.

I expected this to be more complicated but now I have faith that it will work when fitted. I have a new gasket for the top of the tank and all I need to work out now is is which way to orientate the sender unit within the tank.
 

Attachments

  • FER_3663.JPG
    FER_3663.JPG
    2.6 MB · Views: 79
  • FER_3658.JPG
    FER_3658.JPG
    2.7 MB · Views: 53
  • FER_3653.JPG
    FER_3653.JPG
    2.2 MB · Views: 56
  • FER_3649.JPG
    FER_3649.JPG
    1.8 MB · Views: 98
The sudden appearance of sunshine and warmth has jogged me into action with painting the roof. This is at a stage when I suddenly had the inspiration to buy some MDF and start re-making the interior panels; so that's now on hold.

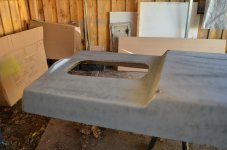
The fibreglass had been repainted at various times, just like the rest of the van. Most of it seemed OK but it was well scratched and with some flaky areas. I filled the marks with polyester stopper and for starters sprayed a couple of coats of high-build primer. This stuff is really good although a small area reacted with some old paint beneath. It sanded down well with 400 grit and I think two more coats and another sanding should do it. The huge area seemed daunting but having very few changes of contour and being a continuous sufrace it was surprisingly quick and easy to prepare.

On this panel my final coat is going to be the much vaunted Rustoleum Combicolour, which everyone seems to put on with a roller; I will be spraying it on. My thinking is that it will be harder-wearing than cellulose and less likely to react with any of the fibreglass or previous paint products. The top-finish is very wavy by design as it has very little internal support, but the sides are evenly moulded.

We've become impatient to get on the road so in the interim we have invested in a 20 year old VW T4, which really shows the impudent size of the 900e. :D It's actually been a bit of inspiration to see that even a fairly high-end product like the VW has an element of homespun about the internals.
 

Attachments

  • FER_3848.JPG
    FER_3848.JPG
    3 MB · Views: 91
  • FER_3847.JPG
    FER_3847.JPG
    3.2 MB · Views: 53
  • FER_3845.JPG
    FER_3845.JPG
    4.2 MB · Views: 83
  • FER_3841.JPG
    FER_3841.JPG
    4.2 MB · Views: 60
Hi Peter
What have you used for the interior (silver) insulation/soundproofing?
Was it self-adhesive?


I've had it so long Gary, that I can't trace the source. It must have been the cheapest I could find.:D It is about 10mm thick and black, closed-cell foam with a self-adhesive backing. The foil top layer is reinforced with fibreglass mesh. I have sealed the joins with aluminium tape. The main thing I'm trying to do is to avoid condensation in hidden areas but I'm lucky that the amount of fixed fibreglas roof on this version of the van insulates much of the metalwork from being in direct contact with the cold air.

The top half of the roof got its first two coats of white Rustoleum Combicolor today. I thinned it with ordinary white-spirit and as it still ends up fairly viscous, I sprayed it (not advised on the tin) using a nozzle that I usually use for undercoat.

It goes on really well and although it will benefit from another coat it already has almost complete coverage and no runs. I knew it would take ages to dry but this allows it to level out and become shiny without polishing.
The colour match with the Corfu White on the bodywork looks pretty good. All I have to do is wait a week or so before I can touch it again.:bang:
 

Attachments

  • FER_3852.JPG
    FER_3852.JPG
    3 MB · Views: 78
Camping mats make a good job of insulation. I had them bonded to the inside of my aluminium Land Rover roof.

D

Without the foil or adhesive but basically the same stuff.(y)

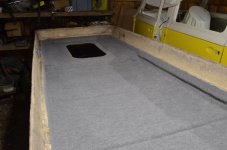
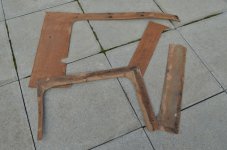
More layers added today with the MDF inner "eaves" cut and fitted using the tatty remants of the old pieces as a guide. These are partly wedged into place as original and then secured by screwing into a frame made of angle-iron which is rivetted to the rectangular hole in the roof. This frame has the chalked-in words, " Sleeping Giant" still visble, which I forgot to photograph.:bang:

I used a brilliant spray-adhesive called "Web-Tack" to fit the 19mm upholstery-foam which is a backing to the headlining fabric which I will be fitting next.

It all went remarkably well for a job that I have been putting off for months!:D
 

Attachments

  • FER_3863.JPG
    FER_3863.JPG
    3.1 MB · Views: 81
  • FER_3869.JPG
    FER_3869.JPG
    1.2 MB · Views: 59
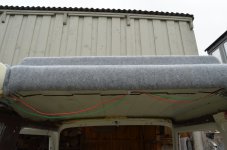
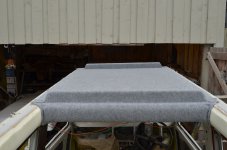
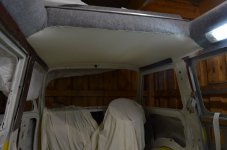
I bit the bullet today and made a successful start on sticking down the headlining "carpet", I was a bit worried that it would be difficult to use as it's thicker and has less "give" than the horrible brown stuff that was used originally. But it went on easily, although it was a slow and methodical job for this upholstery novice, it quickly made a big difference to the front sleeping platform, giving it a light and comfy floor.

This is the second biggest and possibly the most difficult section that needs covering. But when de-constructing the van I realised that there was a specific order that it all goes together. So the next job will be a small area at the back of the van followed by the two side-panels.
 

Attachments

  • FER_3873.JPG
    FER_3873.JPG
    3.8 MB · Views: 96
  • FER_3872.JPG
    FER_3872.JPG
    3.9 MB · Views: 78
Finished! It feels very nice to the touch and it also feels very nice to have got over this hurdle. Now I'm looking at the inside of the top of the roof and working out how all the lifting mechanism goes back in. and which parts of it might be showing signs of wear.
 

Attachments

  • FER_3904.JPG
    FER_3904.JPG
    4.5 MB · Views: 109
  • FER_3905.JPG
    FER_3905.JPG
    4.1 MB · Views: 124
  • FER_3906.JPG
    FER_3906.JPG
    4.1 MB · Views: 104
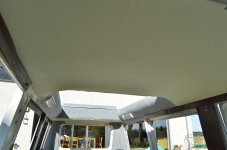
I've fitted the rooflining in the cab and over a small area at the back of the van. This is the traditional perforated white vinyl. The vinyl is backed by a thin layer of fabric and is amazingly stretchy and easy to use. Some vehicles use complex rods or formers to make the shape, but in this van it was simply glued and tensioned on three sides and the final stretching is done using staples to the MDF cross pieces that I fitted earlier.

I'm also fitting a second interior light. I've used a fairly traditional design but with the upgrade of LEDs. I've used Labcraft Trilite and these are very low profile and lightweight and give out a brilliant light.

I've refitted some of the original trim pieces for now so that they secure the rooflining, but I have some white and some grey vinyl on order which should make a big difference to the appearance of the van once I get round to re-covering them.
 

Attachments

  • FER_3931.JPG
    FER_3931.JPG
    5.2 MB · Views: 96
  • FER_3935.JPG
    FER_3935.JPG
    4.4 MB · Views: 141
  • FER_3937.JPG
    FER_3937.JPG
    3.5 MB · Views: 86
  • FER_3914.JPG
    FER_3914.JPG
    4.7 MB · Views: 99
  • FER_3918.JPG
    FER_3918.JPG
    4.9 MB · Views: 57
  • FER_3924.JPG
    FER_3924.JPG
    4.4 MB · Views: 80
Looking good.
You appear to be making rapid progress now. You will soon be ready for your first trip if you carry on at this pace :)

:D

That would be good.....but loads to do yet; eg, all the mechanical work!!!

I sorted the fitment fuel tank at last and went the whole hog with the solid and flexible fuel-lines and the filler-tube and breather-pipe.

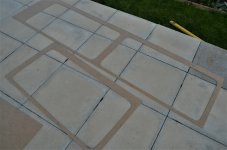
Today I used the remnants of the old window surrounds as patterns to cut new hardboard. Once I stripped out the vinyl which was glued to them there was not much left. The next stage is to glue some new, white vinyl to replace the old brown stuff. I should have some nice images of it within the next week or so.
 

Attachments

  • FER_4109 (2).JPG
    FER_4109 (2).JPG
    2.1 MB · Views: 75
  • FER_4110 (2).JPG
    FER_4110 (2).JPG
    1.7 MB · Views: 89
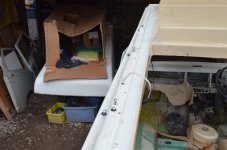
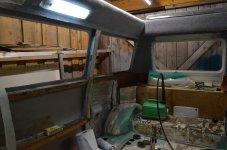
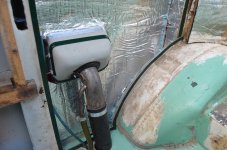
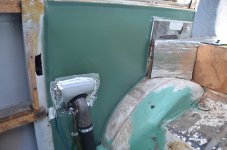
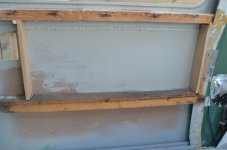
It is obvious that Fiat didn't give much thought to soundproofing and dust/fume-proofing the rear of these vans around the areas each side where there are big cooling louvres. My welding in new panels probably didn't help and there were biggish gaps where all this potential pollution might enter. So I used an unusual material which I would normally avoid... fire-resistant, expanding-foam to supplement the foil insulation.

After spraying with cavity-wax I used double-sided tape and vapour-control membrane (thin polythene sheet :D) to seal the area. I'm hoping this might also reduce the condensation which will otherwise happen when the warm air gets to the cold internal side of the panel.

Before I did all this I double-checked the sender unit wiring from the petrol tank and connected it up. I temporarily refitted the instrument-panel so I could check this because none of the available wiring diagrams matches the colour of my wiring. Lucky I was thorough because I found another terrible wiring splice with potential for things to go wrong.

The larger panel is going to be covered with the lining-fabric used on the roof. I will be reconstructing it as original as it becomes a neat storage pocket in the hollow space created. This involved a small amount of woodwork construction but most of the 30 year old, untreated softwood is still (amazingly) in good condition.

I had to order another batch of spray adhesive because a similar product I found at Toolstation is dyed bright blue; not what you want when working with thin, white vinyl. But I can now get back on track with the window-surrounds.
 

Attachments

  • FER_4139.JPG
    FER_4139.JPG
    4.5 MB · Views: 89
  • FER_4141.JPG
    FER_4141.JPG
    4.2 MB · Views: 142
  • FER_4143.JPG
    FER_4143.JPG
    3.7 MB · Views: 117
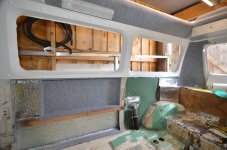
I'm chipping away at the internal trimming with the fitment of the window surrounds. It's quite a tricky job to stretch the vinyl to meet the bodywork neatly, but that has been helped by the very thin material. Perhaps it should have been a touch thicker and I'm not certain that I won't be re-doing it with a different type of vinyl.

My intention to avoid using those horrible white screw-caps has been defeated by the sheer number of screws used and at least this way they are slightly more subdued. I'm trying to use original drilled holes and positions where possible and there is a real hand-made randomness to that which I'm not really sure about.:D

There are still a few locations where there is uncovered bodywork showing and I am using some cheap, foam/foil insulation intended for behind radiators; it should just take the chill off the metal and help against condensation. It's really easy to cut and mould around awkward shapes such as the back of the fuel filler. The web-tack adhesive is the perfect product for fitting it.

I've also fitted the aluminium protection-plate over the headlining above the hob and getting focussed on the finishing bits of roof-trim before I start on the door and other lower panels.
 

Attachments

  • FER_4587.JPG
    FER_4587.JPG
    7.8 MB · Views: 116
Back
Top