17717052334_1044bd2216_b.jpg

900 Bluebell the 900e Amigo

Introduction

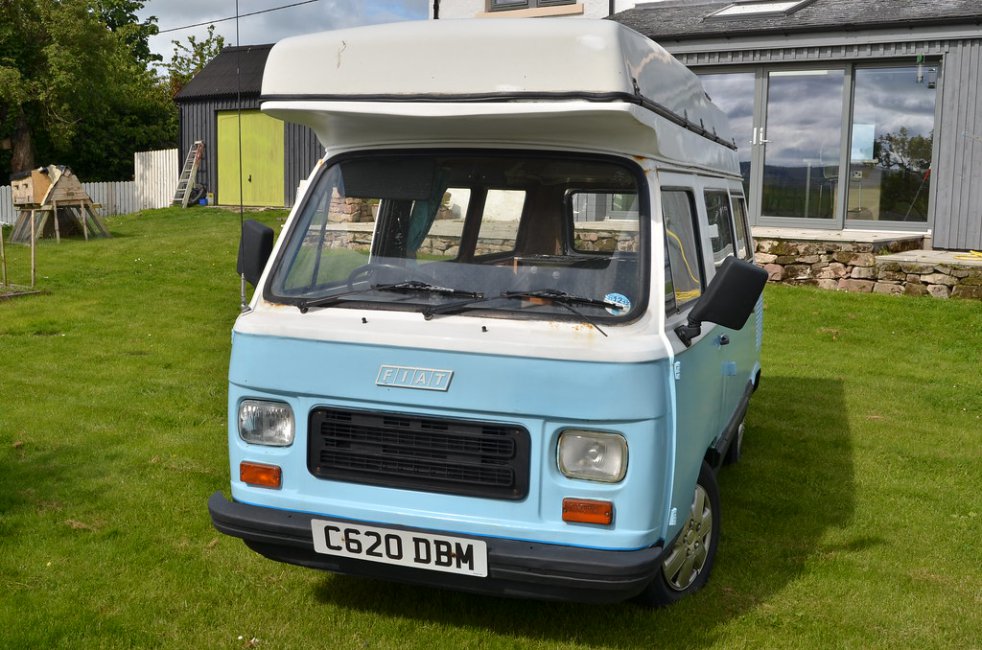
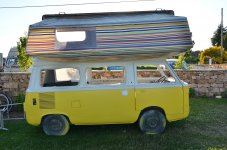
We have just taken on the ownership of this camper from Kelly and Karl and hope to have it on the road within the next six months.
17717052334_1044bd2216_b.jpgDSC_6177 by Peter Thompson, on Flickr
Not only is it a really lovely vehicle, it was also a pleasure to buy it from such a genuine and really nice couple. There was a huge amount of interest in the sale and I am really appreciative that I was favoured to be the buyer ; so many thanks Karl.:)
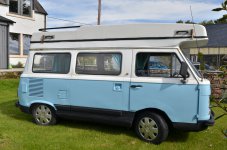
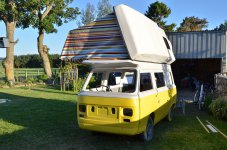
18335728502_1005bcd374_b.jpgDSC_6176 by Peter Thompson, on Flickr
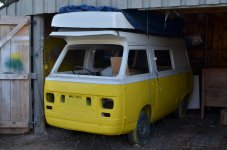
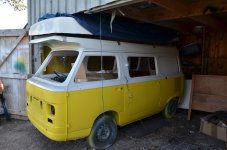
There is a certain amount of essential welding to do underneath, which will add to the welding that has been done in the past. It is currently pretty solid underneath but not as pretty as it could be. I hope to tidy as I go and then work around the bodywork. This has signs of a lot of filler and there is rust poking through in places, but it looks like we will be able to get using it soon.
There are a number of mechanical issue but nothing too onerous and it starts and runs really well.
So a rolling restoration to usable standards.
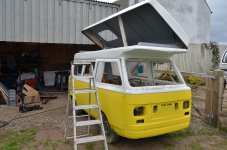
I just need to get the roof open now!
Watch this space as I document my progress.
It's coming together nicely - amazing how the camera angle can make these vans look much bigger than they really are.

What do you mean?.....it's enormous; oops, my nose is getting bigger too! ;)

With that shot it is the ultra wide-angle lense which is usually used in my job taking photos inside houses. But since all the linings are going in, it is starting to feel brighter and hence more spacious. last evening, I made the first of the grey vinyl lower panels. But before all of those can be properly fitted I need to start thinking about the door internals; I'm not looking forward to that.:eek:
 
Happy new year to Bluebell/Buttercup watchers. I'm going to get cracking again within a few days. I just got bogged down with less important things [emoji3]

Happy new year again.....not much happened since my last post and I can't say I'll be back on the restoration any time soon as lots of other things are going on. But the front suspension is the next thing on the agenda as well as selling off a few surplus bits I've picked upon the way.

Good luck to everyone else with their restorations.(y)
 
..just seen this Andy Classicandy45. It's been quiet with the van with a busy winter on other things.

I have started eBaying my Fiat 500 parts. the main things surplus for the van are large, heavy panels. So I need to think about how they will be delivered first.:confused:

I have a brand new tailgate in primer. It is actually for the van but a bit of simple surgery converts it to fit glass and you get a free piece of weldable steel. ;)
I have a van side door brand new in primer which needs the same treatment and is slightly different internally where the door lock fits.

I've also got two doors for a Coriasco, bought in error as anovice..wish me luck with that.:bang::bang:

Eventually I'll photograph and market them and put a link here.
 
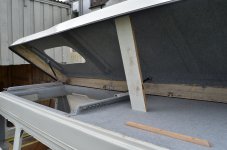
I've kept finding things to put off replacing the roof but finally, it had to be done. Under current conditions it would have been naughty to involve other people and I'm better on my own in any case. So I devised a simple way to raise the roof by drilling holes through the joists above the garage. I made some simple, flat hooks out of sheet steel which fitted under the edge of the roof and looped some thin rope through these and the rafters. By pulling on each corner rope about 150mm at a time I got the roof-panel up to the rafters. It was a bit hairy whilst the roof was suspended so high and it was good to get the van reversed underneath. With a bit of adjustment I have been able to get three of the five hinges in place and the roof sits correctly, allowing for the edging rubber to be fitted later. I'll complete it tomorrow and hope that this marks the start of another push towards completion. It certainly feels better to have it back in one piece.
 

Attachments

  • NOV_6254.JPG
    NOV_6254.JPG
    2.2 MB · Views: 103
  • NOV_6255.JPG
    NOV_6255.JPG
    2.2 MB · Views: 83
Hi Peter
I'm curious about are the holes/vents that sit behind the front grill panel. On Connie there is just a central hole (blocked off on yours) which feeds air to the heater. This is pretty pathetic, although I did manage to swap mine out for a 2 speed fan version when Connie was on the road and it improved demisting significantly (the original needed the van to be moving to get any air flow).

What heating set up do you have?
 
What heating set up do you have?

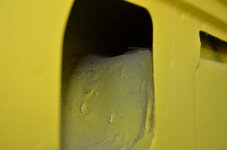
Gary, I didn't realise there was anything unusual about the intakes for the heating. But now I look at it I can see they must have factory-modified as you describe. It looks like they might have been aiming to have a "ram" effect to assist the airflow.

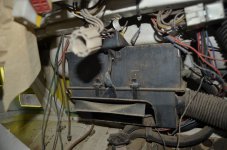
I haven't used the van properly ever and It's been largely dismantled forever. But here's a close-up of the intake and a general view of the heater-box with loads of dangly bits around it.
 

Attachments

  • NOV_6272.JPG
    NOV_6272.JPG
    1.8 MB · Views: 102
  • NOV_6273.JPG
    NOV_6273.JPG
    1.3 MB · Views: 101
Hi Peter
Your heater looks like the original one fitted to Connie. It didn't have a fan (can't tell if yours does) so the modification to improve air flow on yours makes sense.

The first modification I made to connie (about 20 years ago) was to swap the heater for one with a fan (2-speed). It supposedly came off a 900T/E but I'm not 100% sure as it came from a scrap yard and I didn't see the donor van.

The heaters are small but do a reasonable job. However, if yours doesn't have fan assistance I'd recommend adding it to the list - Connie used to steam up terribly if crawling along in traffic when it was raining (before swapping to fan assistance).

I doubt that the fan heaters are knocking around (you might get lucky) but it should be easy enough to fit small in-line fans into the pipes that run up from the heater box to the windscreen vents.

Potentially, you could fit an extra electric demister but watch the amps... the alternators on these vans aren't very big.
 
I'm still a long way from needing to worry about how warm it is in the van.;)

Recently I've been trying to get my head around the arrangement of all the components of the sliding and rising roof. I'll photograph and describe as I assemble it but getting all the pieces back to working condition is a long but interesting puzzle.

The fact that the roof was originally hand-made on a very low production run means that remaking it is fairly intuitive. In fact, in some respects I hope I am engineering my repairs to a higher standard. It's funny to see various places where the metal has been drilled twice when mistakes have ben made and there are even some marks where the drill has gone off target.:D

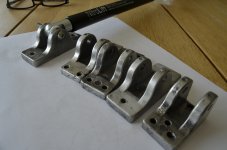
I've buffed up and lacquered the various aluminium pivot-blocks; they have a fair bit of patina but will work ok.

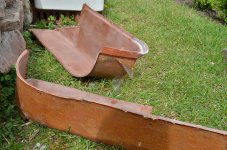
I've also been working on the special fibreglass panels that cover the area at the side of the engine-bay cover. They have been cracked over the years and I want to repaint them in grey to match the new interior.

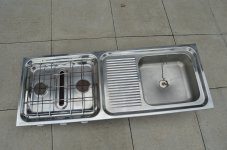
I've dug out the original sink and hob unit, which needs some work. I want a new one as I'm not going for originality, so this one will be on eBay as soon as I work out a carriage price. If anyone is interested at offers above £50 plus postage, please let me know.
 

Attachments

  • _NOV6304.JPG
    _NOV6304.JPG
    3.2 MB · Views: 103
  • NOV_6308.JPG
    NOV_6308.JPG
    2.7 MB · Views: 102
  • NOV_6322.JPG
    NOV_6322.JPG
    3.2 MB · Views: 79
I've had a scary few days installing the raising mechanism for the van lid. In principle it's quite simple, with three identical gas-struts, to help raise and gently allow the heavy roof to lower. But although the roof is very strong, it's a gigantic component which hinges almost to the vertical and it was tricky with so many components having been disturbed and/or replaced. But it has all fallen into place reasonably well so far, with a roof that now does what it was designed to do.

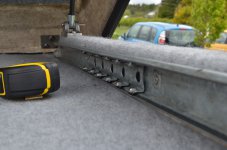
I've also fitted the restored slider mechanisms which allow the sleeping areas to extend out of the side of the roof. there's a bit of tweaking to do but I'm now quite close to fitting the roof canvas.

The roof now sits much better than when the van arrived with me, but I may need to fit strengthening-plates to the hinges as they are made of brass and seem to always have been prone to slight distortion under the strain from the struts. There are stronger, stainless-steel ones which have been remanufactured for VW Viking vans; I think these are the same as fitted to my van and may be worrth consideration.

Anyway, nice to see the garage becoming less cluttered and the van becoming more complete.:)
 

Attachments

  • NOV_6350.JPG
    NOV_6350.JPG
    1.9 MB · Views: 86
  • NOV_6349.JPG
    NOV_6349.JPG
    2.3 MB · Views: 90
  • NOV_6347.JPG
    NOV_6347.JPG
    2.6 MB · Views: 90
I'm really curious to see how your 'roof' beds fit together. I may borrow a few ideas from it - the hammocks in Connie are only suitable for infants.

You'll be challenged if you want to emulate this style of bed. Best to look at the first page of this thread where there are images of the van before restoration.

It works by having three extending sliders, similar to the sort of thing you get in a kitchen drawer; the fixed part of these are attached to the roof. The sliders are attached to aluminium angle and then MDF boards sit on the angle; the boards are the supports for the "mattresses". When fully extended, the single bed completely overhangs the side of the van. The double bed is half over the cab roof and half overhanging the side.

I'll be fitting the canvas at the end of the week and photograph it then.
 
I see what you mean about the challenge... my roof hinges on the opposite side and I don't have the extra overhang at the front. A single bed might be an option though.

A couple of things are a bit puzzling though.
- can you fit 2 adults in the double?
- there doesn't appear to be any support for the beds from underneath (on the outside). The sliders must be sizeable to support the weight of the beds and occupants.
 
- can you fit 2 adults in the double?

..not tried that but we two reasonably slim people...I think so.

- there doesn't appear to be any support for the beds from underneath (on the outside). The sliders must be sizeable to support the weight of the beds and occupants.

Thereby you have whacked the gigantic nail on the head. :bang: The sliders are definitely a bit undersized and because of the way it has to work, the weakest part is under the greatest strain; consequently they were distorted and all but one of the eighteen ball-bearings had been lost. I think I will be taking a couple of stout props with me (and I don't mean rugby players).

There may be some cantilevered support from the canvas top if fitted taughtly
 
..not tried that but we two reasonably slim people...I think so.

I was thinking more in terms of length rather than width, the mattress appears to be curved up at one end. Would your head/feet end up touching the canvas... memories of some very soggy camping trips.

There may be some cantilevered support from the canvas top if fitted taughtly.

I suspect if the roof canvas does offer some support it will put extra strain on the gas struts. A couple of props does seem like a good idea, maybe attach them between the extended bed and the lower part of the van. That way you will always have a fixed distance and not have to worry about uneven or soft ground.
 
Would your head/feet end up touching the canvas... memories of some very soggy camping trips.

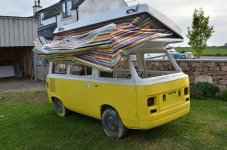
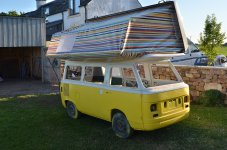
I'm getting closer to being able to find out whether or not it's possible to lie down comfortably because I finally got a myriad of small jobs done that needed doing before the canvas could be fitted. This has been sitting, rolled-up, in the spare bedroom for the last 18 months.

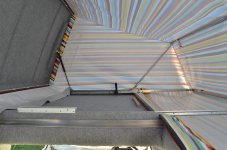
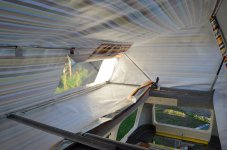
Today it was warm and with no wind, which was perfect for unwrapping the vinyl and offering it up to the roof. So far it is proving to be really accurately made and easier to fit than I expected. It's just tacked to the upper roof at the moment using woodscrews through wooden battens pushed into stitched sleeves in the fabric. OnceI have secured it to the metal stretcher bars I will refit the struts and tension everything. It's already feeling more like a rolling home.....I am just praying for no rain or wind tonight.
 

Attachments

  • NOV_6356.JPG
    NOV_6356.JPG
    3.1 MB · Views: 99
  • NOV_6357.JPG
    NOV_6357.JPG
    2.4 MB · Views: 96
  • NOV_6360.JPG
    NOV_6360.JPG
    2.6 MB · Views: 109
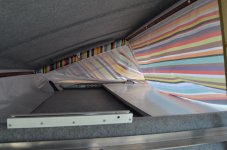
This is such a massive piece of canvas that it's taking ages to align all the seams. I've refitted the struts and was relieved when the thing then sprang up to full height without any issues.

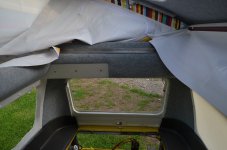
It's been a really hot day which has helped the vinyl to fall into shape and I've started riveting the cover to its frame. The final stage is to secure it to the lower roof which will takes out the huge sagging portion underneath.

I'm pretty sure that it's never going to be ultra-taut because the intermediate support is pretty flimsy, but it's certainly going to be quite noticeable on a campsite. :D
 

Attachments

  • NOV_6362.JPG
    NOV_6362.JPG
    3.1 MB · Views: 114
  • NOV_6364.JPG
    NOV_6364.JPG
    2.8 MB · Views: 114
  • NOV_6370.JPG
    NOV_6370.JPG
    3.3 MB · Views: 93
  • NOV_6366.JPG
    NOV_6366.JPG
    2.5 MB · Views: 97
  • NOV_6368.JPG
    NOV_6368.JPG
    2.5 MB · Views: 118
Back
Top