17717052334_1044bd2216_b.jpg

900 Bluebell the 900e Amigo

Introduction

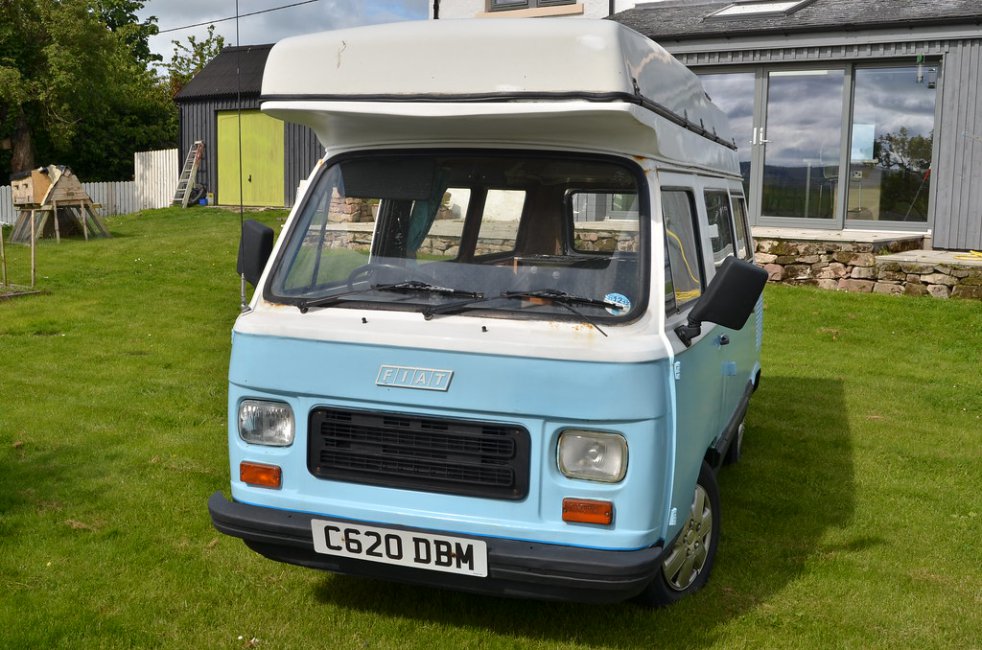
We have just taken on the ownership of this camper from Kelly and Karl and hope to have it on the road within the next six months.
17717052334_1044bd2216_b.jpgDSC_6177 by Peter Thompson, on Flickr
Not only is it a really lovely vehicle, it was also a pleasure to buy it from such a genuine and really nice couple. There was a huge amount of interest in the sale and I am really appreciative that I was favoured to be the buyer ; so many thanks Karl.:)
18335728502_1005bcd374_b.jpgDSC_6176 by Peter Thompson, on Flickr
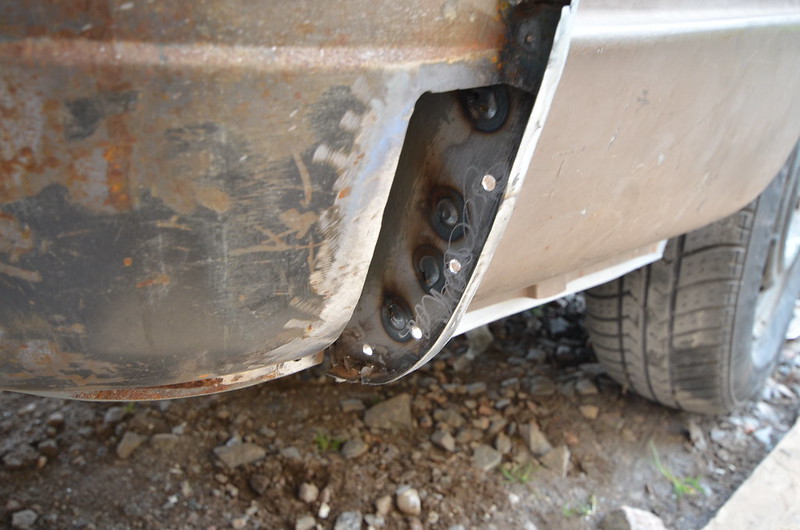
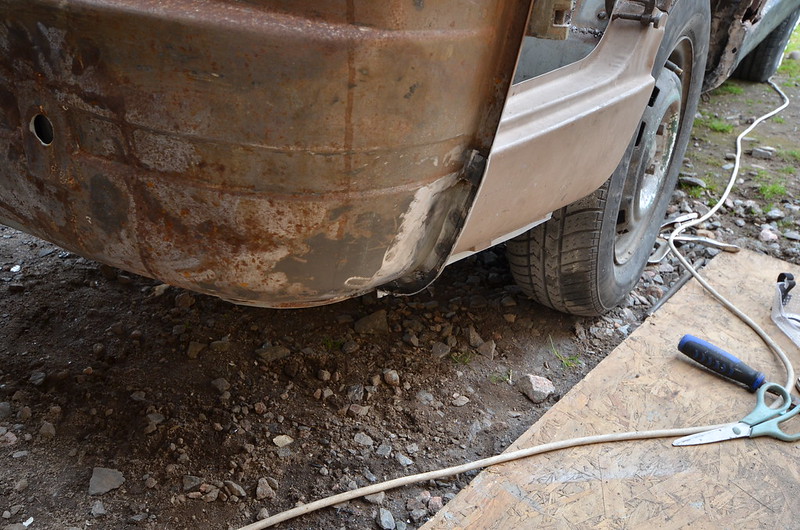
There is a certain amount of essential welding to do underneath, which will add to the welding that has been done in the past. It is currently pretty solid underneath but not as pretty as it could be. I hope to tidy as I go and then work around the bodywork. This has signs of a lot of filler and there is rust poking through in places, but it looks like we will be able to get using it soon.
There are a number of mechanical issue but nothing too onerous and it starts and runs really well.
So a rolling restoration to usable standards.
I just need to get the roof open now!
Watch this space as I document my progress.
I've been left holding the baby (literally), so have nothing better to do than to upload photos and write about the next steps.
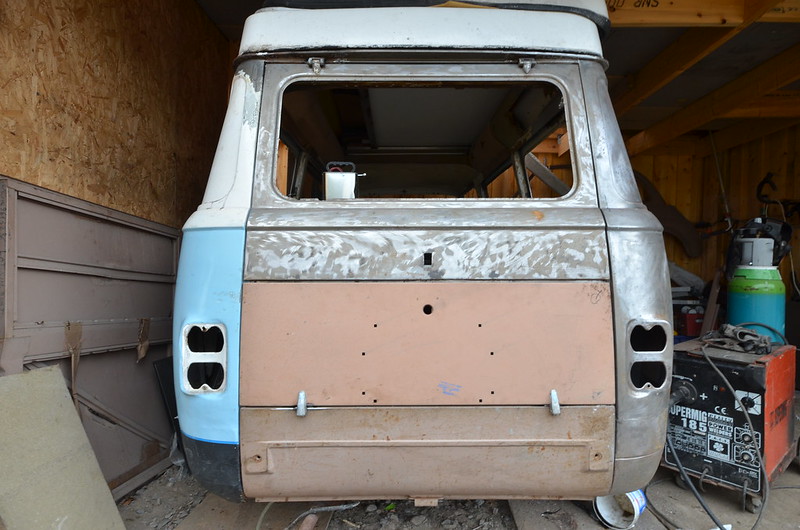
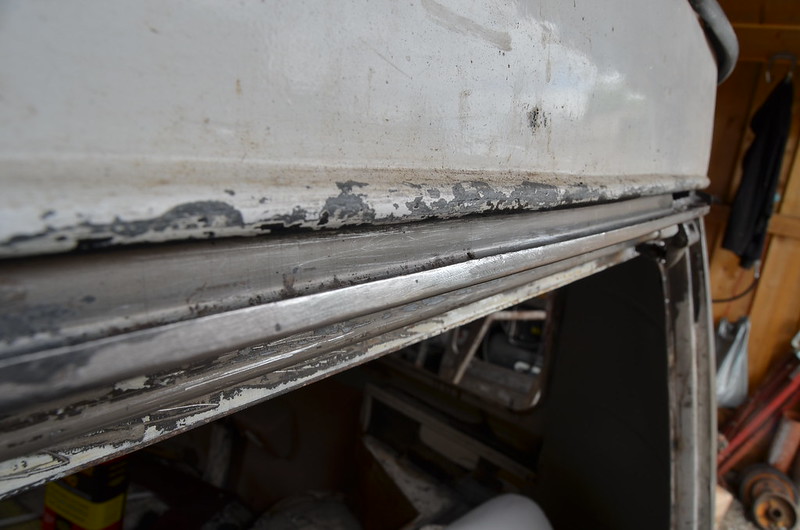
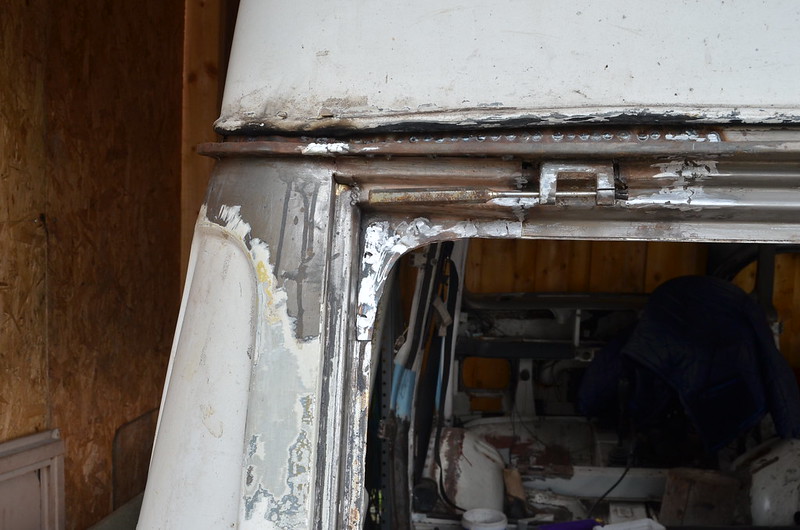
The central part of the rear gutter is in excellent condition, but the interior of the roof is terrible. MAL_9725 by Peter Thompson, on Flickr
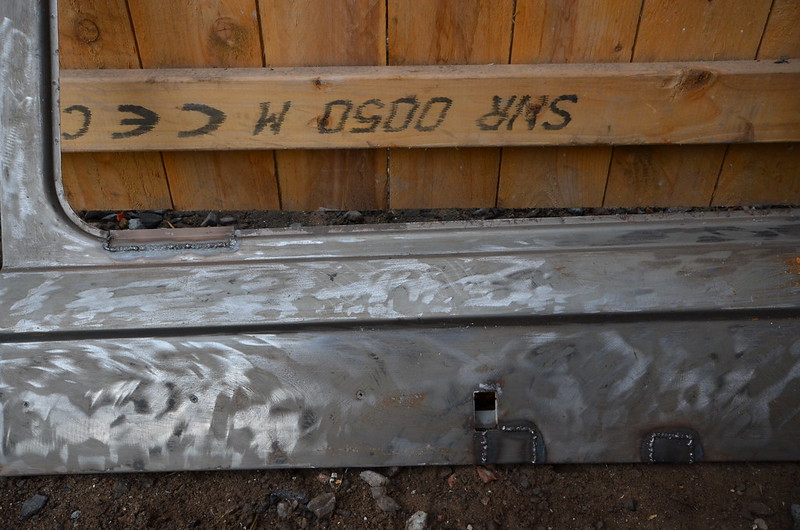
I'm slightly saved by the fact that the lower section of the two-part fibreglass will cover the join in the repairs. You might make it out as the black bit showing through the lacy rust. MAL_9734 by Peter Thompson, on Flickr
It says a lot about what I have tackled that this side looks easy.:eek:
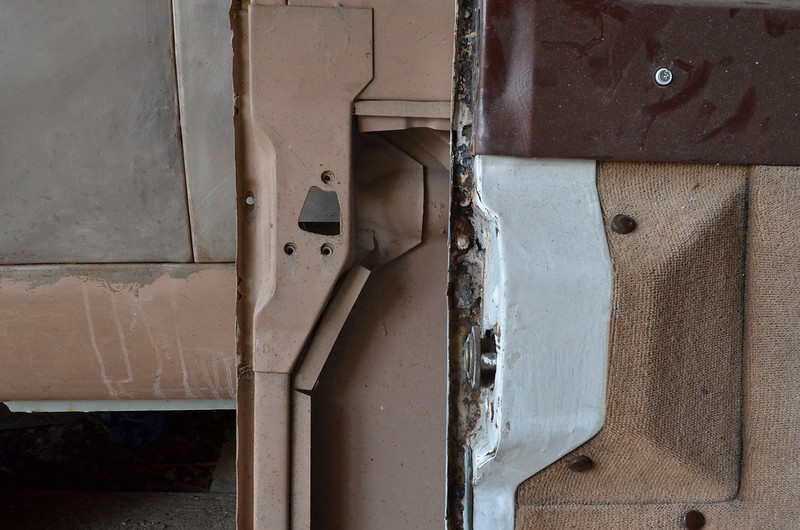
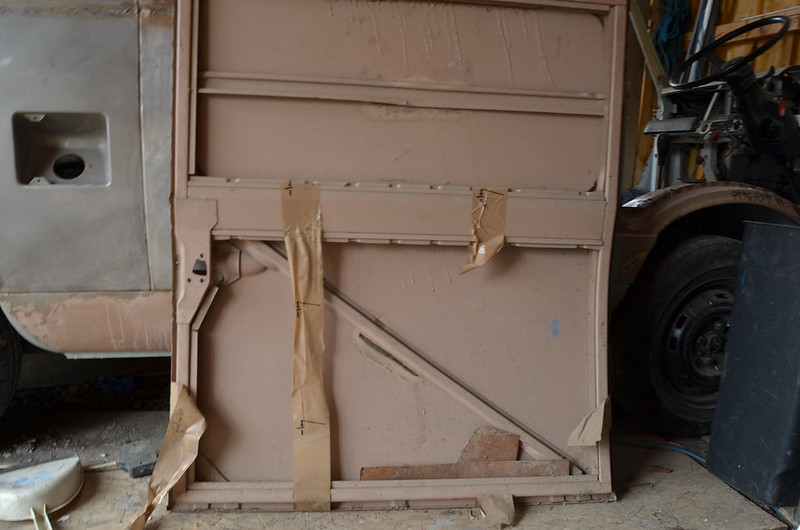
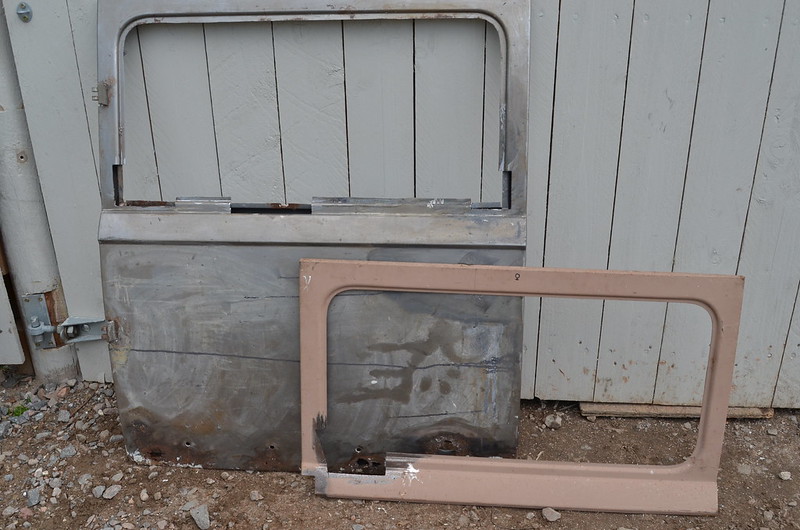
I dragged the old and the replacement, new door out of storage. I need to strip the trim off the old door to see if it will be possible to remove the lock mechanism and the additional metalwork that allows this door to have a more sophisticated locking mechanism. MAL_9736 by Peter Thompson, on Flickr
The new door is designed for the panel-van version and is very basic. MAL_9723 by Peter Thompson, on Flickr
I would also need to remove the panel where the glass should fit, giving me some additional repair steel.:)
 
Peter you really seem to be getting the hang of this now:D

Thanks for saying so but I ought to be a lot better.
No pics today but I have now fnished the guttering and the rear corner internally.(By the way, should there be drain holes at the back?)
I have a bit of welding to finish at the front nearside and then I am going to pause from welding.
I need to work my way around the finished three-quarters of the body, tidying-up any remaining welds, doing some detailed sanding of the stripped metal, removing surface rust and all that has collected in nooks and crannies using phosphoric-acid and then I am ready for putting on an epoxy-primer coat followed by the usual filling and prep.
If there is time between processes I will forge on with rebuilding the remaining left flank of the van. Phew, (wipes brow at the thought of this).:D:D:D
 
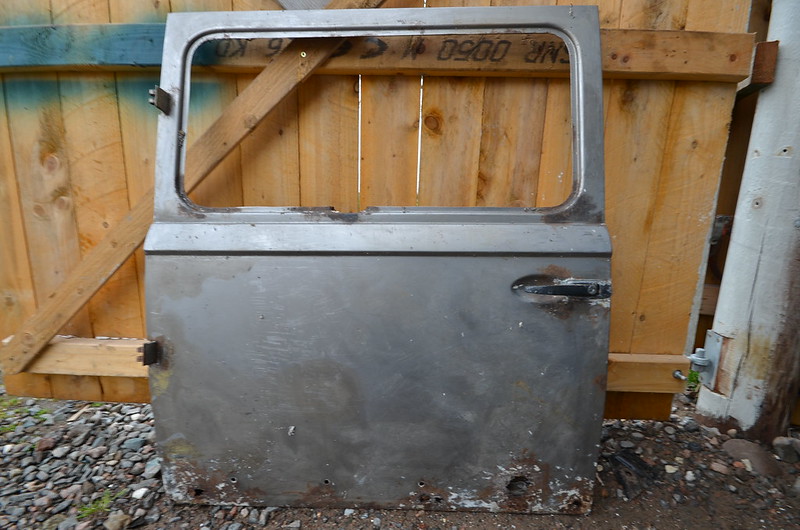
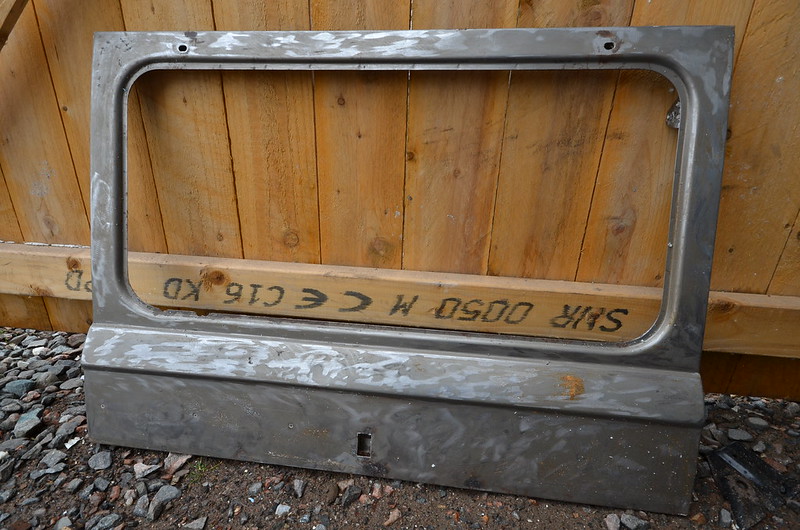
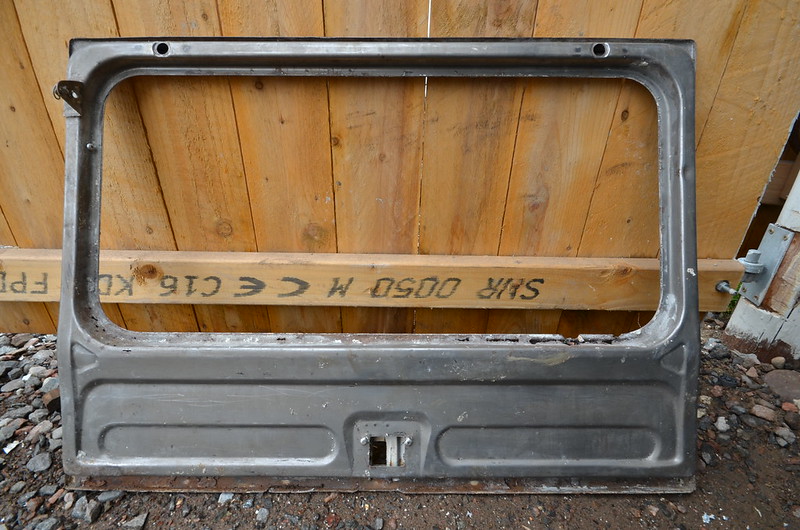
We've had a horrible two days of rain and as the push to get the body in order is dependent on the expected, dry, summer weather, I've had to resort to some peripheral jobs that could be done in the workshop. Those have included the tiresome and long-winded work of stripping the tailgate and side-door of their paint.
MAL_0032 by Peter Thompson, on Flickr
MAL_0028 by Peter Thompson, on Flickr
MAL_0030 by Peter Thompson, on Flickr
I expected to fit brand new examples of both door and bought these at great expense.:eek: They are likely to be up for re-sale quite soon at eye-watering prices. But once the glasses were removed and the saggy, old trim had been taken off the side-door, things, whilst bad, don't seem as dire.
I will be able to rob replacement sections for the damaged window-frame from the brand-new spare which has already provided repair sections for the body.
MAL_0033 by Peter Thompson, on Flickr
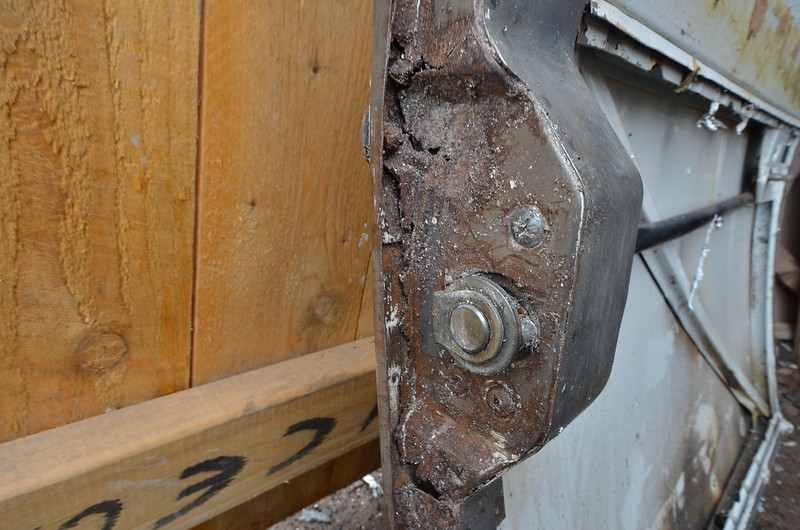
One of the problems with the side-door is that being quite wide and of very light construction, it doesn't take kindly to the weight of the trimmer's adaptation for the camper. So when I rebuild them I will have no door pockets and I'll keep it simple and light. But the frame has cracked near the lock mounting box and on the opposite side halfway between the hinges.
MAL_0036 by Peter Thompson, on Flickr
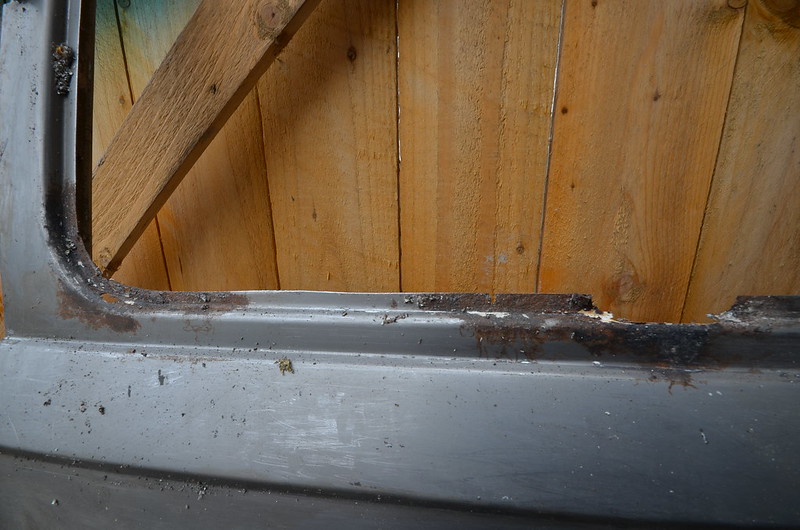
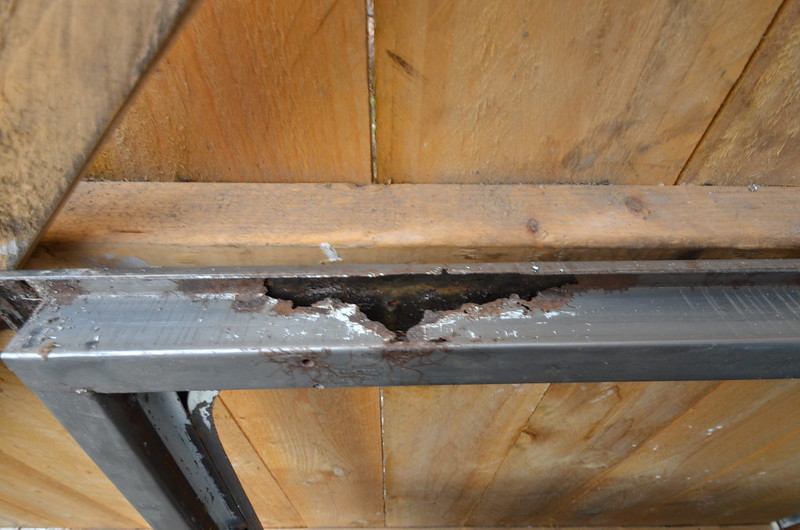
I'm going to have to unpick the spot-welds and rebuild this. I will also have to make a new door base and do some frame repairs. But the good thing is that the door has no lateral curvature to confound things and is made from very boxy sections.
MAL_0035 by Peter Thompson, on Flickr
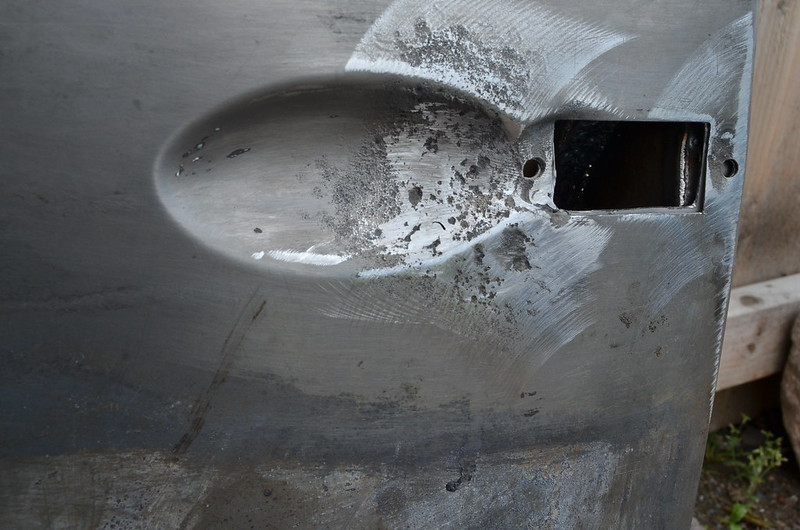
The next task will be to thoroughly de-rust them. In the past someone has simply filled over a lot of rust-pitted areas such as under the handle. The factory didn't help in laying down only a very thin coating of paint on the door frames. It seems likely they were painted in-situ when ftted to the body. But the remarkable thing is that the paint finish on the back of the doorskin has held up really well.
MAL_0038 by Peter Thompson, on Flickr
 
Hi Peter
With regard to the guttering there are small (slot) drain holes at the back, approximately aligned to the middle of the quarter panels.

With Connie these were of little benefit as the roof seal was tight into the gutter. Consequentially this trapped moisture and promoted rust, I suspect that this is a problem with most of the camper conversions.

As luck would have it when I ordered the new roof seal they sent the wrong profile. The new profile leaves about a 1/4" gap to the gutter (while still being tight against the sides of the roof. I'm hoping this will leave enough airflow to keep the gutters dry in future - but I will need to keep them clear of muck etc.

Cheers
Gary
 
That's handy to know, about the holes. I spotted one tiny but perfe.ct hole amongst the rot which didn't sll leem to be an accident. Hardly sufficient really but If Ifl might re-drill jkklll.
I think I'm fortunate that my roof design avoids the common epidemic of roof rot and maybe even protects most of the gutter edgeds, b
 
That's handy to know, about the holes. I spotted one tiny but perfect hole amongst the rot which didn't seem to be an accident. Hardly sufficient really but I might redrill
I think I'm fortunate that my roof design avoids the common epidemic of roof rot and maybe even protects most of the gutter edges,.
So apart from that back bit and a tiny section near the windscreen, the guttering is good.
Re-written after it fired off whilst writing. :D
 
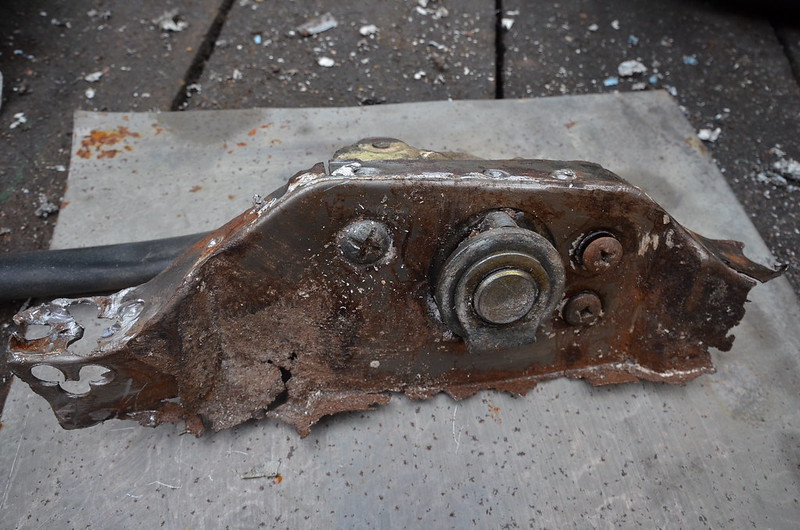
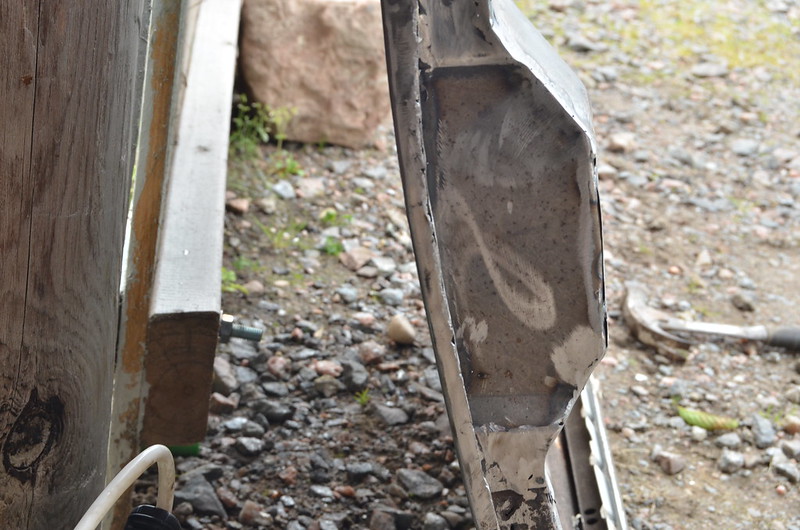
Grandchildren and other duties wiped out most of the useful time today, but I sneaked out for a short time and removed the tinware that houses the side-door lock and which together, braces the door frame. I find the spotweld drill less straightforward than it's supposed to be and it's not always easy to identify all of the welds. I couldn't get at some of them so used the Dremel (who would be without one? :D:D:D) to slice out a part of the outer, which will need to be butt-welded back.
MAL_0046 by Peter Thompson, on Flickr
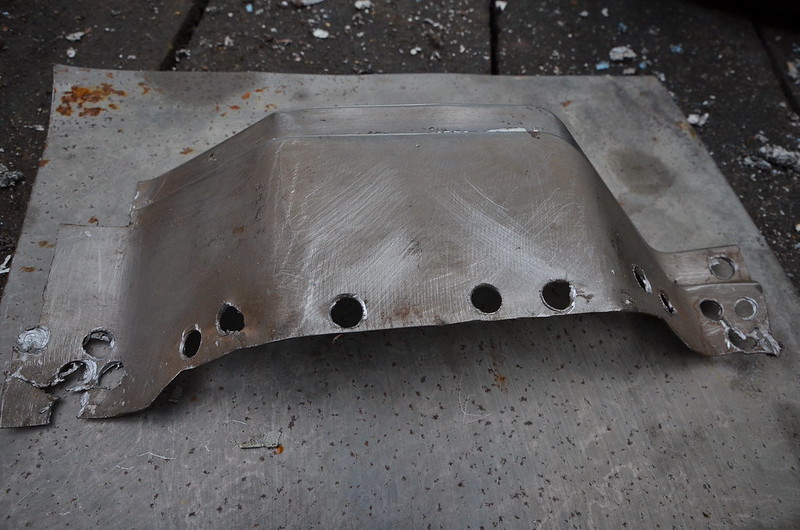
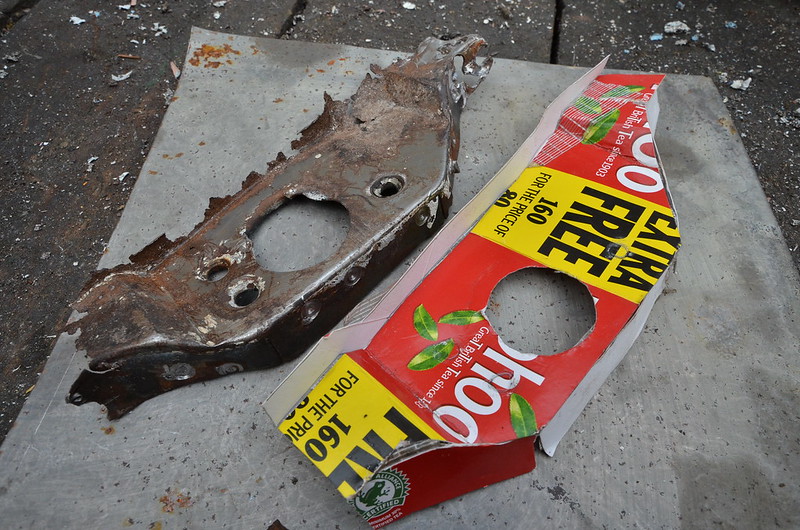
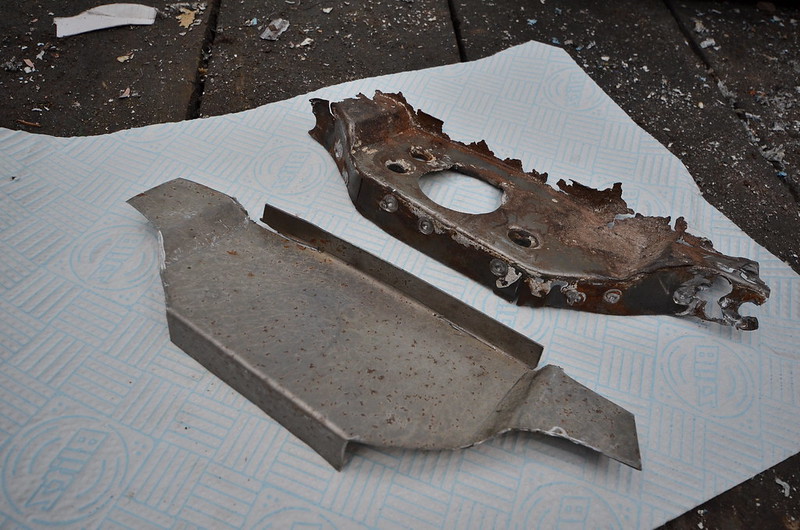
The inner cover is totally shot but presents a fairly easy fabrication job.
MAL_0044 by Peter Thompson, on Flickr
The door frame has a few cracks and a mess of deep rust behind the handle, so this removal operation gives better access to repair all of that.
MAL_0040 by Peter Thompson, on Flickr
I've ordered a couple more square metres of various thicknesses of sheet- steel to help with it.
I bet I end up spending a couple of days on this door alone, which gives some idea of the time involved in this sort of restoration.:bang:
 
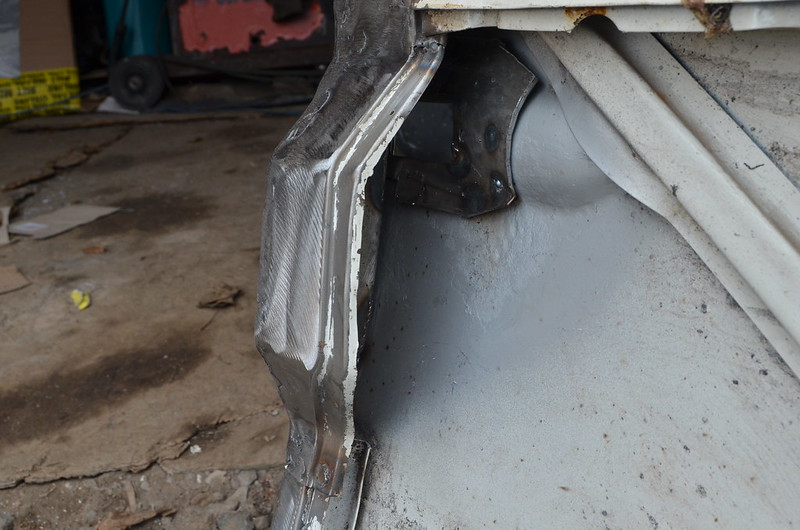
When I said "easy fabrication", I wasn't realising the subtleties of the shape of this item, and how much it controls the curvature of the door where it meets the post. So although I have cut out and shaped the basics using a cardboard pattern, there is still a way to go to sort out the geometry.

MAL_0048 by Peter Thompson, on FlickrMAL_0049 by Peter Thompson, on Flickr
 
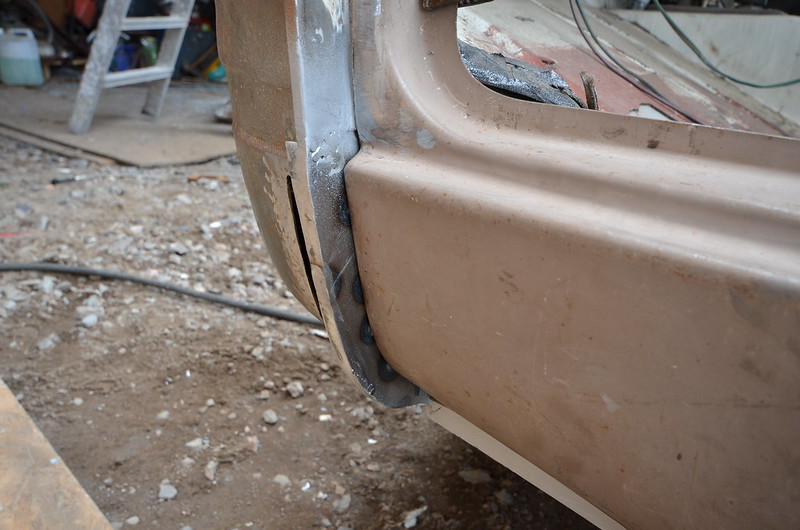
The guttering extends right down the fronts of the doors to the bottom of the sills and I had started to repair the cacky mess that was there a few weeks ago.I finished it today by first trial fitting the door sill.
/4241/35656736096_29a2472b8b_c.jpg[/img][/url]MAL_0055 by Peter Thompson, on FlickrMAL_0050 by Peter Thompson, on Flickr
I don't want to fully weld this on until I have the door and wheelarch trial fitted, so I cleaned up all the surfaces that will be welded and treated them with weld-thru primer.
The only tidy way to weld in the front is by doing it befiore the front of the van is fitted, which is impossible but what they must have done at the factory. Fortunately??? I had a last piece of the front apron to weld in, so I secured the sill first.
MAL_0054 by Peter Thompson, on Flickr
Then, to keep welding as tidy as possible inside the gutter, where it is hard to get the grinder afterwards, I drilled through and welded from the back. None of this is as tidy or as accurate as the other side, but after some grinding back and a bit of filing, sanding and rust treatment which will be done later itis ready for sealer, filler etc.
MAL_0056 by Peter Thompson, on Flickr
 
Last edited:
I removed a serious encrustation of rust in the recess for the door-hndle which a previous "restorer" had plastered over with filler. I like to be patient and gradually dissolve bits like this using neat phosphoric acid and lots of wire-brushing.
There are a few holes and the metal has gone very thin. But at least I can see the optimal area for removal and replacement. It's an optical illusion as to me the recess looks convex.:bang:
MAL_0082 by Peter Thompson, on Flickr
 
Although I am meant to be working in a straight line towards preparing some of the bodywork for primer, I have been distracted by other things. I finally removed the seized tailgate hinge-pin by resorting to using a .75mm cutting disc across the pivot eye to release the pressure; who'd be without a Dremel? :D Once I have new pin fitted a tiny bit of weld should repair it.
MAL_0106 by Peter Thompson, on Flickr
I have finished the repair to the door-shut area. I was concerned that the door would flop and lose its alignment against the closing pillar, but as I replaced the old and new sections of steel I had plenty of opportunities to tweak it. The holes for the locking meachanism and its screws are going to be tricky to work out.:eek:
MAL_0108 by Peter Thompson, on Flickr
I started to make a replacement section for the recessed oval where the door handle sits. I was quite successful but then realised that I was still going to have a bit of filling to do to make it look half decent. I had a brainwave; I converted the item I had made to become a new stiffening piece that goes behind the panel where the handle fits.
MAL_0110 by Peter Thompson, on Flickr
With this as a solid backing I was able to drill out the places where the outer panel has corroded to the point where it has holes and then use the holes to make plug-welds. It's a bit unconventional and there are a couple more bits to do. It looks a bit of a messy bodge in the photo (which it is):D but my first layer of filler with be the non-porous type and having dissolved off all of the rust and then welding through primer, I'm confident of long-lasting results.
MAL_0116 by Peter Thompson, on Flickr
I'm lucky in having a brand new window surround panel which has already given up two patches for the van.
MAL_0118 by Peter Thompson, on Flickr
So I've cut out the corroded areas ready for inserting pieces from this spare.
MAL_0115 by Peter Thompson, on Flickr
 
The sections were cut out and made to fit which is trickier than you would think.
MAL_0120 by Peter Thompson, on Flickr
Then welded in carefully and slowly but still getting a bit of inwards buckling of the steel; I read that TIG would be better for this sort of thing.
MAL_0123 by Peter Thompson, on Flickr
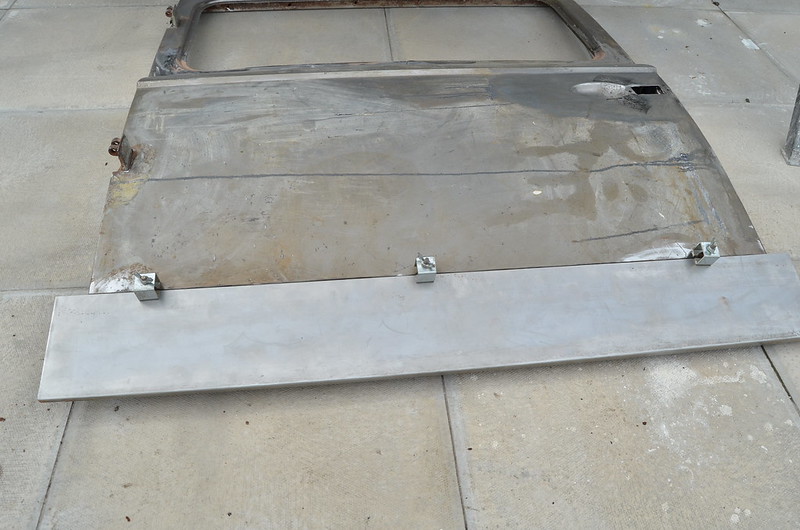
So then onto the door bottom. I cut a piece to fit; one metre long and bent a bottom return on it using the vice and lots of angle-iron and clamps.
MAL_0128 by Peter Thompson, on Flickr
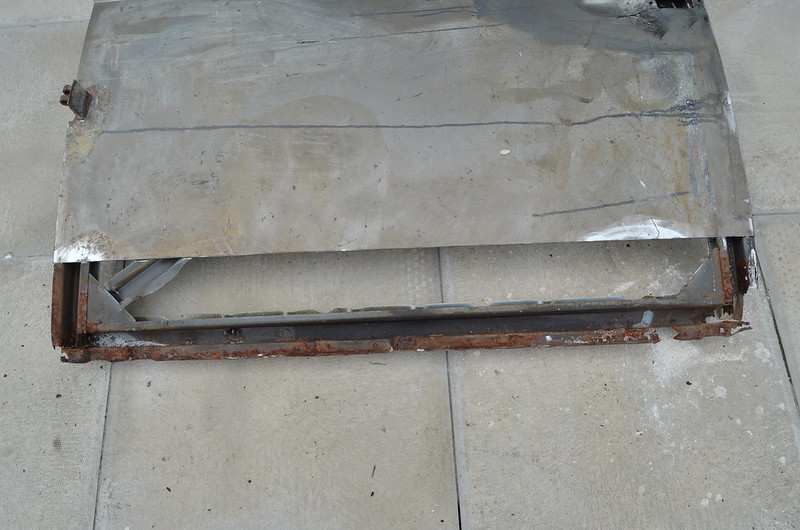
That allowed me to chop out the rusty bottom of the door which, handily, removes the annoying holes for the 900E trim which I will not be using. Again, not as easy as it looks.
MAL_0126 by Peter Thompson, on Flickr
I'm going to repair the frame after I've fitted the skin panel. Before all that I need to get busy with wire brush, acid and then primer, to clean up the internals.
 
Loving the window repairs. We have a bodged repair on one of the rear opening windows we're going to have to sort out at some point. Where did you get the spare door for that Peter. Could do with a corner section for the window, hadn't thought of trying to source an old door/tail and cut it out of that.
 
Where did you get the spare door

Now you're asking. If you look back near the start of this thread ou'll see that I bought almost a full van's-worth of panels. In fact, if I could have found them I would have bought everything! It's surprising what is available if you search deep and particularly if you look on Italian Ebay and take a risk.
The panel that I took the sections off was the upper part of a whole side-panel after I had replaced only the bottom half. I think that by the time I have repaired the passenger door and the window surround on the rear passenger side I will have exhausted that source. But I do have another one, brand-new, which I would part with at the right price once I'm certain I don't need it.

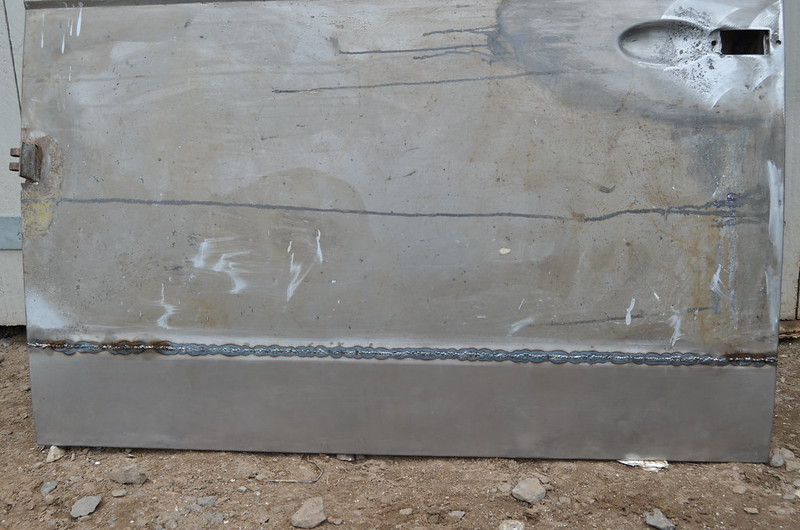
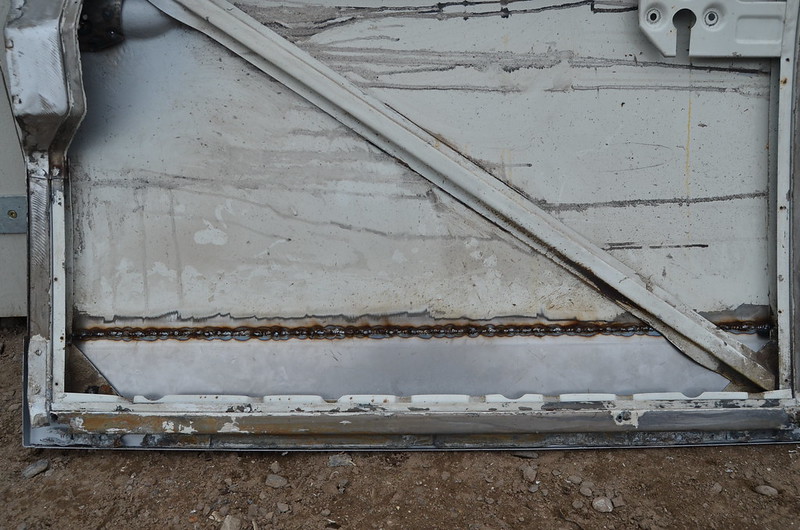
I welded the bottom onto the door. I must have been over an hour at it, letting it cool after doing tiny lengths of weld at a time. Between times I kept on hammering the welds to stretch the metal back after shrinking. I am pleased with it so far and although it has very minor and unavoidable rippling, the only noticeable part is where the diagonal brace prevents me from getting a bodywork dolly behind the panel.
MAL_0132 by Peter Thompson, on FlickrMAL_0133 by Peter Thompson, on Flickr
 
Thanks Peter, will have to have a hunt around.

The door's looking pretty good from here. We've started to strip the doors down but not repaired them as yet. If you have time could you take a pic of the window winding mechanism in one of the doors - our's has been trashed.

The panel around our rear drivers side window has had a patch badly welded into it which has distorted the profile underneath. It'll be a tricky repair to make from scratch but hopefully can find something on ebay.it.
 
.

The panel around our rear drivers side window has had a patch badly welded into it which has distorted the profile underneath.

Andy, If you need a section of the moulding at the bottom of the window and above the main flat panel, just let me know the length and if I have that much left you can have it FOC.

I have finished the side door, which really took some time in the end simply because of the number of patches needed around the inner frame. But the actual metalwork and welding was very easy and enjoyable because so much of it is simple square section.
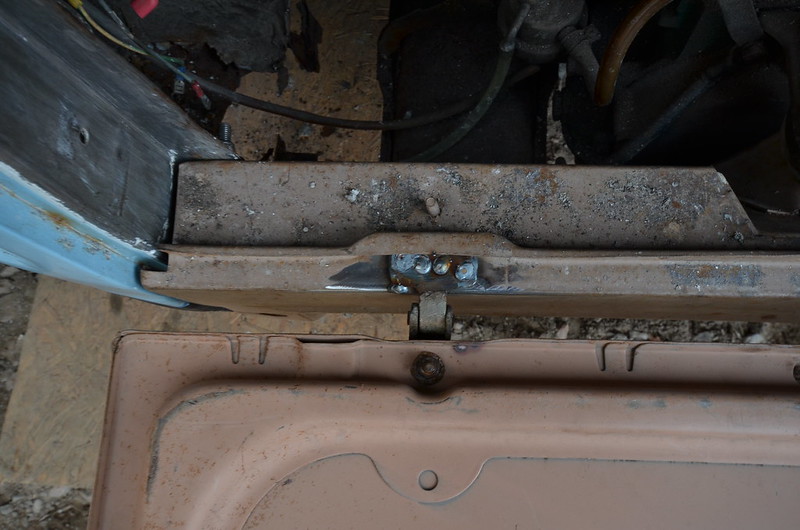
Filled with confidence I have completed another small job which was hanging over me. The new engine support panel comes without any hinges for the engine lid welded on. This may be to allow you to centralise everything before committing to weld. It was tricky to get right and I made some really hot puddle-welds through four holes in each hinge exactly where the original spot-welds had been.


MAL_0698 by Peter Thompson, on Flickr


I'm wondering if here should be a check-strap of some kind because the hinges aren't all that strong and had been bent probably by allowing the lid to slam down
The alignments and gaps could be a bit better but there is scope for adjustment later.


MAL_0695 by Peter Thompson, on Flickr


I have moved straight on to welding up the corrosion on the tailgate. I started with the most cosmetically important bits.


MAL_0700 by Peter Thompson, on Flickr
 
Back
Top