17717052334_1044bd2216_b.jpg

900 Bluebell the 900e Amigo

Introduction

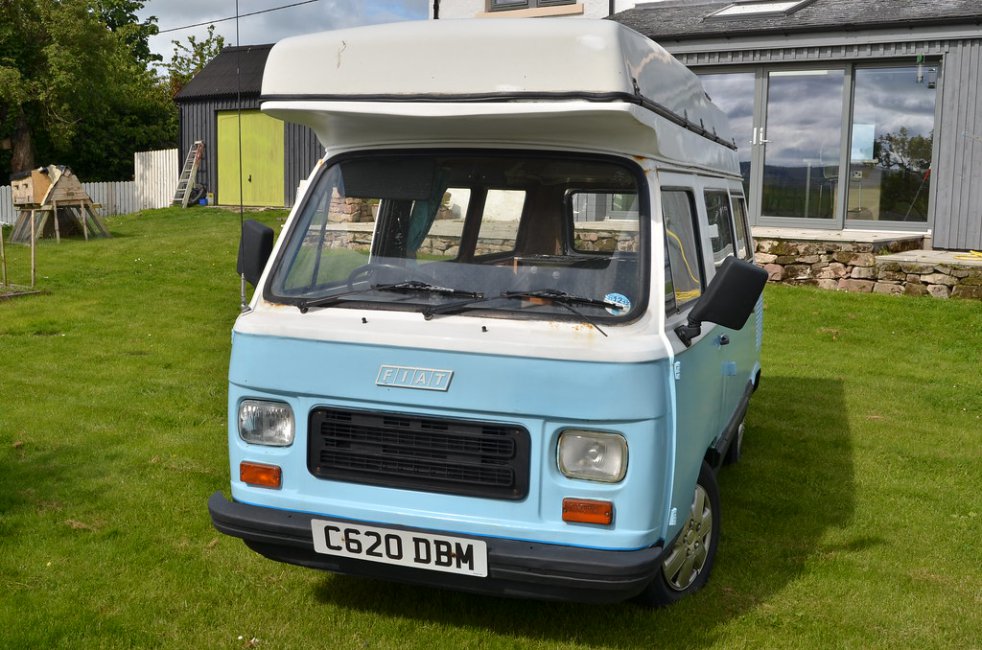
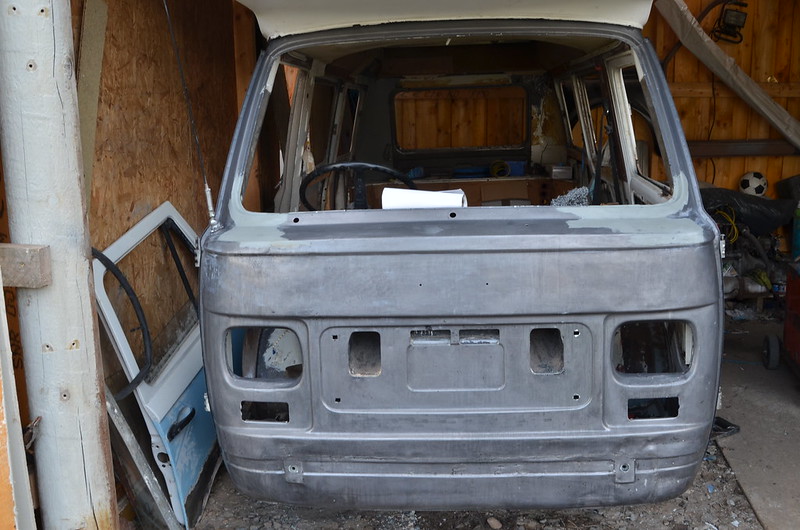
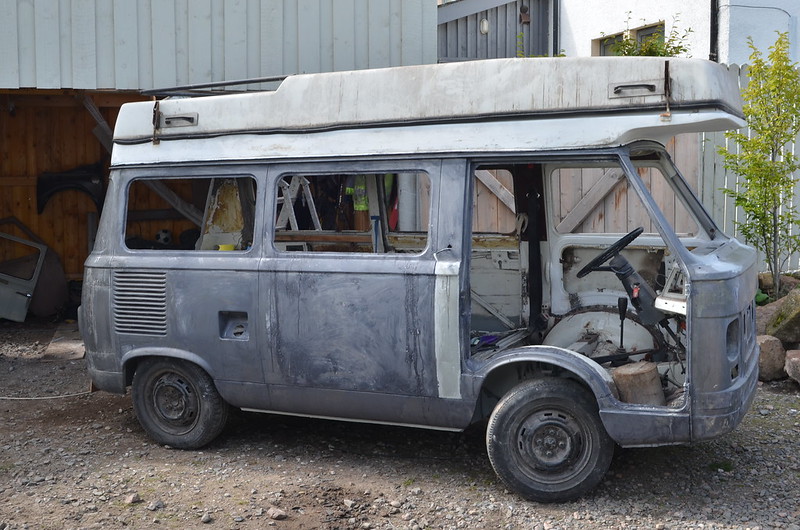
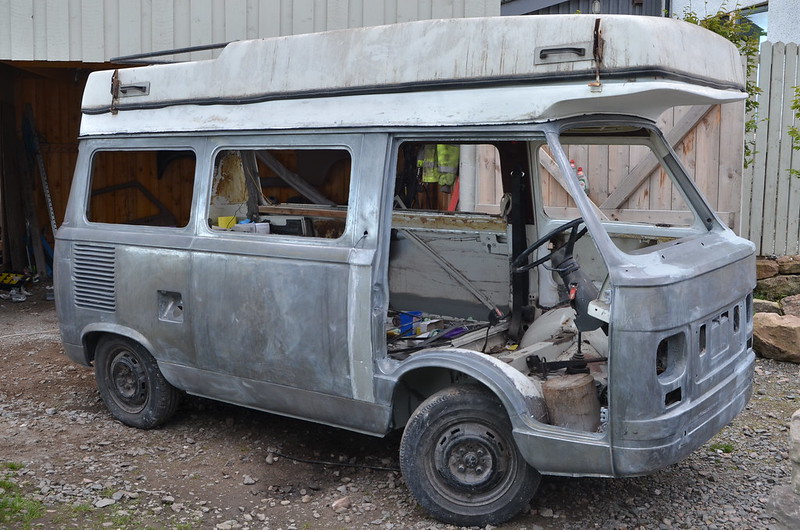
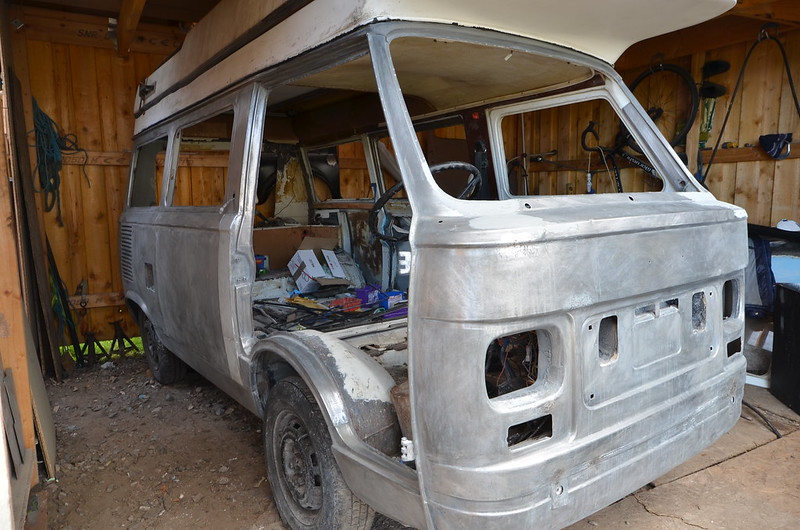
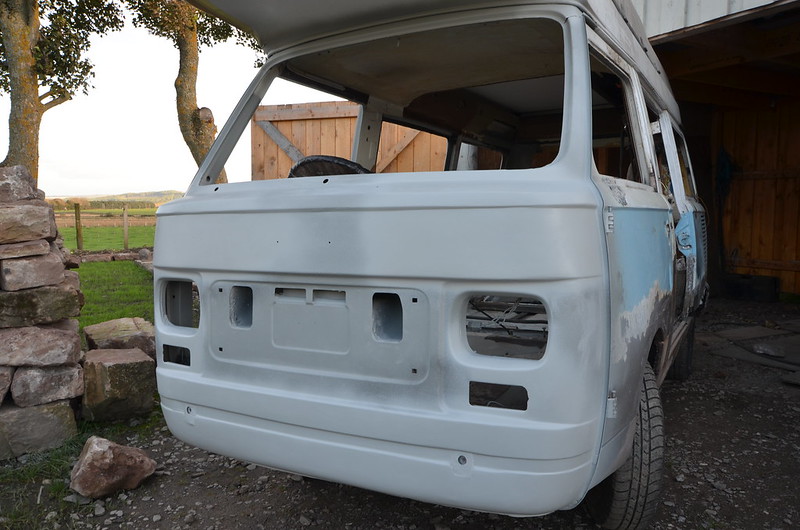
We have just taken on the ownership of this camper from Kelly and Karl and hope to have it on the road within the next six months.
17717052334_1044bd2216_b.jpgDSC_6177 by Peter Thompson, on Flickr
Not only is it a really lovely vehicle, it was also a pleasure to buy it from such a genuine and really nice couple. There was a huge amount of interest in the sale and I am really appreciative that I was favoured to be the buyer ; so many thanks Karl.:)
18335728502_1005bcd374_b.jpgDSC_6176 by Peter Thompson, on Flickr
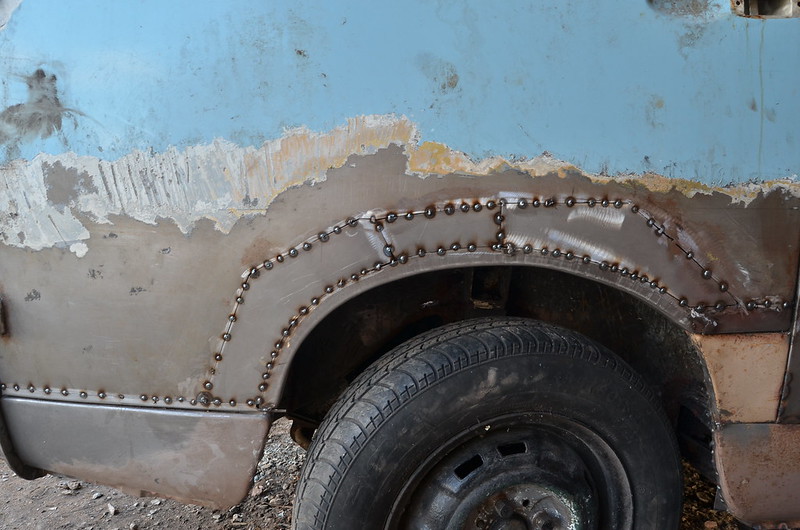
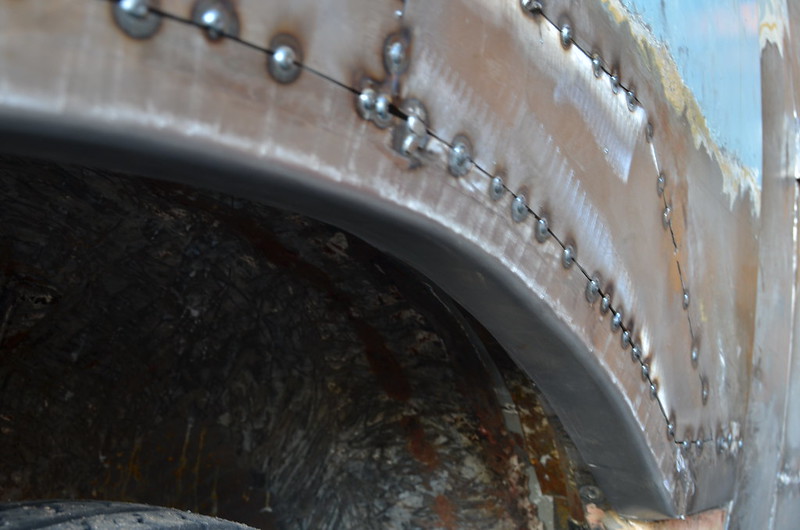
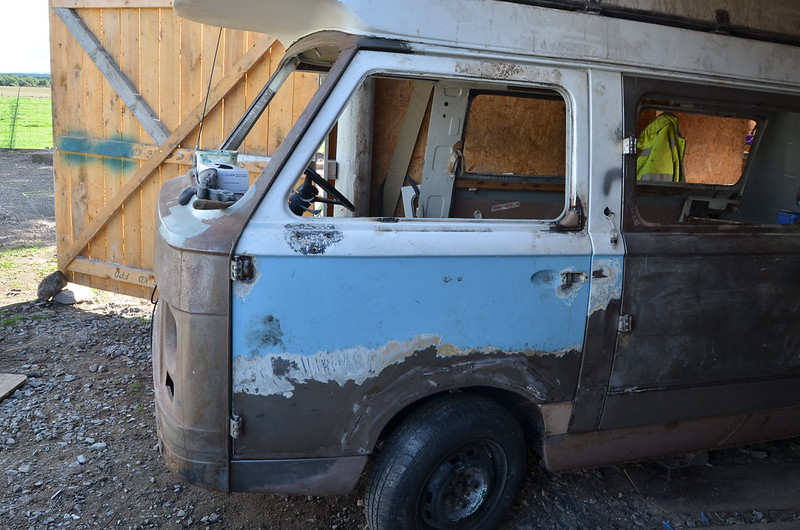
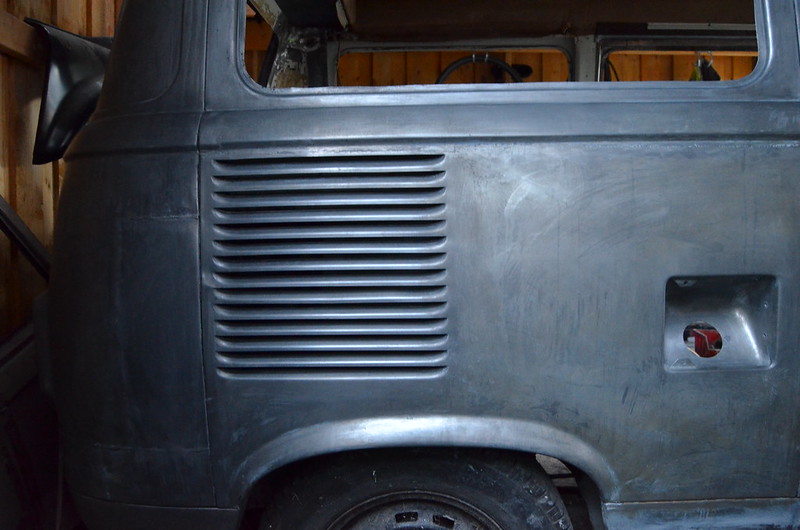
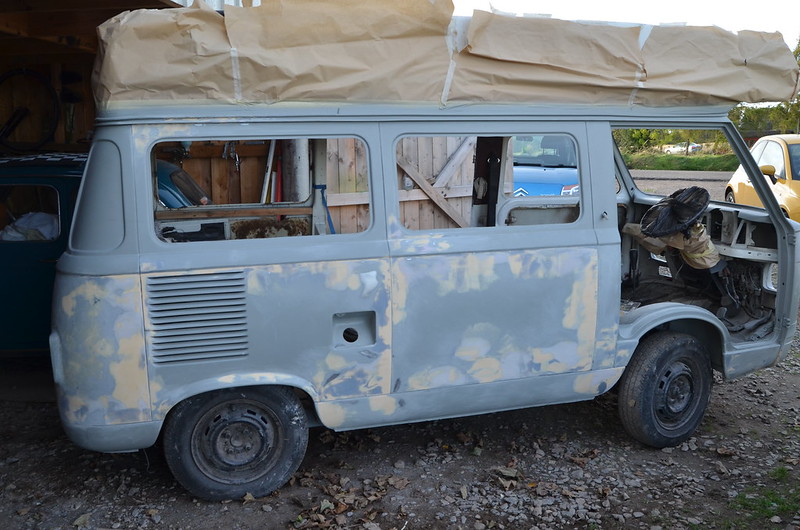
There is a certain amount of essential welding to do underneath, which will add to the welding that has been done in the past. It is currently pretty solid underneath but not as pretty as it could be. I hope to tidy as I go and then work around the bodywork. This has signs of a lot of filler and there is rust poking through in places, but it looks like we will be able to get using it soon.
There are a number of mechanical issue but nothing too onerous and it starts and runs really well.
So a rolling restoration to usable standards.
I just need to get the roof open now!
Watch this space as I document my progress.
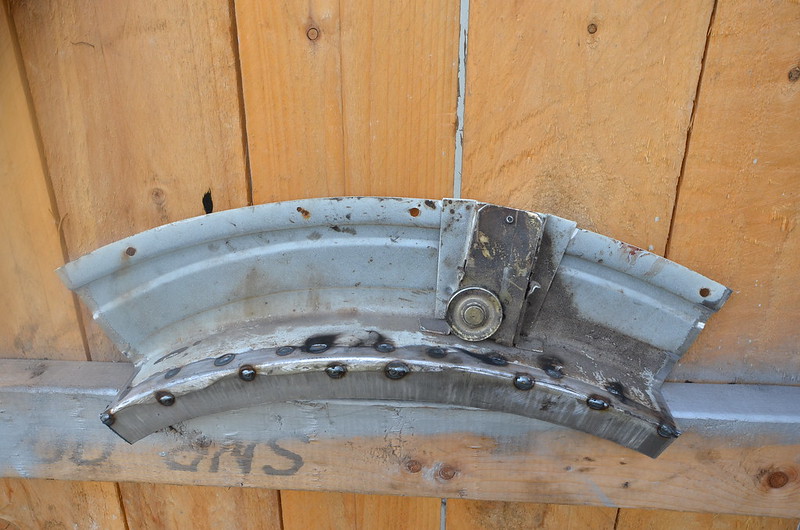
Fancy doing a jigsaw? I was at it all day. I decided that the replacement repair-panel for the bottom of the door-skin covers a much bigger area than I needed and that the major surgery to the arch etc. was likely to cause alignment problems. I'm not keen on its construction; it's very precisely made but the curved flange at the base is a separate piece attached using a number of tack-welds.

MAL_2776 by Peter Thompson, on Flickr

So using it as a template for the curve at the base of the door, I made a "baseline" using the stretcher tool.
The door has subtle curves in all directions and I figured that for this and for reasons of practicality it would be better to repair the door in patches.

MAL_2763 by Peter Thompson, on Flickr
MAL_2773 by Peter Thompson, on Flickr

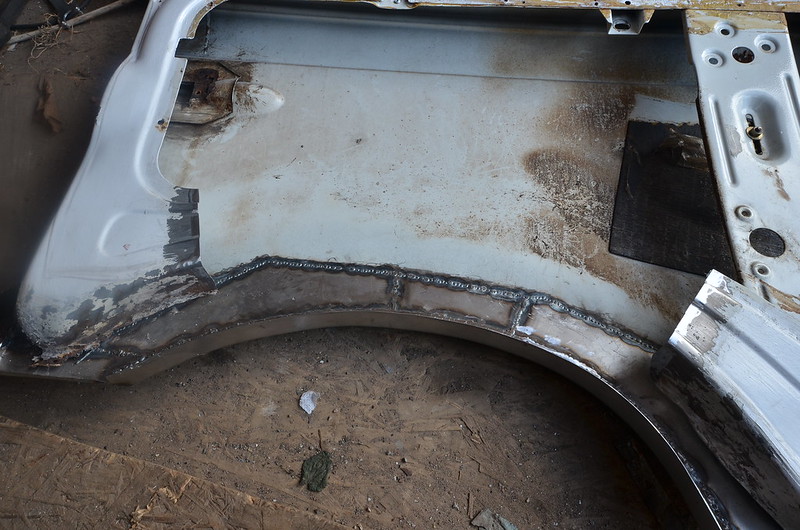
I discovered that the previous repair consisted of a slotted and bent piece of metal glued to the door using blobs of filler and sealant.
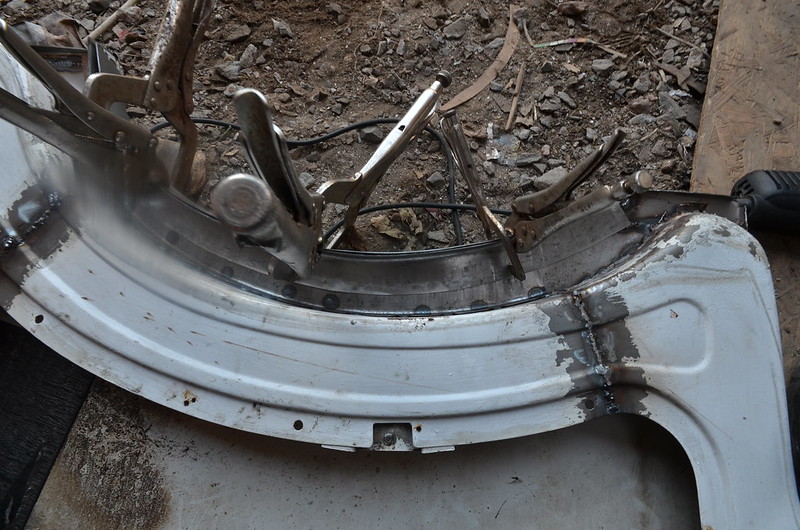
Now it's all tacked together I will weld as much as possible from the rear. But access is restricted because of the shape of the door. This isn't the end because I now have to repair the inner frame and re-attach that to the skin to give it strength....give me strength.:bang:
 
I got the usual shrinkage distorton with so much welding on the door. I hammered most of it out but as I was unable to get at the parts behind the doorskin, and as the doorskin wasn't attached to the frame, I decided to make a surgical removal to give access. So here it is with the bottom pulley for the window-winder exposed.

MAL_2809 by Peter Thompson, on Flickr

This also allowed me to clean the frame up for welding, which was handy because it had been overpainted and there were areas where filler had strayed over it.

MAL_2811 by Peter Thompson, on Flickr

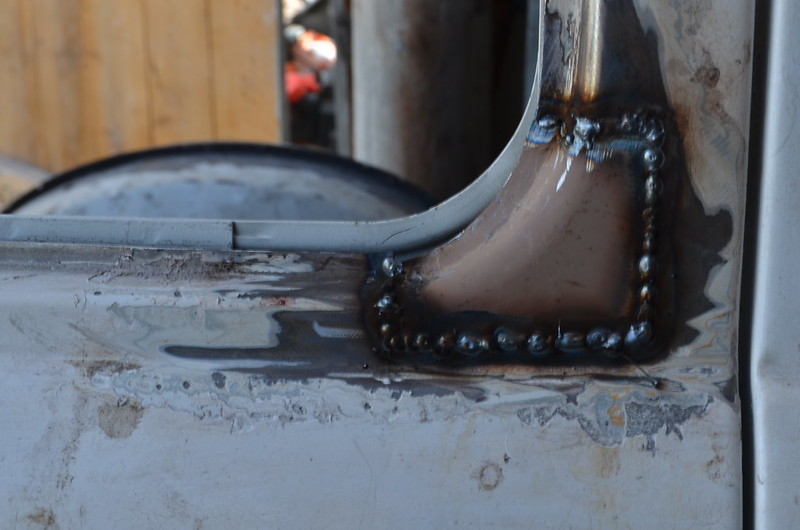
I made a couple of pieces on the shrinker/stretcher and to avoid any more distortion I simply used a series of overlap-weds to join it all together. The area under the door isn't on show and I plan to seal the joins thoroughly and it will all be obscured by protective coatings as it is exposed to all the road spray and dirt.

MAL_2816 by Peter Thompson, on Flickr

I still have few more patches to make to the door-frame and then I'll show the finished article..
 
I still have few more patches to make to the door-frame and then I'll show the finished article..

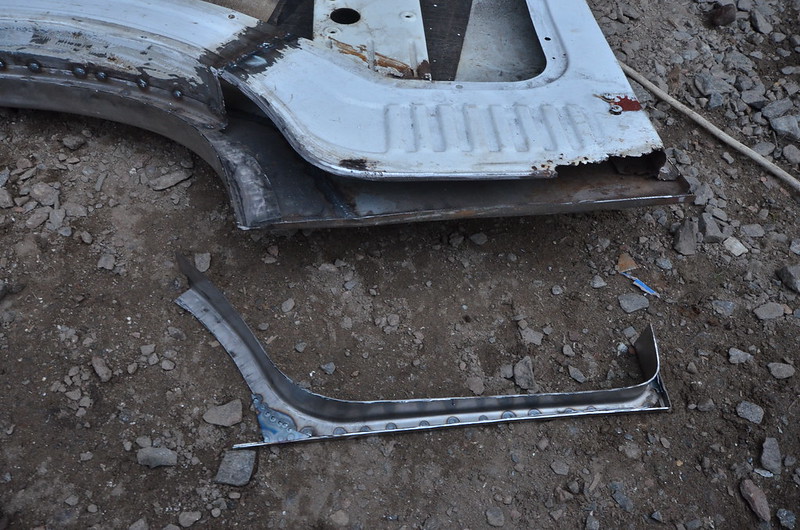
Oh no I won't. This door is no open and shut case; it's going on forever. The bottom of the inner frame is a bit fiddly to make. Having had a busy few days doing other thingsI've only grabbed a couple of hours to make this:

MAL_3175 by Peter Thompson, on Flickr

It's very satisfying making reasonable facsimiles of original sections, but it certainly consumes the time. Here I've tried it for fit and it will need a bit more trimming and shaping before I can weld it in.

MAL_3176 by Peter Thompson, on Flickr
 
Nothing much to report really other than that the door is finally welded-up. There were a few smaller details to fix, such as a corner and a tiny piece of the window-frame and a piece near the top hinge which was bent enough to have needed a lot of crack-prone filler if I hadn't replaced it

150 by Peter Thompson, on Flickr

It closes nicely and meets the surround quite well. I think that the panel has ended up stretched a bit so there's a bit more of a curve to it than there should be.

148 by Peter Thompson, on Flickr

The door gap is all over the place but that may be for all sorts of reasons given the welding this van has endured over the years.
With cooler days and nights approaching it's back to what I set out to do earlier in the summer, which means getting to grips with sanding, acid-cleaning and degreasing the panels ready for epoxy primer,
 
I'm really impressed with your persistence in repairing this door.
I cant say that I would go to the extremes that you have.
At least with the 500 I know I could buy the panels I needed.


it take my hat off to you sir
thumb.gif
 
it take my hat off to you sir
thumb.gif


I appreciate the clear view of the top of your cap-doffed head.:D

But I really had no choice but to be brave because spare doors are so rare and expensive, (when you can find them).
The other thing is that there seems to have been a certain amount of hand fettling in the production of these vans, because the bulk of the bodywork is not a part of a monocoque and may not have needed absolute precision assembly. An indication of this with the doors is that each of them has special shims underneath the catcher plate on the body....one side this amounts to quite a thickness. Also, where the door pillars meet the roof, the curvature at the panel join is wrong, which leaves an insightly gap. Fortunately, this is covered when the windscreen rubber goes in.
I forgive Fiat because techically, it seems that it was built in an Iveco factory.:D
 
The front and the side of the van were stripped back two years ago. Condensation has caused the whole surface to develop varying degrees of rust and today was marked to start removing it. I used phosphoric acid applied with a scotchbrite pad and then abraded with a stainless-steel pan-scourer.
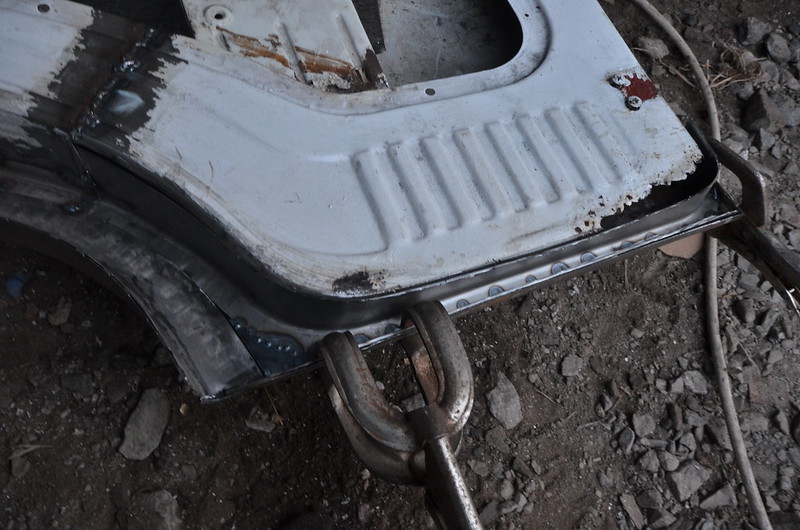
There were a few areas of deep surface rust which I expected to get away with once the acid had taken effect. To get the rusted areas really bright you need to use a wire brush and repeated applications. But this revealed that one area was worn too thin and I cut it out and replaced it. The photo shows it halfway through the job.

MAL_3343 by Peter Thompson, on Flickr

Some areas, such as the bottom flange of the sills, needed extra effort to clean of rust. I'm still not quite there but nearly ready to paint the epoxy. You can make out a couple of areas at the bottom of the windscreen, where I painted epoxy two years ago.

MAL_3344 by Peter Thompson, on Flickr

It goes on better using a brush or roller and as I will be working the surface with bodyfiller and the multiple preparations that come before high-build primer, I don't expect the crude finish to be a problem.
 
Last edited:
I have now treated the front and side of the van, working all the surface rust away by simply rubbing the acid into the surface. There have been a few areas of deeper rust, mainly around window-frames, which have needed a bit more work. The most effective way is to scratch the rust with a Stanley-blade once the acid has soaked it for a while. This is not a quick process, requiring it to be left over night and redone several times, but the result is complete rust removal leaving shiny steel. That shine soon turns to a dull grey, with little rivers of black iron phosphate where the acid drips.

MAL_3348 by Peter Thompson, on Flickr

I've given special attention to the panel joins, which have had the old sealant scraped out and worked acid into the wheelarch returns and anywhere else that will be more prone to rust starting.
I'm now halfway through degreasing the panels and rubbing away all the surplus oxide residues. Once that's rinsed away and dry it will need abrading with 320 grit to give the key for the epoxy.

MAL_3355 by Peter Thompson, on Flickr

This part of the job has been much easier and quicker than I expected, is probably because of the massive amount of new panels used on this side.:bang:
It is nice to see it all in a relatively even colour, despite that colour being battleship grey.:)
 
Looking good Peter,
I must admit using phosphoric acid is one thing I haven't tried yet.
As you know I'm not a lover of leaving Fiat metal exposed for too long and usually get a primer on it before it has a chance to corrode.
But it does look like a very effective method.
smile.gif


Wont be long before you are filling & painting. then off on holidays with Murph tied on the back.
biggrin.gif
 
Although you can get away with leaving it like that for a day or two or even longer, that's not the intention. Before priming, it may develop some flash rust, but as it has to be abraded lightly to let the epoxy get a grip, the rust would be removed. Alternatively you can give a last wipe with a dilute solution of acid.

One of the benefits with this van is that the acid is neutralised by reaction with rust. In any parts where I can't fully remove it, such as the seams between the panels, there is no harm done and it willl inhibit corrosion even when overpainted.

Phosphoric is the "etch" in etch primer but epoxy needs a physical key, hence why this surface will need scuffing before paint.

Finished all I'm doing at this stage, so final repetitive image with the whole side cleaned of oxides:)

015 by Peter Thompson, on Flickr
 
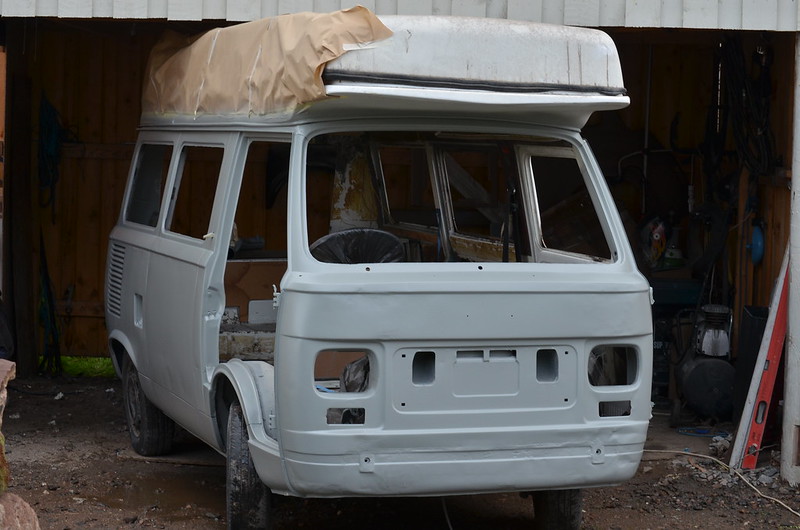
Here it is in all it's silver shininess; throughly sanded with 120 grit to remove all the iron phosphate crud and the odd stubborn trace of factory primer. I found a few more tiny holes where welding hadn't fully sealed-up and I gave great attention to the awkward and half hidden bits like the bottom of the sill and around the hinges.
But I've changed plan (again) and decided that I will spray the epoxy primer as is seems a shame to risk blurring the nice crisp lines of the mouldings and the door and window reveals by using other means to apply the paint. With the epoxy I need a gentle spray to make it adhere properly, so I've ordered a LVLP (low volume, low pressure) gun to lay it on. This has the added advantage that it works better with a breathless, underpowered sprayer like mine and reduces overspray and consequent wastage. The downside is that it's being delivered by Hermes so the bodywork is likely to need another light sanding by the time it arrives.:bang:

MAL_3837 by Peter Thompson, on Flickr
 
I've kept going over the bodywork, micro-sanding and attending to little areas that needed a bit more phosphoric. Eventually I could wait no longer and grabbed a couple of hours when the rain had dried up and there was no wind. By placing the van diagonally in the garage I had reasonable access all round.
The LVLP gun took a bit of time to get used to; it sprays a bit coarser than I am used to and not such a wide spray-pattern, but that may partly be because of the relatively thick,high-build epoxy.
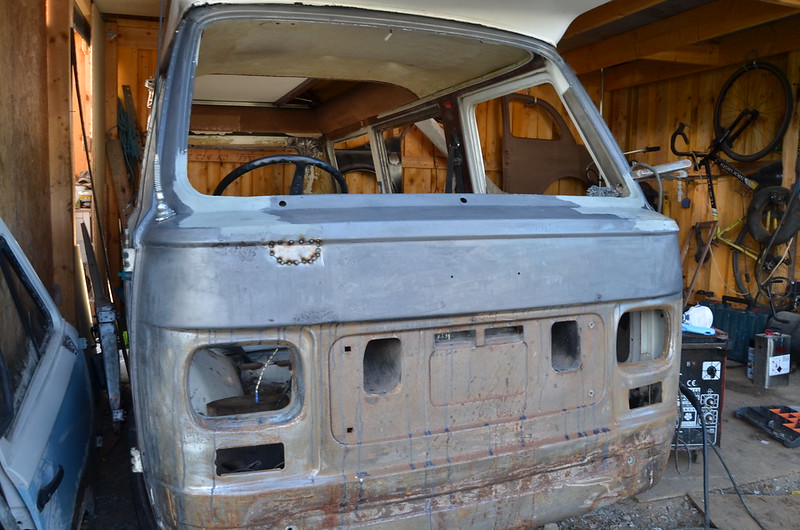
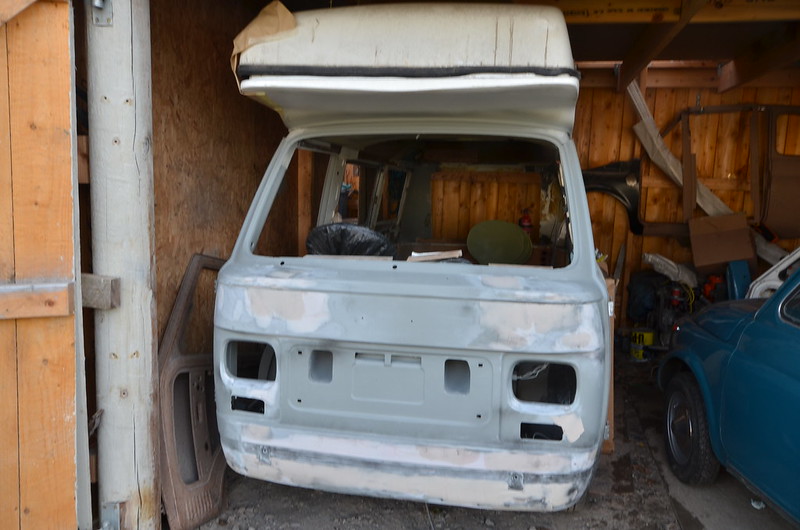
The paint goes on well and doesn't shrink back very much. I'm going to be using swathes of filler, as you can see on the very lumpy and messy front which was way beyond my ability to re-make, but the primer easily covers some of my better welding efforts.

MAL_4301 by Peter Thompson, on Flickr

I have some work to do preparing the tailgate and side-door for paint and I will now be able to get on with the first stages of filling.
 
It's a bit quiet on here, so just an update to show a small amount of progress. I've had a week away on holiday so only just getting going again. The filler on the front has progressed from the initial metallicised stuff which I have put on over the welds to a lighter, easy-sand product.

MAL_4451 by Peter Thompson, on Flickr

It would have been nice not to have needed to lay the filler on so generously, but the mishapes in this front end are well beyound my panel-beating ability. It seems odd to be chucking it on again after all the long processes of removing it in the first place; but this time around it isn''t hiding any rust or holes and all the indentations are as shallow as I can make them.
 
lookin great peter, makes me so tempted to strip n paint mine properly!
I think that thoroughly stripping back the paintwork is always going to be the best policy on one of these vans. But if I had one that was running and things were not dropping off, I would hold back as long as possible...... it's a massive challenge.?
 
I have been busy with a few other little projects, so the filling job on the front end has been painfully slow. But that's actually a good thing in a way, because it forces me to be patient and thorough. But I think I'm at the end of the initial "straightening" and I'm probably going to be able to roller some primer over the filler tomorrow.

MAL_5408 by Peter Thompson, on Flickr

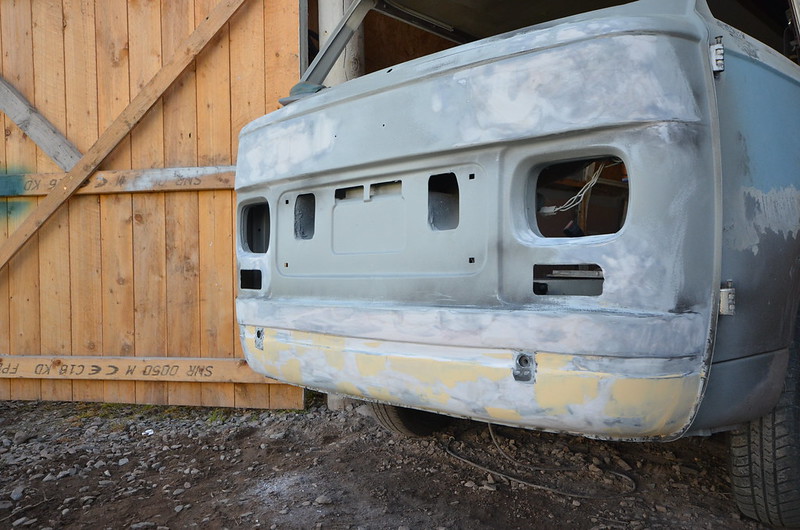
I have never used two-pack stopper before (the yellow stuff on the lower valance) and I am amazed at how good it is. It squidges on really thinly and easily and hardly needs sanding afterwards.(y)
 
Paint and filler continue to dry. :D

The front end got a couple of extra coats of epoxy to seal the filler and to cover the few areas where I had to sand through to the steel in order to find a level. My bodywork moulding creations in polyester filler are not bad but obviously there's a bit of waviness apparent now that it's been primed. But most of this is obscured when the bumper is fitted and after my experience with the 500 I will definitely be applying stonechip paint on the lower areas.

MAL_5774 by Peter Thompson, on Flickr

The new tin of primer I bought is so thick that my steel stirring ruler stands upright in it without any movement.:eek: Technically you're not supposed to thin the paint much, so even with 20% thinners it's still viscous. So I had to use a narrow fan on the spraygun but had the flow set high and moved over the panel quite slowly. The great advantage of this, together with the low pressure spraygun, is that spray drift is minimal and consequently very little paint is wasted.
I've moved attention to the rear quarter which is now filled and levelled and made a start on the wheelarch panel, which although new, has a few distortions gained in transport to me.

_MAL5768 by Peter Thompson, on Flickr

At this rate I'll have the finished half of the bodywork ready for starting the topcoats by the end of next week. Although then I will be moving back onto more paint preparation and welding on the remaining bodywork and doors.
 
Looking really good. Are you going for the original colour? I suppose you have little choice or you will have to change the name via deed poll!!!!
 
Looking really good. Are you going for the original colour? I suppose you have little choice or you will have to change the name via deed poll!!!!


:D
I think it's most likely to be blue...I would like a deeper shade, Sheila wants lighter. Definitely still white above the waistline but the original; Corfu White rather than the Ford Diamond White. She could change her name to Buttercup of course, or Ermintrude.........:D
 
As usual it's taken longer than expected to finish the filling on the side. If I could have found a solid day to get on with it I would be further ahead, but real life gets in the way.:bang:
I don't think any more filler or stopper will be needed here. The filler will be about 5mm thick at the front end of the sill where it had a bit of a twist when I fitted it, but mainly it's just there to level out waves in the panels and to cover welding.
I've ended up going further than I intended in using it to align the levels of adjoining panels which I had mismatched slightly.
I need a dry, windless day tomorrow so that I can recoat with primer.

MAL_6312 by Peter Thompson, on Flickr
 
Back
Top