17717052334_1044bd2216_b.jpg

900 Bluebell the 900e Amigo

Introduction

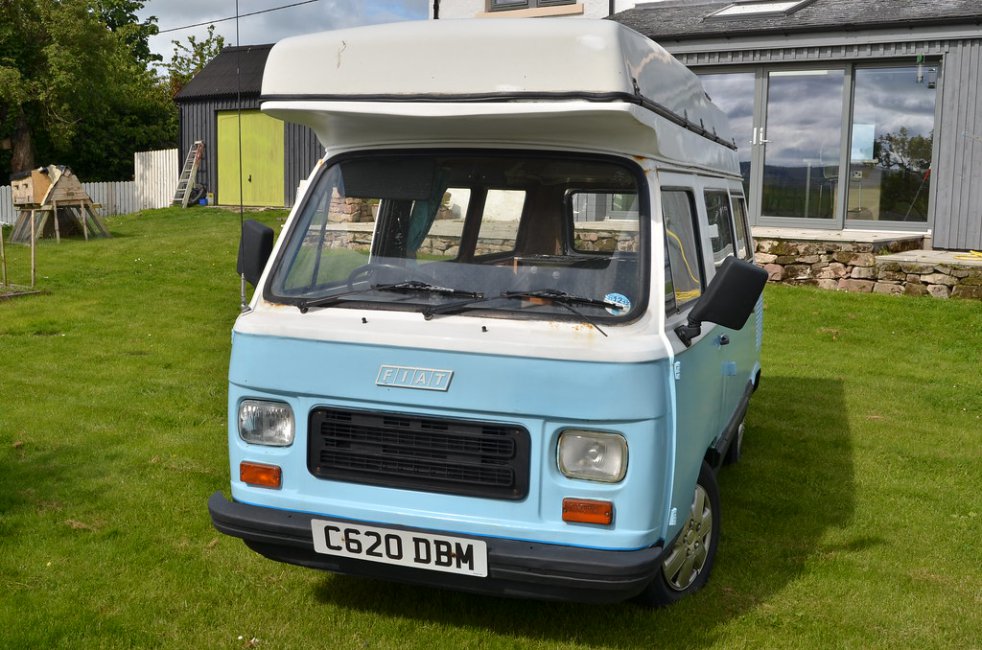
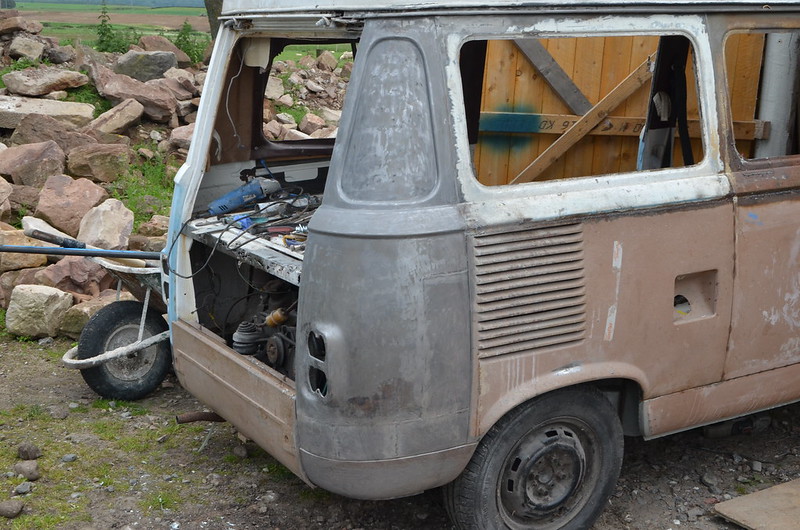
We have just taken on the ownership of this camper from Kelly and Karl and hope to have it on the road within the next six months.
17717052334_1044bd2216_b.jpgDSC_6177 by Peter Thompson, on Flickr
Not only is it a really lovely vehicle, it was also a pleasure to buy it from such a genuine and really nice couple. There was a huge amount of interest in the sale and I am really appreciative that I was favoured to be the buyer ; so many thanks Karl.:)
18335728502_1005bcd374_b.jpgDSC_6176 by Peter Thompson, on Flickr
There is a certain amount of essential welding to do underneath, which will add to the welding that has been done in the past. It is currently pretty solid underneath but not as pretty as it could be. I hope to tidy as I go and then work around the bodywork. This has signs of a lot of filler and there is rust poking through in places, but it looks like we will be able to get using it soon.
There are a number of mechanical issue but nothing too onerous and it starts and runs really well.
So a rolling restoration to usable standards.
I just need to get the roof open now!
Watch this space as I document my progress.
Excellent work Peter. You know I'm a big fan of this kind of work. However for some reason I have missed the last few posts.
Something that will probably inspire you, search YouTube for Project Binky. Car welders at their best!
 
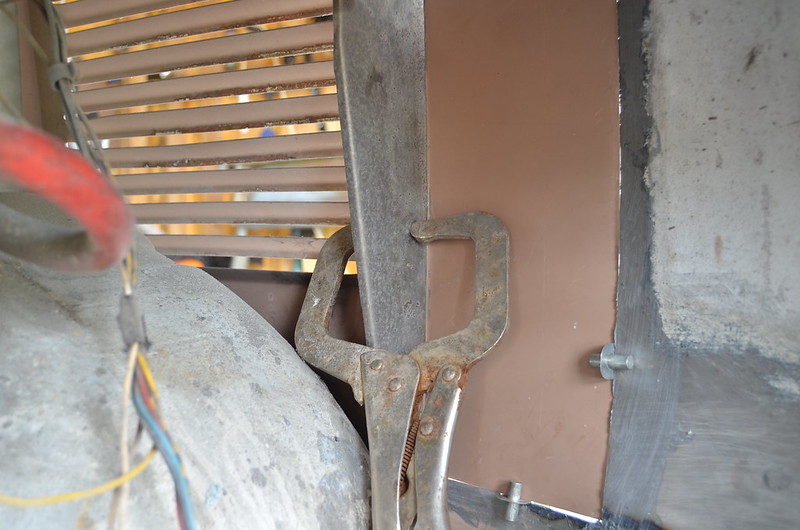
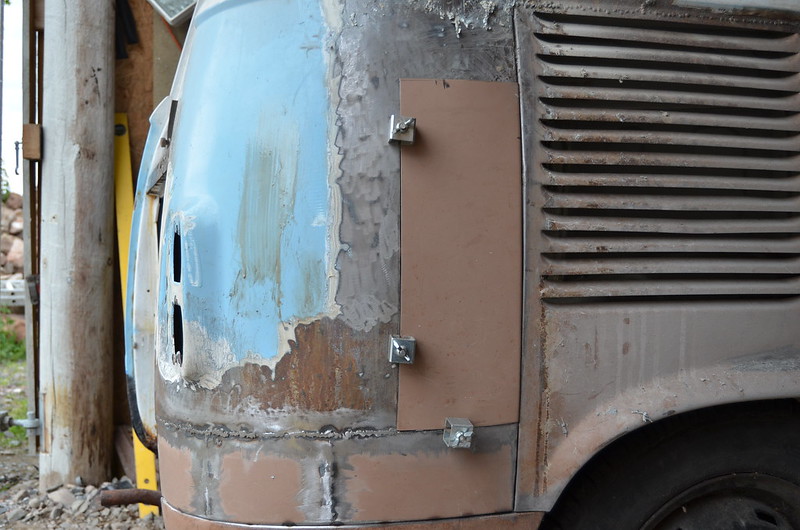
Inspired by Sean's link (7 episodes in now!), I motored on with the next big hole in the van. A part of this has been there since it was made into a camper all those years ago, being a crude rectangle made to fit and external mains input socket.
MAL_8922 by Peter Thompson, on Flickr
Although I will be re-fitting one of these, I will make a better job and probably will re-inforce the hole a little.
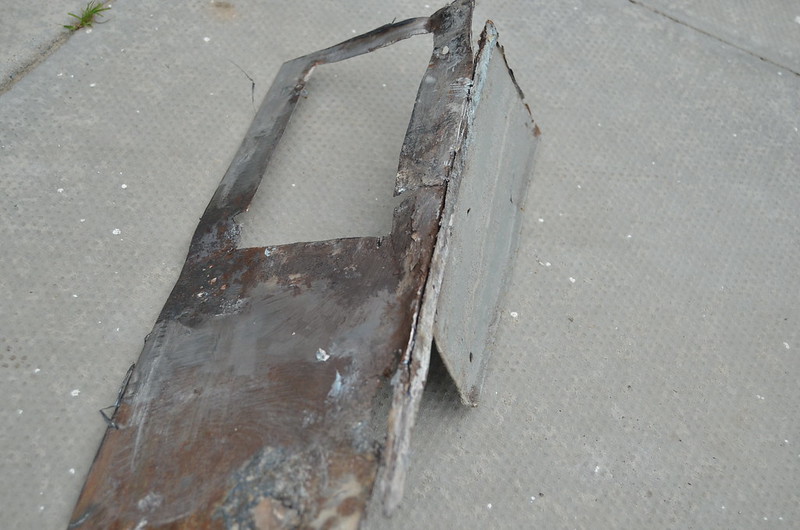
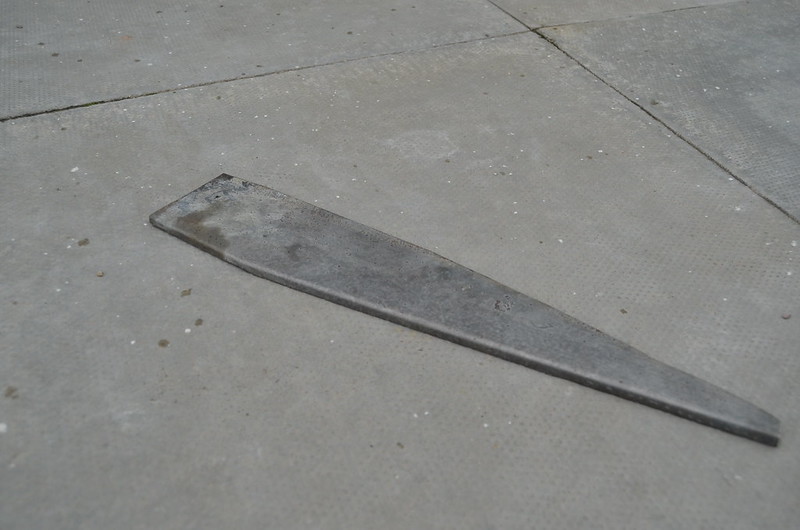
There is a stabilising fillet which is welded to both the panels where they join.
I had already removed the worst of this but now had access to replace the bulk of it. Simple to make but it gives a lot of rigidity.
MAL_8926 by Peter Thompson, on Flickr
MAL_8928 by Peter Thompson, on Flickr
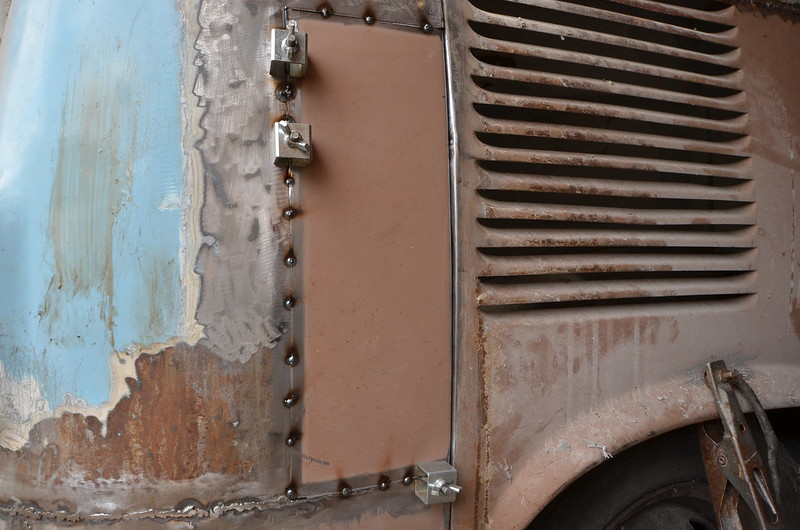
It was a fairly easy matter to make a big, patch for the hole. this has a slight curve which was reproduced by careful use of the shrinker.
After some final trimming it looks like it will fit nicely.
MAL_8925 by Peter Thompson, on Flickr
 
This is a quite a big and relatively flat item to weld so I had to do a lot of tacking and then gradually work around to minimise distortion.
MAL_9312 by Peter Thompson, on Flickr
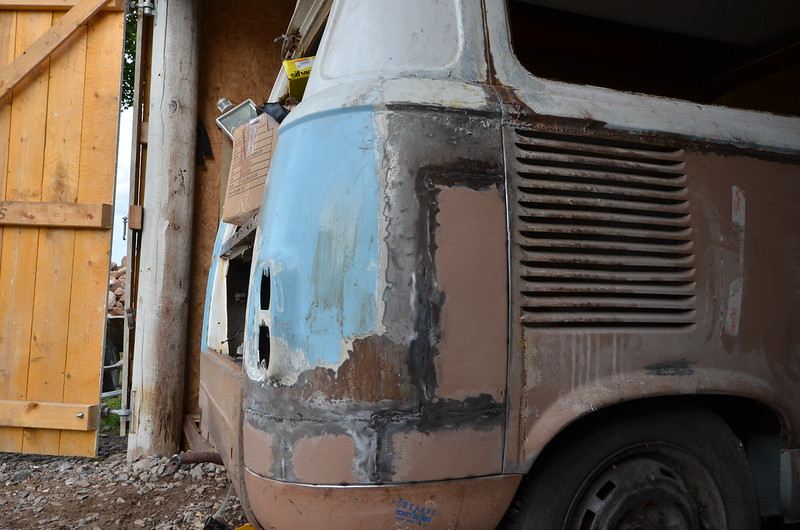
There's still a bit of depression in places at the weld joint but it's got a far better contour and is much stronger than it was.
MAL_9313 by Peter Thompson, on Flickr
This concludes work on that corner of the van, probably three full days' work all told. Tomorrow I will get cracking on some simpler stuff patching up a few holes in the inner wheelarch. :)
 
I must try to count the number of layers of paint on this vehicle. It has apparently been resprayed many times, including a couple of layers of what seems like a sealer such as Barcoat, which makes it very hard to remove. I have taken the paint off the rear quarter and used nearly a litre to achieve that. On the positive side I didn't find any more holes and on it and only couple of filled dents.
MAL_9657 by Peter Thompson, on Flickr
I have also worked on a few unfinished details of welding such as a 2mm thick, re-inforcing gusset -plate which should have been welded between the sill and the front cross-member, but of which there were no remains whatsoever.
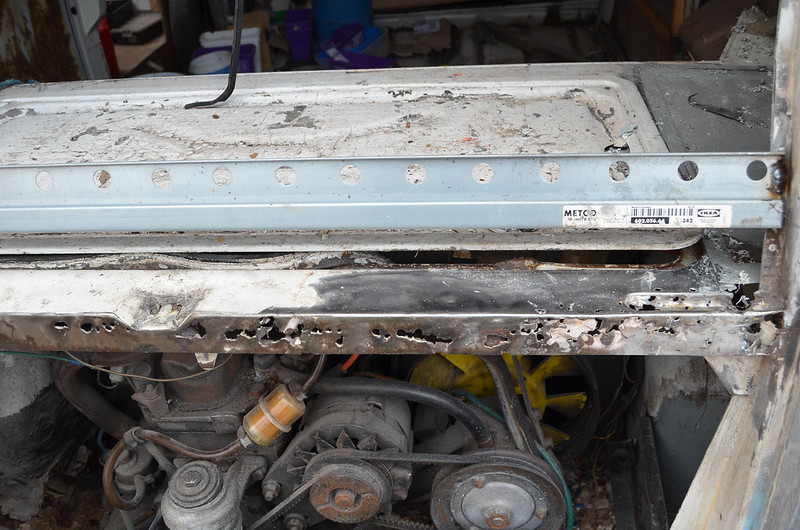
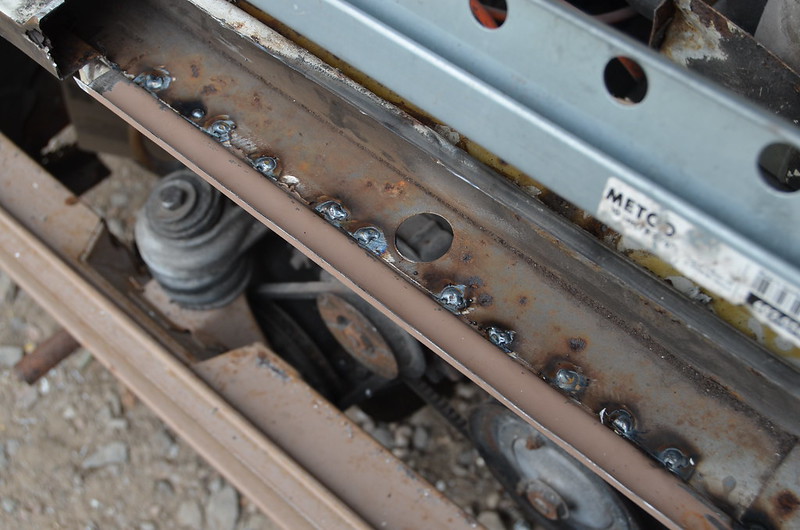
So my attention is now drawn to the upper stay which is welded above the engine bay. After removing all the filler I find that this is full of holes.
MAL_9666 by Peter Thompson, on Flickr
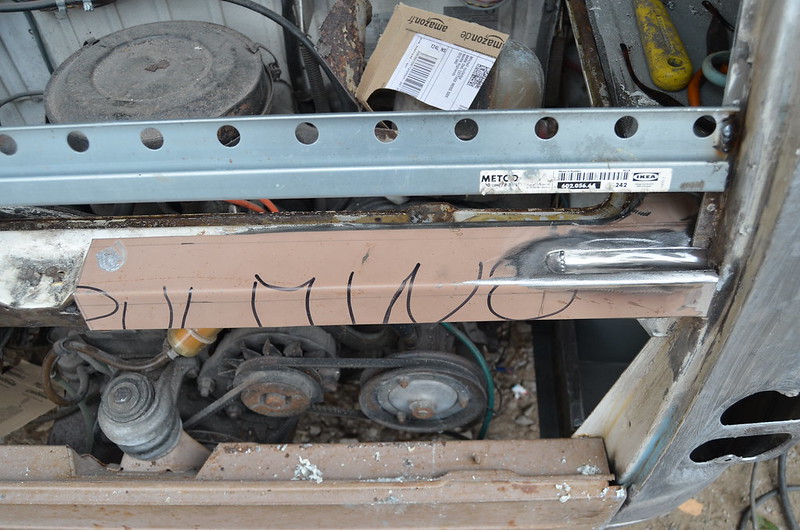
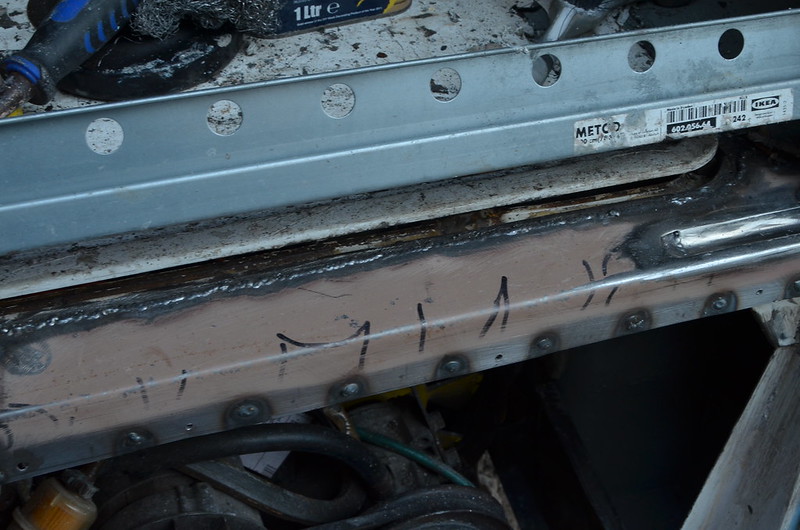
It is an unfortunate part of the design that it seems that water is expected to enter here and then exit through big holes in the bottom of the cross-member. I have put in temporary brace made from a bit of IKEA bracketry and although it might be wise to try and create an entire new component, it is more within my abilty to do it in stages. The first piece took about an hour to make and is now ready to be fitted; it's going to be a big job.:bang:MAL_9667 by Peter Thompson, on Flickr/SIZE]
 
Out of interest, was that converted into a camper by a proper company when it was brand new, or by an owner at some point in its life? :)
It was a camper from new, and from what I read I get the impression that these later ones were converted by a UK company and then marketed as a Fiat product.
Bluebell has a very complex roof structure with a double and a single bed upstairs.:)
 
I see! :) I only ask because I get the impression that a lot of people buy a used panel van, and turn it into a custom camper.

...That's only because they haven't seen an Amigo or Pandora. :D
This one has been so knocked about that I don't feel any need to attempt originality and will be customising the interior in any case. The only thing is that the space is so limited that there isn't really a choice on internal layout.:D
 
peter, there seems to be so many different combinations on setting up my Pandora, I actually forget how it was set up when I got it! It didn't have a fridge, so I removed the fridge housing unit, and got even more variables! I seem to set it up as to how it suits at the time, depending if kids are with me, or if I have adult residents! I have since found original fridge and I think I can afford the space to put it back in. The arrangement possibilities have always impressed me since I got the van, it really is a tardis, especially coupled with the waking. Now I am going to try and store a small portaloo, just to carry and set up a toilet tent for my little girl.
 
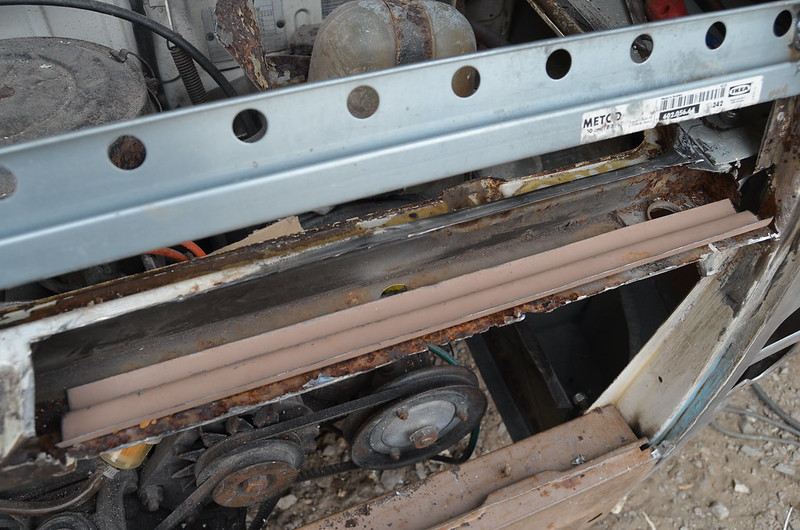
Having removed the top part of the brace I needed to tackle the bottom part.
MAL_9669 by Peter Thompson, on Flickr
I wanted to retain the integrity where the metal was good and therefore simpify the fabrication, so I made a piece that could be lapped and plugged into the original.
MAL_9670 by Peter Thompson, on Flickr
This item is completely out of sight so I am being lazy and avoiding possible distortion and difficult welding.
From this stage I have now treated the remaining rust and I will paint the interior with two coats of epoxy paint before moving on.
MAL_9671 by Peter Thompson, on Flickr
 
I got one side of the cross-member welded on and obviously there is a lot of grinding to do to make it presentable. The other side is much better and is waiting for the rust-treatment to dry prior to priming.

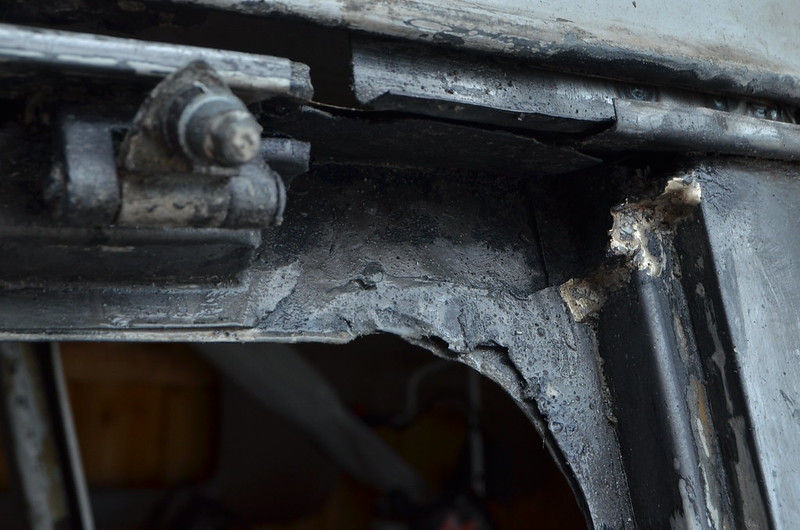
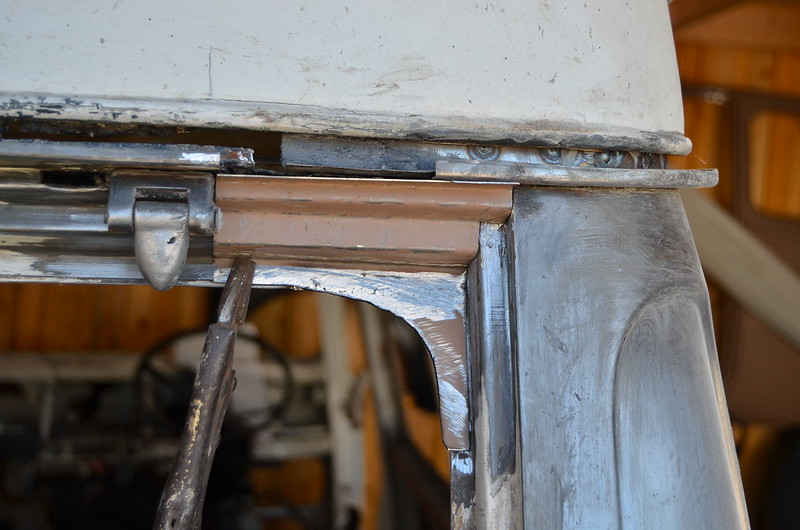
I thought that I may as well make a start on the really corroded area above and below the guttering where the hinges for the tailgate attach. I had already been cheered (it doesn't take much on this van!) that the hinges are firmly attached to some substantial internal mounts which have resisted the corrosion.
It is awkward to access; I really should buy a Dremel. There are some annoying remnants of brazing that will confound the welder and I will need to make quite a few repair pieces to make this good.
MAL_9674 by Peter Thompson, on Flickr
So far, you see it after I have chopped away the worst of it and used a load of phosphoric acid to clean everything up.It's going to need a lot more wire-brushing and shining-up before it's ready for welding.:eek:
MAL_9676 by Peter Thompson, on Flickr
 
Someone's been a busy boy!:D
Only just caught up on this thread. Looking good and some fine fettling going on.
 
Someone's been a busy boy!:D

I have been exceptionally busy with the camper of late; and with the daylight continuing well after 10pm up here I ought to do even more!
The little Fiat is patiently waiting for a new rear oil-seal, but I have more or less sorted the windscreen leak and painted the floor with epoxy.

I splashed out today and bought a Dremel; even with the limited tools included in the kit I am amazed I what it can achieve. So I have tidied up the top corners of the tailgate opening and it will do wonders for the gutter repairs.

I've also got 5 litres of professional paint-stripper as my intention is to clean-up and start painting the three-quarters of the van that will be completely welded up within the next couple of weeks. It's proper stuff and seriously impressive at removing paint. Using a razor-scraper I'm managing to make some decent headway.

I'm at a point where there are lots of little tasks going on in parallel which should come together tomorrow and give me some more achievements to show you.(y)
 
I splashed out today and bought a Dremel; even with the limited tools included in the kit I am amazed I what it can achieve. So I have tidied up the top corners of the tailgate opening and it will do wonders for the gutter repairs.

Oh I am surprised you didn't have one already. They never cease to amaze me. Those tiny little cutting disks are what I used to trim my bonnet down, along with the help of an angle grinder of course.

A good place for spare accessories for the Dremel is the link below, they are pretty good quality compared to the Dremel spares but a fraction of the price and you get loads of them.

Http://www.metalpolishingsupplies.c...rotary-craft-hobby-tool-dremel-accessory-set/
 
Oh I am surprised you didn't have one already.

I thought they were a bit wimpy since my angle-grinders are so powerful and aggressive, but I've seen the light now and thank-you for the link.(y)

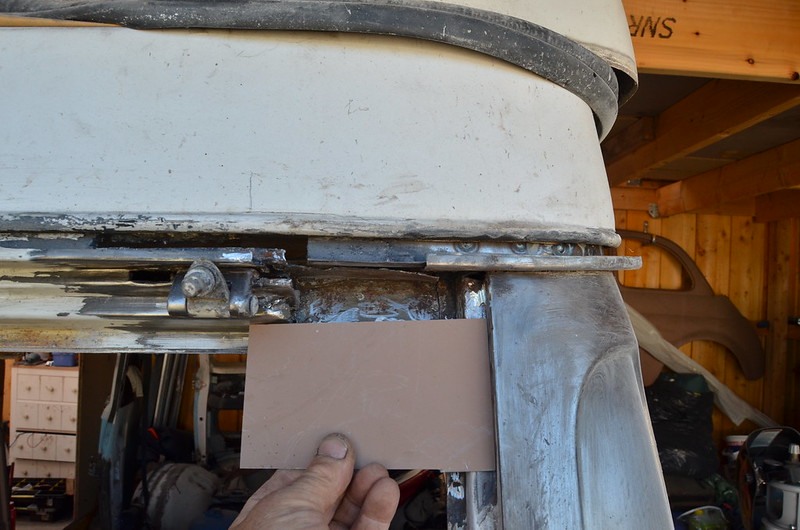
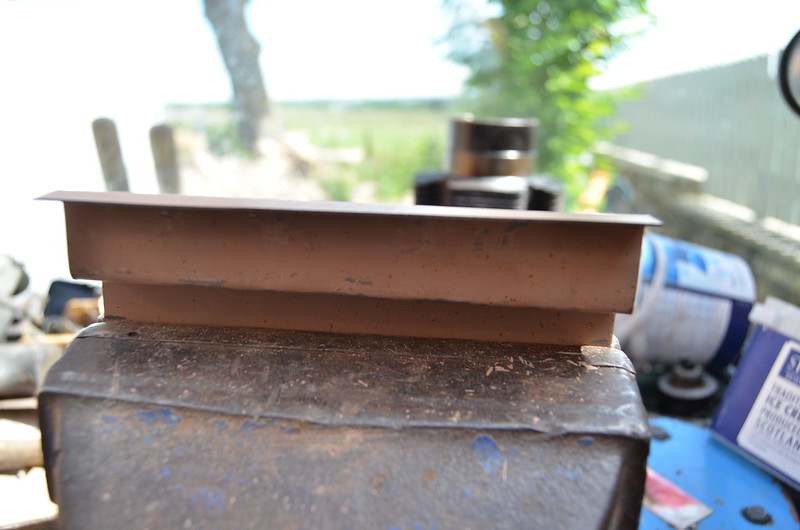
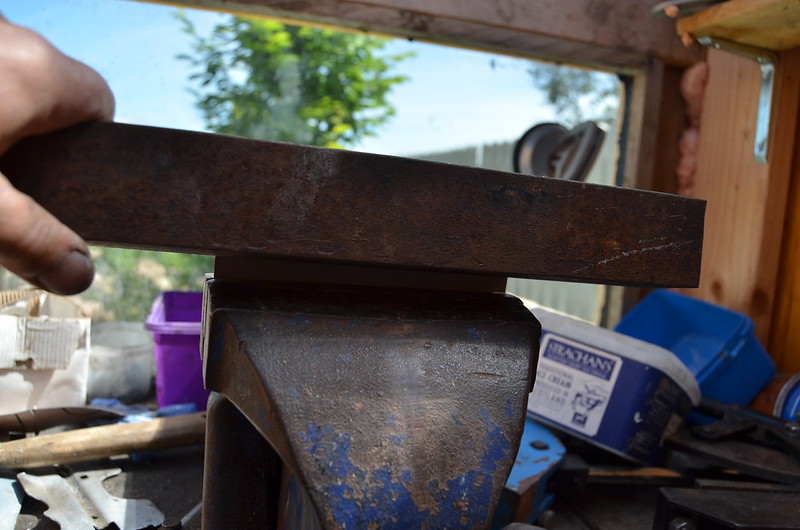
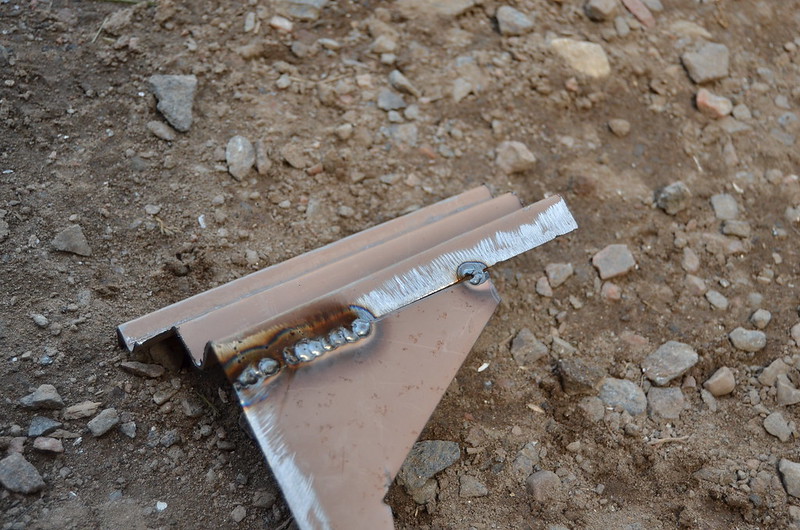
I still haven't got to the stage of welding anything on to the area where the hinges mount, but I have all the pieces made. It requires multiple folds which is easy to do for these small sections which were conveniently the same length as my vice. Just take a piece of steel approximately the right size and fold it one angle at a time going back to measure each time for the next bend.
MAL_9696 by Peter Thompson, on FlickrMAL_9697 by Peter Thompson, on Flickr
I used a piece of angle iron whacked by a big hammer to proceed after the first fold.
MAL_9701 by Peter Thompson, on Flickr
MAL_9704 by Peter Thompson, on Flickr
The piece was then trimmed to fit.
MAL_9705 by Peter Thompson, on Flickr
There was also a re-inforcing gusset which I found easier to roughly cut and weld on afterwards.
MAL_9706 by Peter Thompson, on FlickrMAL_9708 by Peter Thompson, on Flickr
A bit of grinding and all it needs now is some holes drilling for the plug-welds.
MAL_9710 by Peter Thompson, on Flickr
I still need to paint the hidden interior parts before I can go further. It will be a daunting obstacle overcome once this lot is all back in place.(y)
 
Last edited:
i've spent two years on and off in a hell-hole of rust, dust and sparks to weld-up an almost unrestorable wreck. Then I spend a couple of days on and off stripping back some paint.
So only now does Sheila notice any significant changes. " I can almost imagine it finished and us driving in it." she said having noticed this view inside the garage.
MAL_9715 by Peter Thompson, on Flickr
I should have the front, back and one side repaired, welds ground down and paint stripped by the end of the week.
 
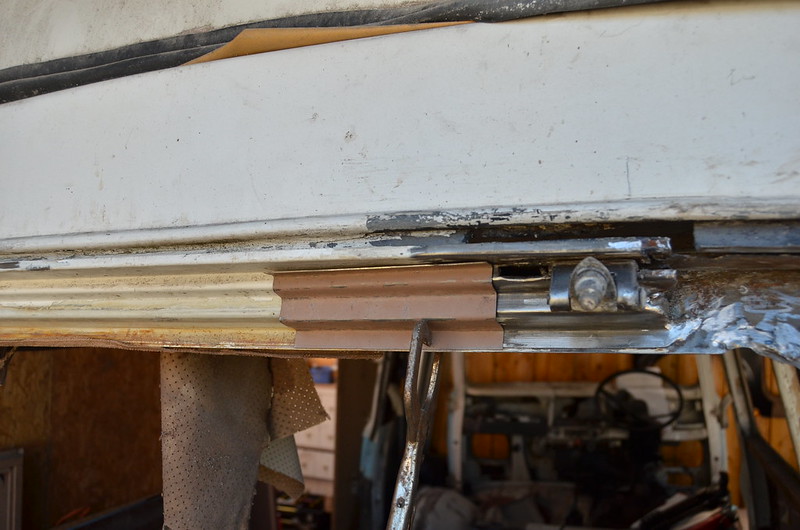
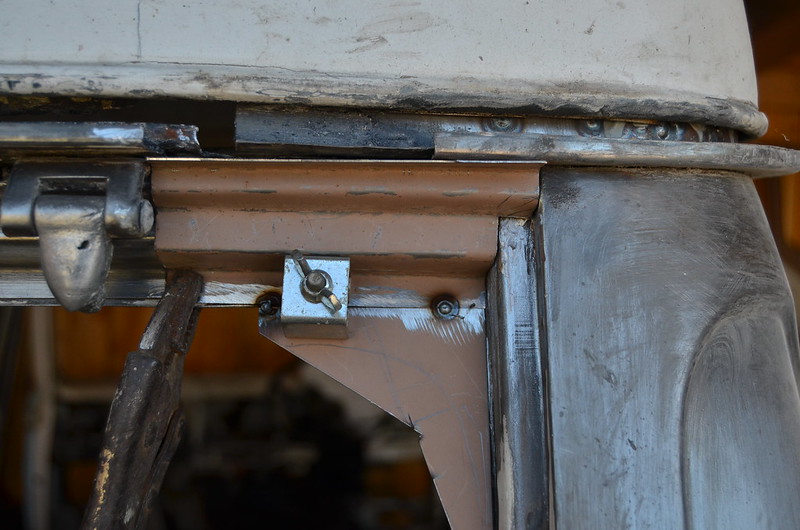
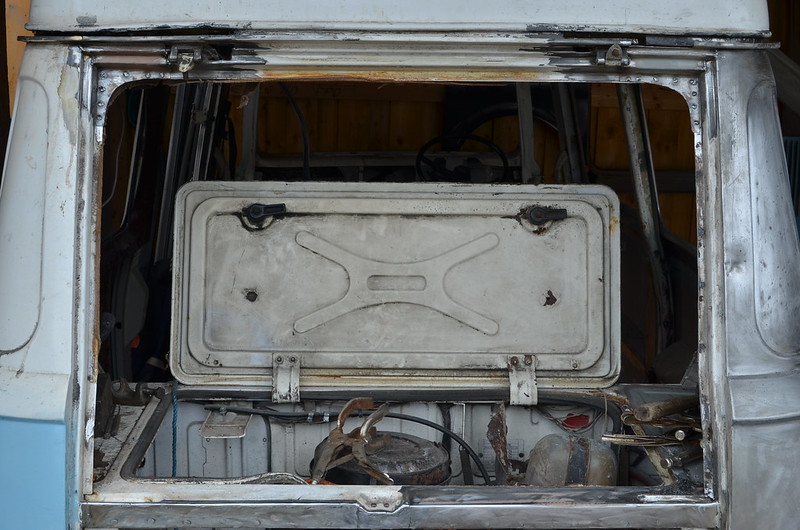
The preparation and future rust-proofing before welding takes most of the time, so it was only today that I got round to welding in the top corners around the tailgate and the final pieces of the cross-member above the engine. I was able to do a reasonably tidy job where Fiat originally brazed some of the joins. I have ground down the welds on the cross-member and although there are obvious signs of welding , it is usually hidden and will tidy up with a bit of preparation before paint. Since this photo I've filled the other couple of holes under the gutter.
MAL_9717 by Peter Thompson, on Flickr
So now I have turned my attention to the inside of the rear roof where I have removed paint back to clean metal and started to treat the rust. Tomorrow I'll start removing the corrosion and make good with new metal which will complete the gutters. It was too late to take a photo of the damage this evening.
 
Last edited:
Back
Top