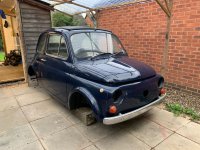
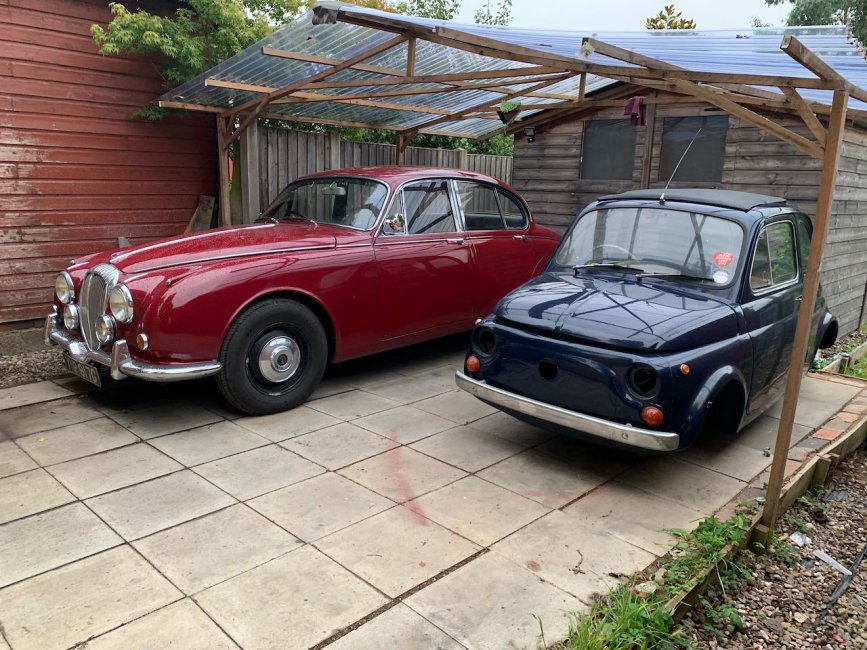
IMG_7594.jpeg

500 (Classic) '65 RHD F Restoration

Introduction

Hi guys :)

My name is Steve, and I'm a rusty-old-car-aholic :p

I've been quietly browsing the forums for a while, and slowing collecting knowledge while looking out for a 500 project. A few weeks ago I took the plunge and bought a project, it's definitely not the best starting point, but it's also far from the worst.

It's a RHD 1965 500F in dark blue. It appears to have been off the road since the mid 80s, and was recently purchased by a trader who was clearly looking to getting running and flip it for a profit before he realised just how much was wrong with it (and there is quite a lot wrong) beneath the surprisingly shiny paint job.

This means it's come to me already mostly disassembled. I'm aware this is a bad idea, especially as this is my first 500 and so I'm not familiar with how it all goes back together... It can't be that complex though can it?! :p

In the photos you can see how it looked as delivered to me, and also how my other classic (also resurrected from a 30+ year lay up period) dwarfs it!
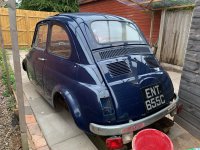
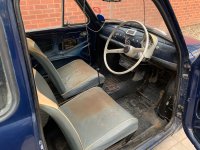
IMG_7589.jpegIMG_7588.jpegIMG_7586.jpeg
  • Like
Reactions: dapedza
Some good progress! Its really odd how some of these cars rust. Some parts which you would think would be eaten away, still exists, yet other areas get totally attacked.

Ive been plugging away also at my end. We are both kinda sailing different ships to the same destination.
 
Thanks :) I’m sure both our cars will get there eventually! And hopefully they won’t drive like ships! Haha

Yes it is strange how different the rust is on different cars. On this car one of the anomalies is that the rust is worst on the drivers side. Normally the passengers side gets it worse from being in the gutter / deeper puddles.
 
This past month since the last update seems to have a flown by, and in many ways I don't feel like I'm much further along! But it's not for want of trying, it's just that theres a lot of prep to do before the comparatively quick and visually impressive bit of fitting the new front end panels.

My first move was to deal with the bottom of the A pillars. I cut out the rot and did a functional, although not super pretty, repair to both sides. It didn't need to be pretty as it will be hidden inside the front wings.

IMG_8772.jpeg


After that I continued to hide from dealing with the mess that is the inner arches by looking at the front bulk head. From the inside I could see some swollen areas under the passengers side strengthening plate. So I drilled the spot welds on the strengthening plate so I could remove it, then cut out the rusted part of the bulk head and then welded the strengthener back on.

IMG_8769.jpeg
IMG_8771.jpeg


It might have been easier to cut out a large chunk of the bulk head, but as the rotten area surrounded the steering idler mounts, I was keen to make sure they didn't move. With that in mind I did a number of smaller patches, one at a time instead.

This left me nothing for it but to get on and dig into the front arches. For the same reasons of making sure the front end geometry stayed intact, I had decided to repair my original inner arches rather that entirely replace them with pattern parts. This started with many hours of scraping and wire wheeling removing the old under seal and fibreglass and then I could see where to start the repairs. Starting with the drivers side, the strengthening plate around the front wishbone mounts was clearly rotten and so were several of the layers behind it. There was nothing for it but to chop it out.

IMG_8786.jpeg


Hmmm. what a mess. Still, once some new layers started going in things always start to look a bit better. With some metal back in here I could also cut away the many old patches to the lower rear edge of the arch. In some places the patches were 4 layers thick here!

IMG_8822.jpeg


This weekend I was able to finish the drivers inner arch off, which is now looking so much better, with new strengthening plate for the wishbone mounts, new repairs where the rear edge meets the floor and patches to the front edge and return lip. It's been quite the task.

IMG_8849.jpeg


Now I've got to do it all over again on the passengers side! Argh! haha.

IMG_8847.jpeg


Still, once this second inner arch is repaired I can start offering up the new panels which will be quite the moral boost :)
Your thoroughness is commendable. I believe you are doing the right thing to do high quality patching rather than wholesale, panel replacement. When completed, your car will look better aligned to the experienced eye.
 
Your thoroughness is commendable. I believe you are doing the right thing to do high quality patching rather than wholesale, panel replacement. When completed, your car will look better aligned to the experienced eye.
First-class effort----well done.
 
Thanks guys. :)

It will be good if the end result is a nice straight car! I will be very glad when the major welding stage is done, it’s a means to an end rather than something I especially enjoy, haha.
 
Picking up where we left off... I got that passengers inner arch finished off.

IMG_8881.jpeg


Which is a nice feeling, because the next move was starting to offer up all the new panels. It felt like a huge leap forward.

IMG_8900.jpeg


...well it did till I saw the sort of panel gaps I was faced with on first attempt, haha.

IMG_8901.jpeg


It was like trying to do a jigsaw, knowing some of the pieces were the wrong shape, but not knowing which ones! I got the doors and bonnet on and spent many hours trying to work out some datums and work out which panels were right and which needed tweaking so things would line up.

Ultimately I found that the front edge of the wings was very flexible, so was likely knocked out of shape in transport/warehouse and so I bent them to match the profile of the front panel. After much head scratching about the inner wing fitment, I decided the repairs I did to the inner arch lip was where the misalignment had originated, so some of that was cut out and repaired for the second time. I also found that my drivers door hinges were slightly bent, causing the door to sit too far backwards in the aperature. That, at least, was an easy fix with a hammer! So many hours later, things were finally starting to line up.

IMG_8936.jpeg


At this stage I'd just been clamping and screwing the panels into place with some self tappers. But now I was getting somewhere close with the alignment It was time to take the panels off and turn them into Swiss cheese, ready for the millions of plug welds I'd be doing to fix it all together properly.

IMG_8965.jpeg


IMG_8975.jpeg


IMG_8974.jpeg

Lots of work in there, much more than I thought it would be to be honest! Still, now its all together, and its looking pretty straight and kinda like a car, which is great. The welding was nearly done, but now I had quote a few small cosmetic jobs to finish off before I could actually pack the welder away for good. First up was the top of the front wings. The previous repair job had involved hammering this area in and covering it thick filler, so months ago I'd just cut it out and decided to deal with it later, unfortunately later had now arrived!

IMG_9079.jpeg


IMG_9096.jpeg


I also had the nasty extra holes that had been drilled into the car for the radio areal and for extra dashboard switches to deal with.

IMG_9081.jpeg


IMG_9074.jpeg


IMG_9097.jpeg


And small areas of rot in the bottom corners of both doors.

IMG_9130.jpeg


IMG_9131.jpeg


But finally, after 9 months of hard work, I could remove the bracing from inside the shell, and step back and admire my rust free Fiat!

IMG_9095.jpeg


That's a nice feeling indeed! I've got heaps of tidying up to do now, lots of underseal still to scrap from the inside (why would you do that previous owner...) and engine bay, then on to paint prep :)
One of the previous owners of this car decided that the best way to preserve the new floor pans that had been welded it was to waxoyl them... inside the car??! Nice sticky black goo all over the inside metal work, that ~30 years later is not really doing a great job of stopping the rust either.

IMG_9171.jpeg


I wasn't happy to just ignore it, so like the underside it all needed stripping off. This is a time consuming dirty job, and one I hope to not have to repeat any time soon! I used a mixture of sharp chisel and white spirit with a scouring pad. Slowly but surely I was able to remove it all.

The end result looked arguably worse than when I started! But with the addition of some primer things looked much better!

IMG_9197.jpeg


Now to repeat the same task in the engine bay...

IMG_9199.jpeg


I found that the underseal in the engine bay was so old that it had dried out to the point where I could attack it with an angle grinder with a knotted wire wheel on it, and instead of melting it just turned to dust. A rather large amount of unpleasant black dust though, which seemed to just stick to everything, especially me as It was a warm day! Anyway, it was done and so I could get a bit of primer on it and feel better about the world.

IMG_9235.jpeg


Seam sealer was the next task. I tried a different brand of seam sealer, as it came in a nice tube and would go in my calking gun, making hopefully a neater job than the usual brush on type. Sadly though, it reacted badly with the primer I'd used and cracked. So I had to dig that out and went back to the old trusty Upol seam sealer I've been using for a decade. With that dried out nicely I could mask up and prepare to get the spray gun out.

IMG_9267.jpeg


On top of the primer, I went with a rubberised stone chip, which went on fairly well. It should give me a decent level of protection in those hard wearing areas.

IMG_9272.jpeg
IMG_9271.jpeg


And now it was ready for some paint! In most of my previous builds I'd gone for black underside. I like the look when its all fresh and shiny, but the downside is that very quickly, once it's been driving out in the real world, the black seems to just look like an old car, and can give off that 'slathered in underseal 'bodge job vibe. So for this car, I decided I would go with body colour for once.

I mean its such a dark blue it'll probably just end up looking black under there anyway! haha. I do like the colour though, and I think this mix I've had made up might even look a touch more grey than what was previously on the car, which I like. It's even more understated and is a wonderfully elegant colour.

IMG_9296.jpeg


I'm pleased with how the paint went on, it feels like a fairly easy colour to work with. It always makes such a difference to see things painted.

At one stage I was considering stopping the body work here for a while and focusing on getting a rolling chassis together, but having thought more about it, I'm going to push on and try to finish out the body shell before the warmth of summer leaves us. I don't know if I'll manage it, but it's gotta be worth a shot! I don't want to risk micro blistering from damp under the paint, like I've had issues with on the Daimler, so if its not ready to paint before autumn starts to really bite I'll have to wrap it up and wait till spring to paint it I think.

With no clean running gear I repurposed the box tubing I'd bought to brace the shell into some stands so that I wouldn't damage the fresh underside when I roll the car the right way up.

IMG_9298.jpeg


I think a couple more cross braces would be wise, so I'll sort that I the next few days. Then it's time to get the car rolled the right way up and time to break out the sandpaper I think!
Also. if you haven't flipped the car back over. I have one favor to ask. I need a dimension lol.

I need to know the overall length of the clutch cable tube. Mine unfortunately was bent and snapped off before i got the car, and heck if i know where i put the piece. I am just going to machine a spacer that fits over the little nub that's left. But just looking for a ballpark length from the bulkhead plate to the end.

Thanks (y)

IMG_9298crop.jpg
 
What was I saying about getting it painted before autumn?...

IMG_9309.jpeg


That has turned out to be an impossible task. I've been pushing on with all the spare time I have, but I do feel like I'm spinning plates a bit here with 4 vehicles, 3 of which are currently in bits! It was quickly apparent that I was not going to get all of the paint prep done this summer.

So I focussed my efforts on getting the interior painted, along with window frames and door shuts. Painting the window frames leaves me the option to re-fit the glass and make it weather tight should I get to the point of assembling any of the interior this winter. This way, if things go well, I'm hooping to essentially complete the rest of the car over winter leaving me just to wait for a warm spring day to paint the exterior and then I can go for a drive!

In the process of prepping the inside, I did discover some more rust in the drivers rear window frame, but thankfully it was only minor and was easily rectified.

IMG_9341.jpeg


Many late nights of sanding...

IMG_9456.jpeg


... resulted in a car that was ready for painting.

0E718C62-B11D-459B-AB60-B4D365A2A914.jpeg


Prepping the dashboard wasn't too bad, but I never want have to prep the underside of a roof for paint ever again! haha.

Anyway, with it looking like the weather is due wet for a few weeks, I was just ready in time yesterday to get the paint on it.

IMG_9476.jpeg
IMG_9471.jpeg
IMG_9473.jpeg


It all went fairly smoothly, though painting the underside of a roof with dark paint looking top against the dark sky, I might as well have been painting blind! There are a couple of runs to sort, but as its a single stage flat colour that is far from a disaster. :)

I will still carry on with the exterior paint prep for now, who knows, if we get another dry bright spell in early October I might be able to paint the exterior then... but I'm doubtful that the stars will align so won't be rushing for that goal.
  • Love
Reactions: fiat500
2 months since the last update, I've no idea where the time went! As usual I've been chipping away at the project, but maybe not making the leaps and bounds forward that I'd like to, haha.

The enthusiasm to push on with the bodywork drained away fairly quickly as the weather started to drawn in and I realised just how many hours of paint prep were ahead of me. I've made some progress on that front though, and the left hand side of the car is mostly roughed out. Still a fair way to go on this though.

IMG_9799.jpeg


In the mean time I've retreated inside the shed and started with some of the mechanicals. Starting at the front made sense, so I rounded up all the front bits to have a look at what I had to work with.

65F51017-70CC-401B-B3DD-85899C231B5A.jpeg


Mmmm yeah, its all a bit rough! I worked my way through dismantling it, while making a shopping list. Corrosion seems to be a bigger issue than wear, for example the ball joints for the track rods were fine, they just needed new boots to replace the perished originals, but the threaded section to allow you to adjust the length was just rusted solid, to the point that I bent one of the arms trying to free it off.

IMG_9725.jpeg


Oh well, at least the parts are available and not overly expensive! Good job it's not too pricey as there was a rather large list of things to buy, including a new RHD steering idler as mine was seized solid and then the main casting proceeded to snap when I attempted to press the old bushes out.

IMG_9752.jpeg


Quite the haul of parts there, including all new dampers, full brake system inc drums, wheel bearings, all suspension bushes, new rear suspension arms and the list goes on...

So where to start... the from uprights and kingpins made sense as I know these can be a bit tricky.

IMG_9739.jpeg


I could feel very little play in mine by hand, but I know when they are packed with old grease it can be misleading just trying to move them by hand. A full strip down and potentially rebuild was the only thing that made sense.

I have a cheapo table top blasting cabinet and so the front uprights, steering arms, brake backing plates and various other small components all got treated to some compressed air and iron grit. The budget nature of the tools shows, but it got the job done eventually and got underseal and rust out from corners I'd have never managed with a wire wheel.

I treated all the bare parts to some anti-corrosion primer and then a splash of paint to brighten things up. I went for a light gold / champagne kind of colour, as I thought this would contrast nicely with the dark blue body without being too stand out. Hopefully no-one but me really gets to see the underside on a regular basis anyway, but I'll know its there and feel better about it rather than it all just being a bit rusty / flat black!

IMG_9798.jpeg


IMG_9804.jpeg


The first king pin assembly went back together nicely, and with a new pin and a carefully fitted spacer there was no play. The second one was more of a fighter! The pin that came out of it was heavily corroded (on the right of the picture obviously!)

IMG_9807.jpeg


And the new pin would not go in, so I think someone had either fitted new bronze bushes and reamed them to fit the old worn pin, or possibly not reamed them at all. The bushes themselves were badly scored and the top one was loose and half slid out when I removed the pin.

I was able to draw a new bush in using some threaded bar, nuts and various washers .

IMG_9784.jpeg


And eBay supplied me with the longest 19/32" hand reamer I could find, as reccomended in the helpful king pin pinned-thread. It still wasn't quite long enough, as the reamer doesn't get to its full size till about 1/2 the way down it's length. I went as far as I could from the one direction before swapping over and coming at it from the other.

IMG_9785.jpeg


This was obviously close enough as the new pin is now a good fit and I was able to assemble this side also. Both uprights got new bushes at the top also, where the upper suspension arm mounts.

IMG_9786.jpeg


The front spring also got stripped down, cleaned, painted and reassembled, and you can see a few other bits that have been blasted and painted in the mean time also.

IMG_9743.jpeg

IMG_9799 (1).jpeg


I'm just waiting on some bolts and washers in there post but then hopefully the front brakes and hubs should all go together fairly quick, especially as most of it is new!
  • Like
Reactions: PeachsGarage
Things have been progressing nicely over rather past few days, I've been working through my boxes of mechanical parts, nice to have bits to be working on in the comfort of the shed on a blustery damp autumn evening.

With the front kingpins and uprights sorted in the pervious update, I could now assemble the brakes, with blasted and painted backing plates, new wheel cylinders and new shoes.

IMG_9812.jpeg


Before fitting the new wheel bearings into new drums and getting this little section finished off.

IMG_9815.jpeg


Getting the drums on was a bit of a challenge! I presume the new shoes are just a fraction big, I spent ages fiddling about repositioning the self adjusters and trying to centre the shoes in order to get the drum on with no luck. In the end I filed 1/2 a millimetre or so off the end of each of the tangs on the shoes where they go into the wheel cylinder and then I was finally able to squeeze the drum on.

The steering box was next, it was a big greasy mess as can be seen in the previous update where I had all the parts on the bench, but after some clean up it wasn't looking too bad.

IMG_9811.jpeg


My plan was to do a full rebuild on it, but the castlated plug that adjusts preload on the input shaft bearings was firmly seized. I bought a special tool for it, and the tool destroyed itself before the nut moved, that was after copious amounts of heat and penetrating oil. So yeah... that's not coming out without risking damaging of the main casting. Luckily the input bearings felt fine with no play, and I was able t clean it out, replace all the seals, paint it, fill it with fresh oil and adjust it for a nice smooth action with no play. If it's done 57 years without the bearings developing any slack, then I think it will do a few more yet!

IMG_9813.jpeg


That basically covers all of the front end steering, suspension and brakes, excluding the bits that will be replaced e.g. track rod arms, so time to start on the rear!

IMG_9818.jpeg


The original rear arms are not in a good way. Some seriously dodgy plating work going on and some major rust. Also, these lovely reassuring wheel bolts, looking like the are only moments away from snapping with thread stretch like that!

IMG_9817.jpeg


So most of this will be going in the bin. This is all that was worth saving (and this handbrake arms will be swapped for new in the end also)...

IMG_9847.jpeg


And then after some cleaning, blasting ,wire wheeling and painting those parts are looking a bit better.

IMG_9849.jpeg


I didn't buy rear wheel bearings with my last parts order, an oversight, so I put these bits to one side till I'm ready to make another parts order and had a rummage in my box of bits waiting ot be restored. The pile is getting much smaller, especially with the big suspension and brakes bits out of the way, but there's still a bunch of fiddly bits to deal with.

IMG_9848.jpeg


This "lovely" custom clutch pedal stop caught my eye...

IMG_9850.jpeg


.. and so the pedal box was the next item for clean up. I went to town polishing all the pivot points, a trick I learnt from classic motorbikes, it can make a surprising difference to pedal/lever actions once they're loaded up with some force. I figure anything gain I can make, no matter how small, will help make the most of any power the brakes will have!

IMG_9865.jpeg


I also stripped and cleaned up the gear shifter linkage. I didn't go to town on there paint as it's 90% hidden, but again where it slides on bushes its polished and the corrosion and old grease is gone so it should have a nice smooth action.

IMG_9869.jpeg


I think the last 'mechanical' components that box are the handbrake and the wiper motor assembly, the rest of it falls more under the category of trim / cosmetics. Still I will work my way through the pile cleaning things up and then it's probably time I should get back to sanding the body work... so I think I'll start looking at the gearbox instead! hahaha.
Thanks Franko :)

They might be small cars, but there's seemingly no less work to be done in restoring one! haha.

Life's getting in the way a bit at the moment, but I'm hoping to have some good time on the car over the Christmas break. I've got my next batch of parts, so might try to have a push to bolt some of the restored bits back on and make it a rolling chassis for the first time in my ownership :)
 
Goldnrust,

I'm happy that I found your write up here at the Fiat forum.
First of ALL i would like to mention that you are doing an impressive job with your 500! My full respect!
Secondly, I would like to say that I kind of got stuck with my restoration, but have now got inspired reading your sharing's.

So, I'm of to the garage tomorrow! THANKS!

Still need some Love...
20221226_195337.jpg
 
Thanks Chrome, thats great if my meanderings have helped inspire anyone to make a bit of progress on their projects :) I'm just here muddling on making it up as I go along, nothing like some of the super professional restorations you seen elsewhere online!
 
Back
Top