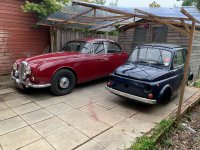
These past few weeks I've been working on my budget engine rebuild/reassembly.
Starting with the head, I had decided to replace the valve guides, so the first step was to remove the old ones. Having watched various videos online about changing valve guides, I made a little tool up from an old bolt so I could drive the guides out with the air hammer and was pleased to see it made light work of it.
Now with the head fully stripped I could get it cleaned up. I got the worst of the grime off with some white spirit and brushes and then threw it in the blaster to tidy it up a bit further. It's not perfect, but its plenty good enough for now
After that I heli-coiled the exhaust bolt holes, I will probably use studs instead as I have seen others do, and then drove in the new guides and then ran a reamer through them to make sure they would be the right size for the valve stems.
The valve gear got an overnight bath in some TFR, which did a reasonable job of cleaning the worst of the grime off. I did still need to manually remove the worst of the carbon build up from the valve heads with a wire brush in the drill though. You can see how much grime had come off the valves by the disgusting colour of the TFR I the morning! haha.
I could now put the valve back in the head, but this is where I ran into a problem, and one I had potentially foreseen. Despite my best efforts to keep things aligned, the new valve guides were holding the valves at a fractionally different angle to the originals (possibly even just how the valve seats had worn with worn guides?) and so the valves were not seating right. Demonstrated here by the light you can see between the valve and the seat when it is touching the seat on the other side.
Having the valve seats re-cut I would presume is the 'right' thing to do, but if I was doing that I would also be silly not to have the valve seats changes for ones that are 100% unleaded safe and obviously fit new valves, then I should probably put a set of valve springs in really... and so on. As this was meant to be the budget option, I thought I'd try just giving them a serious lapping, worst case it didn't work and all I'd done it knackered some valves and the seats that would be junked otherwise anyway. I'm pleased to say, while it was a slow and tedious job, it works and there is now good seat contact all the way round. No light shining through this picture now!
I read mixed things about unleaded on the stock valve seats, same as I did with my Lancia and Daimler. Both of them, like the Fiat, had aluminium heads but there was concern that the material the standard valve seats were made from would still not be up to it, either way I did 20k miles on my Lancia engine on unleaded with no valve seat issues and have done 5k so far I the Daimler with no problem so I have no intention of doing anything different with the Fiat!
With that done it was time to look at the bottom end! The bottom end work started with cleaning the best part of 60 years worth of slime off the crank case.
Much better!
With it all clean, the next job was to heli-coil the threads for the oil pressure switch. Picture of case with stripped out threads before I started, didn't take an after picture apparently!
The engine came with a random bolt wedged in the case here with lots of PTFE tape and RTV. It was only after I'd started on the rebuild I realised this should have been the oil pressure switch. Fingers crossed it was just a 'solution' to the stripped threads and not that someone removed the oil pressure switch to hide the low pressure! (On the autopsy stage there was nothing to suggest a reason for low pressure...)
Next the crank got cleaned, and I removed one of the freeze plugs so I could clean out the sludge trap. Not too much in here, which is good news.
I fitted a new plug and firmly staked it in. I'm aware that these plugs can loosen or even fall out when the engine is run at high RPM, causing catastrophic oil pressure loss. The fix is to weld them in place, but as this engine is standard with no intention to do the mods required to run it at higher revs I decided to just go for a standard staking this time round.
The crank could now go in the cases, with the cleaned up original bearings.
I put the cam in next, with a new timing chain and sprocket set. The old chain was noticeable slack, whereas this is taught, so definitely a wise choice to replace.
The timing chain cover was looking a bit grim still.
So that got a blast and clean up, and I stripped and cleaned the oil pump too and packed it with vaseline to give it something to suck on for first start.
Time to look at the barrels next. I gave them a light home hone, which they seemed to respond to well. Checking the new rings in them, I had gaps that were just larger than the factory spec, but well within the wear limits. So as expect the bores have some wear but it's not too bad.
Now I knew the bores were ok, I gave the barrels some cosmetic clean up. I'm trying to minimise oil leaks and get all of the engine parts nice and clean, because the heating uses the air thats been blown over the engine for cooling. I'd like to minimise the amount of hot oil smell inside the car, haha.
I could then install the pistons with said new rings in the barrels. It turned out I'd lent my ring compressor to a friend, so I just eased the rings in one at a time by hand, made possible/easler working with an air cooled engine with separate barrels
Might as well get them fitted to the engine, and then the sump can go on and it can be stood up and starting to feel like we're getting somewhere!
And then the head could go on too. The pushrod tubes aren't great cosmetically, but they are clean and will do the job and I put a smear of RTV round the new seals to give them best chance of not leaking!
Excellent.
Flywheel and clutch was next. A new clutch seemed a prudent choice as while both the clutches I had were not 'worn out', they were worn.
And then the oil filter/front pulley assembly.
Fuel pump was next, I pulled apart my old one intending to clean it, but it was not looking healthy...
With rebuild kits looking thin on the ground, a new one was at least an easier solution and not expensive.
I thought I'd look at the carb next. It's a bit of a tired old thing, plenty of bodges along the years and has a section of casting missing from where the intake air tube mount to the top. The important bits are there though, so will do for now! Clearly a deep clean was needed though.
Good job I did a big clean, here's a before and after of the emission tube! Would have never run right like that...
I also checked the carb mounting flange on a flat surface and found it to be warped, very common on these which is why I thought to check! With some oiled wet and dry I was able to flatten it back out easily enough.
At this point I ran into a snag that it appears I've managed to order the wrong carb rebuild kit, so there gaskets I have wont fit. Easily remedied, but not this weekend!
So that's where I've got to on the engine front.

On the more mechanical side I've go the distributer and dynamo still to clean up / sort out. Other than that it's just cosmetic tidy up of the fan shrouding and valve cover, and that will be the engine part of this project done
As the weather is starting to warm up a bit this past week, I have also started making use of a couple of daylight hours I can grab to get stuck back in to the body work. Lots of sanding, endless sanding but the filler on the rear quarters is coming along. I'm working in thin passes, filling in low spots and finding high spots, just a few details to sort on the passengers side (pictured) but there's further to go still on the driver side still.
Still it's positive to be able to be back on the bodywork. I will be very pleased when its painted and done, it will really feel like I'm on the home leg of the project then and the idea of getting to drive it will feel within touching distance.