Introduction
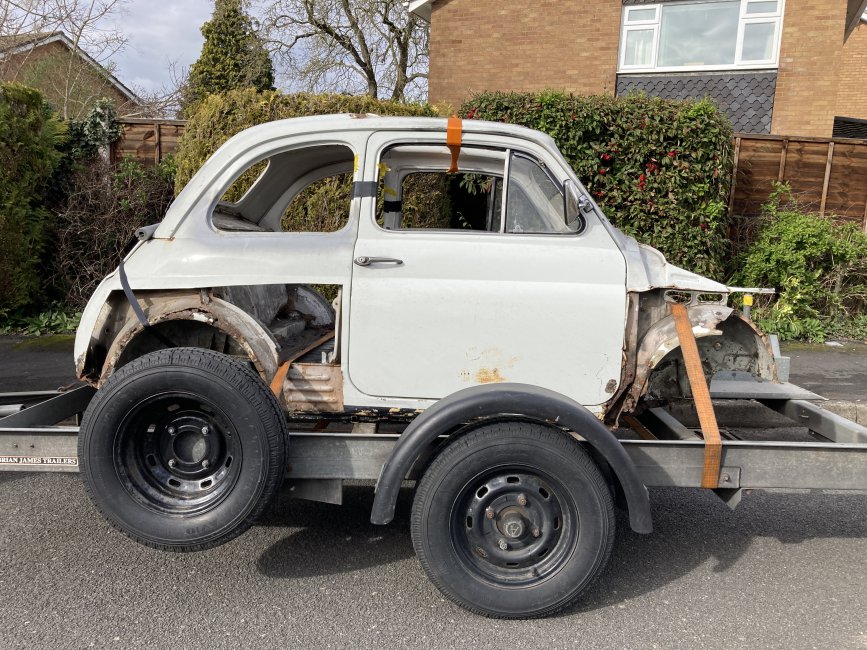
I thought it may be worthwhile to start a thread showing the (hopefully very thorough!) restoration of my 1972 500R. I bought the car already disassembled, however, the person I bought it from had also bought it in this state but not got around to actually doing any work on it. The condition of the body may have been a little daunting for both - as you will see below there is extensive rot.
Here is the body and parts as I received them:-


A few of the parts sat in the back of the van for a little while until I'd worked out where to store them. I noticed that the engine was rattling as I drove along so invesitigated - the head was loose and teh pushrods rattling about, so I thought it best to pull it apart and make sure all was ok. Lucky I did as a I found teh following handy note on a piece of paper INSIDE the oil pan!!

I then set to work on a shopping list of all the bits of what I might need to carry out a complete restoration of the car. All the work is to be carried out by myself, including the paint.
A trip to visit Franko at Ricambio in south London and I came back with whole load of mechanical items - bushes/brake system/load of rubber parts and many body panels. I knew this wouldn't be everything I needed but it should allow me to get going:-

All the suspension, braking components and wheels have also been shot blasted, zinc primed and refinished in black, along with the engine tinwork and some of the internal metalwork. Lucky for me a friend of mine has a very large shotblasting cabinet I could use.


These are all now built up into sub-assemblies with new bushes, braking components etc and stored away for assembly back into the bodyshell when it's ready.
Unfortunately when I got the car i didn't have a complete ignition key, just a broken off handle part! Luckily for me my family have a house in Tuscany where I'm very lucky to visit most summers, so I took the broken key and the ignition barrel with me in the hope that I'd be able to find some blank keys to make the lock work. I found some so I bought 10 expecting that I probably wont get it right first time. In fact it turned out to not be that complicated... I took all the pins out of the barrel and then made a key and the pins fit each other - I now have 3 ignition keys for my car and 7 spare blanks (if anyone needs blank 500R ignition key for a steering lock type car then get in touch).

So now onto the body that's been waiting for me for 5months wrapped up outside:-

Myself and my son picked it up and moved it into the garage onto trestles so it's at working height. First thing was to weld a frame inside to keep whatever will be left of it the correct shape for when it goes back together The intention is to cut as much of teh rot out before having the remains shotblasted. This will provide a good, clean starting point for the reconstruction. I already know I need s few more bits dash panel being one of them as it's rotted away and had a poor repair to the right hand end (historically or by one of the previous two owners).


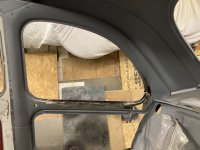
And then I got to work getting it ready for shotblasting. This is work in progress, but most of the RHS is shown to be now removed in these pictures below. I've taken a whole load of measurements from known datums to ensure correct reassembly.


Another week or so and I should have the body ready for shotblasting. It's a little car and I've made it littler, so it should now fit in the back of my Renault Trafic for the journey!
Ray
Here is the body and parts as I received them:-
A few of the parts sat in the back of the van for a little while until I'd worked out where to store them. I noticed that the engine was rattling as I drove along so invesitigated - the head was loose and teh pushrods rattling about, so I thought it best to pull it apart and make sure all was ok. Lucky I did as a I found teh following handy note on a piece of paper INSIDE the oil pan!!
I then set to work on a shopping list of all the bits of what I might need to carry out a complete restoration of the car. All the work is to be carried out by myself, including the paint.
A trip to visit Franko at Ricambio in south London and I came back with whole load of mechanical items - bushes/brake system/load of rubber parts and many body panels. I knew this wouldn't be everything I needed but it should allow me to get going:-
All the suspension, braking components and wheels have also been shot blasted, zinc primed and refinished in black, along with the engine tinwork and some of the internal metalwork. Lucky for me a friend of mine has a very large shotblasting cabinet I could use.
These are all now built up into sub-assemblies with new bushes, braking components etc and stored away for assembly back into the bodyshell when it's ready.
Unfortunately when I got the car i didn't have a complete ignition key, just a broken off handle part! Luckily for me my family have a house in Tuscany where I'm very lucky to visit most summers, so I took the broken key and the ignition barrel with me in the hope that I'd be able to find some blank keys to make the lock work. I found some so I bought 10 expecting that I probably wont get it right first time. In fact it turned out to not be that complicated... I took all the pins out of the barrel and then made a key and the pins fit each other - I now have 3 ignition keys for my car and 7 spare blanks (if anyone needs blank 500R ignition key for a steering lock type car then get in touch).
So now onto the body that's been waiting for me for 5months wrapped up outside:-
Myself and my son picked it up and moved it into the garage onto trestles so it's at working height. First thing was to weld a frame inside to keep whatever will be left of it the correct shape for when it goes back together The intention is to cut as much of teh rot out before having the remains shotblasted. This will provide a good, clean starting point for the reconstruction. I already know I need s few more bits dash panel being one of them as it's rotted away and had a poor repair to the right hand end (historically or by one of the previous two owners).
And then I got to work getting it ready for shotblasting. This is work in progress, but most of the RHS is shown to be now removed in these pictures below. I've taken a whole load of measurements from known datums to ensure correct reassembly.
Another week or so and I should have the body ready for shotblasting. It's a little car and I've made it littler, so it should now fit in the back of my Renault Trafic for the journey!
Ray