IMG_7594.jpeg

500 (Classic) '65 RHD F Restoration

Introduction

Hi guys :)

My name is Steve, and I'm a rusty-old-car-aholic :p

I've been quietly browsing the forums for a while, and slowing collecting knowledge while looking out for a 500 project. A few weeks ago I took the plunge and bought a project, it's definitely not the best starting point, but it's also far from the worst.

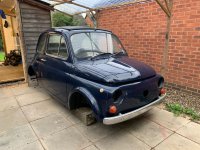
It's a RHD 1965 500F in dark blue. It appears to have been off the road since the mid 80s, and was recently purchased by a trader who was clearly looking to getting running and flip it for a profit before he realised just how much was wrong with it (and there is quite a lot wrong) beneath the surprisingly shiny paint job.

This means it's come to me already mostly disassembled. I'm aware this is a bad idea, especially as this is my first 500 and so I'm not familiar with how it all goes back together... It can't be that complex though can it?! :p

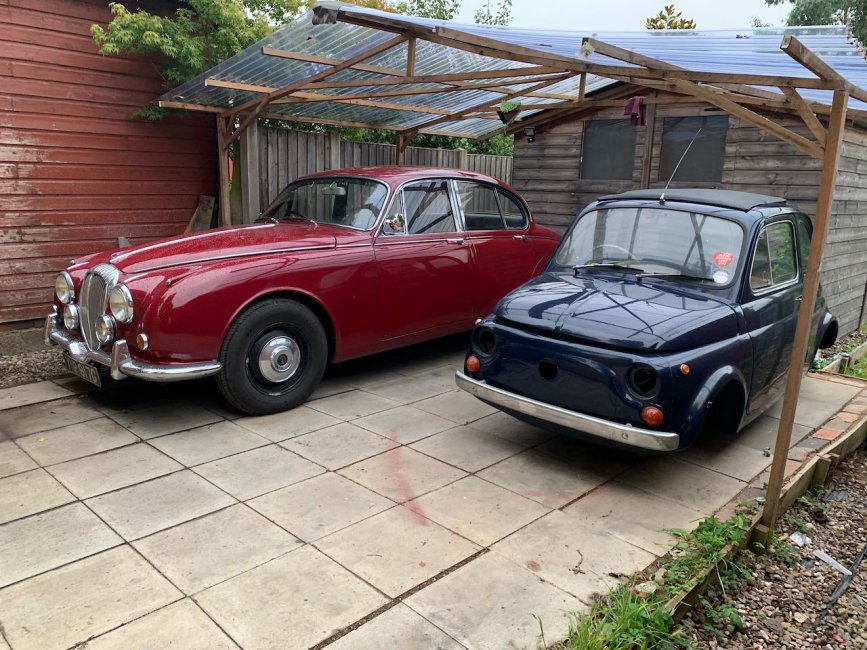
In the photos you can see how it looked as delivered to me, and also how my other classic (also resurrected from a 30+ year lay up period) dwarfs it!
IMG_7589.jpegIMG_7588.jpegIMG_7586.jpeg
Nothing to report other than that I took the 500 for a bit of a New Years Day drive. I figured the heavy rain of the night before would have washed the salt away and by late afternoon the roads were almost dry, so I'd be safe otherwise take it for a spin without having to watch it rust in front of my eyes afterwards!

IMG_5568.jpeg


IMG_5569.jpeg


Was lovely to get out and drive the little machine. And I have to say, given that it had been essentially abandoned under my car port for the past few months since the weather turned, it fired right up and ran like a sewing machine.

Plans for winter modifications have been rather side tracked as I bought another project (I have a problem I know...)...

IMG_5232.jpeg


...but as the 500 is running nicely at the moment that's not the end of the world. It'll probably want some attention come the spring though, a service at least I'm sure!
As a fairly new member, this is the first time I have come across your thread @Goldnrust . As I am at about the same stage as where you started from, this thread is very useful indeed (as well as somewhat inspirational).
Your "latest project" looks very interesting too.!
Happy New Year, and thanks again


BSA C10
 
It's been a slow start to the project so far. First order of the day was just to make sure I could find all the parts I thought I should have, and the good news is it does appear to be all there.

As the weather is closing in on us, it also seemed prudent to take some time to put the winter weather protection up on my car port.

After that I could actually do a bit of work on the car. I picked up where the previous owner had left off and completed the strip down. Removing the interior, glass and other bits and bobs to get right down to a bare shell. That was I could see what I was working with.

Now I can see it, I'm not sure that was a good idea! :p

I've worked on enough rusty old cars in the past decade to know that it always turns out to be worse than I thought it would be and this one is no different, but there is good news too.

The front panel, and the bulkhead behind it are made of a wonderful combination of rust, fibreglass, pop rivets and seam sealer. This I was aware of, so clearly they'll need to get replaced in their entirety.

There are rust holes in the rear spring mounts. All 4 inner wheel arches have been patched, to a varying standard. The front right inner arch is especially bad and has large holes fibreglassed over. There is also a big ugly patch under the front edge of the floor, and the inner sills appear to be a pure patchwork construction. I'm sure the condition of the middle sill will be terrible.

New front wings and rear wheel arch repair sections have clearly been fitted (and been treated to shiny paint), but not welded to the inner arches. Instead someone has just fibreglassed over the gap between the new wings and the old rusty remains of inner arches. See picture of the right hand rear arch after digging the fibreglass out!

I had felt the fibreglass in the arch lips when viewing the car, so knew something fishy was going on, but I have to admit I didn't expect it to be quite this much of a bodge! Fixing it properly will mean removing the outer panels and messing up that shiny paint.

So what about the good I hear you say? Well the floors have clearly been replaced and, though the welds are ugly, are solid. The bonnet, engine lid and doors are all in surprisingly good condition. The window apertures appear to be all original and rust free, likewise the pillars and roof structure also all appear in good condition with no signs of previous repair.

Very much a mixed bag, but I knew that would be the case and now I knew what I was working with, I could make a start :)
I have just put a deposit on a 500l, same colour blue, it has some weight reduction at the front, such as the battery tray, not needed, and the bit underneath, to help weight distribution the lower doors have been filled with play doh and artex I think. The engine has a total loss lubrication system. I aim to pick the car up at the end of April, probably stick it straight in for a concourse instead of driving home.
 
Well it's only been 6 months, but I'm actually doing some work on the 500!

Having gone through various ideas of making it a little racer, I have finally decided to just enjoy it as it is and not risk trying to force it to be something else. I think the drive is just so engaging and makes you want to drive spiritedly that the idea of more power and sports suspension would only improve that, but fro experience I know it doesn't always work like that, and sometimes the simple charm can be lost. So I've been selling off some of the performance parts I've been collecting, which in turn has freed up a bit of money to do a few tidying up jobs (and help the Austin project along!).

Before I can fit the shiny bits though, it was finally time to finish off the paint work! I painted the car a little over 2 years ago now, but the finish out of my gun is never outstanding and I had always intended to wet sand and polish it to a better shine, it just never seemed to get to the top of the list.

Here you can see the finish as it's been for a couple of years.

2a93d7857aa4.jpg


And so feeling enthusiastic one afternoon I broke out the 2000 grit and the hose and made a start. While it looks much worse now, once it's been polished it's going to look a damn sight better.

fffe7f8b7d48.jpg

f2e5d3ca88b1.jpg


It was all going smoothly, till I came to deal with a run on the roof...

448b2cd41785.jpg


Damn. It's always a risk when dealing with runs and trying to flat them back, even when being careful with a block that I might go through in the surrounding areas. I know some folks like the razor blade technique, but I've not had much luck with that either, so I took my chances with the sanding block, haha. I then proceeded to do the same on the passengers door, drivers front wing and front valance.

Thankfully it's a single stage paint in a flat colour, so a pretty easy fix. I got a couple of aerosol cans mixed up to match, as its just easier for these small touch up jobs that bothering with all the setup and clean up of the spray gun.

A couple of days later I was all prepped and spot primed over the affected areas.

1484db040700.jpg


and I'm pleased to say that the paint touch up went about as smoothly as one could hope for! No runs, no reactions, no drama. I breathed a sigh of relief!

bda5b8d77901.jpg


I can make a start with polishing the rest of the car, but will need to wait a couple of weeks for the paint to fully cure before I wet sand and polish these freshly painted panels.

In the mean time I've got a new exhaust and brackets to fit. My old exhaust was a cut and shut, part 500 part 126 exhaust, that I lashed together in a hurry to get road worthy. I've got some new door cards to fit, to replace the very warped and stained originals, to help tidy up the interior and I've got a new bit of window stripping to replace the tired bit in the drivers door. With a bit of polishing of the chrome as well it should start to look as good as it always should have, given the hundreds of hours that have gone into getting it back on the road!
 
The tidying up continues! As I'm slightly stalled on the paint, waiting another week or so before it'll be hard enough to polish, I thought I'd get on with some of the other tidying jobs.

First up I put my new exhaust on. As I mentioned before, the old exhaust was a cut and shut mess. I had bought a new 499cc exhaust when I originally put the car together, but could not work out why it didn't fit. As I was right at the end of 18 months of restoration, and super keen to get driving I just cut it and welded it together with bits of the old exhaust till it did fit! A few months later I found out the reason, a previous owner had fitted 650cc exhaust and matching 650cc exhaust brackets to the car. So I was trying to fit a 499cc exhaust to 650cc bracket. sMaybe it was cheaper or easier to get hold of back in the 80s when the car was previously on the road. As my cut up exhaust looked rather ugly...

aacadf6f8172.jpg


... I thought I'd treat the car to a new correct 499cc exhaust and matching brackets.

d2b2edd09090.jpg


Looks much tidier. I was a bit worried when I first offered it up that I'd still got a mis-match of brackets, but as with many reproduction parts the brackets needed a bit of careful persuasion, ahem, to line up just right.

As it was a warm evening last night I thought I'd also get under the car and do a job I'd been putting off for some time, and that was to wash the underside of the car. I drive a lot of back roads and little lanes and so knowing there was 2 years worth of mud, horse poo and maybe even a little salt left from my new years day run, a bath wouldn't be a bad idea. I quickly regretted this when I was lying in a puddle with the aforementioned mud and horse poo running down into my armpit.

249af3a82783.jpg


Still, the results were worth while, as side from the odd small stone chip and a little surface rust on the drums and some of the bit heads it was all looking rather pristine still.

797327b20a9e.jpg


7e04527c800a.jpg


6b65760b5fbc.jpg


Speaking of surface rust and of poor quality reproduction parts, while I was lying under the car I found that my steering track rod had started ot go rusty, so I presume must have been bare metal when It was supplied and also both the ball joint boots had disintegrated, which is poor for 2 years and 1500 miles.

5e4711013e15.jpg


So I've given the track rod a wire brush and a lick of black paint, which has smartened it up nicely, and ordered a pair of ball joint boots.

I had a bit of time spare at lunchtime so I also had a look at the doors. Most of the interior of my 500 is original, and so has some patina in places and in others is just a bit worn out. The worst offenders were the front door cards. They'd warped through many wet winters and the vinyl was stained and scuffed.

645785ae44f3.jpg


Happily all the interior parts for the 500 are available, and not ridiculously expensive, so I'd bought a new set of door cards last week. With the new door card and a bit of a wipe down of the door and a little polish on the aluminium window trim, it's all looking a lot tidier.

76f77155f71c.jpg


Speaking of the window, I also finally got round to removing the very worn weather stripping from the drivers door.

e9af04da0942.jpg


And fitting a nice new replacement.

b5fb6ad566be.jpg


Can see how nicely the window trim has come up there, and also that the rest of the car now needs a clean! haha.

Still got to do the passengers door, maybe that's tomorrow lunchtimes job!
 
My replacement ball joint boots turned up today, and with the tie rod haven been painted it's all looking very tidy now.

a0a41f471430.jpg


I got the passengers door card on at lunchtime.

18bd78169ade.jpg


And after a hoover and wipe down of the rubber mats with some rubber care, it's all starting to look very tidy and presentable in there. It's just a shame this now really highlights the poor condition of the original seat covers.

I like them because they tell a story and are, as far as I know, original. But the sun damage is really brown and with a couple of minor tears they are looking pretty tatty. I'm on the fence as to whether to replace them.

2a604a6d442f.jpg
 
Unless it is actually 'dirt' of some sort that could possibly come off with a cleaner/degreaser, I would be inclined to replace them. You can take the old covers off non-destructively and keep them - if you really want to be able to go back to original at some point - but in my view nice new covers would improve the interior look a lot.
 
Back
Top