IMG-0348.jpg

500 (Classic) "Sophia's" Restoration

Introduction

I have finally begun the process to start the restoration on my wife's cinquecento "Sophia"

Original Introduction Thread

She is a 1966 F with a 650 motor that has a synchro gearbox, electronic ignition and a dynamo.

When I purchased the car from Bring A Trailer it looked to be in much better condition than when she showed up at our home in December. I knew that I was going to have to do some work to get her to where we wanted to be with the car, but I didn't expect to need to "fix" so much. I'm not necessarily mad about this, as I will be able to learn more about the car as I go through it.
The car was originally blue, but was repainted to green at some point. We plan to bring her back to blue, but not for a few years. I'm certainly in over my head on this, but that's part of the fun!

When I started to look her over, I noticed that the exhaust was severely cracked, the seller stated it was "new"

IMG-1884.jpg


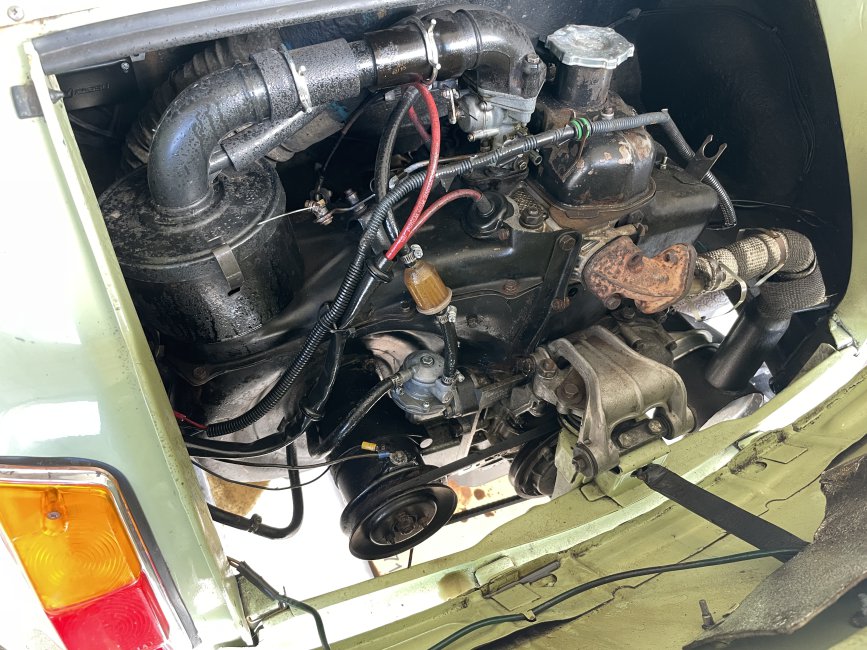
Here's how the engine looked after the first test drive. You'll note that the engine is covered in oil, as it turns out, the car has a major oil leak that sprayed over the whole engine from the belt and pullies. I thought we had a fire with all the smoke!

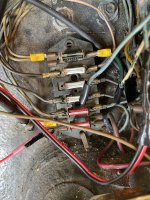
IMG-0348.jpg


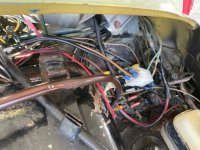
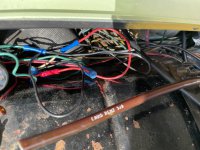
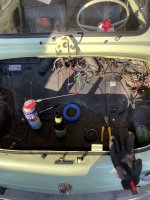
The wiring is also quite a mess, with lots of splices and things not working as they should. I ordered a new loom and will be rewiring the whole car.

IMG-1886.jpg


IMG-1885.jpg


IMG-1894.jpg


Gas tank out to begin the wiring removal process. I think I'll repaint it with the colors of the Italian flag

64220810349-43-E1094-E-D6-CB-43-D1-883-A-A850-B1-A7-BE8-B.jpg


And now the process of removing the bits from the engine in preparation to pull it out to fix the oil leak, paint shrouds, swap oil pan and rebuild carburetor. I'll be replacing the bonnet, starter and accelerator cables as well.

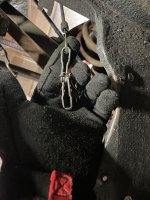
Interesting "fix" for a shorter starter cable...

IMG-2258.jpg


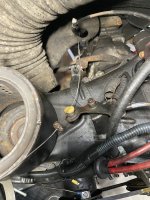
The accelerator cable just runs without a housing for the full length of the car

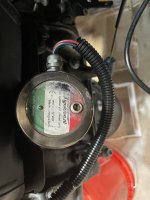
IMG-2253.jpg


Electronic Ignition. If anyone can give pointers on how this needs to be wired into the loom, it would be greatly appreciated.

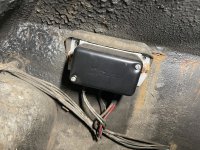
IMG-2257.jpg


Can anyone tell me what this is? Voltage Regulator?

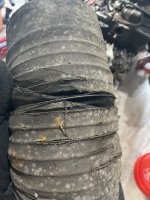
IMG-2256.jpg


Air intake hose needs to be replaced...having a hard time finding this part, any leads?

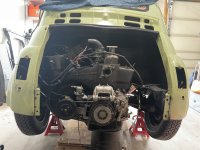
IMG-2254.jpg


And here's how she sits for now

IMG-2252.jpg


The dynamo does not appear to be working, so I will need to rebuild it. I have a spare so I may send it off for refurbishment.
Thanks guys. Is this the bolts I should replace with?
https://www.ricambio.co.uk/front-main-bearing-bolt-kit-classic-fiat-500-126

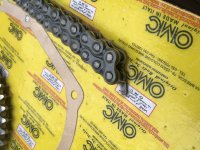
And this is the timing chain kit I am thinking of ordering
https://www.ricambio.co.uk/timing-chain-kit-anti-vibration-classic-fiat-500-126

You only need to replace one of the hex head set screws as you have that odd one and the other 3 originals have the Fiat rating stamped on the top. The picture of the Ricambi screws do not show the heads or wether the countersunk screws are Phillips or Allen screw heads.
The timing chain does not seem to have the tensioners like the original as when they turn at the ends you should see signs of the tensioners.
 

Attachments

  • AFE299EC-0D87-4DBB-8D4D-4A07AE88FB98.jpeg
    AFE299EC-0D87-4DBB-8D4D-4A07AE88FB98.jpeg
    1.8 MB · Views: 65
The timing chain has zero slack when fitted new with new sprockets.
In my experience, it's quite common for the head to seem not very tightly secured when removing. That doesn't necessarily mean it will blow, but in your case there has obviously been blow-by on both cylinders.

The engine has obviously been taken apart previously as there is slight damage to screw heads and at least one of the screws is non-original. I don't think the engine has done a great mileage since then and the head and pistons look like they will clean up well.

I'm sure it will run brilliantly after a bit of tidying up. :)

Peter, when you say clean up the head and pistons, what method do you recommend?
 
Peter, when you say clean up the head and pistons, what method do you recommend?

My method is quite primitive and traditional, but has always worked well, but I like to avoid the involvement of professionals or expensive equipment where I can. To remove the bulk of the carbon I use a variety of scraping implements...whatever is to hand. In the past I've used blunt, old chisels and broad screwdrivers and sharp craft-knife blades on flat surfaces. Then I move on to small, relatively soft, rotary, wire brushes at slow speed on an electric drill and stainless steel "wool". In the final stages I use plenty of thin oil such as WD40 as a lubricant to remove all the final traces.

This way, you will end up with a set of mechanically clean components but they won't look too pretty. Many people would take this opportunity to polish internal surfaces and to soda blast or use other more professional methods to clean surfaces up.

Obviously, you need to try to avoid putting any nicks or scrapes into the alloy surfaces, but I find that the metal is more resilient than you might think. If you're leaving the barrels in place, make sure they can't be moved upwards when the engine is turned as you will want the pistons at the top before cleaning; this is shown in the Haynes manual and I would recommend getting hold of a copy before starting.
 
Last edited:
To hold the barrel in place I use 2 short lengths (1 for each barrel) of tubing and a couple of nuts and washers. Very simple and normally the bits for this can be found somewhere in your workshop.
 
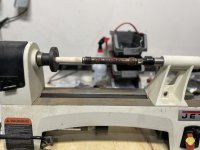
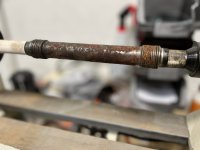
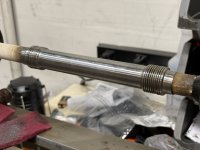
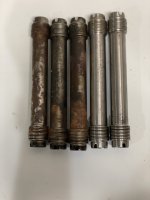
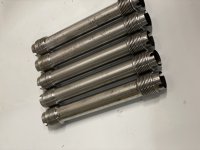
Cleaned up the pushrod tubes. Got a little creative…took a .75’’ wooden dowel and mounted it up on my lathe and hit it with a metal finishing pad. Pretty happy with the results.
 

Attachments

  • 9E618329-96F2-4830-ADF9-B0D7CEDE3574.jpeg
    9E618329-96F2-4830-ADF9-B0D7CEDE3574.jpeg
    2.2 MB · Views: 64
  • 99C4CA59-037B-43E7-958C-8091B80CE855.jpeg
    99C4CA59-037B-43E7-958C-8091B80CE855.jpeg
    1.4 MB · Views: 57
  • C5D0DB93-216E-40D2-AFFF-EC1FA4FD01A4.jpeg
    C5D0DB93-216E-40D2-AFFF-EC1FA4FD01A4.jpeg
    495.3 KB · Views: 60
  • 9891A70F-E2B1-4323-871D-2415A448CB80.jpeg
    9891A70F-E2B1-4323-871D-2415A448CB80.jpeg
    1.5 MB · Views: 59
  • FC267A9C-E496-48CB-BA36-2F927587EF4D.jpeg
    FC267A9C-E496-48CB-BA36-2F927587EF4D.jpeg
    2.2 MB · Views: 64
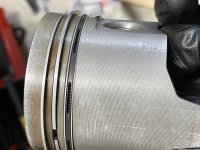
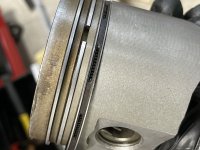
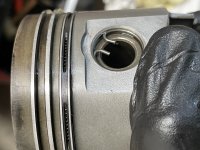
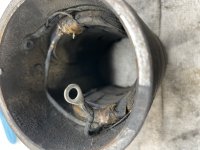
Pulled the pistons today. They look pretty good to me aside from the few scratches. Rings look good too. Any thoughts?

The person who rebuilt the motor last did not put gaskets between the block and barrels unfortunately. Thankfully, the barrels are in good shape.
 

Attachments

  • E821BA2F-77B7-45F1-9964-7AD1E3FDBEF6.jpeg
    E821BA2F-77B7-45F1-9964-7AD1E3FDBEF6.jpeg
    2.5 MB · Views: 51
  • C82EE440-3254-4006-87F7-EFD99B8068AE.jpeg
    C82EE440-3254-4006-87F7-EFD99B8068AE.jpeg
    2.7 MB · Views: 60
  • D65237D8-787D-4311-89A3-E389BAAB7915.jpeg
    D65237D8-787D-4311-89A3-E389BAAB7915.jpeg
    2.3 MB · Views: 55
The pistons look to be fine, however, I would think that it would be wise to fit new rings.
With regard to the gasket between the crankcase and the barrels, I always use the very thin copper gaskets.
 
These are the type I always use, but make sure that you get the correct ones for your barrels---these ones you have shown are for '650' barrels
 
Before you rush into new piston rings I would check the ring end gaps against the sizes shown in the manual. If they are hardly worn they can be reused and are already run in to your bores.
 
Pulled the pistons today. They look pretty good to me aside from the few scratches. Rings look good too. Any thoughts?

The person who rebuilt the motor last did not put gaskets between the block and barrels unfortunately. Thankfully, the barrels are in good shape.

Given that some people don't even use a head-gasket, that shouldn't really be a problem; I think the thin paper gaskets were originally intended simply to bed the metal surfaces rather than as any kind of seal. At the risk of boring regulars, I always come up with this stuff in these circumstances:

https://www.permatex.com/products/g...que-rtv-silicone-gasket-maker-2/?locale=en_us

I've also used it alone, as a sump gasket, for the timing chain/oil-pump cover, on the rubber-rings for the pushrod tubes, where the distributor mates with the block and for all joint surfaces on the gearbox. Over the last 5,000 miles I have had no leaks from any of those interfaces, (but plenty from a couple of FIAT-designed, oil-seal "solutions".) ;)
 
Before you rush into new piston rings I would check the ring end gaps against the sizes shown in the manual. If they are hardly worn they can be reused and are already run in to your bores.

Any idea what that measurement is for a 126 650 motor? I’ve got a 500 shop manual.
 
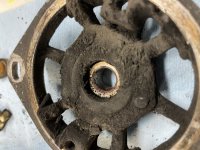
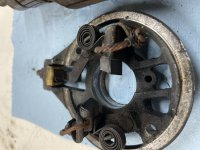
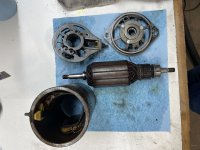
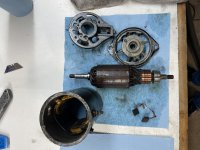
Sophia came with a spare Dynamo and the one attached to the motor, neither of which work. Can anyone determine if they’re worth rebuilding or am I just better off going the rebuilt route? The first photo shows the very dirty “spare” that was included which appears to be an original Fiat stamped Dynamo. It cleaned up pretty well in the parts washer. The second one was on the motor but not functioning. Any input would be appreciated!
 

Attachments

  • 41490315-1C0E-4BC5-8A49-88D6888292AA.jpeg
    41490315-1C0E-4BC5-8A49-88D6888292AA.jpeg
    2.5 MB · Views: 53
  • B4C3CF50-5BAE-4B8A-85F2-FFF3D69F7A7D.jpeg
    B4C3CF50-5BAE-4B8A-85F2-FFF3D69F7A7D.jpeg
    3.9 MB · Views: 49
  • D4119520-4FC8-46B5-9E1C-836AC2BAAB23.jpeg
    D4119520-4FC8-46B5-9E1C-836AC2BAAB23.jpeg
    3.5 MB · Views: 56
  • 8DF8318D-A8C6-4B89-80AB-8B494BEFD9F6.jpeg
    8DF8318D-A8C6-4B89-80AB-8B494BEFD9F6.jpeg
    4.1 MB · Views: 49
  • 1660E682-6D4B-4B4B-A195-E45F3DFF5E6F.jpeg
    1660E682-6D4B-4B4B-A195-E45F3DFF5E6F.jpeg
    4 MB · Views: 54
Back
Top