

You are using an out of date browser. It may not display this or other websites correctly.
You should upgrade or use an alternative browser.
You should upgrade or use an alternative browser.
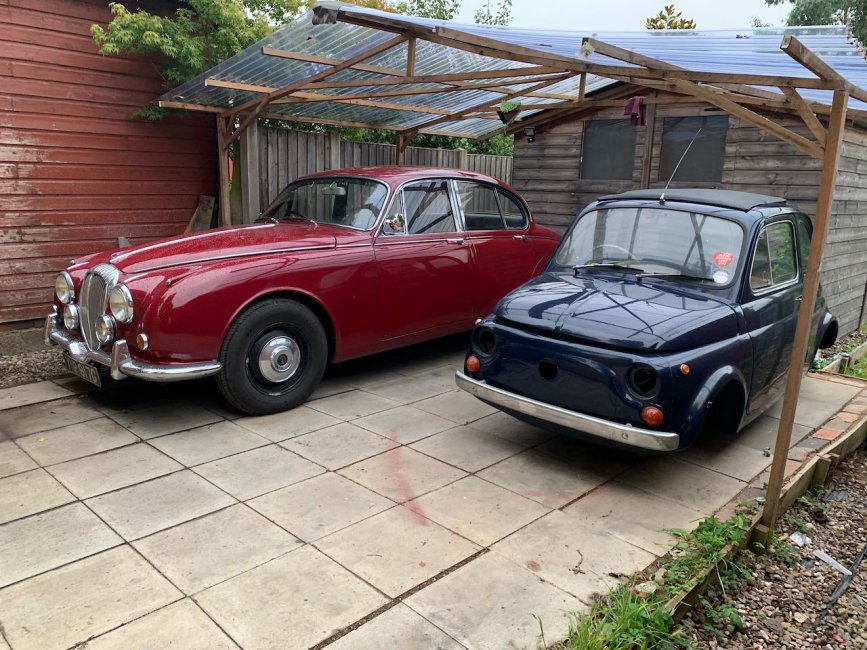

500 (Classic) '65 RHD F Restoration
- Added by Goldnrust
- Create date
- Updated
This past month since the last update seems to have a flown by, and in many ways I don't feel like I'm much further along! But it's not for want of trying, it's just that theres a lot of prep to do before the comparatively quick and visually impressive bit of fitting the new front end panels.
My first move was to deal with the bottom of the A pillars. I cut out the rot and did a functional, although not super pretty, repair to both sides. It didn't need to be pretty as it will be hidden inside the front wings.

After that I continued to hide from dealing with the mess that is the inner arches by looking at the front bulk head. From the inside I could see some swollen areas under the passengers side strengthening plate. So I drilled the spot welds on the strengthening plate so I could remove it, then cut out the rusted part of the bulk head and then welded the strengthener back on.


It might have been easier to cut out a large chunk of the bulk head, but as the rotten area surrounded the steering idler mounts, I was keen to make sure they didn't move. With that in mind I did a number of smaller patches, one at a time instead.
This left me nothing for it but to get on and dig into the front arches. For the same reasons of making sure the front end geometry stayed intact, I had decided to repair my original inner arches rather that entirely replace them with pattern parts. This started with many hours of scraping and wire wheeling removing the old under seal and fibreglass and then I could see where to start the repairs. Starting with the drivers side, the strengthening plate around the front wishbone mounts was clearly rotten and so were several of the layers behind it. There was nothing for it but to chop it out.

Hmmm. what a mess. Still, once some new layers started going in things always start to look a bit better. With some metal back in here I could also cut away the many old patches to the lower rear edge of the arch. In some places the patches were 4 layers thick here!

This weekend I was able to finish the drivers inner arch off, which is now looking so much better, with new strengthening plate for the wishbone mounts, new repairs where the rear edge meets the floor and patches to the front edge and return lip. It's been quite the task.

Now I've got to do it all over again on the passengers side! Argh! haha.

Still, once this second inner arch is repaired I can start offering up the new panels which will be quite the moral boost
")
Well a few weeks have gone past, and while I have not updated, I have none the less been busy! As the work has mostly been a mirror image of the previous rear quarter, there’s not been much to show really.
Picking up where we left off, I finalised the internal structure at the rear of the sills and then got the outer arch welded on.

The closing panel behind the arch needed a similar repair to the other side.

The side panel for the engine bay was next. I take the silence in reply to my previous question to mean there was no repair panel available…
My metal shaping skills won’t win any awards here, but I did manage to make it from one piece, and it’s broadly the right shape!

And then, as before, I moved on to the inner sill.

All of which makes several weeks of hard work seem very quick and simple! Anyway, the good news is that with this work complete I hit a mini milestone, all of the welding rearwards of the A pillars is complete!
So that meant yesterday there was nothing for it but to reposition the car…

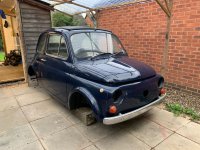
And to break out the grinder to be rid of the poorly repaired, fibreglass, filler, pop rivets and underseal mess that was the front end.

Eeek! It’s a little daunting seeing the car like that. Still I have all the new panels and such a nice feeling to know that the worst of the rust is now cut away and it’s all going forwards from here.


It’s good to see the A pillars are actually pretty sound. Much better than some I’ve seen in other restorations. A simple patch to the lower 6”, which I’ve started cutting back for on the drivers side, and a small repair where they’ve been buttered at the top when the last set on wing ls were fitted sill soon have them sorted.
What’s left of the inner arch isn’t so good, I still think I can patch them but it’s going to be a fair amount of work. They are available new, but as they hold a lot of the critical shape of the front end together, I fear that removing it entirely could lead to stuff getting out of alignment. I guess I’ll see how it looks when I start digging deeper into them behind the patches!
This is my first update, to the new garage format of this thread. So if anyone is reading this in the garage, there’s a whole heap of other updates in the discussion thread that covers the months between introduction and this post!
I’ve had a couple of days off work this week, and so had a bit more time than usual to push on with the welding. I’m really grabbing every moment I can on it, as if possible I’d like the welding done before the heat of summer comes. It’s no fun being bundled up in overalls on a hot summers day.
I won’t bore everyone by going into the same levels of detail as with the other side, it’s all been very similar just mirrored, and it’s taken me less time as I’ve not needed as much thinking time.
The first job was to finish cutting back all the rot and poor repairs.

There was some lovely deep filler over multiple patches on this side.

Anyway, that’s all gone now, after that it was a case of fitting the new inner wheel arch, rebuilding the back of the inner sill structure and repairing the rear lower corner of the door aperture.

So that’s really good progress, it took me several weeks to get to this stage on the other side.
The next step is to fit the outer arch and then to deal with the closing panel, as with other side, but then before moving forwards, I need to look at this panel in the left hand side of the engine bay.

I had bought what I thought was a repair panel for it, but it is actually a very different shape now it’s here! I think it’s an under tray of sorts instead. Any of you folks know if this panel is available to buy or not?