Well you have suddenly decided that you want your car looking like new (if not better than new) you have stumbled on the right link...........
First things first it is very easy when moving into the Power tool based correction to do SERIOUS DAMAGE if your not careful and dont understand what your doing........ If in any doubt do some more homework... This is intended as a starter guide by no way is it a bible........
Always read the specific instructions for the products you use and take your time....
So to start have a good read of this:
https://www.fiatforum.com/car-care/188996-basic-guide-how-clean-your-car.html
and this
https://www.fiatforum.com/car-care/288510-quick-winter-wash-tips.html
A good wash technique is vital to prevent causing any damage. You dont need a foam lance but it does help remove most of the dirt without any rubbing which inflicts the most damage
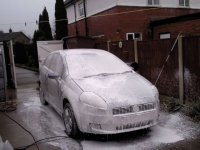
So before you crack out the big guns get your wash method sorted... or you will be doing it all again in a few weeks..........
Once you have decided that by looking at the clouds that its not going to rain checked the weather forecast and its showing a nice warm Calm dry day :chin: (ideally with not too much direct sun) its time to begin.......
Wash the car really really well pay special attention to dirt traps such as door jambs, round the badges, light clusters, wing mirrors, wheel arch lips and the like. The last thing you want is any dirt getting onto the paint work whilst your polishing (this could end up needing a respray)...
Its time to start on an even more in depth clean.....
First things first it is very easy when moving into the Power tool based correction to do SERIOUS DAMAGE if your not careful and dont understand what your doing........ If in any doubt do some more homework... This is intended as a starter guide by no way is it a bible........
Always read the specific instructions for the products you use and take your time....
So to start have a good read of this:
https://www.fiatforum.com/car-care/188996-basic-guide-how-clean-your-car.html
and this
https://www.fiatforum.com/car-care/288510-quick-winter-wash-tips.html
A good wash technique is vital to prevent causing any damage. You dont need a foam lance but it does help remove most of the dirt without any rubbing which inflicts the most damage

So before you crack out the big guns get your wash method sorted... or you will be doing it all again in a few weeks..........
Once you have decided that by looking at the clouds that its not going to rain checked the weather forecast and its showing a nice warm Calm dry day :chin: (ideally with not too much direct sun) its time to begin.......
Wash the car really really well pay special attention to dirt traps such as door jambs, round the badges, light clusters, wing mirrors, wheel arch lips and the like. The last thing you want is any dirt getting onto the paint work whilst your polishing (this could end up needing a respray)...
Its time to start on an even more in depth clean.....
Deep clean
Start with the wheels ideally remove them (Safely jack and axle stand)
clean the same way as body work below (iron remover / tar) and seal with a wheel wax
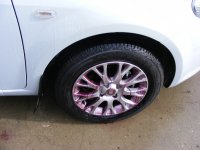 <- gives some idea of the amount of iron deposits on the wheel....
(use separate cleaning cloths just for the wheels you don't want to be dragging metallic brake dust all over the car..)
Whilst the wheel is off clean the arch out with a cheap brush (toilet brush form pound land is ideal and some basic kitchen type all purpose cleaner)
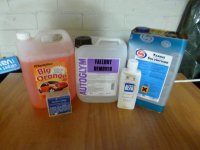
Over time Tar off the roads due to wheel fling and botched pothole repairs covers the lower areas of the car so a suitable tar remover is needed either apply to a dry car with a old micro fibre cloth or a cheap trigger pump bottle (you will find most tar removers soon destroy the pump) try to keep it off any black textured plastic if you can.... then either wipe away very lightly or pressure wash off (you might need to repeat this step until its all removed)
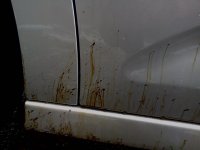
(i find Autosmart tardis works very well)
Then wash the car with hot soapy water again to remove any residue
Then get the car almost dry and on with the Fall out remover AKA IRON remover.....
Now this stuff is not skin friendly so eye protection and goves are advised (it does do damage to the skin so long rubber gloves are better than latex or similar)
this comes in a few brands....
CarPro IRON X
Bilt Hamber Korrosol
And Autoglym Fallout remover are all good (the AG doesn't change colour though)
again apply with either a cloth or spray bottle and leave to work but dont allow to dry out.....
it reacts with bonded rust particles and dissolves the ferrous oxide releasing the particles from the paint...

which due to the chemicals released when steel oxidised can cause clear coat failure and accelerate damage to the paint
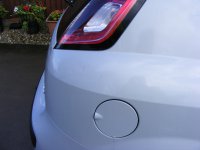
you can see it bleeding (showing a reaction in this pic
This product ideally needs a decent pressure washer to rinse after....
Followed by another wash (you will soon get bored of this step) :devil:
no need to dry the car now as its time to clay the car......
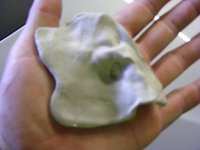
This removes anything else stuck to the paintwork......
see here:
https://www.fiatforum.com/car-care/310048-has-anyone-used-clay.html#post3101760
Then wash and dry the car fully getting as much water out the water traps as you can.......
Polishing
Obviously you can do this by hand if so Autoglym super resin polish is good...
But we are talking about detailing so taking it up a notch lets have a look at Machine polishers...
There are 2 basic types
Random Orbit (aka Dual action ((DA)))
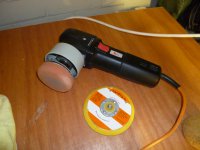
(this is the safest for novices however a rotary isn't the savage beast as by some make out) it moves in a circular movement but with a added side shift aka throw) Think of the pattern a spirograph made when you was a kid thats how it moves....
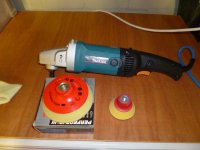
And Rotary Just goes round and round on a fixed orbit.... it is much faster in terms of rate of work but has the risk of working hotter due to increased friction.....
anyhow here is my first go with the DA....
https://www.fiatforum.com/car-care/182419-started-machine-polish-gp.html
You will need a selection of pads and the matching backing plates to fit the machine you have
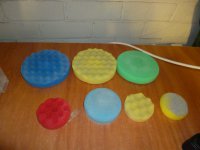
the pads come in 3 main types
Cutting (most aggressive)
Polishing (medium aggressiveness)
Finishing (very gentle)
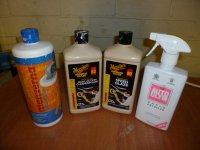
obviously Polish comes in many grades too but its very easy to confuse yourself but think like this
Cutting pad + coarse polish = Very fast paint removal
Finishing pad + Finishing polish = very little removal
cutting pad + Finishing polish = Moderate removal
Time to go down the scrap yard and get a bonnet of a car similar to what you want to work on to get some practice on rather than risk damaging your own car........
zenith point technique
and look on You tube for junkman2000 he has some very good polishing videos
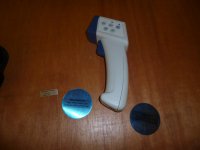
A Paint thickness gauge is a very wise investment unsurprisingly it allows you to measure how deep the paint is...
(however unless you spend a small fortune you will not find one that measures paint thickness on plastic panels and bumpers )
A basic one will set you back about £80 but is far cheaper than a respray (again i could write an entire guide on how to use one)
But basics... go round the car / panel and make a note of how much paint there is in an area a really rapid jump to a high thickness probably means its had a respray in the past......
Next open the door and measure the thickness in the door jamb.... (often the thinnest coating on the car is in the door shut area due to the spray methods used....) so subtract the panel thickness from the door shut thickness and this = a good indication of what there is left to play with i try not to go to more than half this to be on the safe side... Always aim to remove the minimum amount as then you have a safety net should it need polishing again....
Again scrap panel practice comes in handy... to see what your method is likely to remove..
During the polishing keep measuring with the PTG to keep an eye on removal rate (a note book comes in handy) even better is a outline line drawing of the car to mark your measurements on
you will also find panel edges are thinner than in the centre so try to avoid machining the last 10mm or so on the edge and finish by hand.... (masking tape comes in handy here)
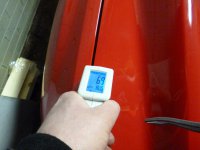
eg below 87um in the bonnet centre and 69um on the edge....
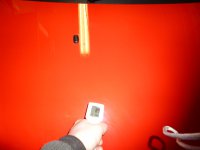
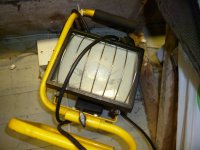
A basic halogen flood lamp is ideal for showing defects and swirls a double tripod even better...
before
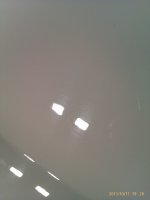
during
Depending on the pad size and temperature i tend to use 4 ish skittle size blobs of polish on a 6" pad and a spritz of Quick detailer spray to help keep the polish workable
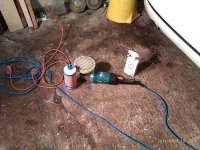
After

Final few steps......
So your now almost totally knackered your arms are killing. The Neighbour is by now totally convinced your mad having attacked your car with an "angle grinder" for hours on end and you want to go to bed well its not finished yet.....
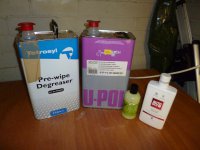
After finishing the car it need a wipe down to remove any polishing residue the polishes are very oily so a panel wipe or paint cleanser should be used to ensure the paint is totally clean ready to accept what ever wax/ sealant you choose to use
Waxing
now for the final push
you now have totally stripped bare naked paint
If its to keep that lovely shine you should now be looking at (hopefully not bare metal silver)
it needs something to protect it
How and what and which is open to debate but you pays your money you make your choice....
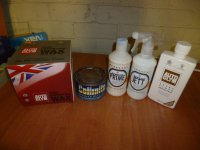
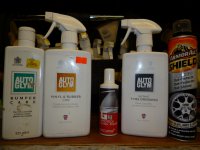
Finally finish off by cleaning the glass with glass cleaner, Treat any black trim with a decent trim care product and dress the tyres and wheel arches..
If your feeling brave there is still the engine bay to do
first off i leave the car ticking over (obviously watch the drive belts and engine fan if it decides to come on)
i damp the engine down using a watering can with a fine rose done soak any electrical components but they are splash proof ((think of all the water that gets in on a rainy motorway journey))
next a good spray of water soluble degreaser such as Muck off (bike section in halfords) Autoglym machine cleaner Or as i use now Bilt hamber surfex....
give it all a good scrub (selection of brushes (tooth brush pot cleaning brush and a dust pan brush for example)
rinse well again using the watering can
repeat if needed....
now for the final bit take the car for a quick spin round the block to shake off most of the excess water but no need to have it fully dry
get hold of some Autoglym Vinyl and rubber care..... and mist over the entire engine bay (avoid the aux belt and cam belt if exposed)
then leave to dry.........
But after all that you should have something that looks a bit like this:

But you know when you open the windows the next morning you will see something like this..


