Reassembly
Reassembly, as they say, is the reversal of removal... but note the following points.
Wash and dry your hands again
The white plastic frame goes back on first, remembering the small assembly of three pins which is pushed through into the circuit board next (the pins are fitted in the photo below).
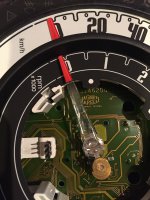
Then refit the warning light icon ring, and the speedometer numbers, followed by the speedometer needle. Note that the needle should be just below the zero with the mechanism turned fully anti-clockwise, as you see in the photo below.

The rev counter numbers go on next - as with the speedo numbers, make doubly sure these are fully pressed into place - the ring is only supported at the bottom (because the speedo needle has to travel around under it) - so be careful to push in the right places! It really is quite some piece of design...
The rev counter needle requires a really firm press - I suggest putting it on about a third of the way, then refit the cluster to the car and turn the ignition on - the two needles should both move up slightly and should both point to 0.
After a couple of tries, and when you are satisfied, push the needles fully home and refit the LCD housing. On the back side, lift the clasp/latch before inserting the ribbon cable, then press it down with a nice click (top-quality parts).
Give the cluster a good dusting/buffing with a microfibre cloth - especially the chrome ring, where fingerprints would look most horrid. If there are, somehow, oily marks on the matt surfaces, use nothing other than hand soap and a damp sponge, then dry with the microfibre cloth - use absolutely no other solvents (no meths, no brake cleaner), or it will end in tears - just my advice
Blow any dust out from inside the front lens - I don't recommend an air compressor, as most emit oily vapours - use a can of compressed air or a camera blower brush etc. Perhaps I should have listed all these things on the first page...
Pop the casings (front and rear) back on.
Put on the three buttons - noting that they are not symmetrical - and refit the foam.
Polish the lens with plastic polish - I use Meguiars Plast-X.
Refit the cluster to the car - perhaps with replacement felt strips on the binnacle tabs if yours have worn through or fallen off.

The total time for all this is only an hour or two and the total cost about £10... I think I've spent longer on this guide than the project itself
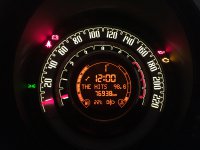
I didn't change the LCD colour, as I thought it was best to leave something that matched all the other illumination in the cabin - but I am now seriously tempted to change everything else to white as well
I did a number of web searches first and found g50245's guide for the Punto. Otherwise I found only one photo of a modified 500 cluster - on a Mini forum - and I can't find it again to include here, sorry!
Have fun, and please share your results

