Tools Required
Philips screwdriver
Fine and standard pliers
Torx bits
10mm spanner
1/4inch drive socket set 8mm and 10mm
Mini cutting discs (Dremel type)
Torque wrench for wheels bolts
Instructions
Make sure you plaster anti seize compound on all the fixings.


You need to install bulbs. Side light bulb holder is a simple push in, as is its bulb. Indicator needs a part turn anti clockwise to release it as does its bulb, and the headlight bulb is the awkward spring clip. See phot for how to clip and unclip this,

One side of the clip has been released and the other is locked behind the retaining hook
Copy right the Panda Nut (LOL) no rights reserved use it as you like. It’s a guide and not instructions so please accept on this basis. 2023
Car featured is a Panda 169 My life 2011
Philips screwdriver
Fine and standard pliers
Torx bits
10mm spanner
1/4inch drive socket set 8mm and 10mm
Mini cutting discs (Dremel type)
Torque wrench for wheels bolts
Instructions
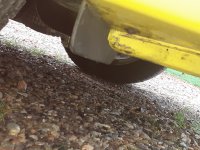
- Jack up the side affected and support car with axle stand(s)
- Remove the road wheel
- Undo the Philips screws holding the front end of the wheel arch liner. There are 5 and there are two nuts on fixed studs. These may have plastic or steel nuts on them. Plastic ones just pull off with pliers and a gentle twist, or remove with 10mm socket.


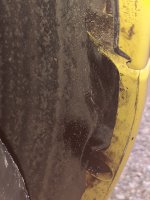
Twin red lines indicate base of the headlight. You can just see the remains of the missing stud for retaining the liner (10mm) nut
– top left - Remove the single under bumper screw that secures the front rubber lip of the liner from underneath the car. Note ** The bottom torx captive nut was a real pain very stuck, so I cut it off with the Dremel disc. The heat and vibration actually loosened it so I reused it by swapping it with the top torx centre bolt, The captive fitting was wrecked in removal so I put a washer and 100 mm nyloc nut back instead. These only need fixing gently very low torque so do up to the bumper and then just nip up quarter of a turn – max.


- Remove the grill. There are four philips screws that need to be removed and it just lifts out.


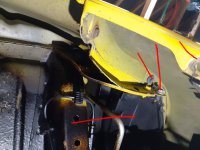
- This gives access to the top torx fixings These all need to be removed.


- Finally the bumper to wing screw/bolt must be removed. See here it’s the top one marked. This screws into a nylon captive thread block so although very rusty should come out with a ¼ drive 10mm socket and extension bar. The bumper is now free to move and can be pulled forward to extract the head light.
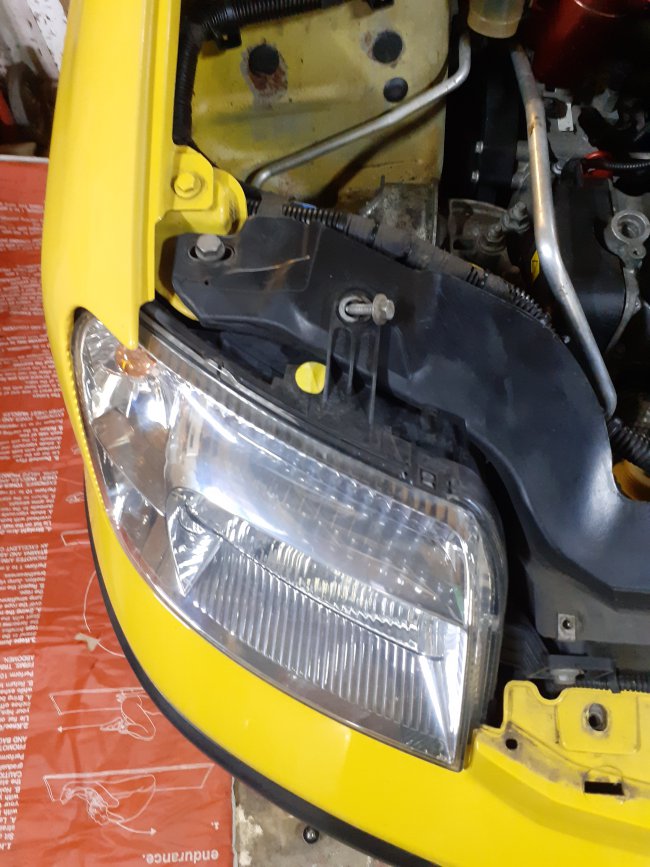
- Fold the arch liner out of the way so you can now see the base of the headlamp and the wheel arch fixing. Even with a lot of penetrating oil this captive nut was not going to move without breaking. It’s a round spigot nut bonded into the plastic and it became unbonded as soon as touched. The headlamp however came out with a small tug. I used pliers to hold the captive nut and removed it quite easily.
- Remove the two remaining headlight bolts supporting the light as you remove them. You can hold it adequately by the top fixing tab / lug.The light need to be tapped or levered toward the centre of the car about 1cm to clear the locating peg that fits in a hole just below the lower wheel arch fixing bolt. It will then come out forwards.
Make sure you plaster anti seize compound on all the fixings.
You need to install bulbs. Side light bulb holder is a simple push in, as is its bulb. Indicator needs a part turn anti clockwise to release it as does its bulb, and the headlight bulb is the awkward spring clip. See phot for how to clip and unclip this,
One side of the clip has been released and the other is locked behind the retaining hook
Copy right the Panda Nut (LOL) no rights reserved use it as you like. It’s a guide and not instructions so please accept on this basis. 2023
Car featured is a Panda 169 My life 2011