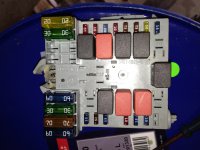
Picture the scene - you get in, twist the key, and the instrument panel flickers and dies. Frustrated, you switch the key off, open the bonnet and you hear a gentle rustling - then a vroom vrOOOOoooom vrooooo... the radiator fan speeding up and slowing down over and over again - even though the key is off. You switch the key on and a relay behind the battery goes tickatickatickaticka... your Stilo is haunted! The door closes with a long drawn-out creeeeeak...
Ok, so the last bit isn't true, but if the rest sounds familiar, you might be facing a water-soaked fusebox. Fortunately, this wasn't my car!
In this case it was due to someone cleaning up after a Selespeed 'accident' (overfilled? needs bleeding?) but it could easily happen if someone power-washes the engine bay - or the battery cover is missing and you drive through a flood.
Photos apply to an Abarth Selespeed model. The first step is to remove the battery, then undo the main ring terminal on the side of the fusebox. You'll need a 10mm deep socket for this. Then spread apart the side supports, and lift the fusebox to release the plugs. Two have coloured levers that must be raised and rotated. The other three have side clips to squeeze. The plugs are all 'keyed' so they can only go back on one way - they cannot be muddled up.
It's a good sign when water pours out of one corner as you remove the fusebox. Then you know you're onto something
Next take a photo with all the fuses and relays in place. This is very important for later reference.
(Continued on next page...)


