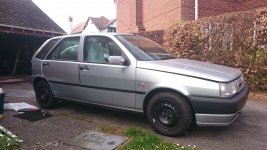
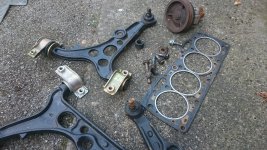
Lego 007.JPG

Tipo (Classic) New Tipo (old model!)

Introduction

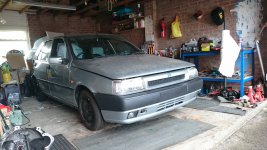
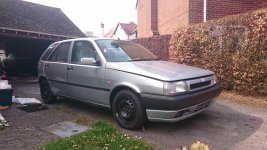
Following the demise of the red Tipo (see previous rust thread) I obtained a new one and this is work to date. This one had a fairly long MOT failure list including excessive corrosion on both front suspension mounts, 1 rear seat belt mounting point and an advisory on the other. However the 'Liberty' special edition with air-con in SX trim was tempting and the previous owner had fitted new springs and had some tidy welding done previously. So what needs doing...
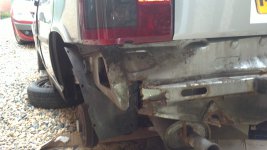
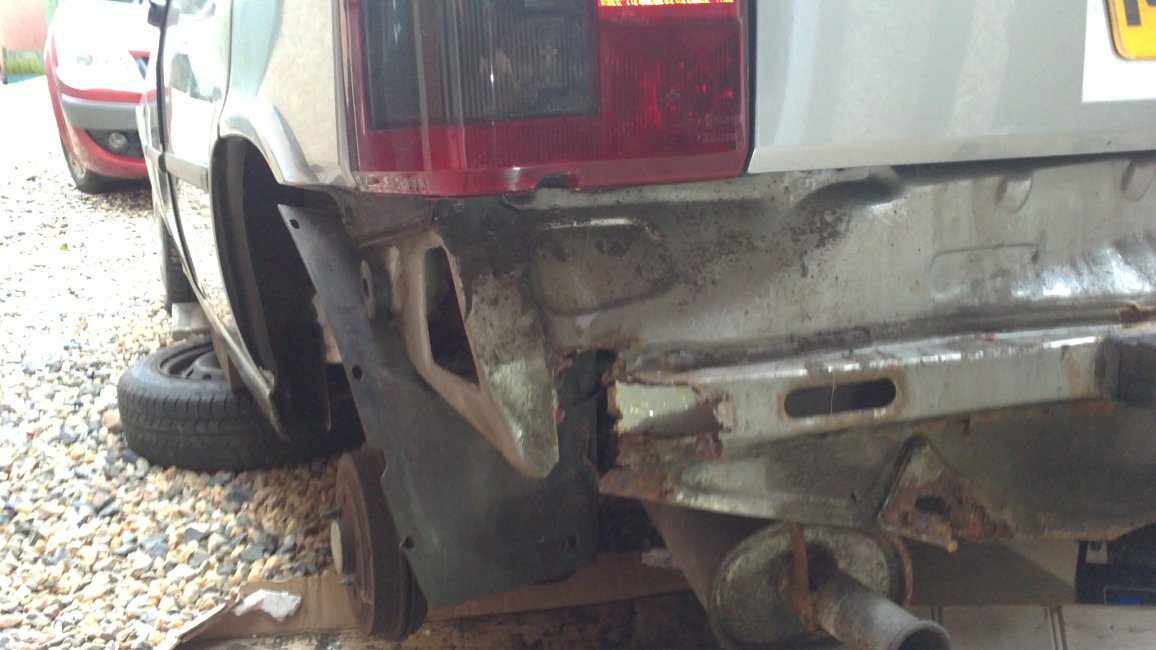
Lego 007.JPG

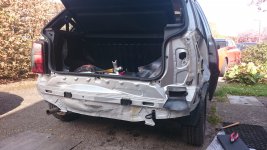
The rear valance is heading the same way as the red Tipo and cutting off and using the remade valance from the red one may be the way forward later on.
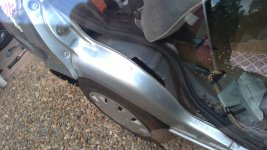
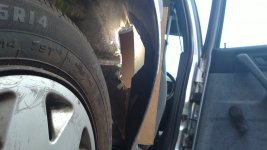
Lego 002.JPG

Lego 003.JPG

The inner arches are not too far gone but there was more rust at the top and the back to tackle later.
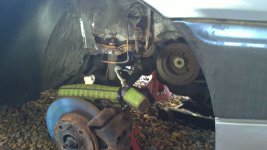
Lego 027.JPG

The holes behind the front struts will be the worst to fix, just above the sub-frame mounting bolts. Both my Mk11s suffer this.
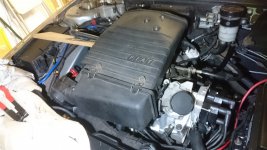
After a couple more replacement hoses from Italy, inevitable further episodes of incompetence, anticipation began to build of potentially powering up the road without the risk of the crank exploding.

DSC_0222.JPG

DSC_0221.JPG

Difficulty changing gear had also been an issue and I'd fitted a replacement 2nd hand box, swapping out the manual lever for the shorter hydraulic arm. The clutch plate looked fine so I didn't change it.
 
Last edited:
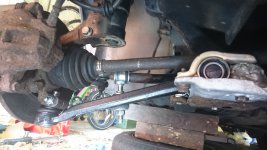
Whilst faffing with the wishbone it became apparent that one leg of the subframe had rusted away around one bolt. Not expecting to be welding again I had no indicated gas left but fortunately it's one of those magic cylinders that keeps on giving. (y) A trick here is to keep the bolt sleeve inside the subframe upright as once welded up, you can't easily reposition it.

DSC_0224.JPG

DSC_0256.JPG

With fluids in the car and the initial coolant and fuel leaks addressed and the new bumper on, it seemed the right time to take a trip on to the driveway...
 
Last edited:
I wish I had your skills, Jonti!

Can I ask you to recommend a specific epoxy mastic paint for these underarch areas, that you mentioned (a couple of years ago) on this thread..?

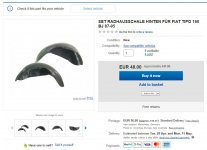
I have used the Rustbuster stuff. I would put a coat of rubberised stone chip on top of it if you are using under the wheel arches for extra protection. Is it a Tipo? If so these inner arch covers from Germany for the rear are fabulous and stop the problem at source. Their range seems to stock a number of models. I found them easy to fit. If only they'd been fitted from new. :cry:

Inner arch liner.JPG
 
Last edited:
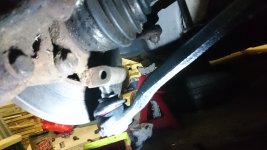
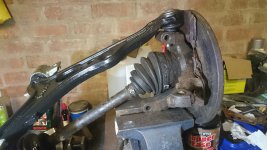
The Tipo made good progress for a few metres before the wheel hubs separated from the wishbones. Conveniently half way in/half way out of the garage.

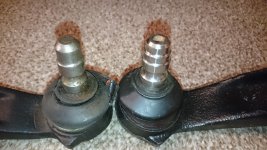
To cut a long story short this car has the wider 17mm pin (on the right). I found it's no good trying to press these into the hub with the weight of the car, it requires a hammer on the vice and the combined assembly has to be fitted. Using new bolts to the subframe seems to reduce the chance of threading.

DSC_0280.JPG

DSC_0315.JPG

DSC_0345.JPG

DSC_0363.JPG
 
Last edited:
Great progress, I've not been on the forum too much and had forgotten this project.

I'm confused by the list from the garage because they imply they put it all together and "set tappets". However I can see that you are fitting the cylinder head etc. yourself at home.

Make sure you carefully check the valve clearances when it's all torqued down finally (don't know if you run it first then re-torque ?). I did my head a few years ago (via a garage) but he didn't redo the shims / clearances at the time so they were all different after the skim etc. For ages I was chasing rough running and bad emissions because many clearances were really tight.

I eventually checked them and we reset them properly with his spring tool and box of shims, unfortunately now I've got the same problem again, they seem to have closed up for some reason.l
 
Thanks for going into detail on that, Jonti

(sorry for the delay)

it's 'actually' for a FIAT Coupe, which as you know; is the same core car, underneath.
If you have had former success with this product; then it's music to my ears...

Where on earth did you source a wing??
Have you got a picture of the car side on, without the wing at the back?
I'd be very interested to see the internal sections at the rear...
 
Last edited:
Thanks for going into detail on that, Jonti

(sorry for the delay)

it's 'actually' for a FIAT Coupe, which as you know; is the same core car, underneath.
If you have had former success with this product; then it's music to my ears...

Where on earth did you source a wing??
Have you got a picture of the car side on, without the wing at the back?
I'd be very interested to see the internal sections at the rear...

Ah, very nice indeed. Well if you grind off any rust, roughen the surface, 2 coats over a couple of days it seems to stay on - though this car hasn't been out much :) I think it came from Gary (sedi2000?) on Ebay. Got the bumper and mirrors sprayed up at the same time. Does this picture help? the lower half isn't original but is not far off. Somewhere I do have a reference picture which I used.

DSC_0366.JPG
 
Last edited:
Great work.. :)

but you could do without all the wishbone issues.. what a faff :eek:

Ive still got marea and tipo wishbones.. will have have to compare with your excellent pics :)

Keep it up..

Charlie

Cheers Charlie! It seems to be a 2mm difference between the wheels staying on or falling off. I think Bravas and Mareas are all the wider variant - 17mm.

DSC_0375.JPG
 
Last edited:
Great progress, I've not been on the forum too much and had forgotten this project.

I'm confused by the list from the garage because they imply they put it all together and "set tappets". However I can see that you are fitting the cylinder head etc. yourself at home.

Make sure you carefully check the valve clearances when it's all torqued down finally (don't know if you run it first then re-torque ?). I did my head a few years ago (via a garage) but he didn't redo the shims / clearances at the time so they were all different after the skim etc. For ages I was chasing rough running and bad emissions because many clearances were really tight.

I eventually checked them and we reset them properly with his spring tool and box of shims, unfortunately now I've got the same problem again, they seem to have closed up for some reason.l

I saw you had said your Tipo was up and running. This means your collar bone must have fixed as I think you were going to weld (your Tipo :)) up?

Thanks for your advice on the shims. They had bolted the cam carrier down on the head in the workshop to set them. Could torqueing down with the gasket later, affect the values? I can say the engine appeared to be running sweetly but just now I'm stumped by a racket that seems to originate from the cam sprocket when the engine warms, it sounds like a dry bearing. :confused:
 
Last edited:
Hi Jonti

My collarbone is OK but still mending, it's been really slow to build bone for some reason.

My Tipo had some welding and got its MOT but had to be encouraged through emissions which surprised and disappointed me... that's what made me look at the clearances because I had picked up a 'misfire' judder at idle, could feel it through the seat.

I was really lucky to find a new Bosal exhaust system sitting on a dusty shelf at CES Chester for £70, there are different front flange fittings (square or triangular) so it's not easy to get a match.

You can check with the rebuilders about the shimming of the camshaft but as I say do your own check when it's all back together.

The worst bit about checking them on a 'running' car is removing the oil that pools in front of the cam before you can measure.

As for your bearing noise, check the Aux belt idler pullet because they have given me no end of trouble over the years.
 
Jonti-

can I ask about your rear wing removal there..?

with the wing off; were you able to see down 'inside' (and forwards) the wheel arch skin into the driver's rear door?

What I mean is; does the rear wheel arch, that you climb over to get in the back, have two layers to it? One under the car, and one that you see above?

is there a gap as such?
I also run an Alfa 146 (same core car again) and have always wondered if water could migrate downwards, through the wheel arch, to reach the sills...

you are perhaps uniquely placed to answer this question...
 
Jonti-

you are perhaps uniquely placed to answer this question...

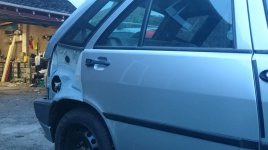
Lol :eek: The 2nd pic on this thread shows the curved piece in the doorway. There is a 2nd skin underneath this forming the inner arch, 10mm or so gap. At the outer edge the sheets meet and are spot welded, on Tipos there is a genius weatherstrip on the back of the door keeping wheel spray off this join. On the other side the double skin terminates at the flange (normally under the rubber seal). On Tipos the bottom of the inner arch rots out letting water into the sill anyway, as the top skin at this point has gone off to form the top of the sill as you can see from the pic.
 
Hats off on all this work Jonti. You have a refreshing positive outlook to keep going despite numerous setbacks.
I tried to remove the rear quarter panels off some scrap Tipos I had stored and could not get them to budge!
The captive fittings for the allen head bolts all broke and even then despite some heat applied they still did not want to release from the body.
Is there some trick to this job that I have not discovered?
 
I had the same problem - had to use a dremel to cut through the bolts. You also need a very sharp craft knife to cut through the sealer - I have replaced both wings on my Sedicvalvole this way now. Luckily the inner wings were OK so a good clean up and rust proof was all that was needed.
 
I have had this issue on many occasions.. Trouble is the nut on the end of the bolt is housed in a plastic holder, which usually breaks as soon as the allen keyed bolt head is turned, then the whole lot just spins without coming undone. Usually about 50per cent break in my experience, so I use a high quality 6mm drill bit in a battery powered electric drill, which is more controllable than a mains powered one, to drill out the bolt, then replace the bolts and nut on refitting. A 6mm drill bit sits nicely in the allen key socket, so you can get a neat job. Cutting the mastic away is also a challenge. Scoring around the panel perimeter with a strong and sharp blade is the only way.
 
Bishophill coachwork in York who spray up the parts for me have said they used to do warranty and dealer work on new Tipos back in the day and the clips were useless then. Where I've used new ones, I've doused them in copper ease.
 
Hi Jonti

I was really lucky to find a new Bosal exhaust system sitting on a dusty shelf at CES Chester for £70, there are different front flange fittings (square or triangular) so it's not easy to get a match.

As for your bearing noise, check the Aux belt idler pullet because they have given me no end of trouble over the years.

That sounds like a boon. I doubt they ever thought they were going to sell that! I believe your car does however have some unusual late model variations going on, what with the cam gasket carry on, colour and your optional safety pack.

It was hard to be sure in the garage exactly where the noise was, I'd replaced the water pump in hope, but I'm disheartened that I'm sure it is the cam sprocket area. Checking the oil seal I've lost the timing as the crankshaft sprocket is buried behind the auxilliary pulleys and you can't see the mark for the belt. On a good note, should I be clumsy, I conclude these engines can't be interference (the diesel was) as when independently turning the shafts, nothing comes in contact.
 
Last edited:
Back
Top