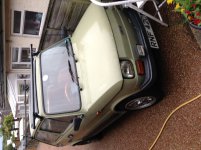
20200209_181323.jpg

500 (Classic) Raukstern's 500F -65 rebuild

Introduction

Hi guys,
My first post except for introducing myself in the newbe thread :)

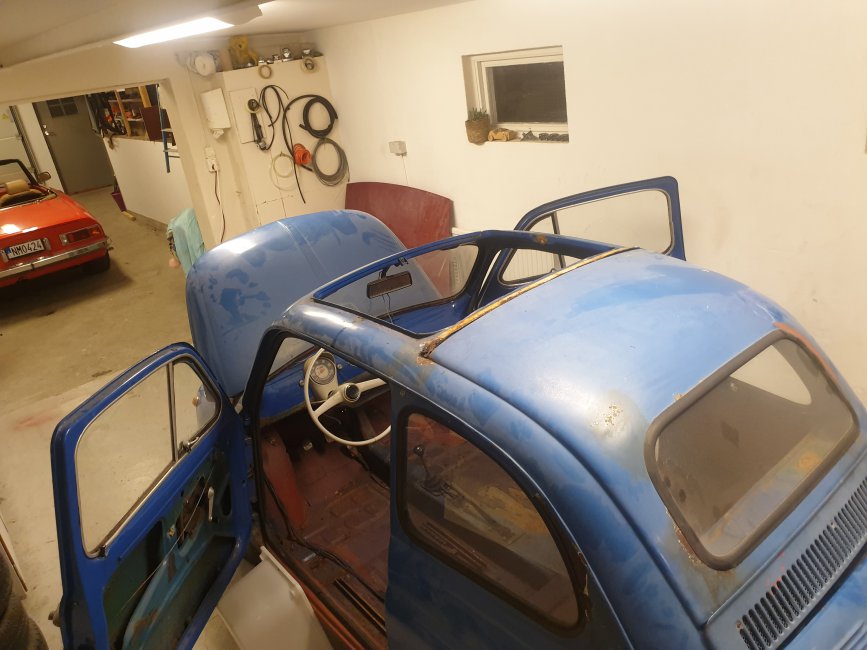
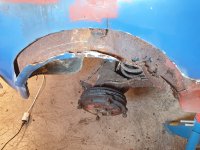
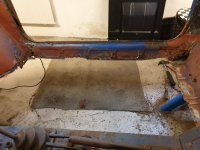
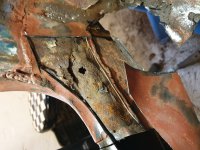
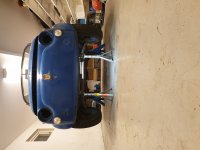
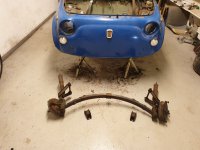
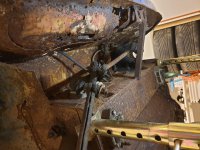
My 500F (my first 500) is in need ofa major restoration/rebuild. I´ve started small, removing doors and interior and cut out the right hand side floor board so far. The rust is far gone :( Some holes, but what is worse is that all the all surrounding sheet metal has serious surface corrosion. So mutch that I fear it´s to thin to be weldable. (Is that a word?) :rolleyes:


I have borrowed a jigg/cradle (or what it might be called in english) to suspend the car in, so that I can rotate it and don´t have to cut and weld om my back.

Now to my first question:
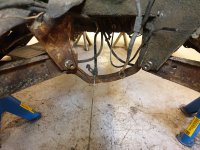
Where do I attatch the mountings in the front?
In the back I´ve seen pic´s online how to mount it. Has anyone here done this and have some pointers?

A few pics to lively up the post. (y) (for some reason some pics gets turned, cant figure out why)
  • Like
Reactions: ClassicFiat500
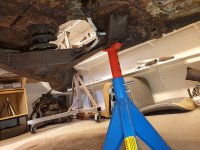
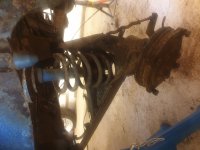
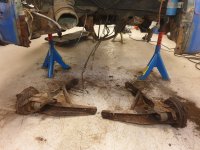
Well... meanwhile the work of stripping the body continues. Last night I removed the rear suspention details; springs, shocks and A-frame.

The common demominator through all the jobs... you know it, RUST. :)
But most of the nuts loosened easy enough. Only the lower shock mount och LH side had to be cut off. No loss, new shocks will be needed later anyway :p

As soon as I´ve got most of the suspention off, I´ll try to get it upp in the rotissiere. But I´m thinking about where in the chassis the best place to fasten it is? On "normal" cars you usually put it in the bumper mounts, but that´s not recommendable here I think :)
Anyone have experience with this?

/Seb
 

Attachments

  • 20200830_180246.jpg
    20200830_180246.jpg
    4 MB · Views: 90
  • 20200830_180313.jpg
    20200830_180313.jpg
    3.8 MB · Views: 92
  • 20200830_184126.jpg
    20200830_184126.jpg
    3.2 MB · Views: 70
  • 20200830_191906.jpg
    20200830_191906.jpg
    4.1 MB · Views: 83
.............................
As soon as I´ve got most of the suspention off, I´ll try to get it upp in the rotissiere. But I´m thinking about where in the chassis the best place to fasten it is? On "normal" cars you usually put it in the bumper mounts, but that´s not recommendable here I think :)
Anyone have experience with this?

/Seb

Josh from Zinger Customs n the US. restored a Jolly on a rotisserie
his thread may show all the mountings..

https://www.fiatforum.com/500-class...00-jolly-restoration.html?336179=#post3344846
 
Great tip, thanks!:)
I see he used the mounts for the rear crossbar. Maybe that works :chin:
How much lighter is a Jolly compared to a normal 500? You guys think it will hold?


/Seb

In realty as the shell will have no doors or such there really would not be that much difference,
the Jolly has no roof and rear windows... but it has extra metal strengthening to allow for the lack of roof....
after all what does a sheet of steel weigh......
 
In realty as the shell will have no doors or such there really would not be that much difference,
the Jolly has no roof and rear windows... but it has extra metal strengthening to allow for the lack of roof....
after all what does a sheet of steel weigh......

I thought so much. I´ll make sure to weld in a new floor panel before I put it upp, to make sure the stability is there.
In the front it looks like most people use the front suspension mounts, so I´ll try the same.

I´ll be back! :)
 
After asking around locally I´ve found a company that can sandblast the whole shell for me, when stripped and ready. (I live on an island, so I didn´t think I´d find it here) (y)
So the plan, for the moment, is to get it to them as soon as I get the shell ready. Don´t know the cost yet, but for such a small objekt it can´t be too heavy... can it?

Has anyone here left a car to the blasters? Pros, cons? Cost?

/Seb
 
Hi Seb,

I had my 500L body soda blasted. Details can be found here.

https://www.sodablastingltd.co.uk/fiat-500-2/

I was really pleased with the process. The only downside is the media remaining in the cavities that takes a while to remove but it’s a small niggle. I also had some of the larger parts blasted while I was there, wheels, trailing arms etc.

Cheers,

Katie

Great, thanks for the reply Katie!

Did you have any really rusty bits, where the only thing left after blasting was holes?

I´m a bit worried the metal is too thin in a few places... But I guess this is how I find out :D

/Seb
 
I think I was lucky in that there weren’t any major rusty bits. There were lots of dents though.

If you chose an experienced blaster they will assess the condition and tell you if it’s suitable for blasting or not.
 
I think I was lucky in that there weren’t any major rusty bits. There were lots of dents though.

If you chose an experienced blaster they will assess the condition and tell you if it’s suitable for blasting or not.

Had a look at your restoration thread, Good work! (y)
Orange is one of the colours I´m considering for mine, when done :)But there´s years left I guess and many colour will come in play and disappear again till then :)
 
Had a look at your restoration thread, Good work! (y)
Orange is one of the colours I´m considering for mine, when done :)But there´s years left I guess and many colour will come in play and disappear again till then :)

Thank you :)

Best get looking now then, it took me 3 years to decide on mine! :D
 
Last edited:
I agree. I took ages to decide on the right green for my 500. Exterior colour was the hardest choice throughout the whole build process and you constantly second guess yourself and your choice.


As mentioned, get cracking now ! :D
 
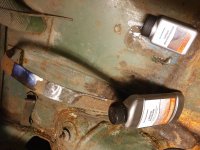
Speaking of colours, does anyone recognise this green colour that kepps showing under bonnets and behind panels? Is it something from an earlier restoration or is it an original?
 

Attachments

  • 20200211_211645.jpg
    20200211_211645.jpg
    4 MB · Views: 61
The deconstruction continues!
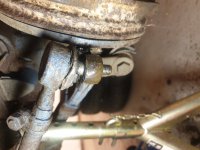
Last night I turned my attention to the front suspension and steering components. Most of it came loose surprisingly easy, but there is allways that last thing that stopps everything in its tracks.

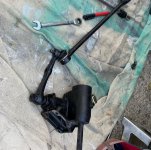
This time it was the outer ball joint that just wouln´t let go. The nut came loose easy egough, but then... I guess it´s been in there for the better part of 55 years and doesn´t wanna leave home.

Unfortunetly I don´t have a torch to heat it up, so for now I´m marinating in i WD40. Banging it good with a hammer gave no result either.
Last choise is to cut the ajustable tube for caster adjustment. Most of these parts will have to be replaced anyways.
 

Attachments

  • 20200909_210557.jpg
    20200909_210557.jpg
    3.6 MB · Views: 49
  • 20200909_194952.jpg
    20200909_194952.jpg
    4.3 MB · Views: 58
That green looks like my 126, I have also seen 500s the same colour.
As for that ball joint, get a nice big hammer or heavy piece of metal and place on one side of the lug and bang the other side with a hammer, it will fall off.
 

Attachments

  • 7FE97658-A533-4921-B6C7-5268227CD6EC.jpeg
    7FE97658-A533-4921-B6C7-5268227CD6EC.jpeg
    1.4 MB · Views: 42
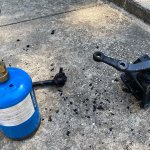
Having recently just done this job, one of my drag link ball joints took quite a bit of persuading. Repeated blows with a pickle fork + hammer seemed to be doing nothing. I took a torch to it for quite a while and went back at it with the pickle fork. Came apart ok. Get a pickle fork to help.
 

Attachments

  • 1572A91F-1671-4BA6-B094-7FB1F055A31E.jpg
    1572A91F-1671-4BA6-B094-7FB1F055A31E.jpg
    438.6 KB · Views: 38
  • E34BB35F-6B5E-47FF-A8BF-3B416FA183FB.jpg
    E34BB35F-6B5E-47FF-A8BF-3B416FA183FB.jpg
    684.7 KB · Views: 35
Having recently just done this job, one of my drag link ball joints took quite a bit of persuading. Repeated blows with a pickle fork + hammer seemed to be doing nothing. I took a torch to it for quite a while and went back at it with the pickle fork. Came apart ok. Get a pickle fork to help.

(y)
Will go and get a torch right away.
 
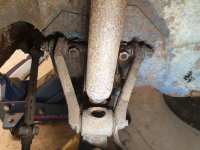
The ball joint splitter did the trick right away. What took me 2 hours NOT to do, was done i 13 seconds with the splitter. (y)

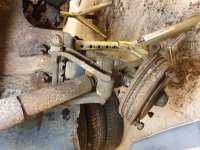
So now the front suspension is out at last. The only thing left in place is the steering box and the central tie rod.

As you can see I have some bodypanels to replace in the front aswell :D
 

Attachments

  • 20200917_194019.jpg
    20200917_194019.jpg
    4.4 MB · Views: 52
  • 20200917_200417.jpg
    20200917_200417.jpg
    3.6 MB · Views: 56
  • 20200917_200514.jpg
    20200917_200514.jpg
    4.8 MB · Views: 58
Back
Top