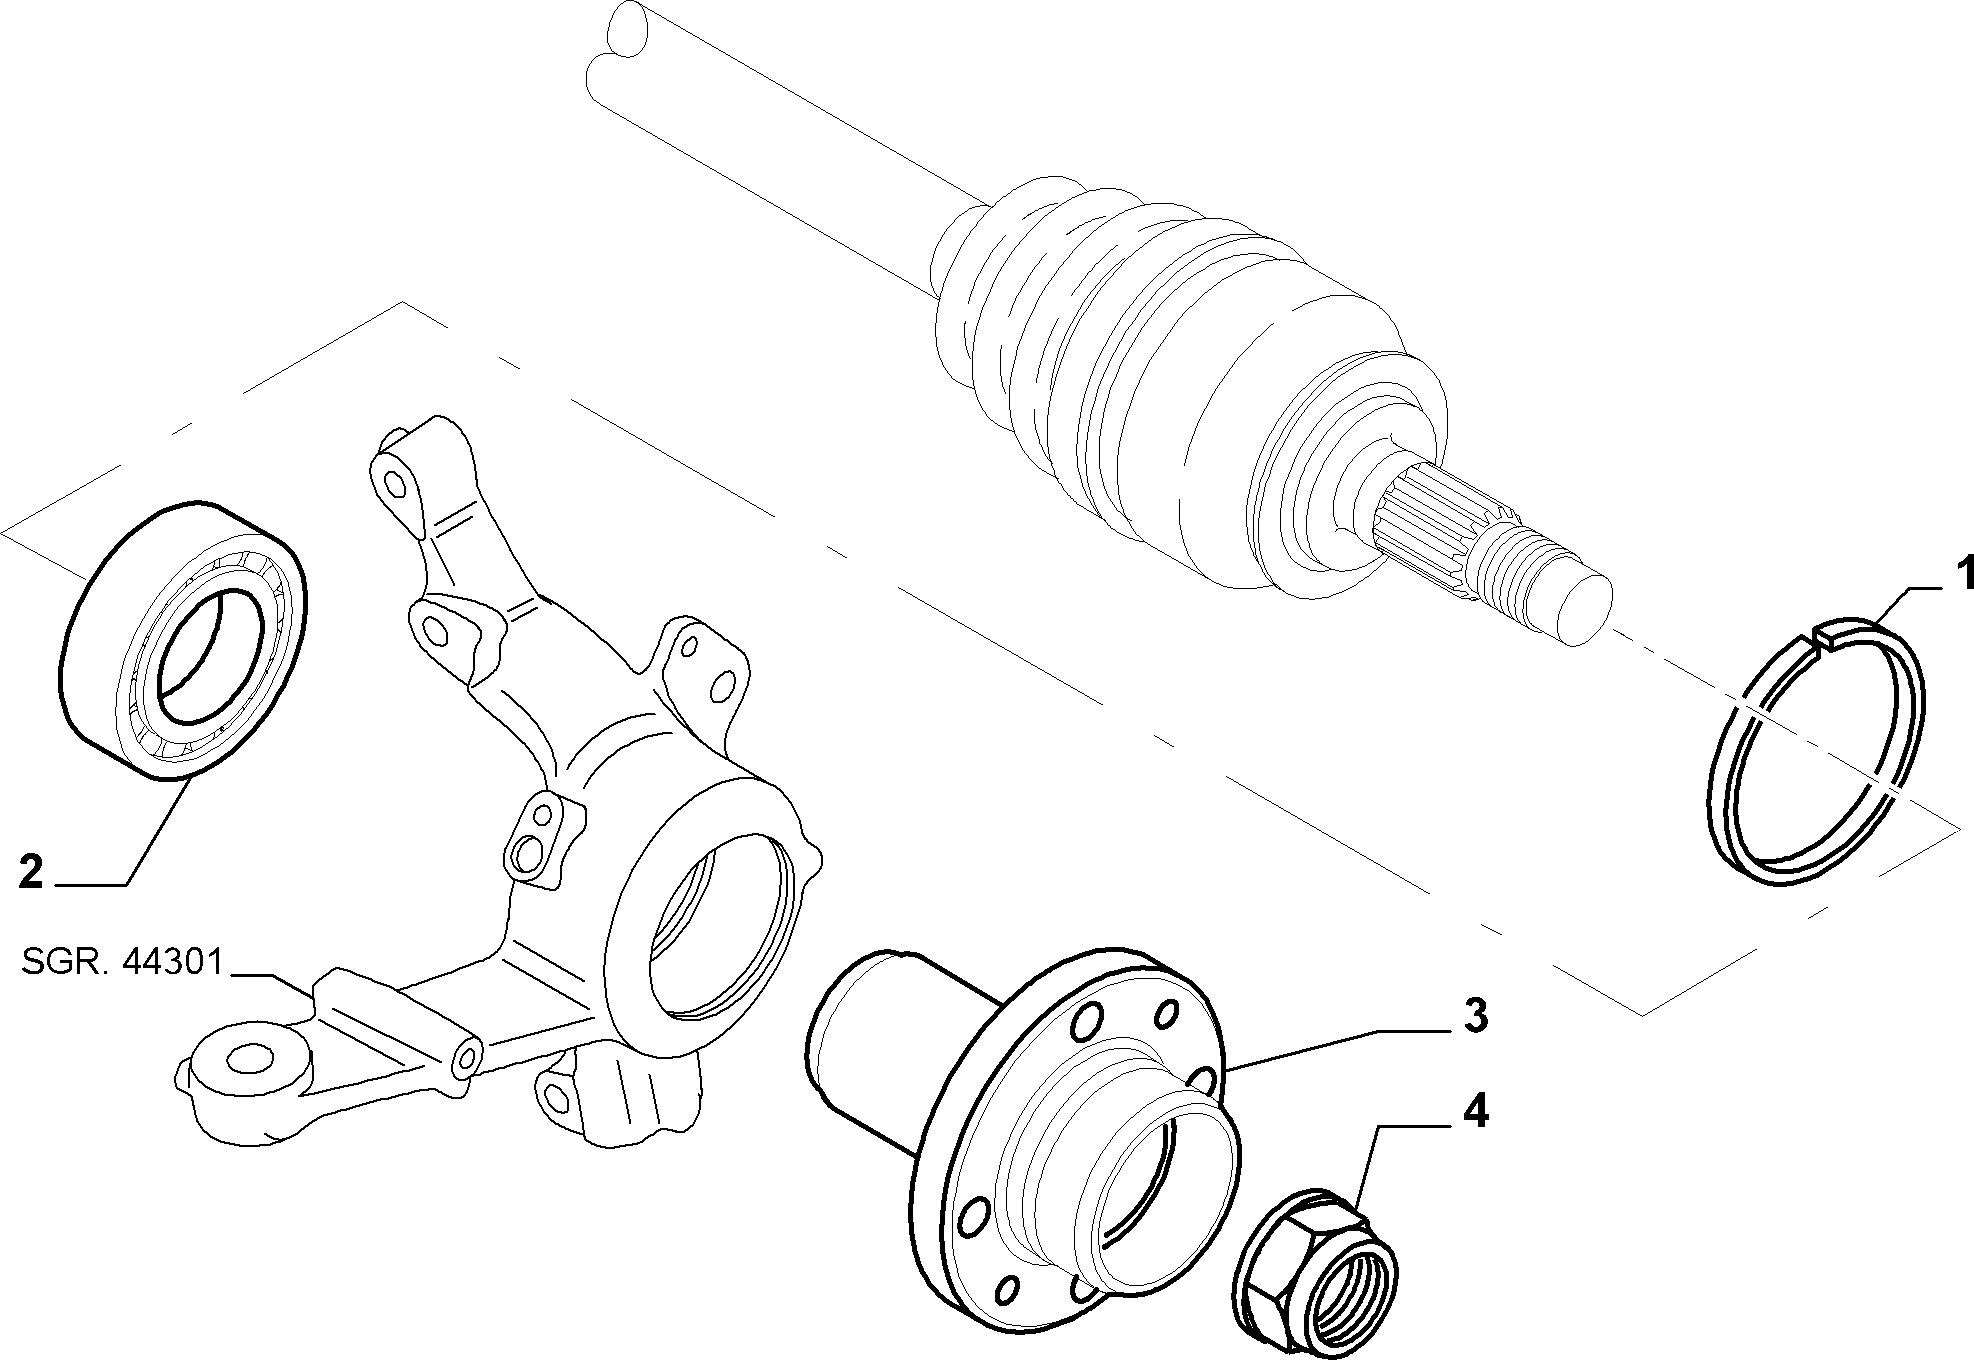
General 2010 Fiat Panda - Parts recommendation

Currently reading:
General 2010 Fiat Panda - Parts recommendation

Oh, another thing with this Panda, I'm going to replace the spark plugs and filters.

What kind of tools am I looking for to do that? Anywhere you'd recommend buying from?
This chap is making quite a good job with a limited choice of tools:


I would strongly recommend a magnetic plug socket rather than the type with a rubber insert. Something like this - either 3/8 or 1/2 inch drive (depending on your ratchet/extension piece size) : https://www.ebay.co.uk/itm/264841516410?epid=19040398777&hash=item3da9c8d57a:g:UEgAAOSwVodjbRYc&amdata=enc:AQAIAAAA8KawJItRdO/EQWJlIfbpLRjOSes7mtaFmoQ/VJbzRX20Dis1sWCf1HzR3GDmq54ELJEiprDjLC2mmf6knkeYfY+KOT9GNulFQAIPurLtzmuyku6PakPMFPGUS6eG6F0rcrFTfBUN7ZzUiAhWOYuK0FmBIxs5LivGqWZyLagW+uDc2naBVMOJPNPOU1UNFavpfmwhP7bUQd861hIcla/JOPtT7cvl2K0EWl2NWYEExF8jCy5tuk77RiOvrhbts6pBxVE+FF712T5R08fe7e0DHe2wJWQeyO4b7m25v3HcA5tS93KzeWGUGla/YFNC0sRbhQ==|tkp:Bk9SR7zQk9GhYg

That breather pipe is often found to be hard, cracked and leaking The genuine dealer part is quite pricey but it can be bought at the likes of S4p more reasonably.

In the video he removes the oil filter with a pair of water pump pliers - a useful tool to have - but I prefer a strap type tool like this: https://www.toolstation.com/strap-w...GerE7T44x2XYNe_n3AhoCvc4QAvD_BwE&gclsrc=aw.ds Of course you'll need a square drive ratchet and/or extension piece to drive it.

Notice he pulls the plug leads off by gripping the rubber sleeve/cap NOT the HT lead itself. These leads can be quite firmly on the plug and if you pull on the wire itself you will often pull the wire right out of the rubber boot/cap, which will wreck the lead. It's the rubber boot gripping the plug ceramic which is the problem. When you've got the new plug installed smear a light coat of silicon/dielectric inside the rubber boot which will make it easier to remove next time: https://www.ebay.co.uk/itm/364182151018?epid=9029676589&hash=item54caf29f6a:g:yH8AAOSwe5xkEEzO&amdata=enc:AQAIAAAA8APaqPGs0chCdWDd2lqvTvyMel9Nb5CMz1hN9v0Svoy6nR3ro06ciTcMRfAmWxb+Tfkf0GcJV19V+kic/LrzplphuIImEg83vm9qo1laYjHouAYwtVIzE2zGkpfB2aRLDV/Ma4mrlC+FpvPvTZbG6zsCF8wu0QAycZCOb9fMxJybtApjynBoFSY0w5gK/r/qd//+S81i9tg3rYB0BKIdi0LPd74HDBDdQcscoGUZaU8fA3kXvnBqGvQN+T+72IlLEHis8gLhqo8actNQgEUo/dIfP0h+qBpKxokkXzUc6hDo9dCQdLf4AHyT/KUu8LCRIQ==|tkp:BFBMppKX0qFi

If any of that's confusing please feel free to come back to me.

Edit. PS By the way, I find the spring on the front of the air filter case is often missing from these. If it's not there the casing can vibrate/knock against the top of the engine. Our Becky's was missing when we bought her and I found one in my parts box which did the job.
 
Last edited:
This post contains affiliate links which may earn a commission at no additional cost to you.
Just thinking about the video. You'll notice he winds the plugs in using the plug socket and extension piece but doesn't use the ratchet until he's wound them well in with his hands. Doing this will prevent serious cross threading and damage to the threads - only use the ratchet handle to finally tighten for the last turn or two. Also don't use a thread lubricant/anti seize (typically people will use something like copper grease) Modern plugs have a sacrificial plated coating - looks a bit like chrome or nickel plate but is actually called trivalent (and no, I don't know what that actually is but it stops the threads from corroding in place and makes a better earth return path for the electric current).
 
I have only ever used anti seize on one engine - a Yamaha bike with 8 valve 900cc air cooled engine. It needed new plugs every 10,000 miles but they were often horrors to remove. I never went to longer lasting plugs as they'd probably never come out. I did use high temperature anti seize but took care to not over-tighten the plugs. Fiats have never been a problem. I use a long plug spanner socket as that gives me the best idea of the correct angle. I have normal sockets and extensions that fit but they flop around, making the plugs easier to get cross threaded.
 
I have only ever used anti seize on one engine - a Yamaha bike with 8 valve 900cc air cooled engine. It needed new plugs every 10,000 miles but they were often horrors to remove. I never went to longer lasting plugs as they'd probably never come out. I did use high temperature anti seize but took care to not over-tighten the plugs. Fiats have never been a problem. I use a long plug spanner socket as that gives me the best idea of the correct angle. I have normal sockets and extensions that fit but they flop around, making the plugs easier to get cross threaded.
They taught us to use Copper based grease in college back in the late '60s and it just became a way of life for me. Mind you back in those days the heads were cast iron - except for "exotica" like the Hillman Imp - and we wouldn't have even thought of getting the torque wrench out of the stores to do plugs.

I'm now completely converted to fitting plugs "dry" since I became aware of trivalent coatings etc. I do still treat the classic horticultural stuff to a lick of it though.

Like you I prefer a nice solid installing tool and agree it allows you to be much less likely to cross thread the plug. I find I get on just fine with solid extensions though and wouldn't even think of using a universal joint unless there was no other option.
Oh, another thing with this Panda, I'm going to replace the spark plugs and filters.

What kind of tools am I looking for to do that? Anywhere you'd recommend buying from?
If you look at that video it gives you a pretty good idea of what he's using to do the filters - as you can see, the air filter doesn't actually need any tools, can't be many you can do that to. However the plugs need a little more thought so I thought I'd use this as an excuse to post one of my, possibly boringly long, posts?

The short answer is you'll need a deep socket, ratchet or "T" bar and some extensions of a suitable length to connect the ratchet, or "T" bar to the socket. Maybe worth looking at this in more depth though.

The rubber boots on the plugs may put up a bit of a fight as they tend to "weld" themselves onto the plug ceramics with age and heat. So far I've always managed to get them off with a pair of water pump pliers but I've always fancied a decent pair of boot pliers, like these maybe? https://www.ebay.co.uk/itm/165624150547?hash=item268ff7fa13:g:688AAOSwGRBi9jAM&amdata=enc:AQAIAAAA4CSwAOPQlrNnzqEDEmVr5XIiJZf4x8WVjLa0dse6oX+CyPagDkA5lvw1KwNQnYaFIvRRKonZQSYt5rTHQ/vu3L6R+xQc8Xnk6zIMjpAINF8lz+TJfjexIbFJGR+wLYPFklLtlQYt5DGLH+MLglNQ15Sxg2lRA8K/WUkM8k/o1vUmWhB0skz9rjGxKqphzkGBMAzQu+o0CpwbiCfsILboWO81AoX6B71IjUqp+k90jDly0Kiknk6PDcphkQlFzupQ8ShBqWzHVykgtMfYjF3VufXrYVyuL2xLSN5pzoX/FBUj|tkp:BFBM5vi1mKJi Just remember to never pull on the wire itself, always pull on the rubber boot.

A lot of cars these days have plugs with a 16mm hex and my preferred "weapon of choice" is this:
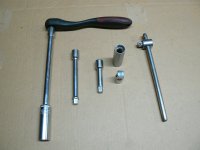
P1100897.JPG

3/8" drive format. The ratchet is a composit material Clarke branded from Machine mart. It's very comfortable to use and doesn't get cold in winter but not so easy to keep clean as the traditional chromed metal type - I like it. The extensions and "T" bar are very old, from the '60's, and probably Gordon brand if I remember (the ratchet was marked but the extensions were not and the ratchet was poor and expired many years ago). The original set just had normal sockets and no plug socket. Back in those days I mostly used 1/2" drive Britool stuff so that didn't matter but one day, in the motor factors, they had a special offer on a 3/8" drive Britool plug socket and I was working on a Bedford CF with the slant 4 engine which had those "notorious" taper seat plugs which were difficult to get to. I bought it and used it quite a lot. In fact it's even marked "For 14mm taper seat plugs" - taper seat was a novelty back in those days! If you look just to the left of the "T" bar you'll see another socket? It's another 16mm deep plug socket but 1/2" drive so to use with the 3/8" format it requires a 3/8 to 1/2" adaptor which is just below it. This one is a magnetic type whereas the Britool is the type with a rubber insert - more on that in a minute. Here's a close up of the writing on the Britool.

P1100898.JPG


Of course there's many other ways to "skin" this particular "cat".

I worked for many years with just 1/2" drive stuff and this job can be easily done with this format albeit that the tools are just a bit more "clumsy". Here's a selection of 1/2" drive stuff alongside the 3/8" for comparison:
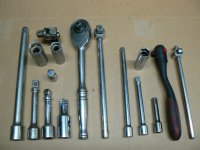
P1100895.JPG

The 3/8" tools can find it difficult to deal with a really tight plug removal which the 1/2" allows you to get "tough" with. Of course there's lots more stuff, like wheel nuts etc, which 3/8" might struggle with so you might like to buy 1/2" drive stuff if you're thinking of getting more involved doing stuff to your car - or just buy both!

As regards the plug sockets themselves, here's a we look at mine:

P1100888.JPG


They mostly come with a rubber insert which is there to hold the plug so it doesn't fall out when positioning it in the threaded hole. The top middle one still has it's but the top right and bottom right do not because, as always seems to happen when they get older, the rubber inserts have fallen out! The two sockets to the left don't have rubber inserts, they have a magnetic ring instead, which can be clearly seen. - Sorry, I forgot to put the 3/8 drive Britool in the picture, it has a rubber insert. In fact the 3/8 socket is a good example of another reason why I don't like the rubber insert type so much, The rubber holds the plug so tightly that the socket stays on the plug and the extension pulls free when you try to remove the tool after tightening the plug! The magnetic type seems to hold the plug nice and secure but not so strongly as to break the extension free so the socket comes out still attached to the extension.

I suppose it might be useful to mention what to definitely not buy? Well here's a picture of some of the slightly weird stuff I've collected over the years:

P1100887.JPG


On the very left is the plug spanner which was in the tool box of the second car i owned, 1936 Morris 8. Obviously wouldn't work on pretty much any modern car I can think of. Next in are a couple of "cheapo" generic jobbies which came from the machine shed when I was a boy and were for lawnmowers and cultivators, again, waste of time for our purposes. The next one is interesting, It's a genuine, French made - says so on it! tool for doing the plugs on the old 504 Peugeot. I did a service on one and had to borrow this tool from the chap working in the next bay to me. Two days later another one came in for service and I landed the job so decided to buy my own. Would you believe it? I never did another! and I had to grind down the end to stop it jamming in the plug'ole! Next to it is a home made attempt at the same tool which wasn't really long enough so you had to use an extension and socket to drive it which then all fell apart as you tried to get it all back out of the hole! Not a big deal. but it slowed you down a lot which cut the bonus! To it's right is a home made thread cleaner. Made from a spark plug with it's ceramic smashed out and the end slotted with a hacksaw then welded to an extension piece for going down long holes. made it for that second 504 which had one "tight" thread and it worked very well. I later bought a proper thread tap but this long tool still comes in useful from time to time. To the right of that is a wee "T" shaped tool which came with a lawn mower or was it a hedge cutter? The small end fitted some of the machine's nuts and it has a flat blade too. It's pretty cheap and nasty however the reason I keep it is that the large socket end is around 19mm so fits some of the weird sized horticultural plugs for the likes of hedgecutters, leaf blowers, brush cutters, etc which I also mess about with.

However, I'm getting a bit carried away with this, so back to our sockets. In my opinion what you need is a 16mm magnetic plug socket. The older cars had plugs with a 21mm hex though, as still do many others, so, when I decided to go with magnetic plug sockets I bought both - and often you'll find deals which include both for not all that much more than just the one. These are my two:
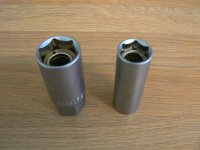
P1100875.JPG

21mm hex size on the left and 16mm on the right (16mm suitable for my 2010 1.2 Panda Dynamic Eco)

By the way, whilst we're thinking about these socket sizes, you're going to find most cars use either 16 or 21 mm hex plugs so you'll cope with most cars you may come across with either one or the other.

The "business" end comes in a bewildering number of variations though:

P1100889.JPG


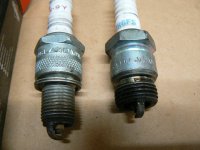
The way it seals to the head generally falls into either the "crush washer" or "taper seat" type. Here's one of each:
P1100893.JPG

Washer type on the left, taper seat on the right. The crush washer should only be used once as once it's crushed then it's, well, crushed! However we all know you can screw them back in and get away with it. nowadays tightening with a torque wrench, especially with taper seats, is highly recommended but if you've done this for years for your living you get the "feel" for how tight to do them. Don't use antiseize when torquing as it renders the torque wrench setting meaningless and increases the possibility of overtightening and maybe stripping threads or distorting the plug body.

Plugs are very engine specific, especially just of late with these small turbo'ed jobbies. Just look at these two:

P1100891.JPG


They're identical in every way, same thread, same overall insulator length, same hex size, etc. However look at the length of the centre electrodes? The one on the left will project much further into the combustion chamber than the one on the right. The heat build up in them will be very different and if the one on the left were put in the engine intended to take the one on the right then the end electrode might even contact the piston! Plugs are very different. Only ever fit the exact correct plug for the engine.

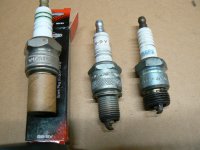
By the way, here's our "old pals" the washer type and taper seat passing the time of day together with a new plug sitting on top of it's box next to them:
P1100892.JPG

Notice the cardboard tube protecting the electrode end? This is there largely to ensure the side electrode is not subjected to any impact during shipping. Plugs today come ready gapped and if you see this tube in place and undamaged then you can be pretty sure the gap will be spot on - I always visually inspect just in case though. Normal, so called "copper core" plugs, like the ones in the picture above, can have their gap altered if you really need to - maybe at an interim service interval? - by gently bending the side electrode (better to do this with the proper tool rather than knocking it against your workbench as you don't want the electrode being damaged and maybe later dropping off inside the cylinder!) Platinum and Iridium plugs should never be messed with. If the plug gap is incorrect the plug should be returned DON'T BEND THE ELECTRODE and stay well away from the very slim centre electrode which is VERY brittle!

Well, she sun's come out and Mrs J is making a cup of tea and cutting a piece of lovely looking cake so I'm off into the garden to sit on my bench, look at the flowers, drink my tea and get stuck into that caramel cake! I'm sure I've probably forgotten something above so please do feel free to contribute - or criticize as appropriate?

Edit. PS was just thinking, you'll notice my older plug sockets are double hex (12 point) whereas the new, magnetic, ones are single (6 point) jobbies? I like that the new ones are 6 point as it virtually eliminates the possibility of rounding off the corners of the hex shape - although, thinking some more on this, I've had plugs snap off in the head (insulator and centre electrode coming away in the socket and threaded portion left in the head) but never actually rounded off the hex with one of the old 12 point tools.
 
Last edited:
This post contains affiliate links which may earn a commission at no additional cost to you.
Was just having a quick skim through what I'd posted re the spark plug sockets. I think there's one very important thing I've not mentioned which is the thickness of the socket. By which I mean the wall thickness of the socket. If you look at the picture I posted above, repeated here:

P1100887.JPG


and look at the end of the 4th and 5th from the left - the special long Peugeot and adapted box spanner I made - you'll notice the ends are ground down to reduce the wall thickness. The Peugeot one was actually sold to me as specifically for doing that engine but I still had to grind it down to stop it fouling on the sides of the deeply recessed hole. Here is a picture of it compared to a box spanner which is how the Peugeot one looked before grinding down:

P1100902.JPG


So let's compare the two 21mm plug sockets I talked about above with a same size deep impact socket - which is the one on the right:

P1100900.JPG


See how much thicker the wall thickness is on the impact socket? Of course it needs to be for the jobs it may have to perform but I've seen cheaper plug sockets with sidewalls that thick and it's no good for many applications, especially where the plug is deeply recessed (at the bottom of a deep hole)

Also, just in case anyone is thinking of making one, here's a better picture of the "business" end of the thread cleaner made from an old plug:

P1100905.JPG


Finally some "nerdy" stuff on the plugs themselves. Take a look at these:

P1100904.JPG


Looking at them it's obvious there's two hex sizes here. 16mm for the two on the left and 21mm for the three on the right. This, of course, refers to the size of socket needed and these two sizes are the most common these days. However you'll commonly see a plug referred to as 14mm, or 12mm - with 12mm becoming more popular these days as cylinder head design becomes more cramped due to the positioning of injectors on Direct Injection engines where using the smaller diameter plug gives them a bit more room to accommodate "stuff". This sizing refers to the diameter of the threaded part of the plug and has nothing to do with the size of socket needed. You can see the plug on the left is a 12mm with the other four being 14mm. Thread pitch - the distance from the top of one thread to another - seems to be the same at 1.25mm. although you have to be a little careful because there are "weirdies" like the Pinto plug - the one on the far right - which, whilst not just being larger in diameter also has a pitch of 1.50mm and I've found some weird ones on horticultural stuff, especially if it's very old.

In real life though, all I do is walk into my local factor: https://allianceautomotive.co.uk/member/24736/srs-autoparts-edinburgh/ give them the registration number of the vehicle, wait a wee while for them check it on the computer and get the warehouse to assemble my order while I settle the bill with the counter staff. A few minutes later a chap appears at the warehouse door with all my parts in a cardboard box and I'm on my way again. I can't remember when they last supplied an incorrect part although it has happened, but not for a very long time and not with "easy" stuff like plugs and filters.

Having to deal with deeply recessed plugs is becoming pretty much the norm these days with modern double over head cam direct injection engines and locating the plug and getting it started into the threaded hole can sometimes be quite a challenge due to not just the depth of the hole but other "stuff" (hoses, wiring looms etc) getting in the way. Sometimes, in these circumstances, it can be useful to use a techinque long known to more experienced "grease monkeys". Push the plug into the end of a length of fairly stiff rubber (or similar) tubing, like this:

P1100906.JPG


Which will then let you locate the plug in the hole and start it into the thread before pulling the tube off and tightening down with a socket. Works well for both removing a plug after loosening with the socket or installing a new one, if you've got an old plug socket which the rubber insert has dropped out of. Also stops you getting it cross threaded as the tubing doesn't grip the plug well enough for this so will slip if the plug jams up on the threads - if you wind it in by half a dozen turns or so before pulling the tube off then you can be pretty certain you've not cross threaded it!

Edit. PS Any of you older chaps noticed the Champion N-9Y - middle plug in the picture of the 5 plugs above - a plug which used to turn up in many different brands of car and was especially loved by BMC/BL in things like Austin/Morris and MG ("proper" MGs that is) cars.
 
Last edited:
I got one of these Long tube with magnet to retain the plug. The magnets fall out but epoxy (or better PU mastic) will hold it in place.
 
This post contains affiliate links which may earn a commission at no additional cost to you.
Thank you very much for all the information above! A lot to take in there, but it looks like the spark plugs will be simple enough (with the right tools).

The reason I was looking at changing the spark plugs was because the car appears to be "pulling" back when building speed. I'm thinking it's a spark plug issue, but I know in aprevious car it was simply the intake was loose. Clamped it and then everything was fine.

I checked the intake on the Panda and it is a little loose but still in place. Exactly how much wiggle should there be when it's properly connected?
 

2740200002.png


(1) - CV joint which allows your wheels to steer.
(7) - wheel bearing. A tight press fit into the hub carrier (aka steering knuckle)
(8) - wheel drive flange; Its splined in the middle so the CV can turn the wheel. It's pressed into the wheel bearing inside.

Mechanic might be able to do the job without replacing the bearing but he will probably want to fit a new one as they are easily damaged.
Update: On recommendation here, I managed to get the flange and bearing replaced.

All in, I've dropped around £1050 on the car (which included the purchase of the car) so I'm quite happy with that.

Ghetto fixing the bumper with cable ties this week, then I have to decide do I sell up and purchase another one (100HP perhaps) or do I keep this as my runner for now?

There is a big difference between driving this and my last car (Audi A3 so to be expected). Bumpy, loud, hot, but my god does it have charm.
 
Another random thought, the cold air in my Panda is more "slightly warm" than anything. I understand the 1.1 Active Eco doesn't have air con, but is there a way to at least get colder air in the car? Does something need flushed?
 
You need to aways park in the shade when possible if the sun is out otherwise the cold air will always be warm for the first few miles
The shade - the thrifty man's air con. At home it's impossible, but when I'm out and about, playing the find the trees in the car park game is always fun.

Today's job is to see if the bumper is salvageable with cable ties. Thoughts?
panda1.jpg


Also noticed when looking at this the crash bar is absolutely bent. One of those things I should have checked before buying. Nevermind, live and learn. Still got myself a bargain overall.

panda2.jpg
 
The shade - the thrifty man's air con. At home it's impossible, but when I'm out and about, playing the find the trees in the car park game is always fun.

Today's job is to see if the bumper is salvageable with cable ties. Thoughts?
View attachment 426641

Also noticed when looking at this the crash bar is absolutely bent. One of those things I should have checked before buying. Nevermind, live and learn. Still got myself a bargain overall.

View attachment 426642
I'd definitely be keep a close eye on the coolant levels looking at that it's almost certainly touching the radiator by the looks of the picture
 
Regarding the bumper, I suppose anything can be repaired? But that looks like it's not worth the effort. I'd be looking for a replacement.

As chris is saying above, keeping an eye on the coolant level is always a good idea with our cars because they really don't like running with low coolant levels. She's obviously had a moderately serious "bump" so a general check of all the steering/suspension etc would be a good idea. long term I'd be keeping a very careful and regular check on tyre wear. If something is bent, even when not obvious to the eye, it'll often manifest itself as unusual or uneven tyre wear.
 
Difficult to recomend what to do with the bumper as its brocken in several places and some missing, epoxy, filler isn't cheap

I like to fix if possible. A clean break would be possible. There quite a lot of pressure when travelling at speed.

Possibly be cheaper to replace

New a possibility if you can find a trade parts supply they are £37 in Lithuania but postage is a killer.. There's a few around £50 with around £8 postage

A frendley breakers should be able to match, and a OEM bumper will be better quality

Screenshot_20230711_104922.jpg
Screenshot_20230711_105016.jpg
 
Last edited:
Difficult to recomend what to do with the bumper as its brocken in several places and some missing, epoxy, filler isn't cheap

I like to fix if possible. A clean break would be possible. There quite a lot of pressure when travelling at speed.

Possibly be cheaper to replace

New a possibility if you can find a trade parts supply they are £37 in Lithuania but postage is a killer.. There's a few around £50 with around £8 postage

A frendley breakers should be able to match, and a OEM bumper will be better quality
I was looking around online for a replacement (I think the exact one you linked) as if it's that cheap, it's probably worth it. Plus, if I take the bumper off I can do the crash bar at the same time.
Regarding the bumper, I suppose anything can be repaired? But that looks like it's not worth the effort. I'd be looking for a replacement.

As chris is saying above, keeping an eye on the coolant level is always a good idea with our cars because they really don't like running with low coolant levels. She's obviously had a moderately serious "bump" so a general check of all the steering/suspension etc would be a good idea. long term I'd be keeping a very careful and regular check on tyre wear. If something is bent, even when not obvious to the eye, it'll often manifest itself as unusual or uneven tyre wear.
Thanks for the heads up on that one. I'll check coolant levels the next time I've got it running, and I'll keep an eye on those tyres. Suspension seems to be fine (according to the garage) but if there's a specific way I can check myself (outside of "that feels weird") then let me know.

You're based in Edinburgh too, any breakers or anything like that you frequent?

I'm going on a big journey on Friday. Trying to decide if I can try get the bumper off and bar replaced before then or if I should wait until I come back.
 
Back
Top