DSC09035.JPG

500 (Classic) Dexter the 1962 Fiat 500D

Introduction

Welcome to my blog for my 1962 Fiat 500D.

I had already started a blog although I wasn't able to change the title and thought it would be best to start a new one with a more descriptive title for others to search and hopefully aid them in their own restoration.

I have split it into 2 sections. This part will be the main vehicle.
The other part will be the engine of which you can find here:
https://www.fiatforum.com/500-classic/444739-fiat-500d-engine-1962-a.html

I took ownership of this 500 in April 2014. This was just after I bought my first restoration project, a 1971 Fiat 500L.
https://www.fiatforum.com/500-classic/345169-franko-1971-500l.html
Sadly I was too far into the L to stop and so the D had to be tucked away until I had the time to start it.
I eventually decided to call him Dexter.

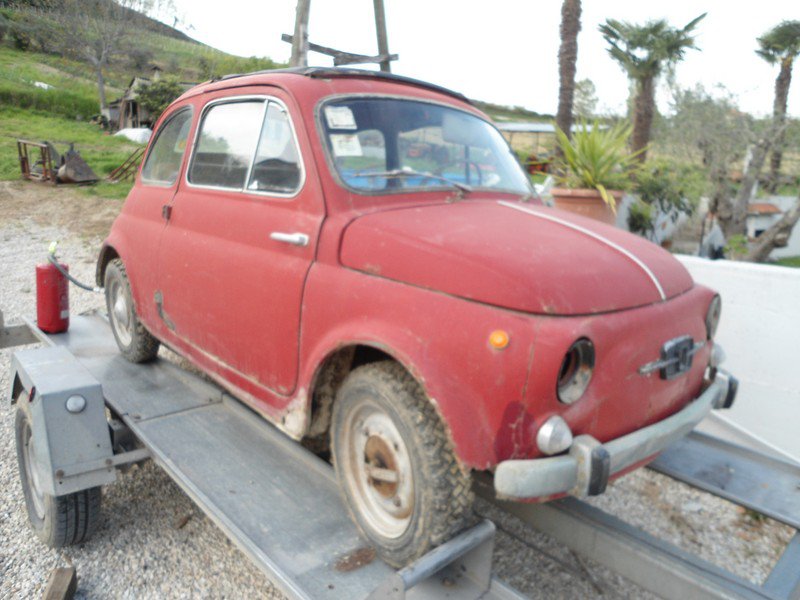
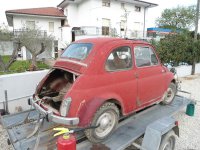
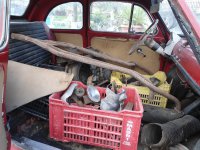
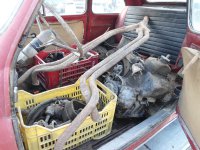
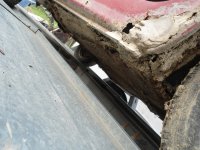
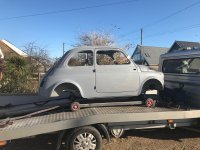
Here' some photos of the vehicle when it was first offered to me. It was at the time on the back of a trailer in southern Italy.
I confirmed I was interested in it, but really wanted to see it before being fully committed. Although I did have a certain forum member that was like the devil on my shoulder saying "Buy it"
devil.gif
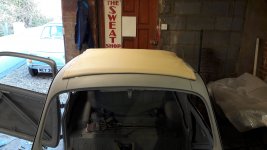
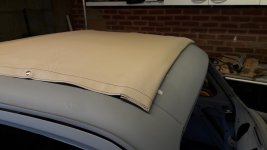
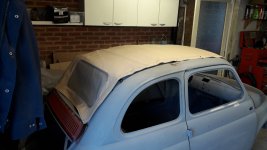
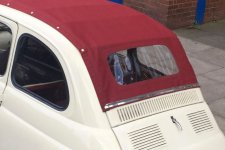
Who's idea was it to go for the full sun roof?


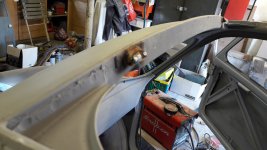
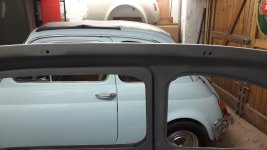
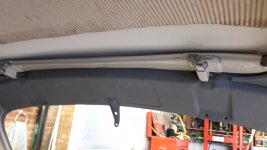
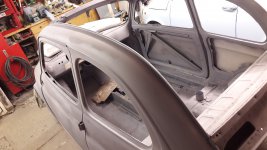
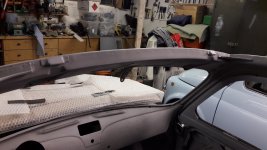
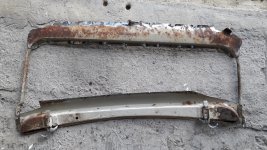
What a nightmare. When I first tried to fit it the front rail would not close down properly. The front edge of the frame was sitting on the front screen rail and the catches were sitting about 3mm higher than the strikers.
Compared to the old one you could see the catches were not at the correct angle. So I tried bending the front frame rail which gave me about another millimetre. Still not enough to close it and that's before the hood cover was on it or the foam strip.
I compared it to the old one and the frame itself was about 2mm difference between the catches and the rail.:eek:
I contemplated pulling the new frame apart and welding in the new front rail. I removed the old one, cleaned it up and then I thought why am I going to all this effort?
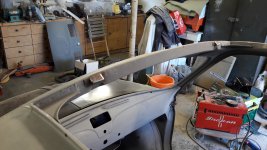
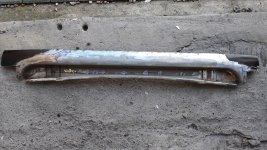
So out came the angle grinder and I cut the bottom 6mm off the strikers on the windscreen rail. Then welded them back on 3mm higher up than before. I still needed to reshape the front edge of the roof frame but now the hood frame fits and closes nicely.
The cover looks to be a good fit, it will need pulling tight and fastening when the car is all painted.
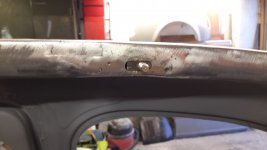
I finally welded in my new hinge point for the full frame. These were tricky as there isn't much room and I had to be careful not to weld the slider in place.
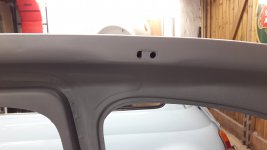
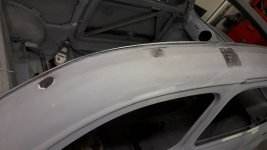
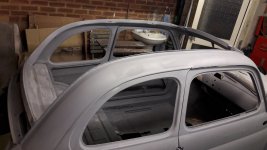
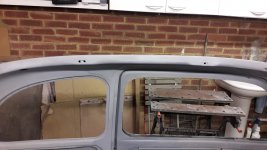
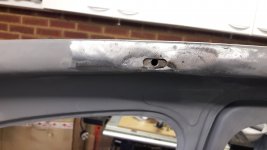
And last of all I welded up the holes in the side roof rails where the D metal hood fixes on.


I reckon I could sell this on as a N model:D
 

Attachments

  • 20191110_150334.jpg
    20191110_150334.jpg
    2.7 MB · Views: 58
  • 20191110_150342.jpg
    20191110_150342.jpg
    2.4 MB · Views: 57
  • 20191110_150349.jpg
    20191110_150349.jpg
    2.5 MB · Views: 62
  • 20191110_132750.jpg
    20191110_132750.jpg
    2.8 MB · Views: 62
  • 20191110_150436.jpg
    20191110_150436.jpg
    3.2 MB · Views: 62
  • 20191111_183512.jpg
    20191111_183512.jpg
    2.5 MB · Views: 62
  • 20191111_183517.jpg
    20191111_183517.jpg
    2 MB · Views: 55
  • 20191110_161313.jpg
    20191110_161313.jpg
    2.1 MB · Views: 59
  • 20191110_161256.jpg
    20191110_161256.jpg
    2.1 MB · Views: 62
  • 20191110_150402.jpg
    20191110_150402.jpg
    2.6 MB · Views: 61
  • 20191111_183455.jpg
    20191111_183455.jpg
    2.4 MB · Views: 51
  • 20191111_183444.jpg
    20191111_183444.jpg
    2.7 MB · Views: 52
  • 20191111_183523.jpg
    20191111_183523.jpg
    2.8 MB · Views: 51
  • 20191111_183502.jpg
    20191111_183502.jpg
    2.9 MB · Views: 61
  • 20191110_161304.jpg
    20191110_161304.jpg
    2.2 MB · Views: 55
Who's idea was it to go for the full sun roof?


What a nightmare. When I first tried to fit it the front rail would not close down properly. ..........
I reckon I could sell this on as a N model:D

Well, we know you really wanted an N with a full sun roof...
so like all the other D owners you tried to create one....
and used Repro parts :D:D:D
I do think many people remove the front rail and use an original one...
Nice to see the holes welded up.... may even fool people into believing there was a full Sun roof D actually made...

But the front mounting holes give the game away, hence why I was asked to remove the paint on my Ecconomica to show it was not a converted car...

still looking good... guess it will be road ready for the summer next year
Hopefully it will all be ready for the Spring.
The new roof frame looks good and well made. There are a few differences though.
Like I said there are some differences in the sizes on the front rail - I really came close to fitting my old front rail on the new frame.
The aluminium catches are not removeable like the early ones. Very close but you have to drill the pin out (which is actually more robust than the original)
If I had an original one I would refurbish it rather than fit a new one, but I would hazard a guess to say they are more rare than finding a genuine N with its original front panel with the grilles in it.:D
Still, im on a mission to make it a nice D. It will not be perfect for the purists but it will be another great example on the road (or stored in my garage).
Are you saying they didn't make a full sunroof D?:eek: But I have seen so many on the internet.;)
 

Attachments

  • 20191110_113557.jpg
    20191110_113557.jpg
    5.4 MB · Views: 47
  • 20191110_122254.jpg
    20191110_122254.jpg
    5.6 MB · Views: 41
Last edited:
..................................).
Are you saying they didn't make a full sunroof D?:eek: But I have seen so many on the internet.;)

Well people claim the D was available as a Transformable....
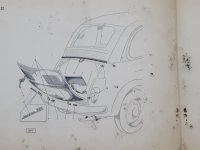
but as I lent my factory parts books to someone I can't scan the "roof" pictures....
Nor in any of the D Instruction manuals I have is there a picture of a Transformable D...

Bit like the Dealer who tried to tell me that they didn't make any RHD N's and they were converted after they left the factory.... Amazing that someone would go to all the trouble of making RHD steering boxes, new dash boards etc etc to export to Malta, NZ,OZ and SA, all with Fiat casting marks...

I suspect some dealers may have converted cars as it was probable that the parts were still available from Fiat
 
Who's idea was it to go for the full sun roof?


What a nightmare. When I first tried to fit it the front rail would not close down properly. The front edge of the frame was sitting on the front screen rail and the catches were sitting about 3mm higher than the strikers.
Compared to the old one you could see the catches were not at the correct angle. So I tried bending the front frame rail which gave me about another millimetre. Still not enough to close it and that's before the hood cover was on it or the foam strip.
I compared it to the old one and the frame itself was about 2mm difference between the catches and the rail.:eek:
I contemplated pulling the new frame apart and welding in the new front rail. I removed the old one, cleaned it up and then I thought why am I going to all this effort?
So out came the angle grinder and I cut the bottom 6mm off the strikers on the windscreen rail. Then welded them back on 3mm higher up than before. I still needed to reshape the front edge of the roof frame but now the hood frame fits and closes nicely.
The cover looks to be a good fit, it will need pulling tight and fastening when the car is all painted.
I finally welded in my new hinge point for the full frame. These were tricky as there isn't much room and I had to be careful not to weld the slider in place.
And last of all I welded up the holes in the side roof rails where the D metal hood fixes on.


I reckon I could sell this on as a N model:D

So now you’ve mastered the sunroof perhaps you could sort mine for me :)
I don’t mean to bleat on about the N thing but is there any difference in the fitting of the roof frame as my catches are different to yours :confused:
 
So now you’ve mastered the sunroof perhaps you could sort mine for me :)
I don’t mean to bleat on about the N thing but is there any difference in the fitting of the roof frame as my catches are different to yours :confused:

in what way are your catches different Andy?
on my one car the alloy parts are slightly different shape, but the metal part on the body is the same....
I will check out the others....


I do have a car with a system that even my Italian mates have ever seen!!!
it has a single central lever and even though it is a full sun roof it uses the front mounting points...

Not sure if you have got round to your starter motor Sean.. but if you can send me a pic.. in particular the rear casing....
I have been sorting and found 2 spare 2 bolt starters, one the same as Andy's the other.... "different"...

I am trying to be even more geeky and get pictures and corresponding year when changes were made....

apparently March 1959 a whole raft of changes were made..
 
So now you’ve mastered the sunroof perhaps you could sort mine for me :)
I don’t mean to bleat on about the N thing but is there any difference in the fitting of the roof frame as my catches are different to yours :confused:
I just checked your thread and your aluminium catches are very different to mine. The one picture of the steel parts welded to your front screen rail looks the same as mine.
So there is a possibility they are early ones? or non genuine or just Portugal ones?
 
I just checked your thread and your aluminium catches are very different to mine. The one picture of the steel parts welded to your front screen rail looks the same as mine.
So there is a possibility they are early ones? or non genuine or just Portugal ones?

Yeah I see what you mean it’s probably just a different aluminium catch because it’s an N :):) or maybe as you say just different for the Portuguese market. I know on old classic bikes many model bikes had all sorts of bits and bobs something to do with not paying bills so have to use different suppliers all the time “apparently”
 
That's all the seams all sealed.
Just a few last minute items to check and then its ready to go to the paint shop.
It's been a long time coming.
All I need to do now is find the right person to paint it for me.
 

Attachments

  • IMG_8905[1].JPG
    IMG_8905[1].JPG
    2.7 MB · Views: 68
  • IMG_8901[1].JPG
    IMG_8901[1].JPG
    2.4 MB · Views: 59
  • IMG_8900[1].JPG
    IMG_8900[1].JPG
    2.4 MB · Views: 67
  • IMG_8897[1].JPG
    IMG_8897[1].JPG
    2.9 MB · Views: 63
  • IMG_8898[1].JPG
    IMG_8898[1].JPG
    2.6 MB · Views: 59
  • IMG_8908[1].JPG
    IMG_8908[1].JPG
    3 MB · Views: 62
  • IMG_8909[1].JPG
    IMG_8909[1].JPG
    2.7 MB · Views: 63
superb work as ever.... love the door fit..

before you jump into paint.. hold fire and check a couple of things....

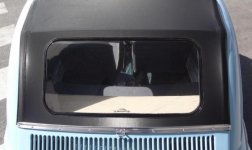
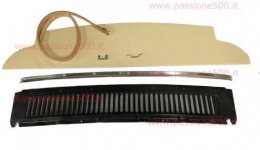
Is the air intake grill across the back the original one?
I am sure the full roof version is different to the short roof...

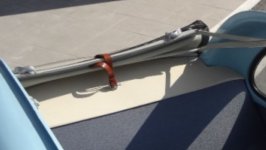
Next the Sunroof rolls up and held closed with a leather strap...
this strap locates round a couple of fixings one located inside the car of the parcel shelf and the other on the alloy strip across the back...
these mountings may nee to be drilled, so before paint would be better...


Hard to explain here... but will try to repost a couple of your pics or give me a ring and I will explain...
Doubt it would be shown in D parts books but would be in N ones
 
Don't worry I have already thought of those!


Is the air intake grill across the back the original one? Yes I removed it from the hard top. It looks identical to the one available except it has 9 holes instead of 10.
I am sure the full roof version is different to the short roof...Only that it has 2 holes in the middle instead of one due to the different aluminium strip that has 2 holes to mount the bracket. That's easy to remedy.
The top of the grill is mounted to the body with self tapping screws. My rear body does have 2 6mm holes pre drilled where the aluminium strip mounts. So im not sure if there should be a mounting plate there or not for threaded screws? I can make one of those and fit it behind easily or use self tapping screws through my grille panel.

Next the Sunroof rolls up and held closed with a leather strap... Bought one of those
this strap locates round a couple of fixings one located inside the car of the parcel shelf and the other on the alloy strip across the back... Bought these.
these mountings may nee to be drilled, so before paint would be better... The one inside the car is the same as the original. not sure if the holes are in the right place. I can easily drill 2 new holes once the roof is fully in place. The one on the outside mounts on or under the rear aluminium strip with 10 holes (bought one of these).


I have checked quite a few 500's on the internet.
Its seems most of the D's converted to full roof used the 9 hole aluminium strip and either have no bracket for the strap or looks like they have made one to fit.
Also most of the N's that I could find have the 10 hole strip but don't show the bracket.

One of the pics show where someone has used the 9 hole strip but then mounted the correct bracket under the strip.
Im thinking that the bracket should be on top of the strip?
 

Attachments

  • Roof strap.JPG
    Roof strap.JPG
    34.8 KB · Views: 56
  • Roof bracket wrong.JPG
    Roof bracket wrong.JPG
    80.8 KB · Views: 55
  • roof bracket missing.JPG
    roof bracket missing.JPG
    47.4 KB · Views: 58
  • Roof parts.JPG
    Roof parts.JPG
    25.2 KB · Views: 57
Don't worry I have already thought of those!

had a feeling you would... but you may have got too excited about Paint...

The alloy strip... People simply weld up the middle hole and drill two more for the bracket as a new strip is stupid money....

I noticed those two holes in the rear... without taking a the grill off my cars I am not sure if there are captive nuts or such... I am sure that using some bolts that match the self tappers would be better as the bracket could pull out the screws over time driving with the hood rolled up and strapped down..
The bracket is under the alloy strip on my car..

so effectively the bracket is held down by the whole length of the strip....
does the repro bracket have any holes or would the screws go right through?
since as you say there are two 6mm holes which must either mean the bracket is attached to the alloy strip and those hoes are just for clearance or to have something behind to allow more substantial fastening (but then why have holes?)
There seems to be a mix of on top or underneath, the alloy strip, but I cannot see being on top as being right as it looks like n after thought..

What was there on Andy's car?


It may be the difference between early grills and later ones I was thinking about.....
 
Last edited:
Excellent!!!! We’ll be able to have a build of soon. What’s all that rough stuff under the wheel arches. Are the holes for the rear lights the right shape ?
 
What’s all that rough stuff under the wheel arches. Are the holes for the rear lights the right shape ?


That's sealer. Its to prevent water getting in and causing rust.
The complete underneath of mine has then been covered with a thick coating of stonechip to add further protection before painting.


I would imagine that yours will be smooth and shiny as with the rest of your hot rod. But then yours will be a show piece as its a royal N
worship.gif

Plus yours wont even be going near a bucket of water let alone going out in the rain.


Yes my rear light holes are correct. The D's (late N's) had the inferior rear lamps fitted:eek:
 
After a long weekend of discussions with the wife...
Dexter was going to go green with beige interior.


I had a few spray out cards done but I just couldn't bring myself to have a green car.


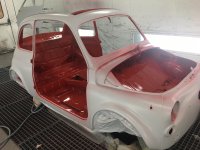
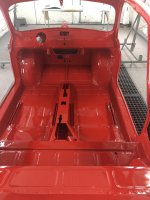
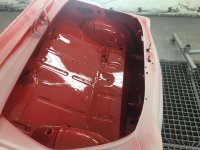
So eventually I the decision was made to go 115 Rosso Medium red.
So he is going back to his original colour
thumb.gif


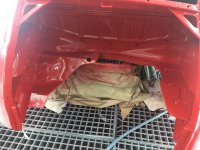
Photos back from the paint shop today.
 

Attachments

  • IMG-20200305-WA0001.jpg
    IMG-20200305-WA0001.jpg
    196.4 KB · Views: 46
  • IMG-20200305-WA0002.jpg
    IMG-20200305-WA0002.jpg
    182.1 KB · Views: 53
  • IMG-20200305-WA0003.jpg
    IMG-20200305-WA0003.jpg
    210 KB · Views: 53
  • IMG-20200305-WA0000.jpg
    IMG-20200305-WA0000.jpg
    181.6 KB · Views: 57
.......................
Dexter was going to go green with beige interior.

So eventually I the decision was made to go 115 Rosso Medium red.
thumb.gif

......................................

But are you going for the common Mass produced Plastic interior or the Upmarket Prototypi Cloth...
D's had the option as well!!!
 
Last edited:
Back
Top