DSC09035.JPG

500 (Classic) Dexter the 1962 Fiat 500D

Introduction

Welcome to my blog for my 1962 Fiat 500D.

I had already started a blog although I wasn't able to change the title and thought it would be best to start a new one with a more descriptive title for others to search and hopefully aid them in their own restoration.

I have split it into 2 sections. This part will be the main vehicle.
The other part will be the engine of which you can find here:
https://www.fiatforum.com/500-classic/444739-fiat-500d-engine-1962-a.html

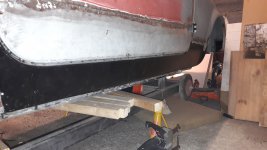
I took ownership of this 500 in April 2014. This was just after I bought my first restoration project, a 1971 Fiat 500L.
https://www.fiatforum.com/500-classic/345169-franko-1971-500l.html
Sadly I was too far into the L to stop and so the D had to be tucked away until I had the time to start it.
I eventually decided to call him Dexter.

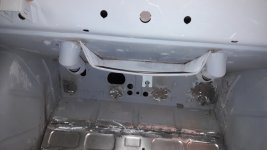
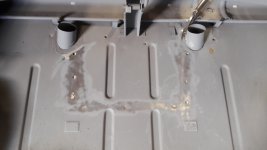
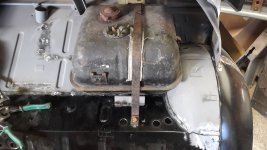
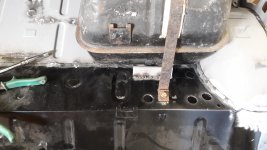
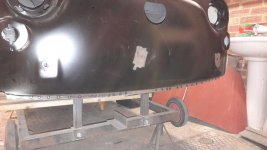
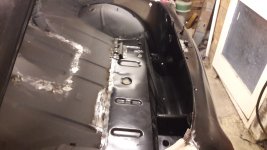
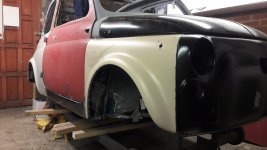
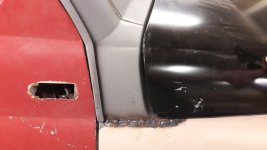
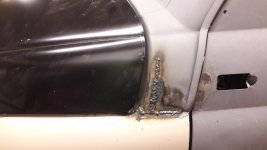
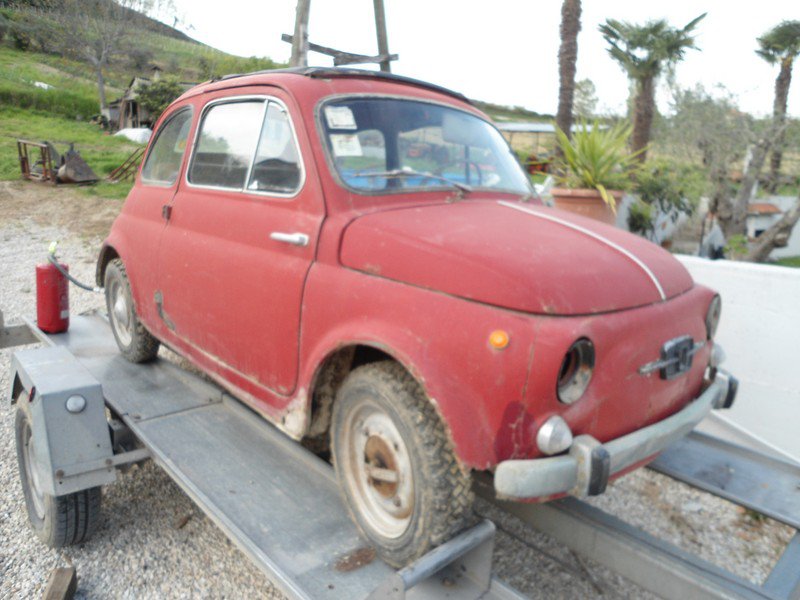
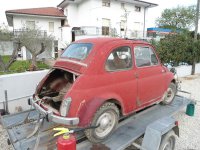
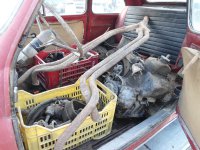
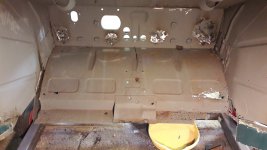
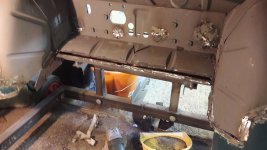
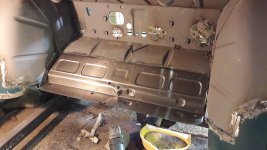
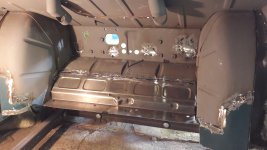
Here' some photos of the vehicle when it was first offered to me. It was at the time on the back of a trailer in southern Italy.
I confirmed I was interested in it, but really wanted to see it before being fully committed. Although I did have a certain forum member that was like the devil on my shoulder saying "Buy it"
devil.gif
I cut the centre tunnel out of the floor today. Plus I renewed the lower bulkhead section. This was quite straight forward and lined up well.
Rather than replace the whole bulkhead panel I cut out the 4 rusty sections from the back and welded new sections in place in the upper section.
These will be finished off with a thin skim of filler and sealer around the joints will also disguise most of the welds.

There is a lot of difference in terms of holes on the new 126 panels plus this would have meant a lot of work to remove the whole panel.
I was quite pleased how this turned out.


The new floor has been temporarily put in place.
I know this is a 126 floor pan and there are a few variances from the D, F & L model but I thought this was the better option.
I had to modify the 2 front corners as they weren't the same shape as the 500 and caused the floor to sit back 1/4 of an inch.
All is looking okay apart from the floor pan is about 1/4 of an inch narrower than the distance between the sills at the back.
But I have a cunning plan.
My angle grinder decided to stop working today. The brushes have worn down and wont make contact. Not bad really for the first set of brushes in 33years. I doubt black and decker make products that last that long anymore.
 

Attachments

  • 20190202_101720.jpg
    20190202_101720.jpg
    2.6 MB · Views: 79
  • 20190202_101750.jpg
    20190202_101750.jpg
    2.9 MB · Views: 73
  • 20190202_110031.jpg
    20190202_110031.jpg
    3 MB · Views: 72
  • 20190202_113849.jpg
    20190202_113849.jpg
    3.3 MB · Views: 71
  • 20190202_122847.jpg
    20190202_122847.jpg
    2.9 MB · Views: 74
  • 20190202_154745.jpg
    20190202_154745.jpg
    2.6 MB · Views: 68
  • 20190202_154813.jpg
    20190202_154813.jpg
    2.6 MB · Views: 67
  • 20190202_154807.jpg
    20190202_154807.jpg
    2.9 MB · Views: 65
  • 20190202_154722.jpg
    20190202_154722.jpg
    2.8 MB · Views: 69
Last edited:
................................................................
My angle grinder decided to stop working today. The brushes have worn down and wont make contact. Not bad really for the first set of brushes in 33years. I doubt black and decker make products that last that long anymore.

Wondered if you were still going for the one piece floor plan...
guess it cuts down welding and less seams to seal....

did it come with those horrible strengthener pieces underneath?

And I have now sussed out why you say "this is the last......"
First the Spot welder packing up, now the angle grinder....

What you are really worried about is having to buy new tools :devil::devil::devil:
You can now buy the floor as a 126 with those extra supports included or you can buy the floor with the 500 floor support and runners. I got the later.


And yes you are right. I don't like the idea of buying new power tools that I may not need in the future. Although I could always sell them on after.
But the main reason is I have other hobbies and life is getting a little bit too busy at the moment, so I don't really want to take another project on in a hurry. I wont say never, but with over 30 years in the car repair trade I think I may of had my fair share of playing with cars.
Plus I am getting a little fed up with my garage being forever in a mess.


I have next Friday and the following Monday off so I am hoping to get a fair bit done next weekend.
 
Take it easy on the restoration Sean; I've found that it is possible to sicken yourself with too much of anything. I've taken a rest from the van for a few months and concentrated on chopping down trees and splitting them into logs. Now I'm feeling good to go with another frantic few months messing with cars.
 
I have been busy the last few days.
The front inner arches were repaired.
The floor has its seat supports welded on and the floor pan welded in front and rear.
Today I welded the 1/4 panel in place and then the inner and outer sill.


One thing is for sure, the later ones are far better in terms of replacement of the panels. These early ones are a nightmare to get them all to line up. There is so much trial fitting and adjusting and you have to have so many panels clamped in place at once to make sure everything fits.


Still that's one side nearly completed.


Tomorrow I start the other side.
 

Attachments

  • 20190210_151858.jpg
    20190210_151858.jpg
    2.4 MB · Views: 60
  • 20190210_151841.jpg
    20190210_151841.jpg
    2.4 MB · Views: 61
  • 20190210_124409.jpg
    20190210_124409.jpg
    2.5 MB · Views: 68
  • 20190208_134347.jpg
    20190208_134347.jpg
    3.5 MB · Views: 63
  • 20190208_134341.jpg
    20190208_134341.jpg
    2.9 MB · Views: 69
  • 20190210_183929.jpg
    20190210_183929.jpg
    2.2 MB · Views: 56
  • 20190210_183922.jpg
    20190210_183922.jpg
    2.2 MB · Views: 55
  • 20190210_183901.jpg
    20190210_183901.jpg
    2.8 MB · Views: 66
  • 20190210_183843.jpg
    20190210_183843.jpg
    3 MB · Views: 61
  • 20190210_170433.jpg
    20190210_170433.jpg
    3.1 MB · Views: 63
  • 20190210_183958.jpg
    20190210_183958.jpg
    3.2 MB · Views: 55
  • 20190210_184231.jpg
    20190210_184231.jpg
    2.5 MB · Views: 57
I have been busy the last few days.
The front inner arches were repaired.
The floor has its seat supports welded on and the floor pan welded in front and rear.
Today I welded the 1/4 panel in place and then the inner and outer sill.


One thing is for sure, the later ones are far better in terms of replacement of the panels. These early ones are a nightmare to get them all to line up. There is so much trial fitting and adjusting and you have to have so many panels clamped in place at once to make sure everything fits.


Still that's one side nearly completed.


Tomorrow I start the other side.


that one piece floor must make life so much easier....

it must be so much easier to keep everything square......

(If they were too easy to restore.... everyone would want a Prototypi)
 
Good progress today.
Left inner and outer sill welded in place.
Although the rear of the sill panel looks the correct shape, it is not quite the right contour of the panel. I will have to do some dressing up before the finishing stage.
Because of where the joint is (nearly a 1/3 of the way up the flat part of the panel) I had to take it really easy with the mig welder. A few tacks at a time and then cool it down with a wet sponge to prevent the heat from distorting it.
This means you don't get a very nice looking weld but once it has been ground back it will be fine.


Overall a massive improvement on how it used to look.
Back to work tomorrow, so probably wont get anymore done until the weekend.
Next stage is to replace the rear engine shield platform and inner fillet panel. After that its the front end.
 

Attachments

  • 20190211_175949.jpg
    20190211_175949.jpg
    2.8 MB · Views: 66
  • 20190211_175850.jpg
    20190211_175850.jpg
    3 MB · Views: 60
  • 20190211_175834.jpg
    20190211_175834.jpg
    2.9 MB · Views: 58
  • 20190211_175743.jpg
    20190211_175743.jpg
    3.1 MB · Views: 57
  • 20190211_175726.jpg
    20190211_175726.jpg
    2.7 MB · Views: 59
  • IMG_1970.JPG
    IMG_1970.JPG
    2.2 MB · Views: 65
that one piece floor must make life so much easier....

it must be so much easier to keep everything square......

(If they were too easy to restore.... everyone would want a Prototypi)
Well when I first fitted it in place I had a gap either side where it meets the sills by the rear floor.
It took a while to realise that I had made the 2 fillet panels that fit between the inner 1/4 panels and the rear floor based on the L ones. They were slightly wider than the D ones and so held the sills further apart.
I had to cut them out and start all over again. Problem sorted.
Other than that there was just the small tweak to the front corners that needed moving by 1/4 inch. I guess there must ne a slight difference between the 500 and the 126 floor pan.


If anyone knew what a pain in the arse these early models are to restore then they really wouldn't bother!
biggrin.gif
 
.........
If anyone knew what a pain in the arse these early models are to restore then they really wouldn't bother!
biggrin.gif

I think anyone who has read you restos appreciates the work you put in to get the panel fit right...

Given the amount of work you do to get what should be a basic panel to fit always makes me wonder how these "professional" restorations can simply slap panels on in the "complete body restorations" as you show very few actually fit...

Along with the photos do you keep any diary of the hours you spend to do things? it would be an interesting account of the work involved to achieve the standards that I think most people would love to achieve...
 
I started today with a trial fit of the panels. Everything fitted ok - ish.
The bonnet has a few tweaks to be made. i.e. trimming up the inside lip as its too wide.
The bonnet wouldn't close as the bonnet lock is welded slightly in the wrong place so I had to drill out the spot welds and reposition it.
The wing tops that joint the front panel are a little short so a small insert will be required to butt these up nicely.
With all the panels in place the front halves of the inner arches were welded in place. Nowhere near where they were originally joined together and they took a fair bit of work reshaping to fit the arch of the wing.
Next to be welded in was the inner front panel, this was done whilst all the panels were clamped in place then I removed the outer panels to finish off the welding.
The front wings and front panel have all been cleaned up around the edges and the wings welded onto the front panel.
Tomorrow I will try the tank in place, fit the bracket and a securing nut for the tank strap. Also a couple of holes need to be made for the speedo, fuel pipe and brake pipe.
Then hopefully weld all the front outer panels in place.:)
 

Attachments

  • 20190223_144208.jpg
    20190223_144208.jpg
    2.2 MB · Views: 57
  • 20190223_144202.jpg
    20190223_144202.jpg
    2.2 MB · Views: 59
  • 20190223_183310.jpg
    20190223_183310.jpg
    2.4 MB · Views: 58
  • 20190223_143700.jpg
    20190223_143700.jpg
    2.7 MB · Views: 65
  • 20190223_143438.jpg
    20190223_143438.jpg
    2.8 MB · Views: 66
  • 20190223_162956.jpg
    20190223_162956.jpg
    3 MB · Views: 64
  • 20190223_183319.jpg
    20190223_183319.jpg
    2.8 MB · Views: 63
  • 20190223_183332.jpg
    20190223_183332.jpg
    2.6 MB · Views: 64
  • 20190223_183344.jpg
    20190223_183344.jpg
    3.1 MB · Views: 63
Front end fully welded in place.
Dashboard undershelf straightened and welded back in place.
Fuel tank bracket installed and tank strap nut added, plus holes for pipes & cables.
The bonnet shuts really well before I have made any alterations which is great. Only down side is the back corners don't quite match the scuttle panel.
So I will probably end up cutting these and welding in a section from the old bonnet. Its a shame these bonnets don't actually fit.
thumb_down.gif
 

Attachments

  • 20190224_100602 - Copy.jpg
    20190224_100602 - Copy.jpg
    3.4 MB · Views: 59
  • 20190224_173306.jpg
    20190224_173306.jpg
    2.6 MB · Views: 57
  • 20190224_100545 - Copy.jpg
    20190224_100545 - Copy.jpg
    2.4 MB · Views: 52
  • 20190224_100619.jpg
    20190224_100619.jpg
    2.7 MB · Views: 54
  • IMG_1335.JPG
    IMG_1335.JPG
    6.6 MB · Views: 61
  • 20190224_114709.jpg
    20190224_114709.jpg
    3 MB · Views: 60
  • 20190224_114842 - Copy.jpg
    20190224_114842 - Copy.jpg
    3.2 MB · Views: 55
  • 20190224_173133.jpg
    20190224_173133.jpg
    3.2 MB · Views: 53
  • 20190224_173215.jpg
    20190224_173215.jpg
    2.6 MB · Views: 59
  • 20190224_173143.jpg
    20190224_173143.jpg
    2.4 MB · Views: 56
  • 20190224_173057.jpg
    20190224_173057.jpg
    2.5 MB · Views: 60
  • 20190224_173111.jpg
    20190224_173111.jpg
    2.4 MB · Views: 58
......... Its a shame these bonnets don't actually fit.
thumb_down.gif

Did you buy a Prototypi bonnet or a mass produced later one?

Nice to see the "Guide to Prototypi Restoration" is coming along....

Really think you have to do an N though... :):):):)
 
Did you buy a Prototypi bonnet or a mass produced later one?

Nice to see the "Guide to Prototypi Restoration" is coming along....

Really think you have to do an N though... :):):):)


It is a 500D bonnet. Comes complete with the D hinge plate.
I tried my original D bonnet which is a better fit, but is too badly corroded and dented all over and beyond sensible repair.


No N's here...too much money, too much hype.:D
And apart from the chassis number the later ones are not really much different to the D. And the early N's have too many parts which are not available or are ridiculous prices.


So happy to have the D. And as I said, no more after this one!:)
 
Back
Top