Myusername
New member
- Joined
- Sep 14, 2021
- Messages
- 86
- Points
- 44
Well I've had the little Panda for a few months now, and driven it about 2000 miles. Generally I'm very pleased with it. However it's certainly not the best example of the breed, and has clearly had 1 careful owner and 12 careless ones.
My question is regarding the way it drives - it's pretty horrible. I don't mean because it's a small car, I mean there's something not right with it.
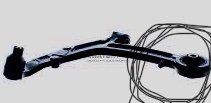
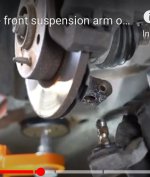
I do about 120 miles per week on dual carriageway, and it's a handful - it wanders, requires constant correction and concentration. There's knocking which can be heard and felt through the steering wheel, and at times loud unpleasant drumming through the structure which can also be felt through the wheel, almost as if some rubber bushing has failed allowing metal to metal contact.
Any thoughts on what the common wear points are before I consider shelling out for parts? And how do the fixtures and fittings respond to attempts to take them apart? On my last car everything came apart beautifully when required, but on a Vauxhall I owned previously, fixings were corroded lumps of rust!
Advice from the collective greatly appreciated.
My question is regarding the way it drives - it's pretty horrible. I don't mean because it's a small car, I mean there's something not right with it.
I do about 120 miles per week on dual carriageway, and it's a handful - it wanders, requires constant correction and concentration. There's knocking which can be heard and felt through the steering wheel, and at times loud unpleasant drumming through the structure which can also be felt through the wheel, almost as if some rubber bushing has failed allowing metal to metal contact.
Any thoughts on what the common wear points are before I consider shelling out for parts? And how do the fixtures and fittings respond to attempts to take them apart? On my last car everything came apart beautifully when required, but on a Vauxhall I owned previously, fixings were corroded lumps of rust!
Advice from the collective greatly appreciated.