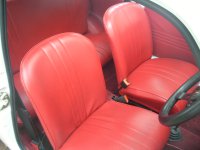
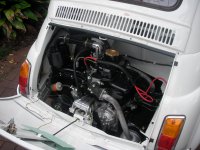
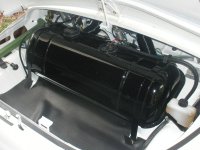
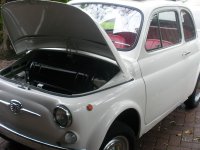
trailer2.jpg

500 (Classic) 500F Rebuild

Introduction

This may be the shortest rebuild thread here. It is going to be a race to the end of the project or to the end of the funds. I am sure there are those of you who know what I mean.

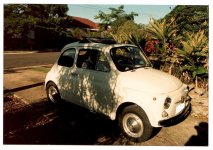
I have owned the car for about 24 years, I did a quick rebuild/tidy when I purchased it. Used it as my daily drive for about 14 years and then took it off the road about 10 years ago. (There is more to this story but this will have to suffice for now.)

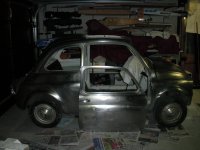
In the last month I have done a parts strip and have almost finished the paint strip so that I can ship the body off to my panelbeater. If I don’t do what I can do myself then the car will sit for another ten years.

Regards

Joe R

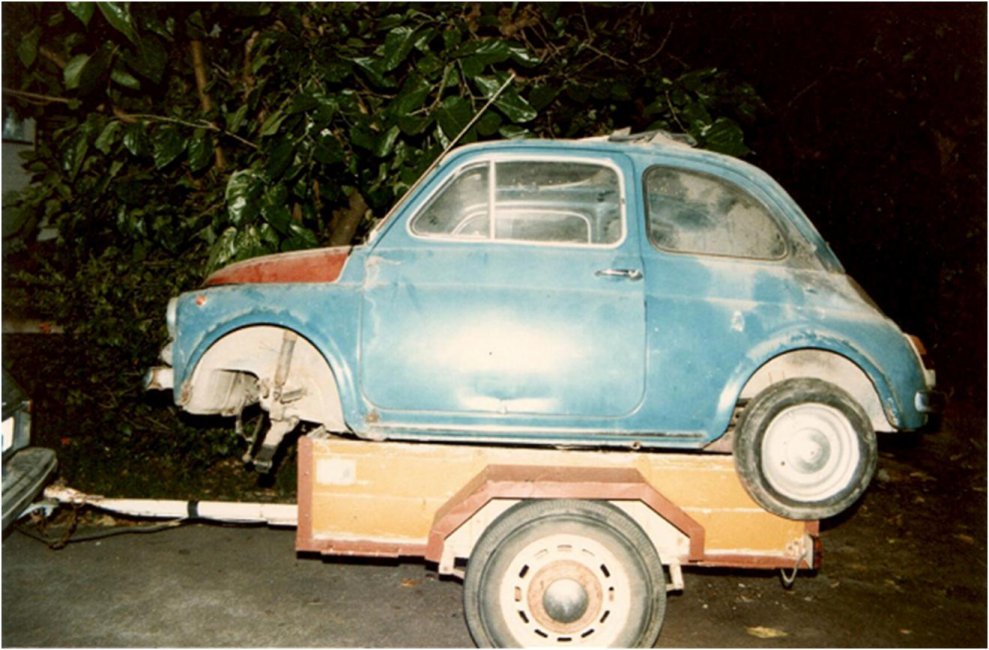
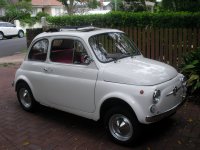
24 years ago (Free delivery!)
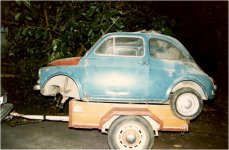
trailer2.jpg


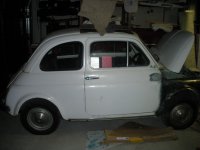
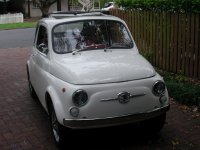
About 15 years ago
scan0001.jpg


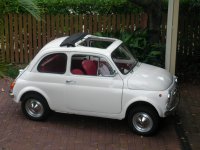
1 Month ago
SANY0324.JPG


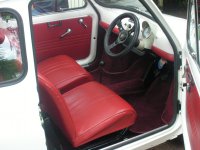
Today
SANY0439.JPG

Now for a quick quiz. Found this on the roof. I think I know the letters and numbers and I have a theory on what it all means. Chocolate frog for the correct answer. (Judged by forum consensus and the prize has to be collected in person.)

SANY0365.JPG
Thanks Chris.

When I look at my car it just looks odd and I know that I don't have a lot of cable lenght to tidy it up and keep it roughly where it is.

Joe R
 
The restoration is coming along very well, I wish that I could get my hands on one. The ones that are for sale here in South Africa go for more than R100 000 (roughly £8300), they are fully restored cars. My dad owned a 500 before he got married and he said he absolute loved the car and especially the long suspension travel that it had meant it could go anywhere.
 
Guys,

a merry Xmas to you all. I hope you all have a great day and can still fit in your car after lunch.....

You may remember I had issues with my qtr vent window frames. My originals had rusted out so I got some stainless ones as replacements. Problems with the new ones was that they were the wrong shape, the pivot point was at the wrong angle and trying to bend the pivot just broke them off. I think others have managed with these parts, not sure why I had so many issues.

Long story short, I took my old ones to a plating business and without blinking an eye the owner said 'I can fix that'. I got them back last night and they look so good. These guys deal with this sort of thing all the time, I don't know why I did not check the repair process out first. I can now get on and put my doors together. I am not going to use a rubber seal in the frame to hold the glass in, I am going to use a sealant instead. If anyone sees any issues with that can you let me know please?

I bought a battery so I could start testing my electrics. Thought my major issue was going to be with earthing out the components. As it turns out this looks like it will not be a problem. There are other gremlins though. (and why is no one surprised?) Biggest issue is that when the lighting master switch on the dash is off the lights behave as they should when I use the column stalk. When the master is on the stalk has no effect. This is the reverse of what it should be and I am not sure how this can be, but it is my little challenge at the moment. I know with these things that you just have to focus on one thing and work it through. By fixing one problem you generally fix a second as well. One thing I have done is to use lengths of old house fuse wire (of the correct rating) to repair a fuse I kept blowing. Lot less expensive when testing that using a new one each time. Will revert back to a proper one now that I have resolved that particular problem.

Nothing much else, still polishing parts in frustration whilst waiting for other things to come together. I have purchased a set of Fiamm air horns from a 124 CC coupe (had one of these years ago and just had to have the same horn for the 500). If you have read my post would you be surprised to hear that I have stripped the compressor and trumpets and started cleaning them with a view to painting? (If you think this is over the top, I can post a link to a Ferrari enthusiast site, they have pages and pages dedicated to these things, correct finishes, ID plates, serial numbers and stampings etc) Not a lot of space under the front to mount the trumpets but I will find a way. I plan on using the relay that came with it and running a separate circuit to a dedicated fuse / power supply. I can only try.

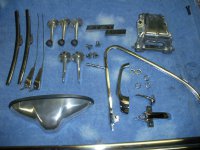
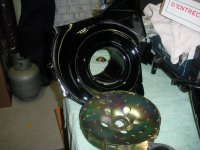
I have included on photo of my shiny bits, a mixture of what I have done at home with a polishing wheel and what I got back from the plating shop. Not all finished and again, I could not help myself, the engine mount was just there when I was doing other things.....

Have a good one and please keep the photo's coming. No one cares the state your car is in, I think we all just like seeing what you are up to.

SANY1416.JPG

Joe
 
Hi Joe,
Looks very nice and shiny- well done! I'm sure urethaning the quarter glasses in will be easier than using insertion rubber- I used to have problems with the brackets coming off the bottom of the door glasses on my 500F until I urethaned it- has been fine for the last 20 years..
Hopefully this isn't too simplistic as a diagnosis but the electrical problem with your lights sounds like the master switch is mounted upside down.. either that or reverse the wiring on the switch.
Happy Christmas!
 
Damon,

thanks for your response. I wish it were so. Ignition will only go in one way and turing the key clockwise locks it in so I know this is correct. Wiring to the ignition is as per the wiring diagram. I have spent a couple of hours on this today, must have something reversed somewhere, I just need to track it down. Not helping is the fact that some of my wires are different colors to the Haynes manual....

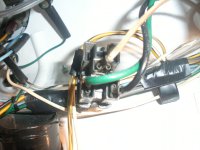
Can anyone confirm the connections on the back of the Lighting master switch please? Perhaps I have these around the wrong way. Not keen to do trail and error on this.

SANY1413.JPG

Regards

Joe
 
Last edited:
I used to be a dyslxeic angostic (I believed there may be a dog).

I got cured today and it helped me find my wiring issue. Two wires into the instrument binnacle were reversed. Go figure. It looked OK from the wiring diagram, but when I (eventually) compared it to the photo I took when I stripped the car, I saw my problem. Now I just need to make some earth wires a little more robust to fix some weak front indicators.

All good now, will start on my doors in the next couple of days so another step forward.

Regards

Joe R
 
G'day everyone.

Has been too long between my posts and a lot has happened since my last one. I sorted out my electrics and although my switches are down for off and up for on (which does not seem right) everything works so it can stay that way.

I moved onto the assembly of the doors. Have been waiting to get to these for so long but after all the anticipation of a major milestone I was more than a little disappointed because I damaged the paintwork on the driver’s door during the process. When I was putting in the glass, it slipped and the metal frame smacked the inside of the door near the bottom. Left a lovely pattern on the outside that now has to be fixed. You can imagine I was not happy. Then, just to reinforce my mistake, I put a scratch on the inside of the driver’s door a week later. What can I say? I have been stupidly careful up until now. Car will have to go back to the panel beater. (Possible photo op Chris? Just need a green car and we have the flag….)

Anyway, moving on, I am now at a point where the doors are finished (grrrr), the boot area is done and the sunroof is on as well. Gets better every day.

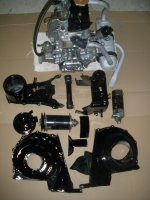
Eventually got the motor back. It has been blasted so it looks quite good. Needed rings, gaskets and seals, bearings, etc. All pretty normal for a rebuild I gather. Nothing fancy with any of the new parts, all standard stuff. 17 or 18 horses (albeit Italian ones) will have to do for now.

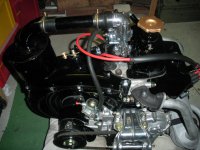
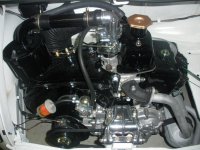
With memories of struggling to fit the engine in 25 years ago (first resto) I took a deep breath and started to put the engine in last weekend. Not sure what my problem was all those years ago but things could not have gone any better. One minute it was out and I swear that about an hour later I was fitting the rear panel. The engine just slipped in. I then actually got some enjoyment connecting the cables and generally fiddling about. Stepped back and all the black and alloy looks so good. I know it won’t last but I am not sure I care.

When the moment of truth came to start the car, I did what I thought were all the right things, suck some fuel through (tastes just like I remember), plugs out and crank the engine a little, plugs in, connect the ignition leads. Another deep breath and I got my son to hit the starter while I looked on from the back. Nil, Nada, Nothing, not even a cough. Scratch the head and grab the manual. 10 minutes with the Haynes manual trouble shooting chart and I made the comment “ that there was no bright spark anywhere to be seen”. My son made a rude comment but I let it pass. Replaced the original coil and we hit the starter again. A couple of cranks and we had life.

It has been over ten years since this car has run, it has never sounded so good. Just idles away so smoothly (for what it is). As of yet I have not started the car myself. Not sure why but I am saving the moment for now. Might wait for my first late night / early morning test run up the street.

I have a little more incentive now and mainly fiddly little things to be done. Bleed the brakes, tidy up the interior, seat belts, get some tyres, try and do a rough wheel alignment . Looking forward to it all (except brakes, I hate bleeding brakes).

As an aside, (and this is a serious requests that relies on a deal of trust) is there anyone out there living in Italy? I am trying to purchase something on http://annunci.ebay.it/ (Milan) and just can’t get a response. I gather it is just too hard for the vendor. Might work if there is someone local doing the legwork for me. I will obviously pick up all the costs etc. Let me know if you think you can help.

Regards

Joe R

SANY1441.JPG SANY1500.JPG
You can just see the dents in the door.


SANY1508.JPG SANY1533.JPG
Yes, the original fan!

SANY1534.JPG
Covers are a bit dusty but you get the idea.
 
This post contains affiliate links which may earn a commission at no additional cost to you.
Guys,

an update as a request for help.

Car is basically finished as far as I can manage. Couple of minor things still need doing, trim along the bottom of the doors is the main visual one and then some adjustments her and there.

The issue I am having is with the brakes. The drivers side rear (RHD) locks up if I stomp on the brakes. Give that brakes are an item that has to be checked for a Roadworthy Certificate (like an MOT in the UK??) I need to resolve.

A rundown on parts that may influence the issue is:
Everything is new except the rigid lines, the T piece at the back, the back plates, the springs that hold the shoes together and the levers for the hand brake that live inside the rear drums.
Shoes were purchased at the same time and are all of the same time.
Front drums were purchased at the same time and are from the same manufacturer.
Rear drums were purchased at the same time and are from the same manufacturer. (MEX I think)
The wheels spin freely with the faintest noise fron the shoes rubbing. (And I mean faint)
Rear tyre pressure is 30 Lbs per Sq inch.
Tyres are new Dunlop 145 x 70 x 12's (and was I happy when I found those on the net for $80 ea with free shipping to me)
There has never been any contamination of the brake shoes with fluid. (There are no fluid leaks either)
I have always bled the brakes in this order, Right rear, Left rear, Left front and then Right front and the pedal pressure feels OK but by no means briliant.
The front and rear ends both need an alignment.*
I have swapped ther rear drums over and the problem stays at the right rear.

I am only willing to test at 20 or 30 KMPH. The right rear locks and the front of the car dives to the left (or is it that the rear steps out to te right??) I have resolve so many issues along the way with this build, I would dearly love to sort this out as well.

Any help will be appreciated, I will post some photos in a moment.

Regards

Joe R
 
Last edited:
Photos to go with my last post. Images are not really godd, not sure what the issue is.

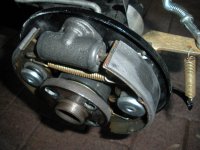
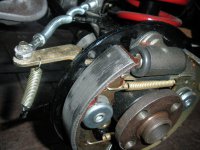
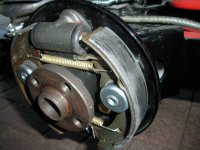
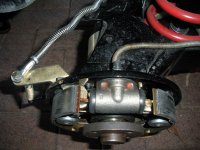
First one is the left rear and that is OK. Other three are the right rear. Dark area is where the shoes are bedding in, not any contamination.

SANY1629.JPG SANY1631.JPG SANY1632.JPG

SANY1633.JPG

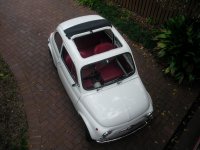
General photos of the car. Needs a wash and some little bits still to go on. Apart from the brake issue there is nothing me from presenting it for a Roadworthy inspection.

SANY1606.jpg SANY1608.jpg

SANY1610.jpg SANY1613.jpg SANY1615.jpg

SANY1617.jpg SANY1618.jpg SANY1621.jpg

SANY1622.jpg
 
Thanks Chris. Up close you would be less than impressed with some aspects, but I am generally happy with the overall effort.

Any ideas on my brake problem?

Rgards

Joe R
 
Guys,
an update on my brake issue. The impression I was getting was that the heavy braking was causing the right rear to lock up and that in turn was causing the car to pull to the left.

After a lot of mucking around, it turns out that my dodgy home front wheel alignment was the problem. (I always knew the alignment needed to be done properly.) When I was doing my 200m test drives up and down the street I was holding the car straight without thinking about it. When I was testing to make sure the brakes were OK I would loosen my grip on the wheel. What was happening then was that all the weight went to the front and the bad alignment was pulling the front to the left.

The weight was also coming off the rear end and the right rear would lock up. (Still don't understand why it was the right rear not the left rear though.) Working on the alignment eventualy resolved the issue.

I put a lot of thought in bto resolve what was really a simple problem. Should have realised it a lot earlier. We live and learn I guess.

Alignment sill has to be done professionally but I am a lot happier with the brakes now.

Regards

Joe R
 
Back
Top