trailer2.jpg

500 (Classic) 500F Rebuild

Introduction

This may be the shortest rebuild thread here. It is going to be a race to the end of the project or to the end of the funds. I am sure there are those of you who know what I mean.

I have owned the car for about 24 years, I did a quick rebuild/tidy when I purchased it. Used it as my daily drive for about 14 years and then took it off the road about 10 years ago. (There is more to this story but this will have to suffice for now.)

In the last month I have done a parts strip and have almost finished the paint strip so that I can ship the body off to my panelbeater. If I don’t do what I can do myself then the car will sit for another ten years.

Regards

Joe R

24 years ago (Free delivery!)
trailer2.jpg


About 15 years ago
scan0001.jpg


1 Month ago
SANY0324.JPG


Today
SANY0439.JPG

Now for a quick quiz. Found this on the roof. I think I know the letters and numbers and I have a theory on what it all means. Chocolate frog for the correct answer. (Judged by forum consensus and the prize has to be collected in person.)
SANY0365.JPG
Slowly slowly. Visited the car last week, not much change.

Have been tinkering around the edges over the last few weeks but today I got a bit of time so I gathered all the 'black' bits that I have been cleaning and hit them with the wire brush again. Went on a hunt and found some more that needed cleaning and stripped them back as well. (Those of you who have crawled around underneath the car may recognise that the horn has been pulled apart as well. Just could not help myself.)

Fired up the compressor and shot a coat of etch on the lot. Came out better than I expected (only used the gun twice now). Will shoot a coat of black on next week if I can get the time. Have no idea on what I am doing here but I willl be better than it was before I think.

Still have to do the front seat frames but that will be done as a task in itself. Most of the other tinware (inside the car, around the engine and suspension) is with the panelbeater.

Regards

Joe R

SANY0719.JPG
 
Have been holding out on you all. There has been progress that I have not reported on so I will put up a couple of posts in quick succession to bring it all up to speed.

Have continued to sort through the parts I have at home, stripping and cleaning what I can and finishing by painting or polishing. I am purchasing parts that I need as I go. I have painted all the black parts that I did not send to the panelbeater (see my previous post). Not a perfect job so I will have to rub back some parts and do them again. Lot of polishing of bright parts, takes a bit of effort but the parts come up well.

Engine has gone off for a health check. I know there is an oil leak somewhere and one of the plug threads is a little suspect. Have not heard back about what needs to be done yet.

Regards

Joe R


SANY0722.JPG SANY0875.JPG SANY0989.JPG

SANY0975.JPG SANY0987.JPG SANY0988.JPG
 
Visited the car again. Still in primer and guide coat but there has been a fair amount of work done on the body although it does not show at all.

Have been speaking to the upholsterer. Not quite sure how the inside will come togehter, I dont wan't to move the car around from place to place. Will just have to see how things pan out.

Regards

Joe R

SANY0945.JPG SANY0946.JPG SANY0947.JPG

SANY0951.JPG SANY0952.JPG
 
Visited the car again this morning, first time I have seen it with a coat of paint. Originally I wanted a red car with black interior, I know this combination works so well (look at Bambino's thread in this forum and you can see what I mean) After agonizing for months, I decided to go for a light colour. I did not want white or cream so Ivory was the logical choice.

I was more than a little apprehensive, the initial photos I saw made the car look white. I know the panelbeater (David) knew what I wanted as we discussed it on several occasion so I had to reserve judgment until I had a look. In the flesh it looks so good, not only the colour but the finish as well.

David wanted to put the windows in so I spent last night cleaning them all up. Took them with me today so they can go in at his leisure.

Car will stay there for the moment so that the upholsterer can have a look at what has to be done. Interior is going to be red.

That brings me up to date for now.

Regards

Joe R

12257_35.jpg 12257_37.jpg 12257_39.jpg

12257_40.jpg 12257_41.jpg 12257_42.jpg

SANY1012.JPG SANY1013.JPG
 
Joe,
I've seen your 500 and it looks great.
IMHO, it would look really good with red upholstery.
Please keep the photos coming - my car has had another engine stripdown as I had a bigend knock from a pair of ill-fitting conrods. They were sent back in exchange for a pair that fit perfectly. Hopefully now I can finally finish the job I started what seems like an age ago.
Chris
 
Time for a confession, I have been holding out on you all. After waiting for such a long time, I got my car back at the end of last month and have not posted any details on what I have been up to.
Car came home on the same tilt tray it went away on. Not a Race Car or Lowered so it must be Prestige. (my story and I am sticking to it)


SANY1050.JPG


Not a good photo, but my Fiat in its natural habitat (of late), the garage. Car is not white as such, but Ivory.


SANY1054.JPG


I purchased new tailights and rubber seals. Lights are OK but the rubber seals are terrible for more than one reason. My old seals did not fit the new lights but I now found myself having to make them fit. Only solution I could think of was to stretch them onto the lights and hold then in place with a zillion clamps and then drop them in hot water. Worked a dream.


SANY1056.JPG


Not a huge amount of progress in putting the car back together. Always a matter of finding a balance between what I have to do and what I want to do………… Started with the wiring loom (that I had previously cleaned) and went from there. Biggest problem is that the paint has made the fit of things like the dash lights and switches etc very tight. I can’t just force the components through otherwise the paint will chip, so I have to gently sand all the openings . I know I am going to have earth problems when I try the electrics but I will address that when I get to it.

One of the last photos shows some of the rear suspension parts that are ready to go in. Note I am upgrading my rear springs to ‘go faster’ units. Farirly simple operation, get your old springs, strip the black paint off them and then paint them red. (I scare myself sometimes.)


SANY1077.JPG SANY1079.JPG SANY1080.JPG


SANY1081.JPG SANY1083.JPG SANY1085.JPG


SANY1087.JPG


General problems to date.
Whilst I have cleaned my gearbox and put in new axle seals, I now discover there is a leak between the main flywheel housing and the main part of the gearbox (I think). Manual says that there is no gasket here between the two. Not sure how this works, I can’t see a metal to metal joint working at all so I will have to have another look.

Have been dissapointed in some parts.

As noted already, some rubbers are rough and this includes some of the bushings.

New screen rubber looks fine but the inside lip no longer hides the two exit points for the wiring that runs from the rear vision mirror to the under bonnet area. (This is really being picky as there is another way around this I think.)

I ordered a couple of frames for the Qtr vent windows. Slightly the wrong shape, the pivot pins are at the wrong angle. When you try and adjust them they break because they are riveted in place, but not very well. Anyone out there have a good LHS original that I can purchase?

The last one is an observation rather than a probelm. I am lucky enough to have parts from three cars that in some cases lets me pick the best component to clean up and reuse. I have three sets of rear whell hubs and have discovered that there are two types that are slightly different. In the scheme of things, I think the bearing and seats are the same but the oil seals are different sizes (by a couple of mm). Of the three sets I have, I have 3 hubs of one type and three of the other. I know I have at least one set of D suspension arms, so this will go towards explaining the difference, but how I got a 3 - 3 split I don’t know.

Finally, on the subject of these rear hubs, does anyone know where you can get the spacer that goes between the rubber coupling and the castellated nut? Place I would normally go does not have them listed.

Enough for now, I will try and do some suspension work next week and post as I go from now on.

Regards to you all.

Joe R
 
Last edited:
Joe,
Congratulations on the progress so far - I'd seen the car on the odd ocassion when I had visited David and it certainly looked very nice. The ivory white colour with red upholstery looked great and I'm sure that you are very happy with it.

I have also had some difficulty with the quality of remanufactured/reproduction parts and haven't quite resolved some of them, particularly the 1/4 windows. The new ones just don't fit properly - as you say, the angles are incorrect, especially for the pivot pins.

The red springs will look good - I too have fitted red rear coils and with a little lowering, I'm also sure, just like yourself, that the car will go much faster ......

As to the Prestige annotation, I'm sure you are correct, but don't beat yourself up about it too much. These cars were mass produced in vast numbers and were never intended to be a high quality item, not in the same context as say a hand built RR, for example. Some parts never fitted well from Day 1, though the panel fit was probably better than many contemporary British cars. I had a friend of mine who owned a TR6 with different length doors - the drivers side door was about 4mm longer than the other. He thought that the cars were deliberately designed that way until he measured another one at a club meet only to discover that the difference persisted but was reversed :eek: Overall the build quality plus the Lucas electrics had him busy for years ....

I'll have a look through my parts bin for those spacers, but I think the only pair I had are currently on my car.

Finally, the gearbox bellhousing to maincase join can be oil-proofed with a liberal coating of Loctite prior to reassembly. I did this to mine and voila, no more leak.

Keep the photos coming,
Chris
 
Last edited:
Guys,

little bit of progress today. I got both my rear suspension arms in and have tidied up most of the cables / lines / hoses that pass through the rear firewall.

Spent a lot of time on the cables etc making sure that I had all the runs correct. Had to do a little work on the main brake line. If I left it as it was I had to force it to fit into the 'T' piece at the back and this meant the line was under tension all the time. I wanted to relieve this so the line was in and out a couple of times as I changed the radius of the last bend. Is all good now.

For the brake lines I still need to screw the 'T' piece to the body and put some tubing around the aluminium lines where they clip to the body. Fuel lines needs a clamp and the starter / speedo transit hole needs a rubber grommet (that I don't have) All simple stuff.

For the arms I still need to check that the springs are seated correctly and then tighten up all the bolts. I think I will only be able to get this done correctly when the car has some weight on the springs so this may need to be rechecked when the motor is back in.

The shockies are new. (I thought that after at least 25 years service the original Boge units would be a bit tired!). The bushes that came with them were of two different types, 4 match the originals, 4 don't. The 4 that don't are thicker, the sides are more of a wedge shape not rounded and the top and bottom surfaces are concave not flat. Not sure if I will replace these.

I have not got the bolts that hold the brake backplates onto the arms so I can't continue with the rear brakes till next weekend. The reason I don't have the bolts is that I sent a lot of fiddly bits away to be plated a little while ago. Was told it would be a week, but it actually took two. Is probably a good thing, it means I am not rushing.

Tomorrow I will tidy up what I did today and then have a look under the front bonnet and perhaps put the fuel tank in. Might try and tackle the front spring as well, I suspect that will be a little bit of a challenge in itself.

Did get an opportunity to speak to my mechanic duriing the week. He said he was pleasantly surprised. He has pulled the little powehouse down and says that a bore hone, new rings, new timing chain/gear and bearing shells should get me running. Head needs some work as there are some stripped bolt holes there as well. There was a little more but I don't think I am looking at anything major to get it running again.

Only a few photo's, I will try and post more tomorrow if I make any meaningfull progress.

Regards

Joe

SANY1109.JPG SANY1099.JPG SANY1091.JPG
 
Big week to move forward, but not without a few difficulties.

During the week in the evenings I have been working on the rear hubs, getting the bearings done and putting the rear brakes together. (More on brakes in a sec) As always, a bit of backwards and forwards making sure that things were fitting ok. Got the rear hubs 'finished' to a point where I have fitted a pair of old wheels and lowered the car back onto them. Managed to get the tank in as well although this may have to come out again as the chassis number has so much paint on it that you can't see it. Will have to sand that area back a little and that will be easier without the tank in I suspect.

This weekend I promised myself that if I got the front spring fitted on Saturday without damaging myself or the car that I would class that as a win. For whatever reason I though this was going to be a real pain. Not sure how long it took but I basically got the spring in and made a start on the rest of the front end on Sat as well so I was happy with that.

Today I continued on the front end and got the steering box and tie rods in, connected the brake master up and got most of the front hubs done. Could not help myself, so I put the front bar on as well.

I have to go back over everything noted here and torque everything down correctly and do a little more work on the brake shoes and drums. New shoes and drums lead to a very tight fit. Even with the shoe adjusters adjusted to pull the shoes in, I have had to remove a little material to get the drums on. Rears stilll bind a lot one of the fronts is OK and I have not worked on the other front drum to get it on yet. Have to tidy and clip down some of the wiring as well.

From when I last drove the car (10 years I think), I remember the brakes being a bit diabolical. I think the drums were out of round, the pedal used the pulse and the car would shudder and weave around under brakes. (This was accompanied by a general front end looseness that would make the car rattle at anything over 50mph!) I am not expecting a miracle but I hope to have something a little better now.

I am getting to the point where I have less of the car in boxes or on the benches and more of the car on the car (if that makes sense). Is a good feeling to recover my bench space.

Not sure what comes next, I think I will do tidy, take stock and decide from there. I have not scratched, destroyed or damaged anything yet so I will continue to take it slowly.

SANY1123.JPG SANY1131.JPG SANY1165.JPG
Dark area on the shoe is where
the drum is rubbing.

SANY1149.JPG SANY1173.JPG
Have to tidy the wiring.


Regards

Joe
 
Joe,

I also had minor problems with the drum brake linings binding - the new ones seem a lot thicker. I'll solve it by driving the car. My old brakes were similar to yours - very out of round drums with either leaking or sticking pistons. Made for an exciting drive down the hill from my place.

Your car is looking magnificent. Maybe you should replace the front badge with the Spirit of Ecstacy - the RR symbol, not the drug - instead of the Fiat badge.

Chris
 
Not a lot of progress and not much prospect of getting anything much else done for the next 4 or 5 weeks.

Slowly getting my work area back to some semblence of order with more parts on the car than in boxes and on my benches. Even though it is a bit slow, things are going forward. I have however put a fairly major scratch in the paintwork, but more on that later.

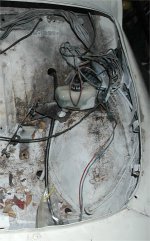
I have basically finished under the bonnet. Have to sort out the battery clamp and some rubber grommets but that should be easy enough. I purchased a rubber seal for the bonnet. Not quite the same shape as the
original and the rubber plugs that I also purchased to hold it in place will not work. I will find a solution I am sure. I have to admit here that I also scratched the paintwork fairly severly under the bonnet. Is OK though. There was so much paint over the chassis number it could not be read. I made myself a sanding mask in the correct shape and proceded to sand and scrape all the paint away. Got back to bare metal and then
put a coat of clear lacquer over the bare patch. I had to do all this as I can't get the car registered unless the inspector can record the number. I can honestly say I was not keen to do this at all.

The front end is mosty together now. I still have to tighten up the front hub bearings and sort out the track rod lengths to get some sort of wheel alignment going.

Rear suspension parts / brakes / fuel lines etc are in. Like the front I have to set the bearing preloads and sort out a couple of rubber grommets. Brakes are still really tight, not sure if driving the car is the way to wear them in so I will have to have a look at a better solution.

Inside has had a little work as well, steering is in as is the speedo. Have run the wiring for the rear view mirror so it runs under the window seal. I have to get the upholsterer in to look at the carpet over the centre tunnel and around the pedal area. Needs a fair amount of rework to get it all to sit correctly. Even though I have never used it before I am going to put the hand throttle back in. The plastic sheath, around the wire carrier is perished but I am going to use some shrink tube to tidy this up. Have tested this on a small area already and it looks OK. Not sure that you see much of the cable anyway.

As noted in a separate post, I am having issues with the 3/4 vent frames. I just can't get the aftermarket ones to fit as well as I would like so I have taken both of the originals to an electroplating place. Owner
has told me he will strip the existing coating, look at what repairs are needed, repair them and then rechrome. Will be two weeks before I get them back, I will let you know how I get on. Frames are stopping me from
putting the doors together. Apart from the drivetrain, the door assembly is the biggest task outstanding.

Have seen the engine and it looks OK. Has been stripped and blasted as part of the rebuild process, I think it is going to look fairly neat when the black shrouds are back on. Needed a new head as the original has been 'skimmed' to the limit. Second hand one has been sourced already. Getting new rings and shells as well. Hopefully will have it back by the end of November but I am not holding my breath.

Apart from that I have been polishing bits in frustration. Inside door fittings came up really good, as did the outer door handles. (I even got some new keys cut!) Could not help myself so I polished the carby and
the rear engine mount as well. What can I say, I was in a polishing frenzy, had my dremel rotary tool in my hand and the carby was just there on the bench.......... Cleaned up the steering wheel before I fit it as well.

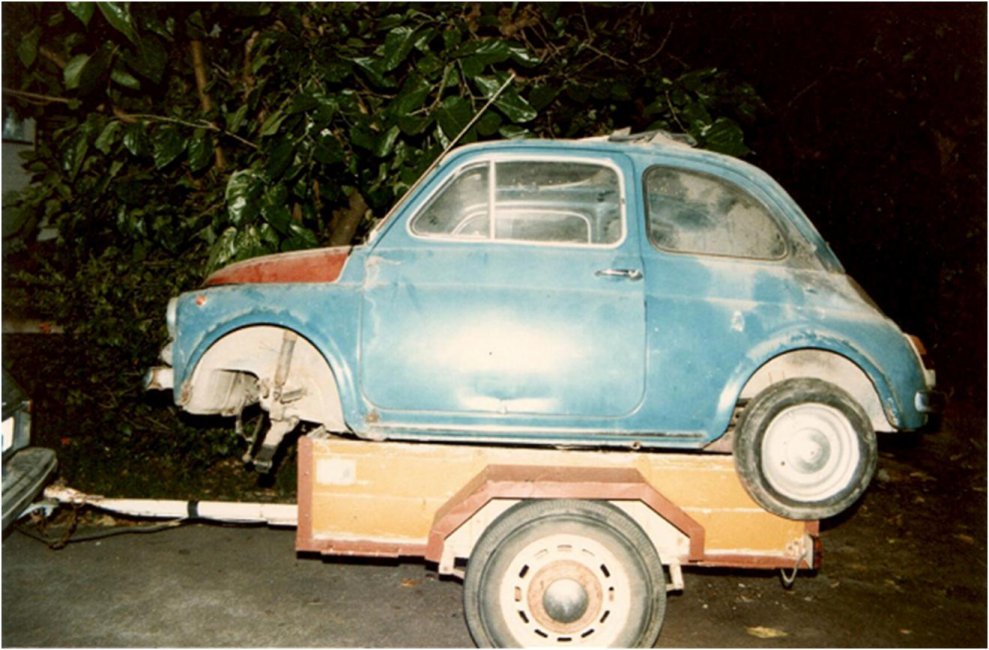
Still lots to do so I have started putting a list together. Will post an update when I make more progress. I have included lots of photos. Sorry about the flare frm the flash in some of them.

Regards

Joe R

SANY1219.JPG SANY1257.JPG SANY1261.JPG

SANY1328.JPG SANY1334.JPG SANY1335.JPG

SANY1336.JPG SANY1337.JPG SANY1338.JPG

SANY1343.JPG SANY1342.JPG SANY1347.JPG

SANY1349.JPG SANY1350.JPG
 
DROOL!

You are at the best part...when everything you cleaned, renewed, replaced starts going back together and looking darn good together.

Those last photos make me want to be a better man....to my Fiat anyway, the rest will follow ;).

BTW, when you put the spedo back in place, did you find an original style rubber gasket or what did you use. As far as the spedo goes, is that style easy to take apart and clean? I believe I saw some metal tabs that might need to be bent and I am always afraid things like that might break.

Thanks!
Phil
 
Phil, thanks for your kind words.

My gasket was OK so it went back in, not sure where you can get another one from but I suspect they are available.

As for the speedo itself, it comes apart from the front. The chrome ring around the front is held in by three tabs that are visible from the back. You are correct in your thoughts, these are very thin and I suspect they will not take a lot of bending before they break. Having said that, you don't have to work them much to free the ring. When the ring comes off the clear palstic face comes off and the black numbered ring as well.

This is as far as I got (and should be as far as you need to go to do a clean up) because after that the indicator needle has to come off before you can undo the two screws holding the actual face of the speedo on. (This has the red I II III indcators on it).

Now I tried this with a speedo many years ago and I don't think I ever got it back together where the needle indication was correct. Needle was floating in the middle of nowhere rather than sitting against the 0 stop.
I think the spindle that the needle pushes onto needs to be under a little tension before you push the needle back on.

I have included a photo of an old speedo pulled apart as far as I could go. You can see that you need take the needle and the face off before you can get to anything else (whatever that is).

Hope this helps.


SANY1359.JPG


Regards

Joe R
 
Phil,

New speedo gasket is available here -

http://www.fiat500ricambi.com/fiat500/?categorie=Rubbers&product=RB1026

Not cheap and required a tiny bit of trimming to fit, but better than my old rotten one.

BTW, speedos are available NOS if you hunt around a bit. You can get them calibrated in mph and kph.

'Taratura classe verde' stamped on the dial translates as class green calibration, but what it actually means beats me :confused:
Probably should have been 'tartaruga classe verde' = class green turtle given how quick these cars were :D

Chris
 
Quick question for someone who has an unrestored car.

My photo shows the wiring to the brake master and horn running along the inside of the front guard (or wing or fender pending where you are from)and then down behind the washer bag and then through a grommet to the underside of the car.

Shoud this part of the loom actually come straight down from the fuse box and then around the inside of the wheel arch to the grommet? (where it would be mostly covered by the rubber mat that eventually sits in that area)

Regards

Joe R

SANY1337.JPG
 
Thanks for the info on the spedo guys. I will be sure not to take it apart any further than shown here. Like you say, I just want to clean the lens and face a pinch. Bambino, I did see that gasket but it looked a pinch different. I thought it looked close enough but was not sure if there was one I had not seen yet.

Joe, the wiring on my car is so hacked, I can't tell you for sure like someone else might. For what it is worth :confused:mine seems to run above the fender and not at the bottom of it.
 
Vas,
The gasket is a bit different and requires some minor trimming to make it fit properly.

Joe,
I've attached a photo of the wiring in that area of my car prior to removal. On my car, that part of the wiring runs along the inside of the front guard.

hope this helps,

Chris
 

Attachments

  • Fusebox wiring.jpg
    Fusebox wiring.jpg
    163 KB · Views: 222
Back
Top