Guide for Removal and Refit of rear radius/trailing/suspension arms (whatever you choose to call them!), well, as this operation is somewhat different due to a pair of arms being off the car to start with, the info will be here for removal and refitting even it if isnt quite in the right order!! pick from it what you need, and as usual - any questions or comments, fire away.
Bush removal and refit will feature in another guide soon, the arms I will remove from the car shall be fitted with new bushes, probably during the summer.
Tools required:
Trolley Jack
Axle stands
30mm socket for hub removal
19mm socket and spanner for arm bolts
17mm socket for shocker bolts
12mm spanner for drum retaining bolts
10/11mm spanner for brake pipe unions
8mm spanner for bleed nipple
Brake hose clamp/Mole grips
Equipment to enable brake bleeding
Car ramps
In the interests of H&S, care must be taken when using wire brushes, use goggles, and a mask in case of airborne brake dust, also when using a jack and axle stands, please let somebody know you intend to be under the back of your car, as an incentive to get them to check on you now and then, ask them to make you a brew.
Some of these procedures refer to basic cleaning and painting of arms and other parts, prior to fitting to the car which will be found later in the guide.
For the circumstances, I had a complete rear arm set given to me, with good bushes in, as usual for anything that has spent years under a car all parts were surface rusty and dirty. The bushes on my car had started making the typical clunking and knocking noise, so I thought I may as well clean up and paint the arms that I have spare, and fit them as a quick fix, with the plan being to restore my original arms with new bushes in ready for "standby" or even to put on sale.
The rear beam and arms assembly was all stripped down and parts stored, a few months prior to me starting the job, the rear beam was given away to help another cinq.
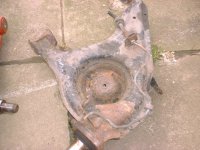
Heres one of the arms as removed, ready for cleaning and painting, as you can see quite dirty and flaky with surface rust, a fair example of what lurks beneath!
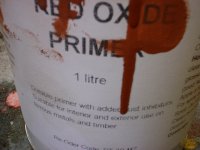
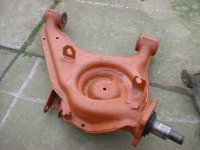
After some rigorous wire brushing to remove surface rust and dirt, I then used some Red Oxide primer which contains rust inhibitors, and allowed to dry, I put quite a lot on so I didnt bother with a second coat, I am not going for a show finish!
Looking better already!
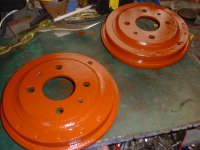
At the same time I gave the brake drums a clean up and then a coat of red oxide on the outside, and the back plates were wire brushed to get rid of flaky paint and rust, underneath the brake dust [be careful when wirebrushing, use a mask if needed] and rustyness the metal was found to be very solid so still useable
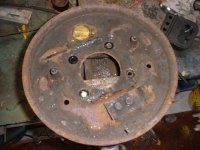
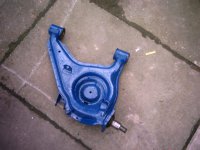
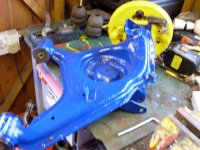
The parts were then painted using some synthetic car paint [I have used synthetic for years, the drums on my car right now are painted with it, with no heat issues] I decided on the arms being blue, and the drums and backplates yellow, this serves no purpose really but the MOT man will have something nice to look at..
Rear arms now painted in blue
After the backplates were dry, I reassembled the backplate to the arm, each backplate fixing has 2xM8 allen key bolts [6mm key] and 2xM8 hex head bolts, the allen key bolts go at the top, the M8/13mm bolts at the bottom to secure.
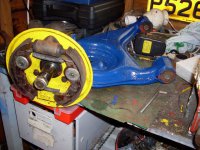
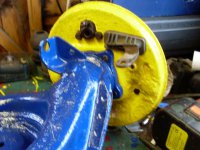
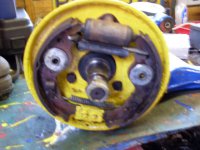
In the following pic you can see the order of the brake parts, the crosslever goes through the rubber gromit at on the backplate, each shoe fits over a small stud on each side of the backplate, the thinner spring goes across the top under the brake cylinder and crosslever, the thicker spring at the bottom, I fitted the top of the shoes to the cylinder and crosslevers, then pushed the r/h side shoe to the backplate and fitted the little clip to hold it to the backplate, I then levered the l/h side shoe into position, and fitted the clip to hold it back, be careful as the springs are quite strong.
Make sure the pivot on the crosslever is nice and free, this little bugger is the cause of many brake problems, and is often the last thing to check after somebody has replaced handbrake cable and shoes to find the handbrake is still poor.
** Removing the arms from the car **
If you need to remove the hubs, loosen the hub nut before you get the car lifted up, it takes a lot of leverage which could knock the car of its stands if you arent careful
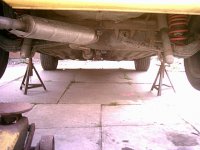
Using a jack, lift up the car then place it on axle stands, I put mine where the rear jacking points are, take care here they need to go where there is some structure and not just anywhere on the floor pan. Chock the front wheels to help keep the car secure.
If you have not already done so, remove the wheels
Release the handbrake
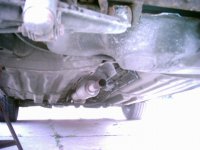
If you are doing the passenger side arm, it will help if you remove the back exhaust silencer, might be worth checking the clamp condition, if its been on for a long time it might snap when undone, be aware! I bought one anyway cos the one I had fitted, was slightly too big.
I am going to be working on the drivers side arm, passenger side is the same so I wont be repeating the procedure
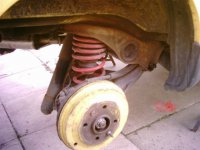
Place a jack under the rear of the arm, you need to lift it slightly compressing the spring, as long as it moves up a tiny bit that will be fine.
Undo the lower shock absorber bolt where it fixes to the arm. Unless you need to remove or replace the shocker, just push it back and upwards out of the way.
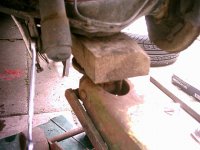
You will do well to undo slightly the arm bolts, this will allow the arm to drop down easily.
Slowly release the jack - arm will drop quite a lot leaving the spring loose, pull out the spring and note which way up it goes, put to the side for later.
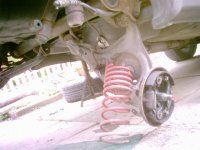
Undo the brake pipe to the arm, hold the back of the flexy with a 17mm spanner while you undo the brake pipe union, I clamp the flexy hose with a pair of Mole grips to stop air getting in and fluid loss, carefully undo the brake pipe, a 10mm/or sometimes 11mm fitting, this can be stubborn and the nut can easily round off, I used a small pair of mole grips very tightly on the flat of the nut, there is a clip you need to pop off to release the flexy part, a good wire brushing will help you see it clearer, pop it off and the flexy will then be free.
At the back of the hub, undo the small clip/split pin at the handbrake cable end, pull back the spring away from the mounting point and pull the cable off and out of the way.
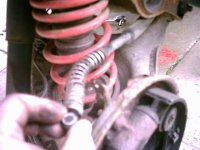
Fully undo the two bolts securing the arm to the beam, careful they might be very tight unless you previously loosened them, again give them a wire brushing and squirt some releasing agent on them to help. When undone pull the bolts out while supporting the arm, the arm will then be free of the car.
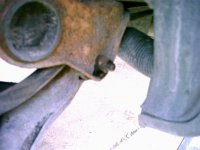
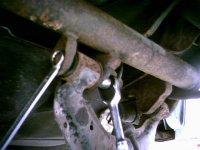
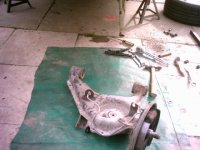
At this point, is where you need to remove old bushes, and fit new - I am going to cover this in a seperate guide soon, so bear with me on that. For now though, I will be fitting my newly painted arms.
** Refitting the arm to the car **
I have a habit of coating all threads with coppaslip [or equivalent], to prevent them from siezing and with the future in mind - me or somebody else might have to undo stuff, and this will help them.
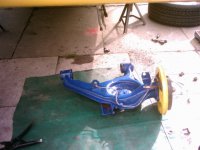
Offer the arm up to the beam, pop in a bolt on each side to hold the arm in place, do up the nuts/bolts but slack enough to allow the centre of the bush to pivot on them, they need to be tightened with the car back on its wheels, so thats when you will need the car ramps.
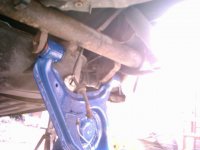
Insert the spring, the correct way up, push the top of it up to the rubber O ring if fitted, and make sure its located, you will need to lift up the arm with a jack so you may need to hold the spring in place at the same time, it can be fiddly, try to push the lower part of the spring towards the seat on the arm, this is much easier with lowered springs due to their shorter length. Once in place lift the arm up with the jack compressing the spring, bring down the shocker and pull it down to its longest length, you need to lift the arm enough to be able to get the shocker bolt in, again, dont tighten this fully just yet.
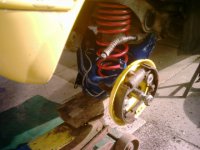
Reconnect the handbrake cable, then the brake pipe
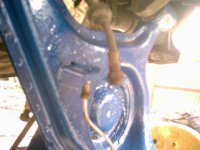
If you have removed the hubs and drums, replace them now
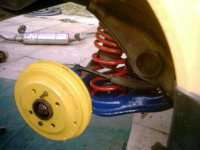
Have your brake bleeding bits and bobs ready, and somebody to help you by pressing the pedal, everyone has their own way of bleeding brakes so I am not going to go into that here, remove the brake pipe clamp or in my case, mole grips, and bleed away.
So now you have the arm attached to the car, and maybe you have done both sides. Refit your exhaust and put your wheels back on, lower the car to the ground - DONT DRIVE IT ANYWHERE YET - put the car on ramps, then go back underneath and fully tighten the arm bolts and lower shocker bolt
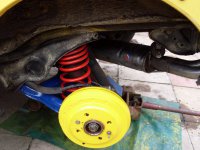
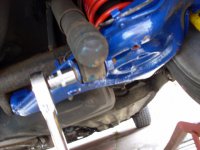
Thats it! all done, go for a short drive locally, to make sure everything is ok, if you have painted the brake drums like I have, check the tightness of your wheel bolts shortly afterwards.
Any questions or comments, fire away.
Bush removal and refit will feature in another guide soon, the arms I will remove from the car shall be fitted with new bushes, probably during the summer.
Tools required:
Trolley Jack
Axle stands
30mm socket for hub removal
19mm socket and spanner for arm bolts
17mm socket for shocker bolts
12mm spanner for drum retaining bolts
10/11mm spanner for brake pipe unions
8mm spanner for bleed nipple
Brake hose clamp/Mole grips
Equipment to enable brake bleeding
Car ramps
In the interests of H&S, care must be taken when using wire brushes, use goggles, and a mask in case of airborne brake dust, also when using a jack and axle stands, please let somebody know you intend to be under the back of your car, as an incentive to get them to check on you now and then, ask them to make you a brew.
Some of these procedures refer to basic cleaning and painting of arms and other parts, prior to fitting to the car which will be found later in the guide.
For the circumstances, I had a complete rear arm set given to me, with good bushes in, as usual for anything that has spent years under a car all parts were surface rusty and dirty. The bushes on my car had started making the typical clunking and knocking noise, so I thought I may as well clean up and paint the arms that I have spare, and fit them as a quick fix, with the plan being to restore my original arms with new bushes in ready for "standby" or even to put on sale.
The rear beam and arms assembly was all stripped down and parts stored, a few months prior to me starting the job, the rear beam was given away to help another cinq.
Heres one of the arms as removed, ready for cleaning and painting, as you can see quite dirty and flaky with surface rust, a fair example of what lurks beneath!

After some rigorous wire brushing to remove surface rust and dirt, I then used some Red Oxide primer which contains rust inhibitors, and allowed to dry, I put quite a lot on so I didnt bother with a second coat, I am not going for a show finish!

Looking better already!

At the same time I gave the brake drums a clean up and then a coat of red oxide on the outside, and the back plates were wire brushed to get rid of flaky paint and rust, underneath the brake dust [be careful when wirebrushing, use a mask if needed] and rustyness the metal was found to be very solid so still useable


The parts were then painted using some synthetic car paint [I have used synthetic for years, the drums on my car right now are painted with it, with no heat issues] I decided on the arms being blue, and the drums and backplates yellow, this serves no purpose really but the MOT man will have something nice to look at..
Rear arms now painted in blue

After the backplates were dry, I reassembled the backplate to the arm, each backplate fixing has 2xM8 allen key bolts [6mm key] and 2xM8 hex head bolts, the allen key bolts go at the top, the M8/13mm bolts at the bottom to secure.


In the following pic you can see the order of the brake parts, the crosslever goes through the rubber gromit at on the backplate, each shoe fits over a small stud on each side of the backplate, the thinner spring goes across the top under the brake cylinder and crosslever, the thicker spring at the bottom, I fitted the top of the shoes to the cylinder and crosslevers, then pushed the r/h side shoe to the backplate and fitted the little clip to hold it to the backplate, I then levered the l/h side shoe into position, and fitted the clip to hold it back, be careful as the springs are quite strong.
Make sure the pivot on the crosslever is nice and free, this little bugger is the cause of many brake problems, and is often the last thing to check after somebody has replaced handbrake cable and shoes to find the handbrake is still poor.

** Removing the arms from the car **
If you need to remove the hubs, loosen the hub nut before you get the car lifted up, it takes a lot of leverage which could knock the car of its stands if you arent careful
Using a jack, lift up the car then place it on axle stands, I put mine where the rear jacking points are, take care here they need to go where there is some structure and not just anywhere on the floor pan. Chock the front wheels to help keep the car secure.

If you have not already done so, remove the wheels
Release the handbrake
If you are doing the passenger side arm, it will help if you remove the back exhaust silencer, might be worth checking the clamp condition, if its been on for a long time it might snap when undone, be aware! I bought one anyway cos the one I had fitted, was slightly too big.

I am going to be working on the drivers side arm, passenger side is the same so I wont be repeating the procedure

Place a jack under the rear of the arm, you need to lift it slightly compressing the spring, as long as it moves up a tiny bit that will be fine.
Undo the lower shock absorber bolt where it fixes to the arm. Unless you need to remove or replace the shocker, just push it back and upwards out of the way.

You will do well to undo slightly the arm bolts, this will allow the arm to drop down easily.
Slowly release the jack - arm will drop quite a lot leaving the spring loose, pull out the spring and note which way up it goes, put to the side for later.

Undo the brake pipe to the arm, hold the back of the flexy with a 17mm spanner while you undo the brake pipe union, I clamp the flexy hose with a pair of Mole grips to stop air getting in and fluid loss, carefully undo the brake pipe, a 10mm/or sometimes 11mm fitting, this can be stubborn and the nut can easily round off, I used a small pair of mole grips very tightly on the flat of the nut, there is a clip you need to pop off to release the flexy part, a good wire brushing will help you see it clearer, pop it off and the flexy will then be free.
At the back of the hub, undo the small clip/split pin at the handbrake cable end, pull back the spring away from the mounting point and pull the cable off and out of the way.

Fully undo the two bolts securing the arm to the beam, careful they might be very tight unless you previously loosened them, again give them a wire brushing and squirt some releasing agent on them to help. When undone pull the bolts out while supporting the arm, the arm will then be free of the car.


At this point, is where you need to remove old bushes, and fit new - I am going to cover this in a seperate guide soon, so bear with me on that. For now though, I will be fitting my newly painted arms.
** Refitting the arm to the car **
I have a habit of coating all threads with coppaslip [or equivalent], to prevent them from siezing and with the future in mind - me or somebody else might have to undo stuff, and this will help them.

Offer the arm up to the beam, pop in a bolt on each side to hold the arm in place, do up the nuts/bolts but slack enough to allow the centre of the bush to pivot on them, they need to be tightened with the car back on its wheels, so thats when you will need the car ramps.

Insert the spring, the correct way up, push the top of it up to the rubber O ring if fitted, and make sure its located, you will need to lift up the arm with a jack so you may need to hold the spring in place at the same time, it can be fiddly, try to push the lower part of the spring towards the seat on the arm, this is much easier with lowered springs due to their shorter length. Once in place lift the arm up with the jack compressing the spring, bring down the shocker and pull it down to its longest length, you need to lift the arm enough to be able to get the shocker bolt in, again, dont tighten this fully just yet.

Reconnect the handbrake cable, then the brake pipe

If you have removed the hubs and drums, replace them now

Have your brake bleeding bits and bobs ready, and somebody to help you by pressing the pedal, everyone has their own way of bleeding brakes so I am not going to go into that here, remove the brake pipe clamp or in my case, mole grips, and bleed away.
So now you have the arm attached to the car, and maybe you have done both sides. Refit your exhaust and put your wheels back on, lower the car to the ground - DONT DRIVE IT ANYWHERE YET - put the car on ramps, then go back underneath and fully tighten the arm bolts and lower shocker bolt


Thats it! all done, go for a short drive locally, to make sure everything is ok, if you have painted the brake drums like I have, check the tightness of your wheel bolts shortly afterwards.
Any questions or comments, fire away.

