So this guide applies to a Grande Punto 1.3 Multijet but will no doubt be suitable for any car that has the same engine.
I had the odd whiff of diesel fumes coming into the cabin mainly with the car stood in traffic, or at first start up, I put it down to the car being an oldish diesel with no DPF, but the Mrs was moaning about it from the passenger seat so I had to investigate!
after looking the engine over to see where a diesel fume smell might be coming from - like the usual places such as the front exhaust section, EGR pipes, with the engine idling I could hear a faint chuffing sound from the top of the engine, so I took off the engine cover/filter box and it was a little easier to hear.
I squirted some WD40 at the injector bases, and this altered the sound slightly, but after looking at the top of the engine a bit closer I thought I would just pour some water into the trough on the top of the engine where the injectors fit.
And the video below, shows that no2 cylinder is leaking through the injector seal:
[ame]https://youtu.be/tNwcb474hQQ[/ame]
Engine tone sounds really rattly on the video, but its isnt in real life, it will be something to do with the phone camera mic.
So, theres work to do! needless to say before carrying on using the car pending repair I drained all the water out of the trough.
Tools needed:
10mm Hex key
Various spanners, 14mm & 17mm.
Injector puller [more about this later]
Later on I had to buy two other tools, an injector seal remover, and an injector seat cutter/reamer tool to clean up where the seal fits [more about this later]
pic 001
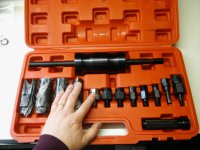
Rags
Carb Cleaner
Mugs of tea
Long Screwdrivers
Drill with pipe cleaner brush
Compressor and air line [optional]
Research on the internet of the job in hand, youtube was very helpful.
Parts:
4 x O Ring Seal [fit between injector and cam cover Part No. PN 55205036
4 x Injector seal
pic 002
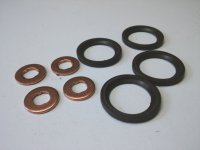
So when the day came to do this job I thought I would just do injectors 1 and 2 as they have to come out as a pair.
First I prepared a work site, I used my ramps stood up and a piece of wood on top to make a table, really just somewhere to rest tools to keep them at hand and to lay parts down while working on the engine.
pic 003
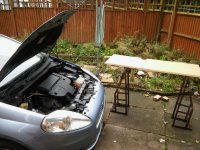
First, you have to remove the air box/engine cover, I undo the connector to the MAF Sensor [I am pointing at it here] and undo the jubilee clip to the air pipe, pull the pipe off and pull the airbox away, there will be another fresh air pipe to pull out.
pic 004
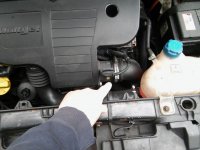
we then see the top of the engine which is what I will be working on.
pic 005
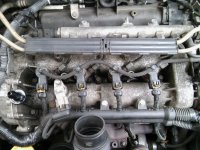
The injectors come out as a pair, so I am going to work on 1 & 2 first as my leak is mainly from no2 but also a bit from no1, I removed the cam sensor to move it out of the way, then pull off the electrical plugs to the injectors.
pic 006
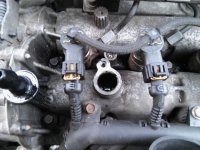
at the injection pump, pull off the two fuel hoses, they unclip by pressing in two tabs and pull away, my engine had been sat for just a few mins, I wrapped a rag around and under them as I unclipped them but diesel loss was minimal.
pic 007
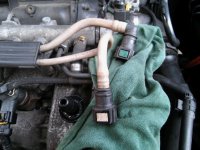
undo two 10mm bolts, and move the fuel lines away from the top of the engine to give more access, they are quite flexible but try not to kink the lines.
pic 008
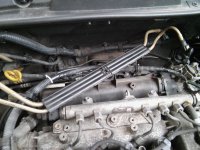
Then I removed the leak off/return pipes, a fiddly clip on each one [dont let it fly off, you may never see it again!] then the pipes just pop off the top of the injectors.
pic 009
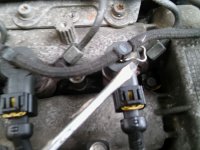
Then move the full pipe assembly out of the way, its quite flexible.
pic 010
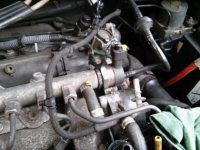
Undo each of the injector pipes, 14mm on the injector, 17mm on the fuel rail. Also undo two fuel rail bolts, to allow it to move a little to be able to get the small pipes out, in this pic I am working on no1.
pic 011
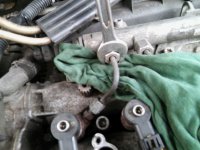
Now, the injector puller tool comes with large open sided sockets as you will need to undo the top of the injector after which you use the other part of the tool to pull each injector out, the top part of the injector isnt very tight. Its the 29mm socket in the set. The black part of the injector that has the electrical connector on it can be moved / rotated slightly to get the socket to fit onto the hex of the housing, I initially found this fiddly as I was worried about the plastic connector housing breaking, but it was fine.
pic 012
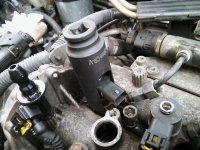
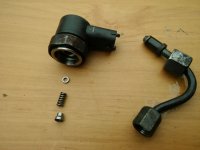
Slowly undo the top of injector, and lift it off, be careful as there are small parts including a spring, carefully take them out and set them down in order, do this for the first two injectors, keep them in numbered order.
pic 013
Now you see the two injectors which are nearly ready for pulling.
pic 014
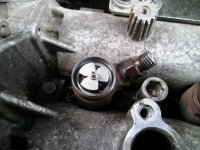
pic 015
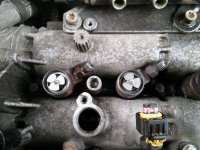
Undo the securing clamp nut and collar, remove them and keep safe.
pic 016
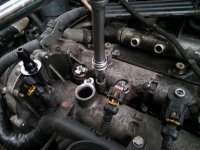
I am now going to use the injector puller tool, starting with the silver adapter which you screw onto the top of the first injector, the thread is very fine so be careful not to cross thread it.
pic 017
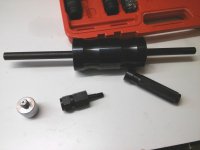
pic 018
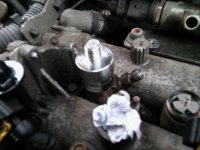
Then fit the ball joint bit, this just allows some movement in the tool and most likely might stop injector from getting broke as the slide hammer assembly is long and weighty.
pic 019
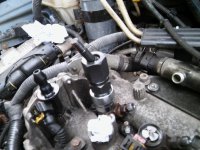
Then the rod fits to the joint.
pic 020
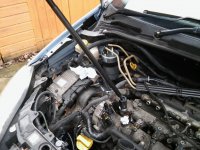
And then the slide-weight over the rod.
And then the stop-end.
pic 021
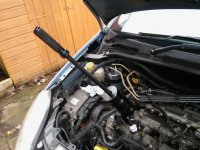
Now make sure everything is screwed together, if its not right there is potential for damage to the injector, now you simply tap the weight up against the stop end, this will pull your injector out, I didnt use excessive force as the weight does its job and taps the injector up and out from its fixing position in the cylinder head.
[ame]https://youtu.be/a4CoZpWyzwY[/ame]
when the injector is out about half way, carefully undo the tool and then do the second injector too, as the clamp that fits between the injectors stops them from coming out all the way in the first attempt, when they are just over half way you can wiggle them out the rest of the way quite easily once you have removed the puller.
You will now have two injectors out, you need to keep them in order, as they are programmed to the car, so dont get 1 and 2 mixed up, I just took no1 away to the bench and left no2 just near its mounting hole.
pic 022
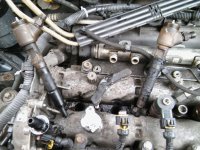
Here we have no1 injector, I cleaned it a bit using carb cleaner but there is more carbon and oily deposits still to be removed but you dont need to go mad on this, the oily black carbon is awful stuff, I dont usually use mechanic gloves but I wished I had, it was really hard to clean from my fingers.
pic 023
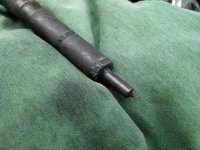
One important note, try not to touch the very tip of the injector, especially with anything metal, or wire [such as a wire brush], it will probably survive a little carb cleaner going over it, just dont try to clean that little tip. Certainly - dont drop the injector! the injection holes in the tip are miniscule.
Where is the seal then? !
the copper seal which is what I want to replace, should be on the end of the injector, but for both injectors the seals are stuck inside the injector hole in the cylinder head, so at this point I am fairly stuck as I tried a few removal methods and no joy, I cannot risk damaging the cylinder head where the seal fits...
pic 024
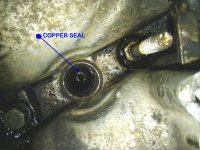
So on that day I wasnt able to proceed any further, and as I needed to use the car I had to clean the holes and the injectors as best I could, and reassemble [I rechecked them with my water test, it was still leaking, but maybe less!, and driving it afterwards saw an improvement!].
So, more internet research, including speaking to a diesel fuel injection specialist for advice, I bought two more tools to add to my growing collection, an injection seal remover £7.50 amazon, and an injection seat cutter £39 amazon. If me or my Mrs get another car [hers is petrol at the moment], that too will be diesel, so I am looking ahead somewhat in my tool purchase, I do have friends that have these tools but I dont like borrowing.
So, after delivery of tools, here I show you the injector seat reamer, once the copper seal is out of the way this tool is used to clean up the sealing face where the injector with its new seal will fit.
pic 024b
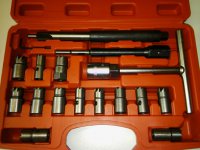
Choose the cutter size required, it will fit the guide shaft using a grub screw
pic 025
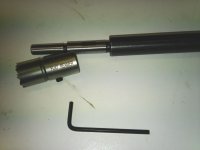
Here the cutter head is fitted to the shaft
pic 026
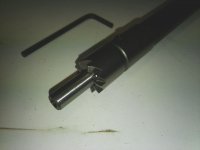
and here it is with the handle T Bar fitted ready to be used
pic 027
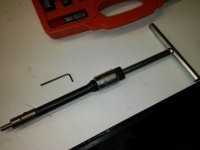
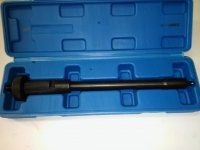
Next up, we have a remover tool to retrieve the copper seal from deep down in the cylinder head
pic 028
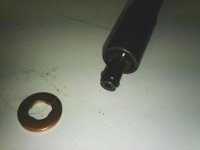
At the tip, this opens up [or spreads out] when you turn the knurled knob on the end of the tool, and will grab the copper seal
pic 029
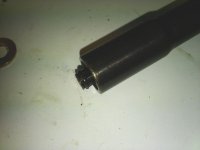
you can screw in the tip, to adjust the depth that the tip works at, this will help stop it grabbing at the injector tip hole, I have screwed it in a bit here so you can see the difference compared to the pic above
pic 030
And so we resume....
So, onto another day and hopefully a better outcome, again I am only working on 1 & 2 and I will skip the removal process as its the same as above, I have got a lighter slide hammer modified to fit my injector adapter as I hope the injectors will come out really easy this time.
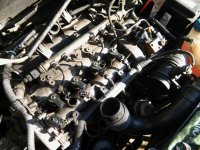
Here we are again with the engine cover/filter box removed, the injectors 1 and 2 unplugged and the cam sensor out of the way
pic 031
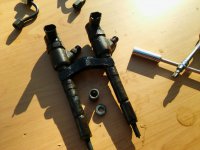
After removing the leak off and fuel pipes, and the securing clamp nut, they just needed a little wiggle this time [no tools] and they are both out with ease, here they are with the clamp fitting which is just a loose fit over each injector
pic 032
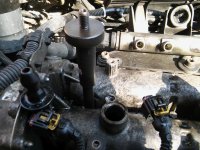
In we go with the seal remover, set it to the required depth, and push down, it will sort of click into place as it goes through the seal
pic 033
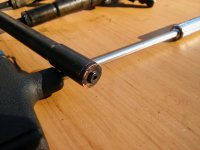
seal removed with no bother after around 2 seconds! its on the end of the tool here
pic 034
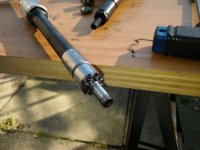
Now I used my seat cutter/reamer to give a new surface for the new seal to seal to, a teeny bit of grease on the tool stops swarf from getting into the cylinder, I also used an air line on my compressor to blow any potential swarf away too.
pic 035
Looking down the hole into seat number 1, as you can see its now got a good surface, do this with the other cylinder.
pic 036
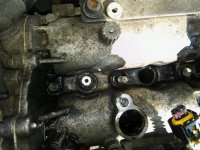
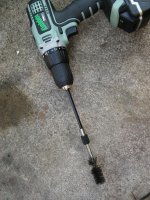
I used a pipe cleaner brush attachment on my drill to clean up the injector hole tubes, with some carb cleaner, it worked quite well.
pic 037
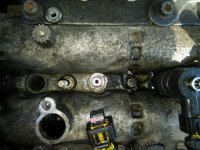
Here the second cylinder hole is done
pic 038
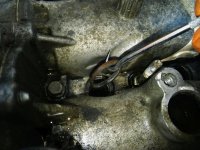
Now I am picking out the top seal, its just a press fit into a cut out in the cylinder head, in hindsight there wasnt a great need to change these, they were quite dear at £2.50 each.
pic 039
Simply press a new seal into place, really easy this bit.
pic 040
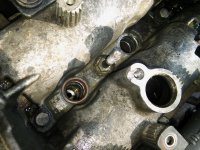
Now the injector seal, make sure the injector is clean in the area where the seal goes, the seals are slightly domed on one side, the domed side goes against the injector, flat side to cylinder head.
pic 041
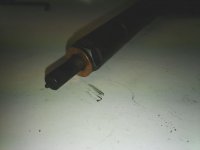
Now put the injector into the hole, not shown is number 2 as well, you loosely assemble the clamp onto them and guide them into the holes
pic 042
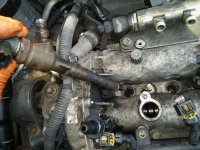
The tighten the clamp, I dont know what the torque is, it just did them up tight enough so that I wasnt going to strip the thread.
pic 043
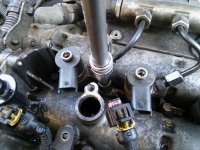
From there on, its just a case of reassembly
metal fuel pipes to injectors from fuel rail, secure fuel rail, attach bleed off tubes and clips, plug injectors back in, attach fuel pipes to fuel pump, push them on until there is a "click" from them.
The first time I did this job, the engine started after a couple of attempts, but this time took a few more attempts, and I was concerned about my battery going flat so I hooked up another with some jump leads, it started eventually and I did my water test again and all was well.
Once I was happy with engine running, no leaks, everything present and tight, I refitted the air box.
To sum up, this wasnt too hard a job, it helped for my first attempt that I had the injector puller, and then for the second attempt a proper seal remover and the seat cutter, I doubt a good enough seal could be achieved without those tools.
I have tried to pics of most of the process, and of course I only worked on 1&2, 3&4 are sealed good, so there is no point disturbing them.
I have indexed the pics, so you can refer to the pic if you need to ask a question or point something out.
Any questions, please ask.
Thanks for looking!!
I had the odd whiff of diesel fumes coming into the cabin mainly with the car stood in traffic, or at first start up, I put it down to the car being an oldish diesel with no DPF, but the Mrs was moaning about it from the passenger seat so I had to investigate!
after looking the engine over to see where a diesel fume smell might be coming from - like the usual places such as the front exhaust section, EGR pipes, with the engine idling I could hear a faint chuffing sound from the top of the engine, so I took off the engine cover/filter box and it was a little easier to hear.
I squirted some WD40 at the injector bases, and this altered the sound slightly, but after looking at the top of the engine a bit closer I thought I would just pour some water into the trough on the top of the engine where the injectors fit.
And the video below, shows that no2 cylinder is leaking through the injector seal:
[ame]https://youtu.be/tNwcb474hQQ[/ame]
Engine tone sounds really rattly on the video, but its isnt in real life, it will be something to do with the phone camera mic.
So, theres work to do! needless to say before carrying on using the car pending repair I drained all the water out of the trough.
Tools needed:
10mm Hex key
Various spanners, 14mm & 17mm.
Injector puller [more about this later]
Later on I had to buy two other tools, an injector seal remover, and an injector seat cutter/reamer tool to clean up where the seal fits [more about this later]
pic 001

Rags
Carb Cleaner
Mugs of tea
Long Screwdrivers
Drill with pipe cleaner brush
Compressor and air line [optional]
Research on the internet of the job in hand, youtube was very helpful.
Parts:
4 x O Ring Seal [fit between injector and cam cover Part No. PN 55205036
4 x Injector seal
pic 002

So when the day came to do this job I thought I would just do injectors 1 and 2 as they have to come out as a pair.
First I prepared a work site, I used my ramps stood up and a piece of wood on top to make a table, really just somewhere to rest tools to keep them at hand and to lay parts down while working on the engine.
pic 003

First, you have to remove the air box/engine cover, I undo the connector to the MAF Sensor [I am pointing at it here] and undo the jubilee clip to the air pipe, pull the pipe off and pull the airbox away, there will be another fresh air pipe to pull out.
pic 004

we then see the top of the engine which is what I will be working on.
pic 005

The injectors come out as a pair, so I am going to work on 1 & 2 first as my leak is mainly from no2 but also a bit from no1, I removed the cam sensor to move it out of the way, then pull off the electrical plugs to the injectors.
pic 006

at the injection pump, pull off the two fuel hoses, they unclip by pressing in two tabs and pull away, my engine had been sat for just a few mins, I wrapped a rag around and under them as I unclipped them but diesel loss was minimal.
pic 007

undo two 10mm bolts, and move the fuel lines away from the top of the engine to give more access, they are quite flexible but try not to kink the lines.
pic 008

Then I removed the leak off/return pipes, a fiddly clip on each one [dont let it fly off, you may never see it again!] then the pipes just pop off the top of the injectors.
pic 009

Then move the full pipe assembly out of the way, its quite flexible.
pic 010

Undo each of the injector pipes, 14mm on the injector, 17mm on the fuel rail. Also undo two fuel rail bolts, to allow it to move a little to be able to get the small pipes out, in this pic I am working on no1.
pic 011

Now, the injector puller tool comes with large open sided sockets as you will need to undo the top of the injector after which you use the other part of the tool to pull each injector out, the top part of the injector isnt very tight. Its the 29mm socket in the set. The black part of the injector that has the electrical connector on it can be moved / rotated slightly to get the socket to fit onto the hex of the housing, I initially found this fiddly as I was worried about the plastic connector housing breaking, but it was fine.
pic 012

Slowly undo the top of injector, and lift it off, be careful as there are small parts including a spring, carefully take them out and set them down in order, do this for the first two injectors, keep them in numbered order.
pic 013

Now you see the two injectors which are nearly ready for pulling.
pic 014

pic 015

Undo the securing clamp nut and collar, remove them and keep safe.
pic 016

I am now going to use the injector puller tool, starting with the silver adapter which you screw onto the top of the first injector, the thread is very fine so be careful not to cross thread it.
pic 017

pic 018

Then fit the ball joint bit, this just allows some movement in the tool and most likely might stop injector from getting broke as the slide hammer assembly is long and weighty.
pic 019

Then the rod fits to the joint.
pic 020

And then the slide-weight over the rod.
And then the stop-end.
pic 021

Now make sure everything is screwed together, if its not right there is potential for damage to the injector, now you simply tap the weight up against the stop end, this will pull your injector out, I didnt use excessive force as the weight does its job and taps the injector up and out from its fixing position in the cylinder head.
[ame]https://youtu.be/a4CoZpWyzwY[/ame]
when the injector is out about half way, carefully undo the tool and then do the second injector too, as the clamp that fits between the injectors stops them from coming out all the way in the first attempt, when they are just over half way you can wiggle them out the rest of the way quite easily once you have removed the puller.
You will now have two injectors out, you need to keep them in order, as they are programmed to the car, so dont get 1 and 2 mixed up, I just took no1 away to the bench and left no2 just near its mounting hole.
pic 022

Here we have no1 injector, I cleaned it a bit using carb cleaner but there is more carbon and oily deposits still to be removed but you dont need to go mad on this, the oily black carbon is awful stuff, I dont usually use mechanic gloves but I wished I had, it was really hard to clean from my fingers.
pic 023

One important note, try not to touch the very tip of the injector, especially with anything metal, or wire [such as a wire brush], it will probably survive a little carb cleaner going over it, just dont try to clean that little tip. Certainly - dont drop the injector! the injection holes in the tip are miniscule.
Where is the seal then? !
the copper seal which is what I want to replace, should be on the end of the injector, but for both injectors the seals are stuck inside the injector hole in the cylinder head, so at this point I am fairly stuck as I tried a few removal methods and no joy, I cannot risk damaging the cylinder head where the seal fits...
pic 024

So on that day I wasnt able to proceed any further, and as I needed to use the car I had to clean the holes and the injectors as best I could, and reassemble [I rechecked them with my water test, it was still leaking, but maybe less!, and driving it afterwards saw an improvement!].
So, more internet research, including speaking to a diesel fuel injection specialist for advice, I bought two more tools to add to my growing collection, an injection seal remover £7.50 amazon, and an injection seat cutter £39 amazon. If me or my Mrs get another car [hers is petrol at the moment], that too will be diesel, so I am looking ahead somewhat in my tool purchase, I do have friends that have these tools but I dont like borrowing.
So, after delivery of tools, here I show you the injector seat reamer, once the copper seal is out of the way this tool is used to clean up the sealing face where the injector with its new seal will fit.
pic 024b

Choose the cutter size required, it will fit the guide shaft using a grub screw
pic 025

Here the cutter head is fitted to the shaft
pic 026

and here it is with the handle T Bar fitted ready to be used
pic 027

Next up, we have a remover tool to retrieve the copper seal from deep down in the cylinder head
pic 028

At the tip, this opens up [or spreads out] when you turn the knurled knob on the end of the tool, and will grab the copper seal
pic 029

you can screw in the tip, to adjust the depth that the tip works at, this will help stop it grabbing at the injector tip hole, I have screwed it in a bit here so you can see the difference compared to the pic above
pic 030

And so we resume....
So, onto another day and hopefully a better outcome, again I am only working on 1 & 2 and I will skip the removal process as its the same as above, I have got a lighter slide hammer modified to fit my injector adapter as I hope the injectors will come out really easy this time.
Here we are again with the engine cover/filter box removed, the injectors 1 and 2 unplugged and the cam sensor out of the way
pic 031

After removing the leak off and fuel pipes, and the securing clamp nut, they just needed a little wiggle this time [no tools] and they are both out with ease, here they are with the clamp fitting which is just a loose fit over each injector
pic 032

In we go with the seal remover, set it to the required depth, and push down, it will sort of click into place as it goes through the seal
pic 033

seal removed with no bother after around 2 seconds! its on the end of the tool here
pic 034

Now I used my seat cutter/reamer to give a new surface for the new seal to seal to, a teeny bit of grease on the tool stops swarf from getting into the cylinder, I also used an air line on my compressor to blow any potential swarf away too.
pic 035

Looking down the hole into seat number 1, as you can see its now got a good surface, do this with the other cylinder.
pic 036

I used a pipe cleaner brush attachment on my drill to clean up the injector hole tubes, with some carb cleaner, it worked quite well.
pic 037

Here the second cylinder hole is done
pic 038

Now I am picking out the top seal, its just a press fit into a cut out in the cylinder head, in hindsight there wasnt a great need to change these, they were quite dear at £2.50 each.
pic 039

Simply press a new seal into place, really easy this bit.
pic 040

Now the injector seal, make sure the injector is clean in the area where the seal goes, the seals are slightly domed on one side, the domed side goes against the injector, flat side to cylinder head.
pic 041

Now put the injector into the hole, not shown is number 2 as well, you loosely assemble the clamp onto them and guide them into the holes
pic 042

The tighten the clamp, I dont know what the torque is, it just did them up tight enough so that I wasnt going to strip the thread.
pic 043

From there on, its just a case of reassembly
metal fuel pipes to injectors from fuel rail, secure fuel rail, attach bleed off tubes and clips, plug injectors back in, attach fuel pipes to fuel pump, push them on until there is a "click" from them.
The first time I did this job, the engine started after a couple of attempts, but this time took a few more attempts, and I was concerned about my battery going flat so I hooked up another with some jump leads, it started eventually and I did my water test again and all was well.
Once I was happy with engine running, no leaks, everything present and tight, I refitted the air box.
To sum up, this wasnt too hard a job, it helped for my first attempt that I had the injector puller, and then for the second attempt a proper seal remover and the seat cutter, I doubt a good enough seal could be achieved without those tools.
I have tried to pics of most of the process, and of course I only worked on 1&2, 3&4 are sealed good, so there is no point disturbing them.
I have indexed the pics, so you can refer to the pic if you need to ask a question or point something out.
Any questions, please ask.
Thanks for looking!!

