I discovered the filter whilst accessing the wiper motor..
it was filthy..so tapped out worst of the ditritis, and sourced a replacement
thanks to MODERN Bravo owner gadge for supplying one at a good price
Lift the bonnet, use the prop in it's secured position.
walk along the LEFT wing until the Black scuttle drain is in front of you,
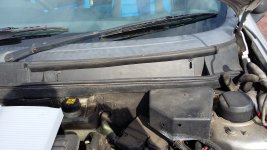
the access panel is secured with 2 x self-tapper screws,
and then has 3 x location slots cast into the plastic
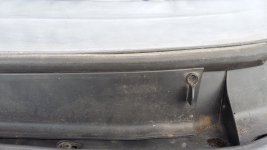
remove the 2 x screws
( the panel is then "free")
get a flat screwdriver under the rubber screen to bonnet trim - work/slide it along so that the TOP of the access panel is exposed
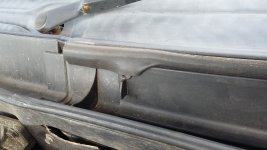
tilt the top of the panel FORWARD - away from the screen,
then LIFT the panel out of the 3 x retaining slots
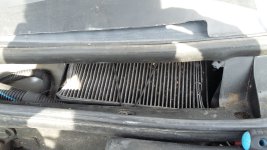
it was filthy..so tapped out worst of the ditritis, and sourced a replacement
thanks to MODERN Bravo owner gadge for supplying one at a good price
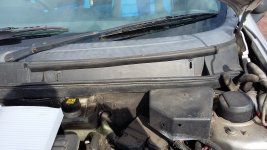
Lift the bonnet, use the prop in it's secured position.
walk along the LEFT wing until the Black scuttle drain is in front of you,

the access panel is secured with 2 x self-tapper screws,
and then has 3 x location slots cast into the plastic

remove the 2 x screws
( the panel is then "free")
get a flat screwdriver under the rubber screen to bonnet trim - work/slide it along so that the TOP of the access panel is exposed

tilt the top of the panel FORWARD - away from the screen,
then LIFT the panel out of the 3 x retaining slots

Removing filter
the filter is sat in a rectangular plastic "tray",
and secured with a stretched rubber cord "o"- ring
IF it's covered in leaves / junk.. then get a hoover / etc in there to remove said junk
you do NOT want any of that to potentially fall into the fan housing..!!:bang:
GENTLY work the rubber cord over the small hook,
then the filter can be wriggled upwards
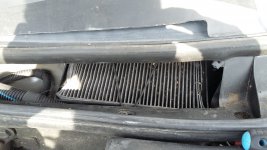
Clean / Inspect
Have a look around the area,
is there any dust build-up inside the heater channels,
are the faces of the black plastic where the filter sits still clean and dry
now is the time to clean..
is there any dust build-up inside the heater channels,
are the faces of the black plastic where the filter sits still clean and dry
now is the time to clean..
New Filter Installation
there are some small ridges on the top faces where the filter sits,
where the "fins" of the filter nestle..so it will stop the panel filter moving under airflow..
or indeed extreme driving
at this point I had an issue,
the Mk1 bravo filter was physically too big / oversize
for my 2001 Marea JTD - aircon equipped car
View attachment 180836
so I had to offer -up the original .
and against the 2 decided the WIDTH was OK , but just TOO LONG
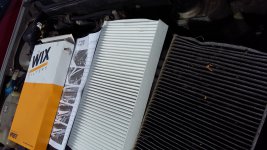
so used a sharp craft knife to trim the filter down- I went fractionally TOO LONG.. then offered against the filter box frame, ALMOST fitted.. but the filter would not sit flat.. arched like a bridge
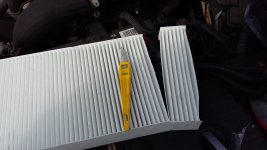
removed another 2 x segments from the filter - SUCCESS..!!
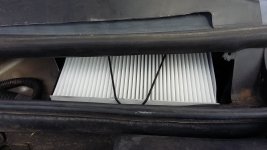
laid the filter into the filter box frame,
the ridges on the frame do a good job of locating the filter,
CAREFULLY stretch / work the 16 year old o-ring.. into place
Replacing covers
double check the area is still clean .. and you've left no tools in there..
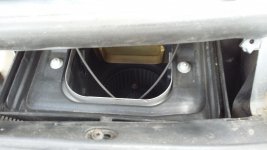
lower the trim panel down - locating on the 3 x tabs
then lean it BACK towards the screen
you will need to run the rubber sealing strip back over the panel,
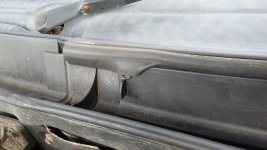
it's now in place and reasonably stable.
refit the 2 x self-tapper screws.
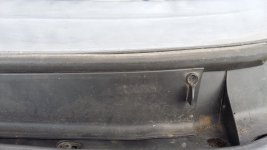
double check everything looks good,
put ignition key in car, and test AIRFLOW - could be quite an improvement..!!
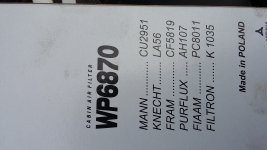
the supplied filter packaging for reference.
