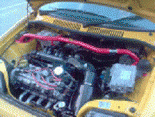
This guide is for the stilo engine. It will also apply to 1.2 16v engines as well, but if your going to the hassel of a 1.2, why not a 1.4?
I also take no responsibility for anyything whatsoever, the guide is designed to assist your own knowledge
Before we start, make sure you understand the costs involved in this swap, not only for the parts, but the insurance as well. Most companies will not insure this engine swap due to the dramatic increase and the fact that it has not been in the car 1 year +. However Adrian flux are very understanding.
I have no knowledge or info on removing the variator/putting a plate over it, so will not cover this. It is fairly straight forward according to Aaron (J333EVO) and you may find more info in his thread. Other than that the engine from the grande punto is pretty much the same.
Before we start you may wish to look through these threads as they are also great sources:
https://www.fiatforum.com/cinquecento-seicento/91558-seicento-1-4-16v-project.html
https://www.fiatforum.com/cinquecento-seicento/176286-my-1-4-16v-cinquecento-development-thread.html
https://www.fiatforum.com/cinquecento-seicento/166019-cinq-abarth-project-1-4-16v.html
https://www.fiatforum.com/cinquecen...-what-ive-gone-done-now-d-stage-2-begins.html
https://www.fiatforum.com/cinquecento-seicento/115502-1242-8v-spi-preparing-engine-turboing.html
Also my own thread which has lots of costs and part numbers that may be of some use:
https://www.fiatforum.com/cinquecento-seicento/226910-dans-1368-cinq.html
Before you carry out this engine swap:
Make sure that the suspension has been upgraded and the brakes have also been upgraded or do not continue. For brake upgrades please see this guide:
https://www.fiatforum.com/cinquecento-seicento-faqs/93835-brake-upgrades.html
This guide also covers removal of the charcoal cannister system. Although it is not environmentaly friendly it creates a nice bit of space in the engine bay.
Parts required
1.4 16v stilo engine (the more bits you can get with it the better as you can sell on these spares)
supersprint manifold (code SUP814401 ) or similar
You have the option to fit the stilo inlet manifold (if you silkaflex the engine mounts and remove the firewall cover) but you will need a spacer made for a suitable throttlebody and the 1.2 16v MAP sensor.
1.75 / 2" bore exhaust
A gearbox that can handle the power (i used the 6 speed that was designed for the engine) but this creates more work. A 1.2 16v gearbox should suffice.
1.2 16v ECU and engine loom or standalone (many options available)
1.2 16v alternator
Cinquecento engine mounts
1.2 16v Coil pack mounts and coil packs (or 8v packs in the punto sporting mount
1.2 16v Ignition leads
cinquecento alternator belt
stainless steel cable ties
Cinquecento driveshaft cups from cinquecento gearbox
Gearbox oil
Engine oil
Coolant
2 new front hub nuts
some sort of induction kit
uprated fuel pump, such as the fiat stilo, punto gt, or even the ford rs2000 iirc. The possibilities are endless as alot of walbro pumps are interchangeable, but double check on the forum first.
Fuel pressure regulator, something like a SARD is perfect although a couple of us have used immitations to good effect
Fuel hosing (high pressure)
silkaflex or tigerseal (optional but recommended and required if using stilo inlet)
I would say minimum 14" wheels (needed for GT brakes anyway) or the wheels will just spin
Fuel pipe T piece
handful of hose joiners for fuel hosing and coolant hosing
Coolant hosing
Lots or jubilee clips
Cinquecento gearbox selector mechanism (if fitting 6 speed)
Cinquecento clutch arm (if changing from hydralaulic clutch, highly likely)
Cinquecento gearbox speedo worm drive
Cinquecento haynes manual and punto manual came in very handy
Coolant pipe from cinquecento
Sealing ring for coolant pipe above
Fabricated Engine mount spacer (optional, but means less cutting of mount)
Fabricated Spacers for alternator
Some sort of spiral wrap for the wiring harness
Fabricated throttlebody spacer (recommended)
Cinquecento coolant temperature sender
Steering lock reducers or wheel spacers (if fitting a 6 speed box)
Recommendations and removal
Things i would definately recommend you replace while the engine is out:
Cambelt
Cambelt tensioner
Clutch and thrust bearing
Spark plugs
water pump
alternator belt
thermostat
exhaust gasket
driveshaft cup seals and locking clips
CV boots
Radiator
Other tools required that you may not have:
camshaft locking tool
angle grinder or lots of strong hacksaw blades
special clutch alignement tool of something fabricated
Circlip pliers
For removing your cinquecento engine please see this link or a haynes manual:
https://www.fiatforum.com/cinquecento-seicento-faqs/93884-engine-swaps.html
I would recommend removing the battery while doing this swap as the car is going to be in pieces for a while.
Also make sure the driveshafts are removed completely, not just from gearbox as they will get in the way
Remove engine loom and ECU
The only part of this you will need is the D4 connector as shown later, but make sure you keep it all as the wires will come in handy.
Take this opportunity to remove the OS headlight as it makes life easier.
However, before taking it out, make a mark on the bolt where the nut finishes.
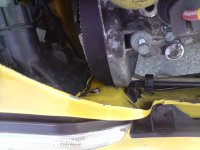
The reason for this is you will need to cut the spare thread off of this to clear the cambelt properly. This can then be chopped off, making sure the nut still goes on smoothly. or replace with a self tapper as above.
Remove the radiator and cooling fan, as it only gets in the way later
You may want to fast forward and remove the cannister at this point
New engine in front of you
Right first off you need to have your new engine in front of you.
If you have the wiring loom attached go around and undo it all.
There is a sensor on the back of the engine, this can just be left alone as it will no longer be required.
Cut off the old alternator belt and throw away
Unbolt the power steering pump, but beware that there may still be fluid inside and is an irritant, will strip paint, etc
Remove the remaining alternator bolts, one of which goes through the engine mount, then withdraw alternator
Put the powersteering pump and alternator in a box marked (for sale on ebay)
Unbolt the 3 engine mounts (1 is attached to the alternator and 2 on the gearbox if you bought it with the engine. May have been removed already.
![P150610_19.28[02].JPG P150610_19.28[02].JPG](https://cdn.fiatforum.com/data/attachments/50/50620-699789737842587895400493da239383.jpg)
The alternator actually covers one of the new mounting holes for the cinquecento engine mount, so don't panic when you cant see the 3 in a triangle.
If you have all the airfilter box, remove this and add it to the ebay box
Unbolt the 4 bolts that hold the throttlebody on and add the throttle body to the 'box'
You now have your decision to make regarding the inlet manifolds. You have 3+ options:
Option 1
Leave the stilo inlet manifold and run with the stilo injectors. If you wih to
do this you will need a fiat punto 1.2 16v MAP sensor. With this sensor in front of you, the problem with it is it is slightly too wide to fit in the stilo inlet. So what you do is take the 2 rubber rings from the sensor. Then carefully sand a little bit of the edge off. I also sanded a tiny bit from where the rings sit, so they sit can push in a little further when mounted.
The mounting hole for this sensor lines up nicely on the stilo inlet
Option 2
Use the punto 1.2 16v inlet manifold with the 1.2 16v injectors and fuel rail.
You then use the 1.2 16v MAP sensor
Option 3
Use the punto 1.2 16v inlet manifold with the fiat brava/o 1.6 fuel rail and fiat stilo injectors. You need this fuel rail to allow the injectors to mount correctly.
Another option
use a bravo inlet manifold and mess around trying to wire up a suitable MAP sensor etc. Not recommended.
Make sure all of the oil is out of the engine and gearbox before going any further. Drain into suitable sealed container and dispose of in an environmentally friendly way.
Remove the 4 coils from the tops of the spark plugs. These can be added to the 'box'
![P170710_13.55[01].JPG P170710_13.55[01].JPG](https://cdn.fiatforum.com/data/attachments/50/50629-df60ec3478cd2c9b14e90fd5083028e5.jpg)
Undo the spark plugs. This stops pressure build up inside the engine while timing. Make sure nothing drops into these holes by putting some tape over the tops.
You can now unbolt the bracket that holds the coil packs to the head. Now using the punto bracket and coil packs bolt them in its place with a thin layer of sealant.
The new thermostat can now be fitted.
Fitting new belt
Undo the upper and lower timing belt covers
Check that your new cambelt and tensioner match the ones you are about to remove.
You need the 2 locking bolts and the 2 locating rods to time correctly.
Remove the inlet manifold. This needs to be done to access the rear camshaft locking hole
Undo the 2 plugs (one on the front and 1 of the rear of the head) for inserting the locking tools into.
Insert the 2 locating rods into plug holes 1 and 2 and screw in.
Rotate the engine with a spanner until the 2 locaing rods are level. There are 2 positions where these will be level, but only 1 where the 2 locking bolts will screw into the camshafts.
Screw the 2 bolts into the camshafts
Take note of which way the cambelt rotates.
Undo the tensioner bolt and withdraw the tensioner
Slip off the cambelt
Unbolt the water pump and fit new
put the new tensioner on, but do not tension up
Put the new belt on, easiest way is to start at the crankshaft and work your way round to the tensioner.
Push tensioner until belt is taught and tighten tensioner.
Remove bolts from camshafts and put plugs back in
Turn engine through 2 full rotations and check that the marks on the tensioner line up or are pretty close.
To the left means too tight and to the right means too loose iirc.
Line up the locating rods and put the locking bolts back in
Adjust tension of belt until after 2 rotations you can get the marks lining up, make sure you remove bolts and put back in each time, just in case.
Refit the lower timing belt cover, however without modification the top one will not fit.
You can now remove the tape from the top of your plug holes and fit your new plugs. You can even put the HT leads on to keep the plug recess's clear of dirt.
Fitting clutch and making your gearbox work in your cinquecento
You can do this now or later. Probably easier while its off though
You need to remove the speedo worm from the cento box, the selector from the top (held in with 5/6 bolts) and the clutch arm, which is held in place with a circlip. You also need the cinquecento driveshaft cups. These are a bit of a pain to remove. They are help in place with a strong retaining clip. Easiest way is a screwdriver either side and suddenly try to lever/pop them out. This is a very messy bit. You now need to clean everything up.
Now repeat with the new gearbox cups.
I would now recommend replacing the driveshaft cup rubber seals as i had one leak after fitting everything and filling up the oil
Fit the cinquecento cups onto the new gearbox using a hammer and a flat piece of wood to protect the cup.
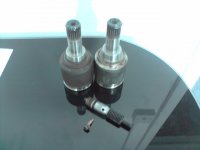
Remove the bolts around the gearbox holding it to the engine. Dont miss the one going the other direction at the front of the engine, like i did and wonder why it wont come apart. Leave the top one until last.
Undo the bolts holding the flywheel cover to the gearbox
With the gearbox now seperate from the engine you can now unbolt the clutch pressure plate. These should be undone in a diagonal sequence. With this removed the clutch comes out.
At this point i used a damp cloth to wipe off any dust from the inside of the housing and from the flywheel.
![P160610_17.09[03].JPG P160610_17.09[03].JPG](https://cdn.fiatforum.com/data/attachments/50/50608-0034ee8981e8e26f6b22f235a8c0b507.jpg)
Inside the housing you can now pull the thrust bearing off of the spline.
give this spline a bit of a wipe with a dry cloth as you do not want water on this. Be careful not to inhale any dust.
Apply a little grease that came with the clutch kit you bought to the spline
Put the new thrust bearing onto the spline. It should locate using the 2 cut outs in the thrust bearing.
On the top of the gearbox housing you have have a clutch clutch arm. This needs to be replaced with the one from the cinquecento gearbox.
To do this, undo the circlip and pull off.
The cinquecento one goes on in the same position as it does on the cento.
There is a double notch in the spline to locate with.
![P190610_19.47[01].JPG P190610_19.47[01].JPG](https://cdn.fiatforum.com/data/attachments/50/50605-099fd3c348b2cf95f584bd636d1cc1e6.jpg)
Put the cinquecento arm on and replace the circlip.
Remove the speedo worm from the gearbox, by undoing the bolt/screw on the side of the worm then simply pulling it out with a pair of pliers
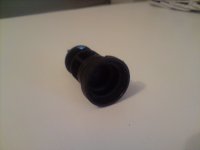
Now to get the 6 gears you need to undo the selector mechanism from the top of the cinquecento gearbox. There is 5/6 bolts iirc holding this on.
![P150610_19.52[01].JPG P150610_19.52[01].JPG](https://cdn.fiatforum.com/data/attachments/50/50647-69848dd3200e72c9c7a44900bce87db4.jpg)
Hopefully the gearbox was in neutral when it was removed or it makes things awkward.
Repeat on the 6 speed gearbox.
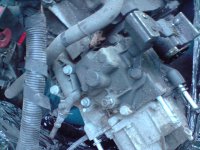
Scrape the sealant from the cinq selector face and the gearbox face, making sure all bits go onto the floor not in the box.
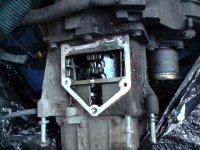
Put a small bit of sealant arount where the other sealant was and torque down the selector mechanism.
To put the new clutch back on you need either a special clutch alignement tool of something fabricated. I used a thick chisel handle with some electrical tape around the end.
Make sure the clutch face width and pressure plate holes line up correctly before proceeding.
Put the clutch over your tool and line it up on the flywheel using the tool to rest it in place. Now slide your pressure plate over the tool and start doing up the bolts finger tight in a diagonal sequence, making sure the clutch stays in perfect contact with the flywheel. Now tighten all bolts to 10NM again in a diagonal sequence.
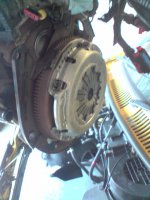
You can now carefully align your gearbox back into position and do up all the mounting bolts.
How many nuts and bolts do you have lying around now
Removing the charcoal canister and assosiated parts
Inside the Inlet manifold on the stilo engine is an evaporator. this can simply be unbolted. The hose at either end can be unhooked. This can be added to the 'box'.
![P080710_21.55[01].JPG P080710_21.55[01].JPG](https://cdn.fiatforum.com/data/attachments/50/50653-61e3c1cce6f33303e8258dad81a9396b.jpg)
To unbolt the charcoal cannister itself there are 2 bolts. One to the front and one right up in the depths. Easy to get with the engine out, but a pain once fitted.
The wiring connector should be unplugged as you have already removed all the engine loom wiring. One connection from the cannister will already be undone as it came from the original throttlebody.
The other is a return pipe that feeds back to the tank. This can be cut just
before it joins the solid metal piping as it enables you to put it back in at some point if you require.
Spacing your alternator to make the belt line up
If you bolt your punto alternator onto the stilo 1.4 engine you will notice that the pulleys do not line up. To alter this i made spacers from the stilo engine mount that i took off of the engine previously. If you do not have this something will need to be fabricated. You need to make 3 spacers exactly the same width. Mine are roughly 27mm but double check they line up nicely when the alternator is in place.
![P070810_18.54[02].JPG P070810_18.54[02].JPG](https://cdn.fiatforum.com/data/attachments/50/50683-638295b602ea4dd2fcacd4fee9ca041e.jpg)
Allowing the alternator belt to clear the engine mount
To do it properly take the engine mount to an engineering shop and have a 5mm spacer made up for the flat side of the mount that bolts to the engine. This spaces the mount out slightly, but not enough to make it impossible to connect the other 2 mounts later, although it is slightly harder. Alternatively you could make something similar.
While the alternator is in place, bolt the engine mount onto the side of the engine. With the cinquecento alternator belt, check that it can rotate freely, if not continue to grind the mount.
I would personally leave the alternator to one side until the engine is in place as it makes things easier.
With the engine mount now finished i would take this opportunity to fill the mounts full of silkaflex or similar. These take a couple of days depending on brand to set so be prepared for that. Not pretty, but does the job very well.
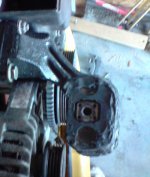
Coolant pipe problem
Getting around the coolant pipe problem:
As you can see the stilo has a 2 way pipe coming from the water pump. The problem with this is that it hits the radiator nicely when left like this.
![P210610_20.03[01].JPG P210610_20.03[01].JPG](https://cdn.fiatforum.com/data/attachments/50/50660-a98343491925d724d80207ff15ac0c64.jpg)
Soo....
If you still have your cento engine brilliant as you can remove the coolant pipe from this rather than buy one. I would still advise you buy a new sealing ring just in case however. Here is the difference:
![P250610_11.52[01].JPG P250610_11.52[01].JPG](https://cdn.fiatforum.com/data/attachments/50/50663-a1b48731a94271a6d9bc8755bbcdcc0f.jpg)
To replace this, simply undo the 2 bolts holding it in place and twist out. To remove the rubber seal use a small flat screwdriver, being careful not to scratch the housing surface.
Clean where the seal locates and insert the new seal
Push the cinquecento pipe into place and put the 2 bolts back in to hold it in place.
Replacing the fuel pump
This is covered very well in the haynes, but:
Make sure the battery is not connected
If you already have the back seats out, brilliant. This is easier.
You need to gain access to the top metal cover above the fuel tanks from under the back seat so will need to remove.
Undo the fuel cap to release pressure, just in case
Undo the 4 screws holding the metal plate in place
Unclip the 2 wiring connectors
Undo the nut on the retaining bracket
Pull out the supply and return (a bit off tissue handy is good at it will drip)
Using 2 beefy flathead screwdrivers insert them into the nothes. Then use a 3rd in between them to rotate the plastic anticlockwise if that makes sense.
Take out the sender
Let this drain as it holds quite alot of fuel
Unplug the pump wiring connector
Undo the fuel pump bolts, being careful not to drop them into the tank in a second
Lift out the pump (let it drain again)
Replace with new pump and refit as you took it out.
The Fiat barchetta pump i used was slightly shorter and thinner, this meant i had to make a rubber seal around the pump to hold it tightly in place. Fairly obvious when you have the pumps side by side.
Reconnect all wiring etc and then battery if you really must, but personally i would leave it off.
Fitting the engine
(firstly the more help the easier)
Personally i did it the hard way, from the top without the gearbox and took the bonnet off. Then tried to get gearbox back on...
If i did it again i would leave gearbox on.
You then lift the car off the floor enough to slide the engine underneath via the use of tall axle stands.
Make sure chocks are under the rear wheels as cento handbrakes are not exactly trustworthy.
Taking the bonnet off makes life alot easier here
Using a hoist of some sort, lift the engine up into place and bolt on the OS mount.
This takes a bit of manouvering as all sorts of hoses will get in the way.
Main culprits that should be out already are the radiator, fan, water tank and charcoal cannister.
If you can now put another engine mount into position perfect. You may be able to lower the engine slightly to line up bolt holes, but would be very wary if raising. A better solution would be to raise a trolley jack underneath the gearbox casing with a piece of wood to protect and carefully lift to get it to line up. Leave the engine hoist cables in position until all 3 mounts are bolted in securely.
The car can now be lowered to the ground.
Bonnet and headlight can be replaced, chocks removed, etc.
The exhaust manifold can now be bolted on and needs to be done before the radiator goes back on as its a bit of a squeeze, prefereably with a new gasket. The supersprint manifold comes with a bracket that will secure it to the sump. The lambda can now be bolted in.
Few little bits
The coolant temperature sensor to the side of the inlet manifold has a different connection to that of the punto loom. Easiest away around it is to fit your cinquecento one.
Fitting a breather filter?
If you wish to fit a breather filter, it saves you joining the hose to the induction. MOT stations can now add this to the emissions depending how awkward they want to be as it is another exit for gasses.
A breather can be fitted directly to the top of the flame trap as the flame trap stays in place when the hose is remove.
Connecting up the fuel pressure regulator
The supply is the one on the right and the second return is the left one. The second return will already be blocked off if following this guide.
If using the replica FPR it comes with a handy bracket. I bent this into a flat bracket rather than the right angled bracket and mounted it here, however you can mount it werever you see space really.
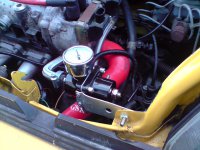
Since writing this guide i have altered the position of this FPR as it is too close to the exhaust manifold and risks getting vapour lock. It is now where the heater box is/was
The small connector is a vacuum pipe and needs to be joined to the inlet manifold. If using the stilo manifold there is spare connection to the rear nearside of the inlet manifold that was used for the evaporator that has now been removed. If you are keeping the charcoal cannister set-up you can put a Hose T connector onto this pipe.
I found 5mm silicone hosing is a perfect fit for both the FPR and inlet vacuum connections
The other connection to the inlet manifold can now be either blocked off or used as the vacuum for the FPR as it is slightly closer to one of the mounting possibilities next to the headlight.
Relocating the coolant tank (if using stilo inlet manifold)
You will not have this problem if using the punto inlet, but still worth considering moving as it looks soo much tidier.
If using a stilo inlet manifold the coolant tank will contact the edge of the inlet manifold where the MAP sensor is positioned.
This means you can either mess around trying to make it fit here or move it to where the battery is and put the battery in the rear.
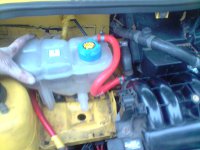
For moving the battery to the rear of the car, this link is extremely useful:
https://www.fiatforum.com/cinquecento-seicento/128346-moving-battery=boot.html
To attach the coolant tank i used the original mounting bracket. Simply cut it into a thin strip. Quite simple as shown:
![P070710_19.15[01].JPG P070710_19.15[01].JPG](https://cdn.fiatforum.com/data/attachments/50/50676-f5cb685cdcf7fdbf471b12e214dfb7ec.jpg)
This means that the holes are already the correct size for the bolts and you dont need to buy metal sheeting or attempt to cut it smoothly.
The radiator and fan can now be put back in.
The brake servo hose can now be joined to the inlet manifold.
The clutch cable can be re-attached along with the 2 selectors for the gearbox.
The driveshafts can be put back in place with the new boots, grease and hub nuts.
The throttle body can be attached if it hasnt already. If using the stilo inlet a spacer will need to be made. The induction can now be attached.
Running the coolant hoses
These are very tight from the heater matrix to the inlet manifold if using a stilo set-up, however should run nicely if using the punto inlet manifold. If using the stilo hoses, you will need to shorten the hose coming from the matrix to make the 90 degree bend closer to the bulkhead.
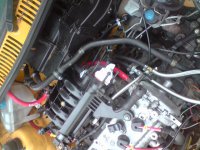
If you have relocated the coolant tank you will need to extand the lower hose that flows around the the OS of the engine and to the 4 way connector. This will require some 16mm hosing and joiner
The other coolants hose can be put back in place. From the heater matrix the the top one goes to the the 4 way pipe next to the exhaust manifold. The lower one needs needs to be adapted so that it has a T after it comes from the matrix. The smaller hose goes to the small header tank connection and the larger connection goes to the head behind the thermostat.
Wiring
With the Cinq ECU removed you can decide where to put your ECU
I found the easeies option was to fit where the cinq one was and route wires under tray and round back of engine, allowing the coil wires etc to come out where you need them.
For the wiring you need to connect:
cinq orange to punto orange
cinq pink/yellow not used
cinq black/white not used
cinq orange blue not used
cinq white/red to punto blue/black
cinq green/white is for temp gauge on dash
cinq black/purple to punto black/purple or black
cinq orange/green to punto brown/white
cinq green/yellow to punto green/yellow
cinq green/grey to punto green/grey
cinq red to punto blue
There is then a red/black that goes to the spare plug hidden underneath the battery tray that is for the ignition.
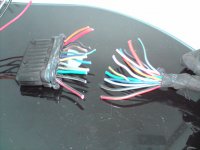
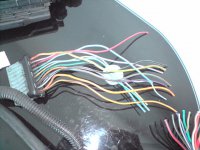
Then the ground with a ring terminal going to ECU casing
Punto engine loom ground i put onto gearbox ground connection that is shared with the body to gearbox ground. Works for me. Sanded and sealed for good connection.
I extended the crank sensor all the way around the back of the engine bay so it was out of the way from manifold etc, but you can run it wherever you feel fit.
Unplug the injector wiring from the stilo engine if you have it and plug in the punto wiring, this can now be connected to the punto loom.
Plug the 2 clips into the throttle body.
Connect up the lambda, the coolant sensor, the oil sensor, the MAP sensor and then the d4. The D4 may need to be extended if it you can not get it out of the way.
The reverse sensor can be plugged in along with the fan wiring and radiator switch.
A lower temp switch and even a lower temp thermostat can be made using this guide:
https://www.fiatforum.com/cinquecen...nq-sei-stat-cooler-running-gt-switch-mod.html
The stilo starter motor has strange connections on it so make sure you pay attention to how it comes off. There is a large ring that needs to clip into the plastic waterproof bracket, then a smaller one that goes over the bolt.
Pipes to protect, and last few bits
The pipe running fom the 4 way connector to the coolant tank will touch the manifold if it is left where it is. After lots of reading about wrapping manifolds i decided to wrap the coolant hose instead. This was held on with stainless steel cable ties. Another steel cable tie was then wrapped around this hose to the lower radiator hose to pull it away from the manifold.
If using a similar induction kit set up the filter will rest on the coolant hose coming from the thermostat. This can also be wrapped to protect it.
If relocating the coolant tank. The hose coming from the bottom will rub on the battery tray. I simply cut away the battery tray as i know i will never use it agan. Making sure to seal where you have left bare metal. Another option would be a second hose wrapped around the edge. This will protect it nicely, but will still have to be check to see how quickly it is wearing through.
As the engine is deeper this same hose runs very close to the radiator fan.
Make sure this is cable tied into position away from the blades.
Finally, reconnect the battery. and turn the key one click. It should flash the code light as normal, the injector light should come on for 5 secs and in this time you should be hearing it prime. If you cannot hear it prime, firstly check the fuel cut off switch. If no luck please start a thread on the forum where somebody will assist you.
You can now trial start to see what happens, however running for any length of time with no back pressure from the exhaust is not recommended.
If it starts although, albeit extremely loud, you can now adjust the fuel pressure to be at 3.5 bar while idling.
Now that most parts are done the exhaust can be made up. Clearance wise, the supersprint manifold sits nice and close to the sump so will clear the ARB unlike the standard cinqueccento exhaust.
I hope this will be of some use to somebody in the future. I have had great fun doing this engine fun, although quite stressful at time. The guys on the forum are brilliant and if you have any questions please start a thread and we will try our best to help.
A great thanks to all who helped me and continue to help, and i hope to pass my knowledge on as it progresses.


