

You are using an out of date browser. It may not display this or other websites correctly.
You should upgrade or use an alternative browser.
You should upgrade or use an alternative browser.
Technical Project Paolo
- Thread starter Paolo66
- Start date
Currently reading:
Technical Project Paolo

They look alwight Damian.
I bet you cant wait now!
I bet you cant wait now!
OP
OP
Paolo66
Established member
- Joined
- Feb 6, 2013
- Messages
- 1,004
- Points
- 235
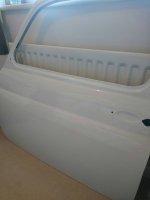
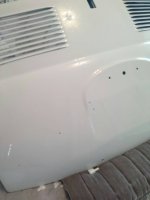
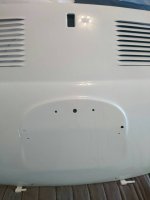
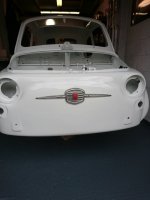
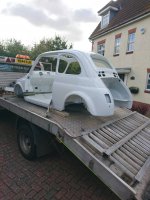
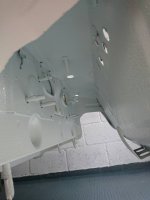
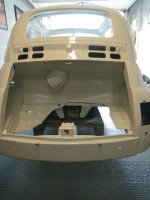
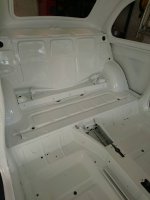
Paolo is back home! Haven't stopped looking at him and going "wow". Been over him with a fine tooth comb and can't see any drips or blemishes, it really is a top job. First thing I did was put his nose badge on to give him his identity back. Put the rear grill on as well but might have taken it too far by polishing the screw heads! Now the fun begins, get ready for lots of questions
Attachments


the hobbler
Distinguished member
- Joined
- Jul 25, 2012
- Messages
- 4,499
- Points
- 1,132
Just for interest Sean, who did your paintwork---they seem to have done a first-class job. As regards as to where to start, a constant supply of cups of tea would seem to be required. Do you have a wiring diagram? if you haven't let me know and I will send you a copy of one from my Factory work-shop manual.


OP
OP
Paolo66
Established member
- Joined
- Feb 6, 2013
- Messages
- 1,004
- Points
- 235
Thanks Tom, I have numerous wiring diagrams in both English and Italian. I have bought a labelling machine to label each wire. I am waiting for some loom tape to turn up to wrap it all up. The paint job was done by a guy called Frazer Linsell who owns his own business called F Paint. I met him at a local car show where he was able to show me some other cars he had done. Difficult to capture in photos but it looks even better in the flesh. Its concours condition
Damian (not Sean)")
Damian (not Sean)
Regarding your wiring diagram ,I copied it from the workshop manual
and my son got me a copy blown up to A1 size . I then mounted it on a
piece of board.It was much easier to trace wires.I am sure if you have access
o a manual a friendly copy shop would be able to blow it up for you.
If you are stuck send me a private message.
and my son got me a copy blown up to A1 size . I then mounted it on a
piece of board.It was much easier to trace wires.I am sure if you have access
o a manual a friendly copy shop would be able to blow it up for you.
If you are stuck send me a private message.
OP
OP
Paolo66
Established member
- Joined
- Feb 6, 2013
- Messages
- 1,004
- Points
- 235


Every little bit counts Damian. You will soon be putting them all on the car and then you will be obsessing over the nuts & bolts
OP
OP
Paolo66
Established member
- Joined
- Feb 6, 2013
- Messages
- 1,004
- Points
- 235
My wiring loom has some wires for the wiper motor that have bullet connectors. My wiper motor has a 4 pin plug as does my old loom. Should I put the plastic plug on the new loom or bullet connectors on the wiper motor? Does it matter?
My wiring loom has some wires for the wiper motor that have bullet connectors. My wiper motor has a 4 pin plug as does my old loom. Should I put the plastic plug on the new loom or bullet connectors on the wiper motor? Does it matter?
It doesn't really matter Damian. It was probably done so the wiper motor could be unplugged easily if it went faulty and to ensure the wires don't short together.
If it was me I would swap the plug over to the new loom but it depends if you have a crimper or soldering iron and how easy it is to get the old connectors out of the plug?


That's what every restoration isSmall baby steps
unless you're on the Discovery channel and have half a dozen people in the background working on it too It's very satisfying crossing off all those little jobs though.
cheers, Steve
the hobbler
Distinguished member
- Joined
- Jul 25, 2012
- Messages
- 4,499
- Points
- 1,132
Yes, but Ed China is 6ft 4in tall and works full time on the job---and they don't do it to the standard you have achieved!!

OP
OP
Paolo66
Established member
- Joined
- Feb 6, 2013
- Messages
- 1,004
- Points
- 235
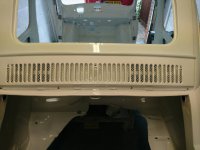
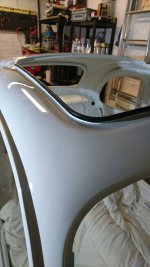
Slowly ticking off the small jobs. Have fitted some trim for the sunroof
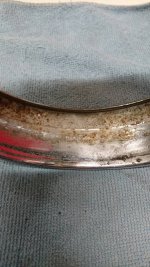
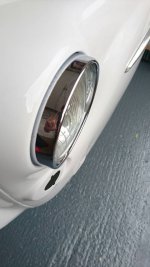
Cleaned one headlamp. Used some tin foil and white vinegar and it was like magic!
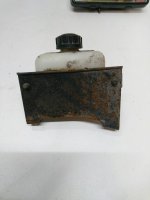
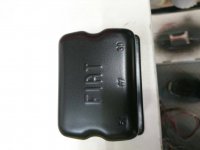
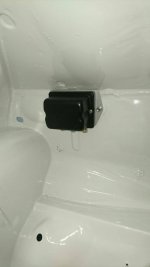
Fitted the voltage regulator box which looks better than new
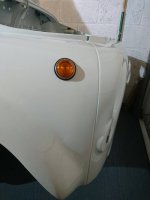
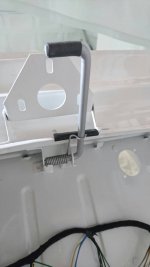
Bonnet catch is on. Have kept that zinc and then fitted a rubber piece so it doesn't scratch the bonnet.
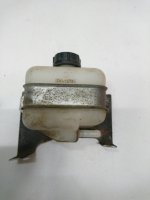
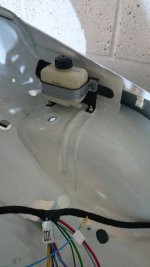
Fitted the brake reservoir
Busy weekend ahead I reckon
Cleaned one headlamp. Used some tin foil and white vinegar and it was like magic!
Fitted the voltage regulator box which looks better than new
Bonnet catch is on. Have kept that zinc and then fitted a rubber piece so it doesn't scratch the bonnet.
Fitted the brake reservoir
Busy weekend ahead I reckon
Attachments


Patination. Keeping the Faith.:worship:
Great that you're not just replacing everything Damian.
Keeping the Faith.:worship:Great that you're not just replacing everything Damian.
Similar threads
- Replies
- 7
- Views
- 837