Technical Project Paolo

Currently reading:
Technical Project Paolo

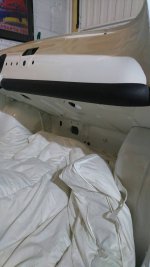
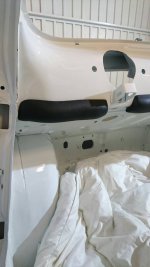
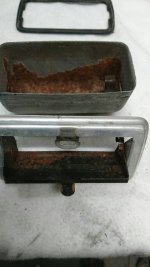
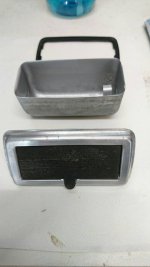
It's too easy to just replace everything Peter not to mention too expensive. Patina I can live with, dirt and grime I can't. If it can't be cleaned to satisfaction, and it's cheap enough, I might replace. What I'm finding though is that there's nearly always a way to get anything clean and to a fairly high standard. Takes time but no longer than waiting for it to arrive from Holland/Germany
 
Case in question Peter. Used tin foil and white vinegar on this headlight surround. Some of the pitting still shows on the inside but the rest of it has come up a treat. As the bits you will see on the car are shiny it goes on
 

Attachments

  • 1476456221912.jpg
    1476456221912.jpg
    36.4 KB · Views: 21
  • 1476456230854.jpg
    1476456230854.jpg
    37 KB · Views: 22
Are you going to protect it with a fancy chemical product like Gteqh C1?
I found that without it the corrosion came back very quickly
 
Are you going to protect it with a fancy chemical product like Gteqh C1?
I found that without it the corrosion came back very quickly

Not at those prices Andrew. Cheaper to buy a replacement. Got something similar I have used on my shower screen will give that a go if need be
 
My headlights have the main bulb in the middle and then a smaller bulb at the bottom which I have never used as there was no wire for it. Anyone know how it should be wired up? Was going to wire it up as the park light and then change my clear lens on the park lights for orange ones and just have the indicator wire going to these.
 
You can get the Gteqh for £25....
I would wire the side lights into the lower lamp and change the lower light unit to orange.
I have an unwanted set if you need them
 
Damian, that's what I did.
Side light wires go to the bulb and then an earth wire from the bulb holder.
I ended up replacing the wire in the bulb holder as they both broke after a little fiddling
thumb_down.gif
 
My headlights have the main bulb in the middle and then a smaller bulb at the bottom which I have never used as there was no wire for it. Anyone know how it should be wired up? Was going to wire it up as the park light and then change my clear lens on the park lights for orange ones and just have the indicator wire going to these.

That's the way UK spec 500s are wired(y)
 
You can get the Gteqh for £25....
I would wire the side lights into the lower lamp and change the lower light unit to orange.
I have an unwanted set if you need them

Yes please Andrew. I will PM you and sort it out
 
Damian, that's what I did.
Side light wires go to the bulb and then an earth wire from the bulb holder.
I ended up replacing the wire in the bulb holder as they both broke after a little fiddling
thumb_down.gif

Where do you wire the earth to Sean? Theres an earth from the headlights as well, where does this connect to?
 
Where do you wire the earth to Sean? Theres an earth from the headlights as well, where does this connect to?


Don't let the rust distract you on this image.:D
The two earth cables you mention terminate at a paired ring terminal secured to the body by the top mounting nut of the front-facing indicator or sidelight unit.
As seen here the way the factory arranged it on Murf....as yet un-messed with in 2009.:)
DSC_6130 by Peter Thompson, on Flickr
 
Whats that thing sticking out of the top of the front wing Peter?
 
Whats that thing sticking out of the top of the front wing Peter?

It had super-duper, pingable back wing mirrors which had pinged back just once too often. The first owner had customised the car ...the steering-wheel was painted black and had a real heavy-duty "glove" wrapped around it and it had a collectors' item, Lucas Sports coil with a screw-in HT lead for which I later got about a tenner on Ebay! Oh, and there was some sort of crinkly, brownish-red surface finish on a lot of the car; I have since seen it on other 500s but never done as well as it was on mine.:D
 
Knee pads on. Had to drill new hole as the studs didn't line up with original holes. Scary on new paintwork
 

Attachments

  • 1476533176146.jpg
    1476533176146.jpg
    43.4 KB · Views: 26
  • 1476533185243.jpg
    1476533185243.jpg
    42.2 KB · Views: 27
  • 1476533195286.jpg
    1476533195286.jpg
    21.5 KB · Views: 27
Can someone tell me how these switches go on please? What goes inside the car and what goes in the front compartment? A close up picture of a switch fitted would be great (@Franko500)
 
Sussed it I think. Just the shiny knurled nut inside. Is this correct?
 
Heres a challenge to try and get clean
 

Attachments

  • 1476538618090.jpg
    1476538618090.jpg
    47.7 KB · Views: 22
Kerry must have been talking to Peter. She wouldn't let me clean it too much as she wanted to keep some patina!
 

Attachments

  • 1476540388848.jpg
    1476540388848.jpg
    38.2 KB · Views: 25
Back
Top