2023-10-29 01 Classic car meeting, Blackbushe Airport (Large).JPG

500 (Classic) Noah's "Ark"ive

LHD 1971 Fiat 500L

Introduction

My 500 arrived with me at the end of August. Summary:

  • LHD 1971 500L in blu scuro with bordeaux upholstery
  • Originally registered in Viterbo, then from 1975 in Rome.
  • Imported to the UK in June 2021
  • Registered by DVLA in the UK as a 1975 on a P plate
The Italian reg document had a date in 1975 based on the Rome reg. Date. VIN, features (e.g. type of badging, instrument cluster) point to a 1971 car. I also have a copy of an ACI inspection giving 01.01.1971 as date of "immatricolazione" and 20.10.1971 as date of first registration.

Based on this info and a letter from the Fiat 500 Enthusiasts Club and details of a list of VIN ranges and manufacture dates, DVLA updated the V5C and issued a 1971 reg :)

Here's how it looked with the Rome plates, and then with the first UK ones.

Named Noah since Noè is Italian for Noah (original UK reg was NOE)

And with current (1971) plates ;)
  • Like
Reactions: porta and ben
Thats a very interesting find you got there.

Regarding the "Estratto Cronologico" was it difficult? ive been trying to find routes to discover the history of my car, but without good Italian contacts, its near impossible for me. What type of info did they require. chassis number? I really want to try and find the original liscense plate # for my car, and get them re-created.
 
@Bounding Bambino - It was not too difficult but I did know the most recent Italian registration number, because the car still had the plates on it when I saw it in London before the UK registration had been assigned :). Also, he had had a ACI 'Visura' which gives the current status(at the time of the inspection). Unless you know the registration number I think it may be difficult.

Did you get any of the original Italian documentation? Or at least, do you know which province it was from? If you know that, you could try contacting them and ask if they can search by chassis number... it may be possible since at least some of the information is computerised.

https://www.aci.it/i-servizi/servizi-online/estratto-cronologico-del-pra.html - ACI first page on the Estratto Cronologico
https://iservizi.aci.it/crononet/#/ - Contains info for 'foreign applicants' including Notice (instructions) and Application Form. The form requires the registration number (licence plate) so if you don't have that, then possibly your best bet would be to write to one of the PRA offices (vehicle registration offices) in the list here and ask them kindly if they could look up the registration number by the chassis number. If you don't know the province, just pick one - I went to the Rome one because that's where my car was last registered but I would guess that Rome might have more people available than some of the smaller ones... though they might be busier. In any case, I got a pretty quick response to my email enquiry. I did write in Italian, though, so if you don't speak Italian it may be worth asking someone kindly to help ;)

For time the process was: initial email enquiry on Monday morning, payment made and form emailed to them Monday afternoon, documents received by email around noon on Wednesday! A whole lot quicker than my dealings with the UK DVLA ;)

Good luck
 
A bit of fun with perspective in this afternoon's sunshine: Noah + Bburago 1:16 scale model, but they look about the same size from a certain angle :)
As a keen photographer I love this I must now & try it with my wife’s Beetle & my 1/18 model Fiat, perspective is great. You must have been laying flat on the floor.
 
From a few recent outings in the sunshine. For anyone who's interested, I post quite a few Fiat pics (some others too!) on my Instagram account: @smomccarthy
 

Attachments

  • 2022-03-26 26 Westerham Evangelical Chapel (Large).JPG
    2022-03-26 26 Westerham Evangelical Chapel (Large).JPG
    230.5 KB · Views: 47
  • 2022-03-26 27 Westerham (Large).JPG
    2022-03-26 27 Westerham (Large).JPG
    354 KB · Views: 41
  • 2022-04-03 01 Fiat 500 (Large).JPG
    2022-04-03 01 Fiat 500 (Large).JPG
    489.4 KB · Views: 44
  • 2022-04-03 02 Fiat 500 and Ferraris (Large).JPG
    2022-04-03 02 Fiat 500 and Ferraris (Large).JPG
    333.6 KB · Views: 43
  • 2022-04-03 03 Fiat 500 and Ferraris (Large).JPG
    2022-04-03 03 Fiat 500 and Ferraris (Large).JPG
    290.1 KB · Views: 48
Yesterday I sorted out a problem that has been a bit of a pain, literally :).

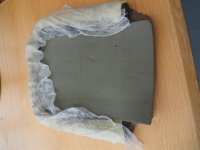
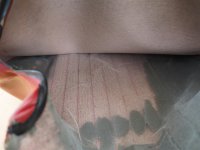
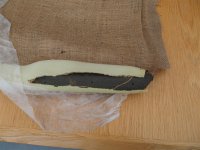
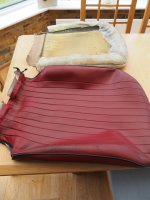
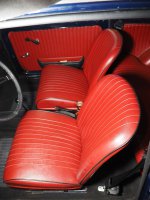
My driver's seat is feeling a bit tired, to the extent that I can feel the lower rear bar on my backside when I sit in it. Checking a bit more, it was really only the backrest that had gone baggy, so I removed the cover and foam from the backrest and found the culprit: the hessian backing had split away from the moulded rubber most of the way up one side of the rubber tube cover, making the front of the backrest sag. I stuck it back with spray adhesive and stitched it with strong thread for extra strength. The main foam itself was in decent enough order, though the thin layer of foam on the inside of the cover material had mostly perished away. I also stuck a piece of camping mat foam on the front of the backrest foam for a bit of extra cushioning.

Now it's all back together - looks the same but feels a lot better. I guess I'll find out when the weather is good enough to take it out for a drive :)
 

Attachments

  • 2022-04-03 19 Fiat 500L front seat (Large).JPG
    2022-04-03 19 Fiat 500L front seat (Large).JPG
    247.9 KB · Views: 49
  • 2022-04-03 18 Fiat 500L front seat (Large).JPG
    2022-04-03 18 Fiat 500L front seat (Large).JPG
    280.4 KB · Views: 50
  • 2022-04-03 17 Fiat 500L front seat (Large).JPG
    2022-04-03 17 Fiat 500L front seat (Large).JPG
    250.4 KB · Views: 46
  • 2022-04-03 16 Fiat 500L front seat (Large).JPG
    2022-04-03 16 Fiat 500L front seat (Large).JPG
    288.5 KB · Views: 50
  • 2022-04-03 15 Fiat 500L front seat (Large).JPG
    2022-04-03 15 Fiat 500L front seat (Large).JPG
    233.4 KB · Views: 49
  • 2022-04-04 01 Fiat 500L front seats (Large).JPG
    2022-04-04 01 Fiat 500L front seats (Large).JPG
    193.2 KB · Views: 50
Im slowly working on refinishing my seats, and obviously because i cant leave anything stock. Ive been contemplating ideals to "reinforce" the back design. One ideal i was contemplating of testing is using strap material, and doing some horizontal straps around the hoop to help prevent seam pull on the exterior cover. Once your lower back/caboose is pushing onto/into the lower half of the back.

In your case it looks like the foam/burlap inner cover is acting kinda like a restraint, preventing the back from going too deep into the frame hoop.

I picked up all new foams for my seats, but designing it to be durable and prevent sagging is key. I was also contemplating welding in some curved flat bar across the hoop horizontally to help provide support, but it would be nice to add some springy'ness to its overall construction.

Its obviously hard to add all the creature comforts in such a small seat frame.
 
Apologies if this has already been said somewhere in the thread but what is the mileage and is it on its original engine & 'box, to your knowledge?
Just intrigued how well the mechanicals hold up. I've always fancied an air-cooled 126 which I appreciate has more displacement than a 500 but I believe the engines are closely related
It had 45,000km (~28,000 miles) on it when I bought it. As far as I know it's the original engine and gearbox and appears to run OK
 
I think that to large extent it would depend upon how the car had been treated during its life. I knew a guy some years ago who owned an early 594cc Fiat 126 that had covered over 100,000miles. He had the full history of the car and it had had no major breakdowns only the regular normal services according to the manufacture’s instruction.
 
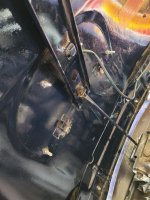
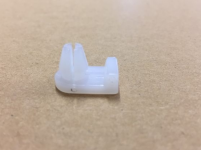
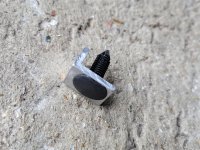
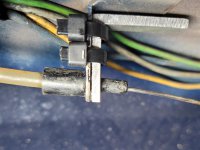
In answer to a different question elsewhere, @Toshi 975 noticed that I was missing the small retaining stopper/clip for the engine lid strap (at the engine end). He kindly identified that Motobambino sell them but I decided to make a replacement up from bits i had to hand: a large plastic stopper with Christmas tree grips and a piece of angled ali cut and drilled to size. Does the trick nicely and should stop the lid from flopping down if the strap were to come loose:
  • Inside of engine lid showing strap end about to come out (on the far right)
  • Correct stopper (c) Motobambino
  • My replacement
  • Replacement fitted
 

Attachments

  • 2022-04-10 01 Fiat 500 engine lid (Medium).jpg
    2022-04-10 01 Fiat 500 engine lid (Medium).jpg
    153.5 KB · Views: 53
  • Screenshot 2022-04-10 at 16-02-46 Motobambino - THE Classic small Fiat Specialist Home.png
    Screenshot 2022-04-10 at 16-02-46 Motobambino - THE Classic small Fiat Specialist Home.png
    189.6 KB · Views: 55
  • 2022-04-10 02 Fiat 500 engine lid strap retaining stop (Medium).jpg
    2022-04-10 02 Fiat 500 engine lid strap retaining stop (Medium).jpg
    202.5 KB · Views: 53
  • 2022-04-10 03 Fiat 500 engine lid strap retaining stop (Medium).jpg
    2022-04-10 03 Fiat 500 engine lid strap retaining stop (Medium).jpg
    153.1 KB · Views: 53
Last edited:
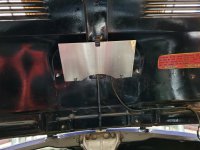
In reply to the original question here, @Toshi 975 identified that the missing item on the inside of my engine lid was a heat shield to protect the number plate light assembly. Apparently it was originally asbestos (!). Although presumably not essential, I decided to make use of a piece of ali sheet that I had lying around, still with its protective film on, to make up a replacements based on the photo of the relevant item on the Motobambino website. It's added a few grams to the weight, which is probably not a fantastic idea given the 'power' of an untuned 499cc engine, but hey-ho!
 

Attachments

  • 2022-04-10 04 Fiat 500 engine lid heat shield (Large).jpg
    2022-04-10 04 Fiat 500 engine lid heat shield (Large).jpg
    249.5 KB · Views: 46
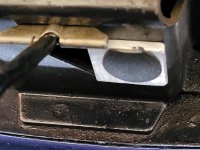
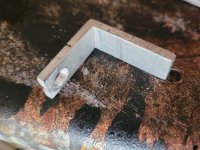
I fixed another of those annoying problems today. I went to open the bonnet/frunk lid and, as has been happening for a while, I had to pull several times on the lever quite hard before it would release the catch enough to be able to open the lid. Same issue as I've noticed before i.e. the brace where the cable goes through just before the catch had bent again, meaning that it was closer to the catch and therefore not releasing it as much as it should on a 'normal' pull. Previously I've just bent it back but it was not a long term solution. I'm not sure if it is just age and/or the fact that the brace is a very thin piece of steel but this time it was bent maybe 20°.

My solution was to get a piece of 3mm angle ali, drill a hole for the cable sheath and a slot for the cable itself, the Araldite it to the original brace and the underside of the bonnet lid frame. For good measure I put a couple of zip ties on it - I would have put a self-tapping screw or a nut and bolt but there is not much room to get a drill in there. Maybe later if this doesn't hold...
 

Attachments

  • 2022-04-15 40 Fiat 500 cable brace (Large).jpg
    2022-04-15 40 Fiat 500 cable brace (Large).jpg
    211.8 KB · Views: 49
  • 2022-04-15 39 Fiat 500 cable brace (Large).jpg
    2022-04-15 39 Fiat 500 cable brace (Large).jpg
    244.9 KB · Views: 47
I have the same problem, tried adjusted it, then replaced the cable, but still the same. I have to open the window, pull the cable standing outside the car then whilst holding the cable lift one side of the bonnet. It works if you have long arms! I will try making another bracket as you have done, but so worried about locking myself out of the bonnet/trunk, I suppose I could attach a piece of wire or string to the lock inside if I get locked out
 
So... I went to the Minis at Goodwood meeting on Sunday (Minis + any cars that appeared in The Italian Job film of 1969... mine was the only non-Mini out of 140 cars :)).

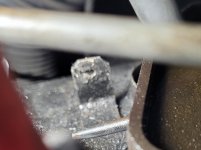
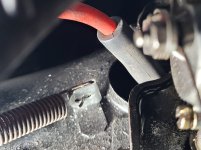
Halfway round the circuit the car started revving madly on trailing throttle and I was having to pull the pedal back up with my foot. On inspection back in the pits as expected, it was related to the throttle return spring: the spring had torn through solid metal on the end fixed to the engine cover (poor photo but you can just make out that it has ripped through from the hole to the edge at about 10 o'clock from the hole). Amazingly, though the spring was nowhere to be seen, someone found it in the paddock (must have pinged off on the track and stayed in the engine tray until I got back) and, since I had been asking Mini owners in vain if they happened to have a Fiat 500 throttle return spring, someone else remembered me and returned the spring to me!

It made for an interesting run in the afternoon - 40 miles tulip route, then 40 miles home.

Since I don't have access to a welder I came up with an alternative: folded a small metal bracket to fit round the tab, drilled a new hole in the tab for the spring and refitted the lot. Seems to work! If teh hole starts ripping out again, the bracket should save it from puling right out.
 

Attachments

  • 2022-08-29 Fiat 500 throttle return spring mount damage.jpg
    2022-08-29 Fiat 500 throttle return spring mount damage.jpg
    886.8 KB · Views: 52
  • 2022-08-31 Fiat 500 throttle return spring mount repair.jpg
    2022-08-31 Fiat 500 throttle return spring mount repair.jpg
    1.4 MB · Views: 54
... also, I fixed the bit of slack in the accelerator pedal that has been bugging me - at the pedal end it seemed to be moving an inch or more before doing anything. I have adjusted the nut on the cable in the engine bay before but it's always been difficult to hold the cable and have 2 spanners in place to nip it up in the right place. Then it struck me that without the spring it wouldn't be pulled back. I manually pulled the cable through to see how much slack I needed to take up (about 5mm) and marked the existing position of the cable by running a Sharpie marker round the cable. Then I removed the spring, undid the nut and slid the retainer up the requisite distance from the mark, tightened it all up and replaced the spring. Hey presto, no slack in the pedal :)
 
You are loosing valuable cooling air not having the spark plug grommets fitted.
 
Back
Top