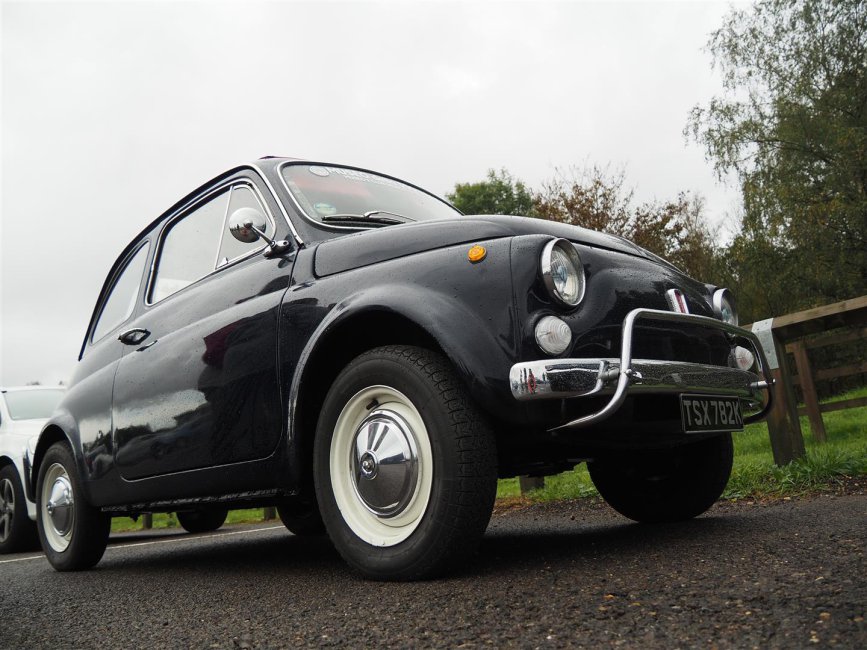
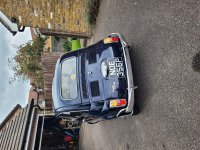
2023-10-29 01 Classic car meeting, Blackbushe Airport (Large).JPG

500 (Classic) Noah's "Ark"ive

LHD 1971 Fiat 500L

Introduction

My 500 arrived with me at the end of August. Summary:

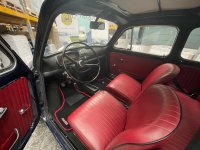
  • LHD 1971 500L in blu scuro with bordeaux upholstery
  • Originally registered in Viterbo, then from 1975 in Rome.
  • Imported to the UK in June 2021
  • Registered by DVLA in the UK as a 1975 on a P plate
The Italian reg document had a date in 1975 based on the Rome reg. Date. VIN, features (e.g. type of badging, instrument cluster) point to a 1971 car. I also have a copy of an ACI inspection giving 01.01.1971 as date of "immatricolazione" and 20.10.1971 as date of first registration.

Based on this info and a letter from the Fiat 500 Enthusiasts Club and details of a list of VIN ranges and manufacture dates, DVLA updated the V5C and issued a 1971 reg :)

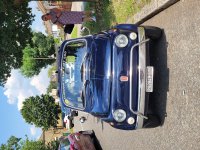
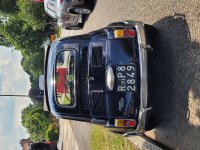
Here's how it looked with the Rome plates, and then with the first UK ones.

Named Noah since Noè is Italian for Noah (original UK reg was NOE)

And with current (1971) plates ;)
  • Like
Reactions: porta and ben
Update: I went out for a short )10 minutes) drive this morning and all good: starting OK, running OK and at the end no visible fuel leaks and hot smell but no fuel smell. The only thing I did was a slight adjustment to the idle speed.

(also: "needle valve" in my previous post should be "float valve")
 
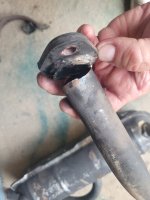
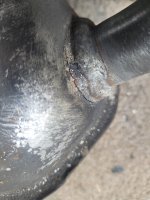
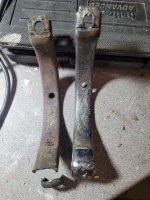
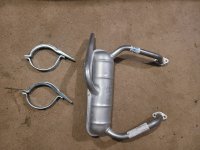
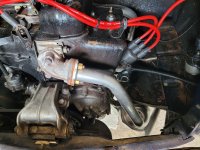
Today I finished the install of a new exhaust. After the carb/fuel hose issue above was fixed, I went out for a drive and it started getting LOUD! Investigation revealed one pipe snapped off at the elbow flange, and the same pipe's joint with the silencer cracked, After weighing up whether to go for a sports exhaust, I decided on a standard replacement. Motobambino supplied the exhaust and two new brackets and it now seems to be running quietly again.

Of note:

  • The snapped bracket had previously been welded, as had the unbroken one, so I suspect that there had been a problem in the past. Either way, I thought it better to get both new ones.
  • The new ones were difficult to get onto the studs before I bolted them down... not sure why, but I eventually got them on and gradually tightened them up.
  • I also fitted new deep brass nuts and split washers on the flange to elbow joints, though I did reuse the gaskets, putting on some exhaust gasket goo before tightening them up
  • I followed the good advice from @fiat500 for the fitting/tightening sequence in order to minimise stress and strain:
    • "The exhaust should be placed in the bottom bracket which should first be secured to the crankcase.
    • The flanges should be tightened to the elbows which are loosely secured to the head.
    • The top straps are tightened over the silencer, and finally, the elbows are secured to the head."
(Full details in this thread)
 

Attachments

  • 2025-05-13 01 Broken exhaust.jpg
    2025-05-13 01 Broken exhaust.jpg
    1.3 MB · Views: 6
  • 2025-05-13 03 Broken exhaust.jpg
    2025-05-13 03 Broken exhaust.jpg
    1.3 MB · Views: 6
  • 2025-05-15 01 Broken exhaust.jpg
    2025-05-15 01 Broken exhaust.jpg
    2.6 MB · Views: 5
  • 2025-05-15 02 New exhaust.jpg
    2025-05-15 02 New exhaust.jpg
    2.5 MB · Views: 7
  • 2025-05-16 01 New exhaust.jpg
    2025-05-16 01 New exhaust.jpg
    3.6 MB · Views: 7
  • 2025-05-16 02 New exhaust.jpg
    2025-05-16 02 New exhaust.jpg
    3.3 MB · Views: 7
Today I finished the install of a new exhaust. After the carb/fuel hose issue above was fixed, I went out for a drive and it started getting LOUD! Investigation revealed one pipe snapped off at the elbow flange, and the same pipe's joint with the silencer cracked, After weighing up whether to go for a sports exhaust, I decided on a standard replacement. Motobambino supplied the exhaust and two new brackets and it now seems to be running quietly again.

Of note:

  • The snapped bracket had previously been welded, as had the unbroken one, so I suspect that there had been a problem in the past. Either way, I thought it better to get both new ones.
  • The new ones were difficult to get onto the studs before I bolted them down... not sure why, but I eventually got them on and gradually tightened them up.
  • I also fitted new deep brass nuts and split washers on the flange to elbow joints, though I did reuse the gaskets, putting on some exhaust gasket goo before tightening them up
  • I followed the good advice from @fiat500 for the fitting/tightening sequence in order to minimise stress and strain:
    • "The exhaust should be placed in the bottom bracket which should first be secured to the crankcase.
    • The flanges should be tightened to the elbows which are loosely secured to the head.
    • The top straps are tightened over the silencer, and finally, the elbows are secured to the head."
(Full details in this thread)
....different wording, but the advice is originally from the Haynes manual....from when those manuals were written by someone who had really tackled the job. :)
 
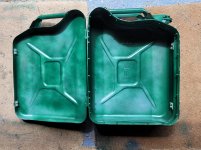
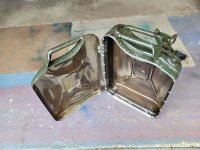
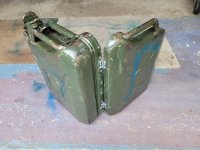
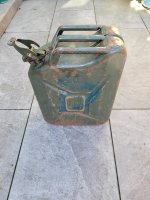
Off-topic, but I've just completed a mini project to make a toolbox/case from a 20 litre jerry can. I got the 'well used' can from eBay, amazingly for £2.99 including delivery!

I was inspired by some similar items on Etsy, etc. but they seem to be expensive for what they are and they were all cut across the top meaning that a( they have very visible trimmed edges and b) are carrying all the weight on the hinges and catches.

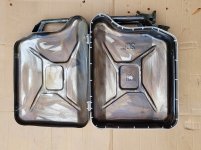
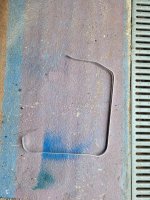
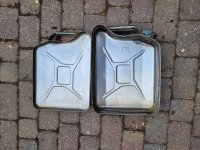
My idea was different, e.g. to make it like a small suitcase, hinged along the long edge. After washing out the can with washing up liquid and warm water, I marked out the cutting line and cut with an angle grinder as much as I could, leaving a short section between two of the three handles to be cut with a hacksaw blade., finishing off by cleaning up the cut edges with a file, flap wheel, and wet and dry paper. I took the opportunity to rivet down the front flap of the middle handle, as cutting it had left a bit of handle unsupported. Then it was time to rub down the metalwork and paint on some anti-rust treatment.

Rather than using edge trim as per other examples I've seen, instead I made a lip to fit inside the bottom half of the 'suitcase' and riveted it in place to act as a guide when the top is folded down so it fits snugly. Then I fitted the hinges, rubbed it down, gave it a couple of coats each of rattle can primer and some Halfords green topcoat, and finally fitted the adjustable catches.

Not sure what I will use it for (airline cabin baggage, maybe? :D ) but it kept me out of trouble for a couple of days
 

Attachments

  • 2025-05-24 03 Jerry can toolcase project.jpg
    2025-05-24 03 Jerry can toolcase project.jpg
    2 MB · Views: 14
  • 2025-05-24 02 Jerry can toolcase project.jpg
    2025-05-24 02 Jerry can toolcase project.jpg
    3.2 MB · Views: 11
  • 2025-05-24 01 Jerry can toolcase project.jpg
    2025-05-24 01 Jerry can toolcase project.jpg
    2.4 MB · Views: 14
  • 2025-05-23 03 Jerry can toolcase project.jpg
    2025-05-23 03 Jerry can toolcase project.jpg
    5.1 MB · Views: 14
  • 2025-05-23 02 Jerry can toolcase project.jpg
    2025-05-23 02 Jerry can toolcase project.jpg
    3.6 MB · Views: 13
  • 2025-05-23 01 Jerry can toolcase project.jpg
    2025-05-23 01 Jerry can toolcase project.jpg
    3.8 MB · Views: 13
  • 2025-05-22 03 Jerry can toolcase project.jpg
    2025-05-22 03 Jerry can toolcase project.jpg
    5.7 MB · Views: 12
  • 2025-05-22 01 Jerry can toolcase project.jpg
    2025-05-22 01 Jerry can toolcase project.jpg
    1.9 MB · Views: 11
  • 2025-05-24 04 Jerry can toolcase project.jpg
    2025-05-24 04 Jerry can toolcase project.jpg
    3.1 MB · Views: 13
Back
Top