Technical  Failed MOT

Currently reading:
Technical  Failed MOT

Main thing is to get the brakes working correctly inside the brake drum, this will give a good foot brake and also means the handbrake should need minimal external adjustment inside the car where the two cables link on the bar.
As a 15 year old apprentice I was told you always manually (in those days ) adjusted brakes at the drum first. It is to do with leverage (effort on a lever is strongest at 90 degrees) so once a brake is out of adjustment the pull on the lever is less efficient. Hence if a cable is adjusted first the pull on the lever inside the brake drum is much less efficient.
Back in those days it was common to see these cable adjusters sold and even MOT tests permitted one per cable!!! This seems incredible today. I even saw a display of these sold at an Autojumble a long time ago!
Basically if a cable is so stretched it needs that to take the slack out, then something is seriously wrong.
When setting up brakes after adjustment at the drum, if there was an external lever coming out of the drum I would turn the wheel and a light pressure on that lever would activate the brake, so then any adjustment at the cable would be very small. Obviously harder with cable going into drum like your Punto, but you get the idea.:)
 

Attachments

  • 1768647530221.png
    1768647530221.png
    803 KB · Views: 13
Check the Drums Guide, discussion. Most important thing is a bimetal (part of the self-adjuster).
https://www.fiatforum.com/threads/rear-drum-strip-and-clean.235078/post-4532867
file.php


As for handbrake, everything matters. Cable mount stiffness and the shield tension (just like in bicycle brakes, but cars are not adjustable here).
Initial adjusting takes 1-2 days of driving, then you can judge the brakes performance (check on the "rollers" at MOT station and do the graph like in the Guide, then decide what's next). Without the test, you cannot tell the difference (Left/Right) and if it's getting better (after your "strip & clean").
Clicking sound is not enough (self-adjuster can skip the tooth).
file.php


This is junk (your effort goes to bending rusty mounts, not actual braking). Mounting spots on the rear axle bushing brackets are even more important.
old_rusty_brackets_-cables_mounts-jpg.479641


And folks, start using data. You can test brakes (and emissions) outside the MOT.
mot-braking_force_differences-jpg.217787

I'm still waiting for someone to replicate such graph. Am I the only one in the world?
 
Last edited:
The traveling part makes the difference. Cable travels limited distance inside outer protection. That is the distance it can actually move the shoe.

Yes. Think of it like this:

The metal cable has retracted inside the hull because the handbrake was fully pulled:
Position of the last fixation on the hull + (shortened) distance of outside part of the cable when lever fully pulled = brake shoe position when handbrake fully pulled

The brake shoe spring has pulled the metal cable out of it's hull because the handbrake was fully released:
Position of the last fixation on the hull + distance of outside part of the cable when lever fully released = brake shoe position when handbrake fully released

If the hull is incorrectly fitted on that last fixation (too far out or in) the brake shoe won't be able to travel it's expected range because the outside part of cable will look like it's "too long" or "too short" but the only problem here is the incorrect fitting of the hull on that last fixation before the drum.

What path the hull takes under the car doesn't matter as long as the hull is long enough and can be correctly fixed on its last bracket before the drum.
 
Clicking sound is not enough (self-adjuster can skip the tooth).
file.php

You could cautiously try bending the metal tongue slightly so it achieves better contact with the teeth if a spare part is not available.
Or simply replace the adjuster.
 
The left cable is on, but not tightened in all of its brackets. So i have two new handbrake cables fitted.

I was trying to get the equalizer bar attached to the cables to have a look at what the handbrake cable would do, (drums on), but there isn't enough slack for me to get the nut back on. So i'm just thinking now lol.

IMG_20260117_113237.jpg
 
You could cautionously try bending the metal tongue slightly so it achieves better contact with the teeth if a spare part is not available.
Or simply replace the adjuster.
I have ordered two new adjusters that will arrive today. The usual motor factors don't supply them so i had to get them off Amazon, i've previously had these exact Amazon adjusters in the past and they were very low quality, one or perhaps both broke before fitting, i can't quite remember, but at short notice that is the best i could do.
 
I have ordered two new adjusters that will arrive today. The usual motor factors don't supply them so i had to get them off Amazon, i've previously had these exact Amazon adjusters in the past and they were very low quality, one or perhaps both broke before fitting, i can't quite remember, but at short notice that is the best i could do.
Well... best you could do is try and fit right the ones you have first.
 
The left cable is on, but not tightened in all of its brackets. So i have two new handbrake cables fitted.

I was trying to get the equalizer bar attached to the cables to have a look at what the handbrake cable would do, (drums on), but there isn't enough slack for me to get the nut back on. So i'm just thinking now lol.

View attachment 479945
Assuming both cables correctly in their locating positions and handbrake lever is fully off, can you with your fingers pull the bar enough to locate that adjuster nut?
If not then something is wrong.
 
The left cable is on, but not tightened in all of its brackets. So i have two new handbrake cables fitted.

I was trying to get the equalizer bar attached to the cables to have a look at what the handbrake cable would do, (drums on), but there isn't enough slack for me to get the nut back on. So i'm just thinking now lol.

View attachment 479945

Take the drums off,
Gently pull on balance bar to get nut started.
Then turn nut until all slack taken out , keep looking at levers on shoes so they dont move
 
Well... best you could do is try and fit right the ones you have first.
Aye.
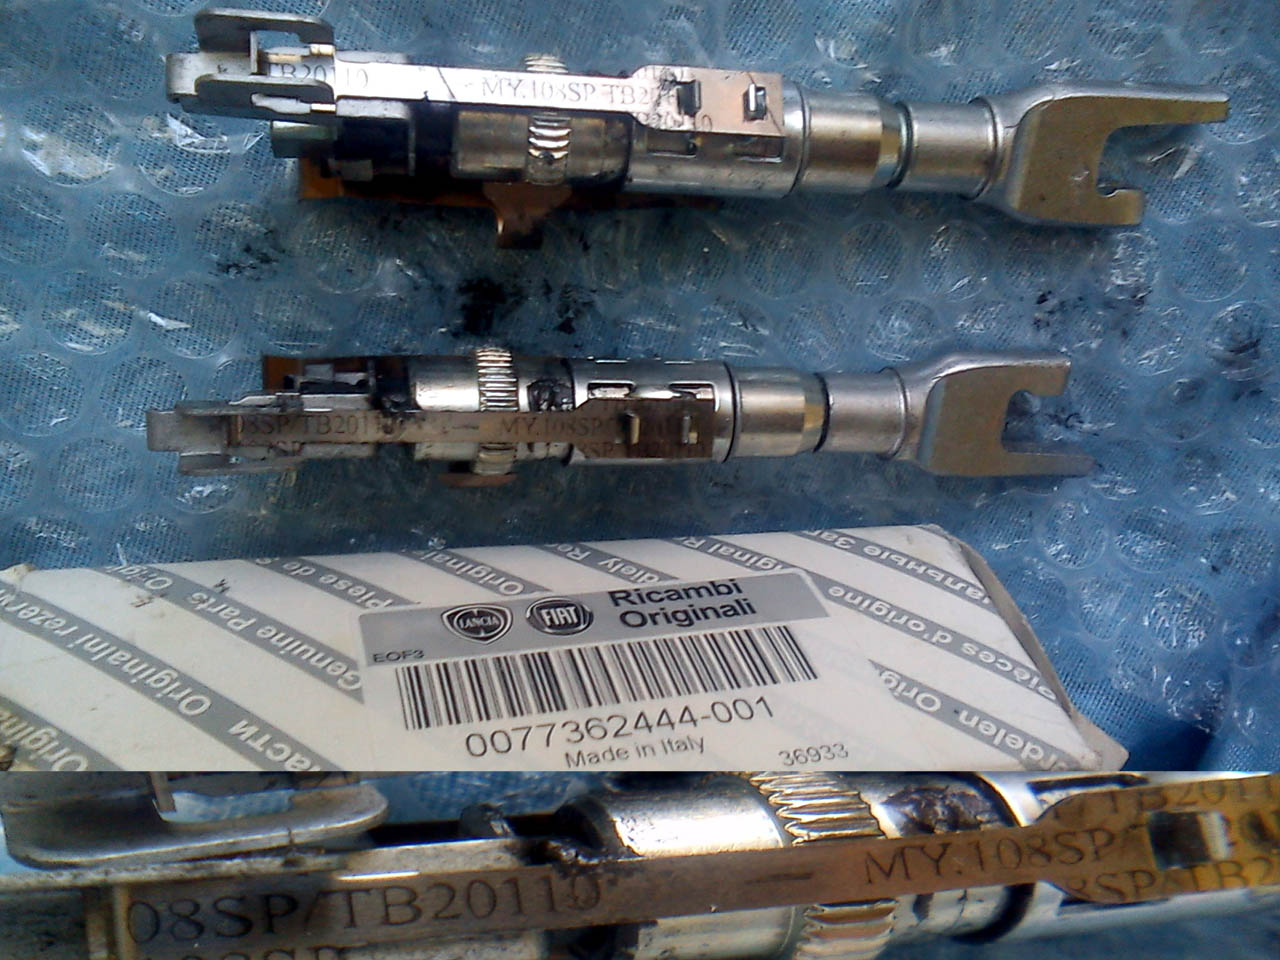
Self-adjusters must be original. Cheaper/counterfeits don't have the bimetal strip.
Plus the leaf-spring is too strong (requires bigger slack/gap until the next tooth will engage and adjust the shoes closer to the drum).
file.php
I did fit a cheapie self adjuster to the left a couple of years ago. I could swear i heard it clicking, but maybe it didn't click enough, i can't remember now. The right self adjuster may be original.
 
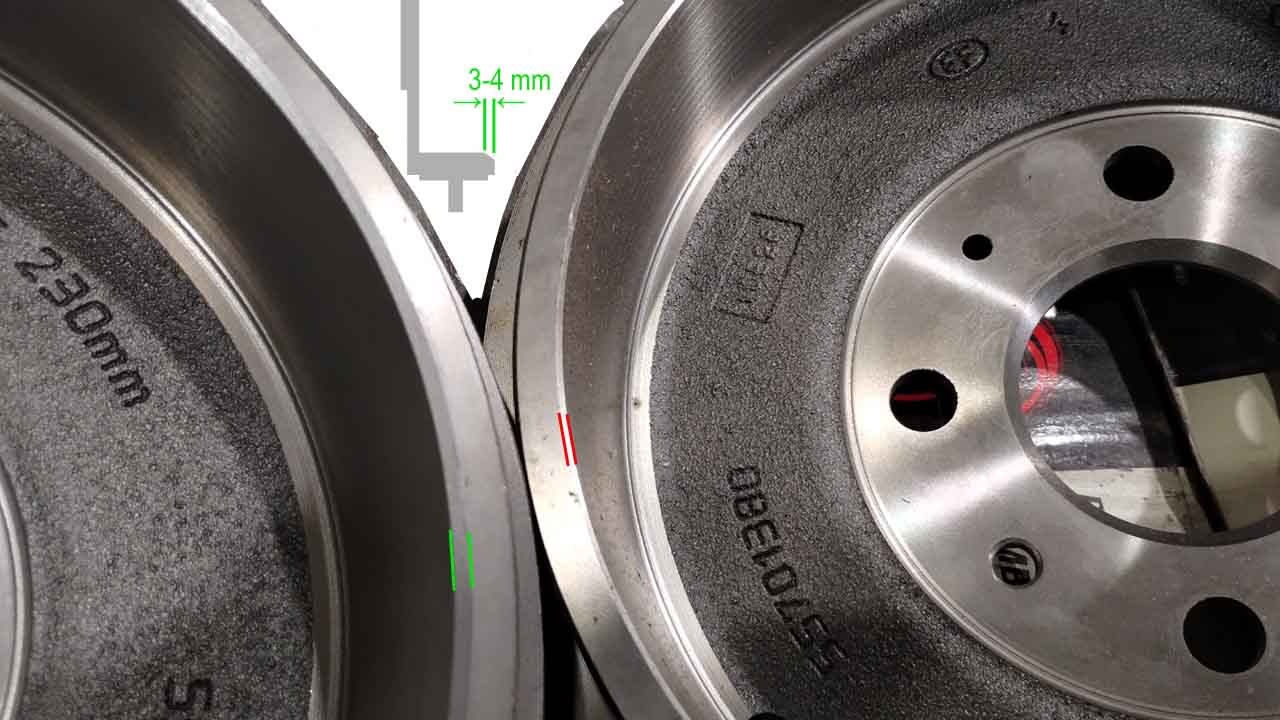
While the drums are off i'm going to give the lip a quick grind down.
Mask on and don't go further in than that wear lip that you can feel at the edge wear brake shoes don't reach, otherwise you will cause uneven braking etc.
Remember the only reason for grinding away that lip is to allow drum to go on and off easily after shoes have adjusted up.:)
 
You could also do the chamfer (on the lathe) to eliminate the "lip" forming in the future.
file.php


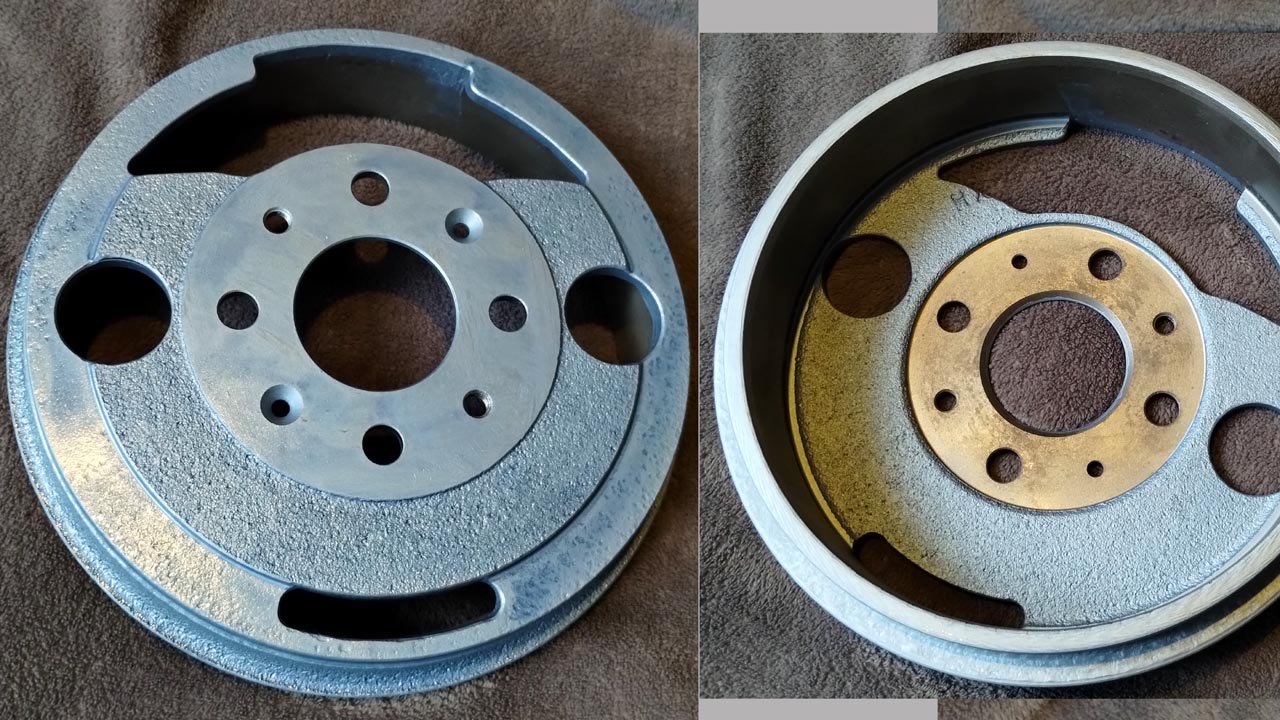
To check the operation during "strip & clean" consider doing special tool/jig/dummy_drum like that. From the old drum. But This is too fancy.
file.php


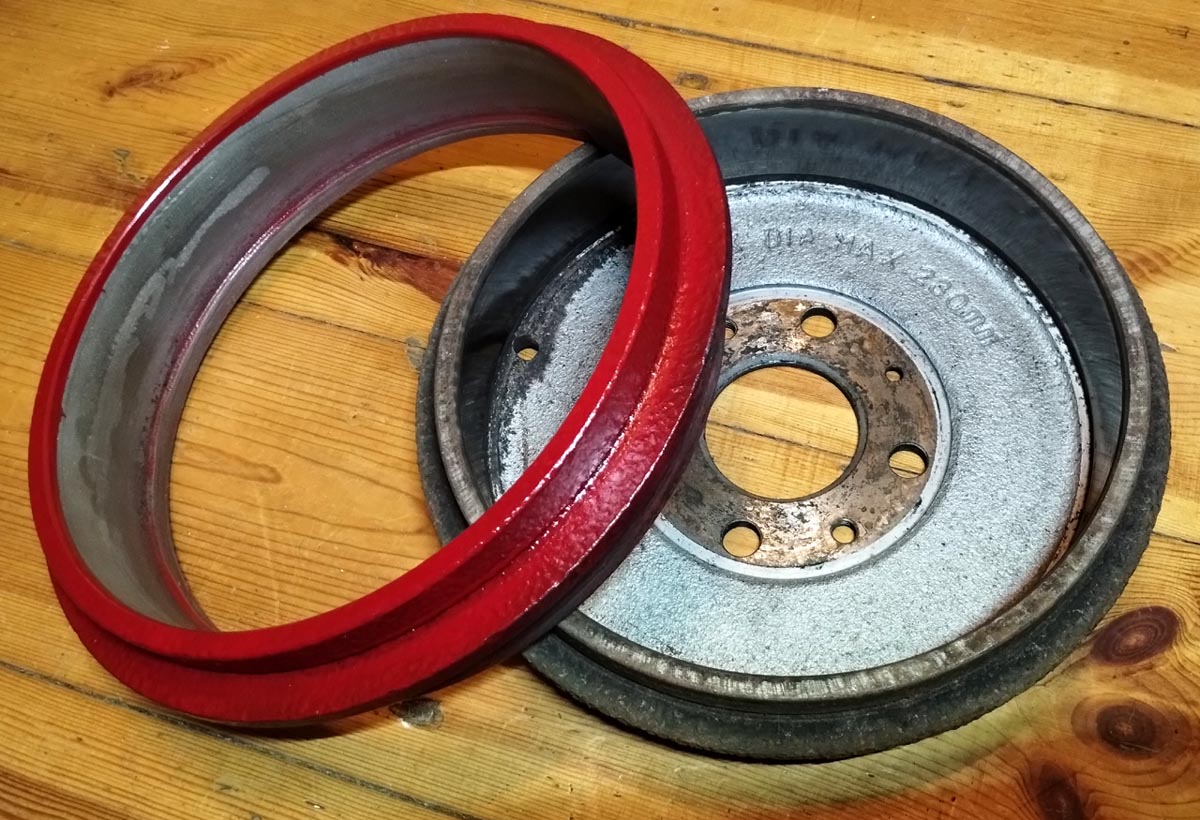
This is easier. Just the "rim" (cut from the drum).
file.php
 
Last edited:
Back
Top