Well, here goes! This is not in anyway intended to be a guide as to how to change a Panda Timing Belt, Andy Monty's guide has to be the definitive work on that and I can't thank him enough for his guidance.
As I've said elsewhere I'm a great believer in leaving things alone if you don't need to touch them. So I was wondering, as I set to work on this, if I really needed to slacken the cam sprocket retaining Torx bolt?
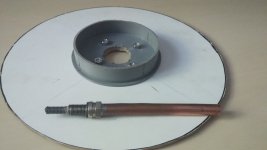
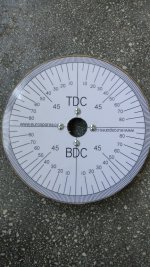
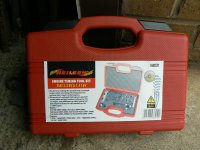
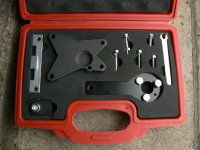
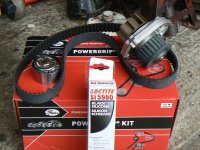
The only way I could know for sure would be if I checked it with the proper tools when I'd finished so my two items of major expense were the timing kit (I bought a Neilsen kit for a very reasonable price on eBay) and the Belt kit.
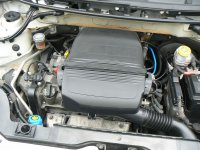
The Haynes manual recommends removing the battery and tray then the individual coil packs and finally the coil pack holder. With a little dexterity you can get the three holder screws out on their own so you can leave the battery where it is. The harness for the injectors is held by one set screw easily accessed but watch out for the right hand end which has a small plastic extension which needs to be coaxed out of it's hole carefully to avoid it snapping off.
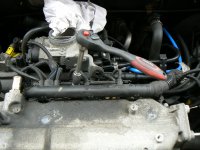
Next problem was the engine mount. To be specific, not so much the mount itself which comes off quite easily (piece of wood and trolley jack under sump), but the block which is bolted to the front of the engine. It's held by four large (15mm headed?) set screws which are very tight up on the inner wing. I had thought my Halfords Vortex sockets would come in handy here as they are much shallower than my standard 1/2" drive stuff
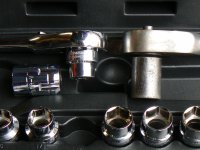
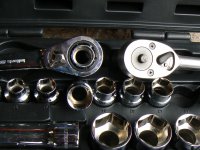
Unfortunately they are too "fat" and wouldn't sit squarely on the bottom bolt heads! eventually I got them with the ring end of a combination spanner and 3/8" long extension used as a lever on the open jaw end! They were VERY tight! There was also a lot of jacking up and down to gain access and to remove the mounting block itself. Really this was probably the most awkward part of the whole excercise.
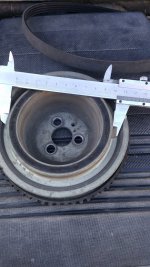
So now all the stripping work is done. Mount dismantled, belt guards off, cam cover removed, crankshaft phonic wheel pulley removed, etc. First thing I notice is the dirt (rubber dust from belt wear and gritty dust) around the bottom sprocket, but, thank goodness, not a trace of oil from either top or bottom seals. I was going to change them if there had been any question but it's bone dry! Yippee!
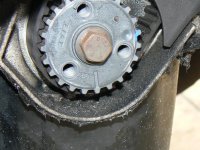
Beginning to think this is the original belt maybe. (I have no evidence of it having been changed despite a full book of service stamps. Car's 8 years old with 62,000 miles approx) So, now fit up the timing tools and apply tippex marks to belt and sprockets.
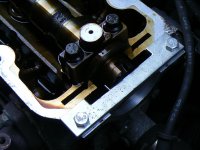
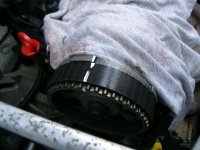
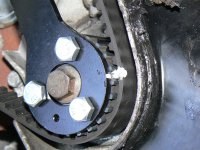
Slacken tensioner and remove old belt. Hmmm. Surprisingly good but quite "hard" feeling and very shinney.
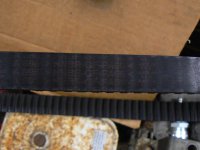
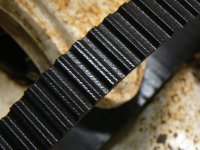
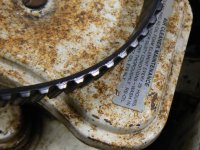
Oh well, it's obviously not been done recently so It's just as well I'm doing it now. Next strip out the water pump. And there you go. Give it a nice spin and suspicions confirmed, a nice scrunchie bearing noise. So there's the culprit behind that little bearing zizz I was hearing!
Next I transferred the tippex marks from the old belt to the new one and all that's left to do now is build it all back together. Boring job cleaning up the block face where the pump sits, boy does that Fiat sealant stick! Didn't slacken the cam sprocket/pulley torx bolt so found I had to remove the small locating screw that holds the bottom sprocket timing tool to the bolt hole for the cover and back off the crank by about 1/2 a tooth to get the new belt over the sprockets. Removed all the timing tools, set the tensioner to "max" position and, very gingerly, rotated the crank for a couple of revs and rechecked timing. All looking A1!
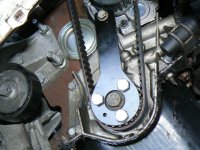
Then thought, I'll just swing the engine over maybe a dozen times before setting the tensioner back to it's running tension just to bed everything down nicely. OOPS! Forgot the cam cover is off! Next minute frantically scrambling for my drip tray to catch the teacup full, or so, of oil which has leaked down the front of the engine from the oil feed hole in the head and is now spreading out nicely on my sand colored slabs! Took about 1/2 an hour to clean that up - What a clot!
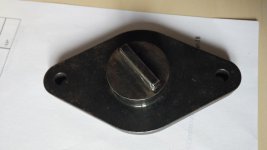
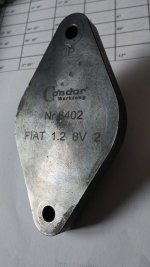
Ok now for the big check. Have I got away without slackening that cam pulley retaining bolt? So carefully turn her over till the crank locking tool lines up and, struggling up once more on these 71 year old legs, I find that the cam locking plate just slips in as nice as you like! Just all the "bits" to put back now and I'm done. Oh, Damn! I forgot there is a leak on the metal pipe where it comes out of the back of the water pump
So. The story is, yes you can accurately do the cam belt on these engines by the "Tippex" method BUT, and it's a big but, only if the cam sprocket was correctly set by the last person to do it. (As, I think, was mentioned by s130? in my Tech Talk thread about finally getting my Multiecuscan working.
Well, last time I tried this none of the pictures came out! So as it's taken me quite a while to do this I'm a bit nervous about hitting the "Post" button! Come on though Jock, just do it! Yes, Do it NOW
As I've said elsewhere I'm a great believer in leaving things alone if you don't need to touch them. So I was wondering, as I set to work on this, if I really needed to slacken the cam sprocket retaining Torx bolt?
The only way I could know for sure would be if I checked it with the proper tools when I'd finished so my two items of major expense were the timing kit (I bought a Neilsen kit for a very reasonable price on eBay) and the Belt kit.


The Haynes manual recommends removing the battery and tray then the individual coil packs and finally the coil pack holder. With a little dexterity you can get the three holder screws out on their own so you can leave the battery where it is. The harness for the injectors is held by one set screw easily accessed but watch out for the right hand end which has a small plastic extension which needs to be coaxed out of it's hole carefully to avoid it snapping off.

Next problem was the engine mount. To be specific, not so much the mount itself which comes off quite easily (piece of wood and trolley jack under sump), but the block which is bolted to the front of the engine. It's held by four large (15mm headed?) set screws which are very tight up on the inner wing. I had thought my Halfords Vortex sockets would come in handy here as they are much shallower than my standard 1/2" drive stuff


Unfortunately they are too "fat" and wouldn't sit squarely on the bottom bolt heads! eventually I got them with the ring end of a combination spanner and 3/8" long extension used as a lever on the open jaw end! They were VERY tight! There was also a lot of jacking up and down to gain access and to remove the mounting block itself. Really this was probably the most awkward part of the whole excercise.
So now all the stripping work is done. Mount dismantled, belt guards off, cam cover removed, crankshaft phonic wheel pulley removed, etc. First thing I notice is the dirt (rubber dust from belt wear and gritty dust) around the bottom sprocket, but, thank goodness, not a trace of oil from either top or bottom seals. I was going to change them if there had been any question but it's bone dry! Yippee!

Beginning to think this is the original belt maybe. (I have no evidence of it having been changed despite a full book of service stamps. Car's 8 years old with 62,000 miles approx) So, now fit up the timing tools and apply tippex marks to belt and sprockets.


Slacken tensioner and remove old belt. Hmmm. Surprisingly good but quite "hard" feeling and very shinney.


Oh well, it's obviously not been done recently so It's just as well I'm doing it now. Next strip out the water pump. And there you go. Give it a nice spin and suspicions confirmed, a nice scrunchie bearing noise. So there's the culprit behind that little bearing zizz I was hearing!
Next I transferred the tippex marks from the old belt to the new one and all that's left to do now is build it all back together. Boring job cleaning up the block face where the pump sits, boy does that Fiat sealant stick! Didn't slacken the cam sprocket/pulley torx bolt so found I had to remove the small locating screw that holds the bottom sprocket timing tool to the bolt hole for the cover and back off the crank by about 1/2 a tooth to get the new belt over the sprockets. Removed all the timing tools, set the tensioner to "max" position and, very gingerly, rotated the crank for a couple of revs and rechecked timing. All looking A1!

Then thought, I'll just swing the engine over maybe a dozen times before setting the tensioner back to it's running tension just to bed everything down nicely. OOPS! Forgot the cam cover is off! Next minute frantically scrambling for my drip tray to catch the teacup full, or so, of oil which has leaked down the front of the engine from the oil feed hole in the head and is now spreading out nicely on my sand colored slabs! Took about 1/2 an hour to clean that up - What a clot!
Ok now for the big check. Have I got away without slackening that cam pulley retaining bolt? So carefully turn her over till the crank locking tool lines up and, struggling up once more on these 71 year old legs, I find that the cam locking plate just slips in as nice as you like! Just all the "bits" to put back now and I'm done. Oh, Damn! I forgot there is a leak on the metal pipe where it comes out of the back of the water pump
So. The story is, yes you can accurately do the cam belt on these engines by the "Tippex" method BUT, and it's a big but, only if the cam sprocket was correctly set by the last person to do it. (As, I think, was mentioned by s130? in my Tech Talk thread about finally getting my Multiecuscan working.
Well, last time I tried this none of the pictures came out! So as it's taken me quite a while to do this I'm a bit nervous about hitting the "Post" button! Come on though Jock, just do it! Yes, Do it NOW


