- Joined
- Sep 14, 2009
- Messages
- 19,492
- Points
- 3,294
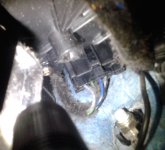
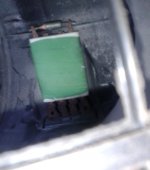
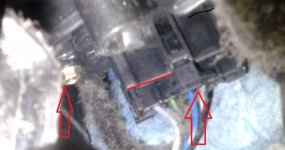
The fan works fine on full speed. Other speeds packed up one by one. The resistor is visible and clearly over heated so a new one is required. I have not checked the cabin filter which may be dirty but airflow has never been an issue. It has pent 90% of its life on speed 2 - almost full load on the resistor - so no surprise it's fried.
It might be possible to access from the top but there is no certainty. There is considerable work either removing steering or the whole dash moulding so my plan is to go for a PWM controller. The potentiometer can be fitted to the original control knob but a separate switch is needed for the aircon. I'm looking at fitting a push button to the circular vent above the gear lever. There is space and it wont get switched accidentally.
More to follow when I get the components.
PS - finding a PWM that's not shipped from China is proving difficult.
Here's a good example https://www.ebay.co.uk/sch/i.html?_from=R40&_trksid=m570.l1313&_nkw=193376416750&_sacat=0
Last edited:
This post contains affiliate links which may earn a commission at no additional cost to you.
 But like I said taking out the whole steeringwheel and column is no biggie.