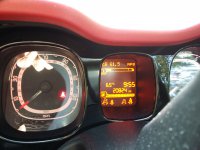
Last night's weather report said it was to be "ok" for the next couple of days and indeed the sun was shining when I got up so today's been a "bonding with Becky" day. After I took Mrs J her cup of tea and ginger snap - careful if you start that sort of thing lads, you'll never be allowed to stop! - I made myself a nice big bowl of porridge and wandered round in my garage assembling the stuff I was going to need.
Getting that pesky thermostat changed was the priority and I was intending to suck the coolant out of the header tank (on the 169 Panda it goes right down the side of the rad so you can almost empty the system if you've got a syphon of some sort, which I do, but I needed to make up a small diameter extension hose to get in with. After a rummage in my odds and sods boxes I came up with this:
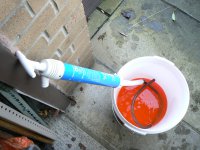
I could have just pulled the bottom rad hose but I want to keep the coolant spotlessly clean for reuse as it was renewed less than 2 years ago and it's 5 year OAT coolant. Pumping it into a clean bucket makes this easy. So, ready to go then? Well yes, but where to start first. The thermostat is under here:
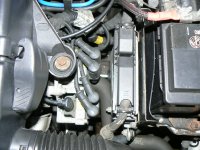
"Here" being the coil pack - my 1.2 60hp has the twin coil wasted spark system. The Haynes manual and other advice I've read says to remove the battery and battery tray and move the ECU out of the way. If you look at the picture above you can see the size of the cable bundles going to the ECU and the fact they look a little "chewed" too. My instinct is always to leave thick bundles of wire well alone. I've had too many problems over the years with breaks in loom wires like this when you move them.
When I did her cam belt a couple of years ago again the manual said to remove the battery, battery tray and ECU but when I looked at it I didn't think it made any sense. All that needs moved is the coil pack surely? So that's what I did. It has to be said the 10mm hex headed bolt underneath the pack is a bit of a swine to get at but other than that there's only one nut and another bolt, both easy enough to access, once you've unplugged the HT leads and the LT feeds to the coils (record the HT lead positions, If you forget which lead goes to which plug there's no distributor to make identification easy these days!) The LT plugs, which have retaining clips you can easily break if you're not careful, are quite different and with different length cables so you can't really mix them up. With the leads all disconnected it now looks like this:
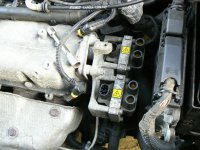
You can get on with removing the 2 bolts and one nut which secures the pack to the end of the cam cover casting. remove the coil pack and everything is delightfully accessible. You can see how you've now got pretty unrestricted access to the thermostat housing assembly:
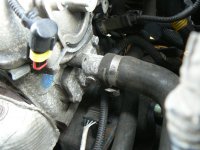
Whip out the two M10 hex headed bolts (I've been talking head sizes because I think people relate to that better. Of course a bolt with a M10 head - so it takes a M10 spanner to drive it - has a 6mm diameter threaded portion) and you can pull the housing off away from the head complete with hose still attached:
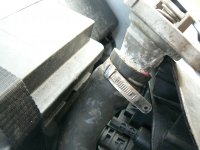
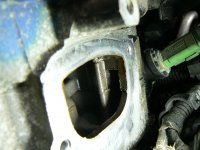
Leaving the port in the end of the head to clean up, degrease and install the new thermostat housing (the thermostat and it's housing come assembled and can't be split, unlike many where you just buy the thermostat itself and swap it into the old housing). I'm pretty certain the old thermostat is the original - so 11 years old, not bad eh? - because the hose clip is the original factory fit type and the general condition of the old thermostat would suggest it's been on there a long time. Another pointer may be that the gasket is a superior rubberized jobbie rather than the cheap, but to be expected, fibre one supplied with the new one. This rubberized gasket made removal of the old housing and cleaning up of the mating faces very easy. there was almost nothing to scrape off:
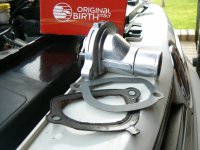
Here's the old and new gaskets for comparison with the new Thermostat in the background:
Interestingly, perhaps? If you look carefully at the top of the housing in the following picture you can see there is indeed a small air bleed port, complete with a small ball bearing which will block flow when the engine is running so it's obviously there to assist with air elimination when filling? I'm making a point of this because the hole is small so air transfering through it will take time - and all that that implies?
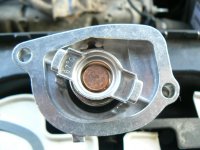
A wipe over with some degreaser spray and it was ready for the new one to be installed. Getting the hose off the old housing casting was the usual struggle to destroy the clip, but a concerted attack with a robust pair of sidecutters and a screwdriver soon had it begging for mercy and, surprisingly, for once I shed no blood!
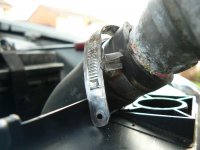
There was a lot of bits of aluminium corrosion clinging to the inside of the old hose so I undid the jubilee type screw clip on the radiator end and took the top hose off altogether so cleaning out would be easier. There is a clip on the radiator end - obviously not factory fit I'd guess - which is of a design I've never before seen:
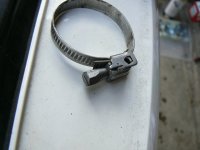
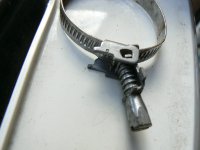
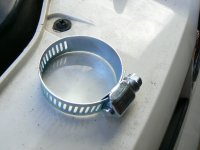
The screw part hinges up, so you can slacken or tighten it extra quick I guess? In practice it's a faff to use! Here's the ordinary one I used on the thermostat end to replace the one I destroyed which, like all the other makes I've seen before, doesn't flip up:
In fact it was a good thing I took the hose right off the vehicle because I noticed this:
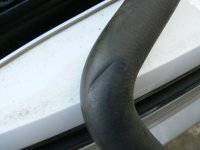
The hose had been rubbing up against the bottom corner of the ECU mounting plate. I could see no reason for this. The hose is in otherwise good condition. The wear has not gone through the outer layer of rubber and it's still soft and supple and it had been correctly fitted with the "witness" marks both correctly aligned. The battery tray and ECU mountings are all correct and I can see nothing wrong with engine mounts etc. I decided to shorten the hose by about half an inch at the thermostat end before refitting it - I'll be keeping an eye on it though.
The new housing and mating face on the end of the head were wiped over with degreaser and a very light bead of my favourite sealant applied before assembling the whole thing with the new gasket - did someone say "belt and braces? - With the hose installed and clips tightened it was very pleasing to see a good clearance to the ECU housing:
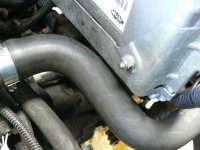
If you've got a 169 it might be worth having a look at this?
Now just that bl***y bottom bolt on the coil pack to deal with! So with coil pack, HT and LT connections all remade she's "resting" till tomorrow for the silicon to "go off" before I refill the coolant and bleed her through.
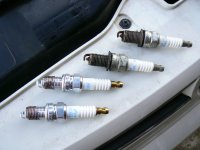
In fact she's due an MOT in the next couple of weeks so as I had the air filter housing off to access the above job I replaced the plugs while I was "on a roll" The old plugs looked like this:
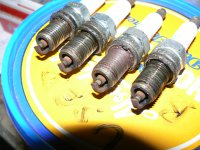
Which I actually though wasn't too bad seeing as how she's never been up to temp for the last year or so due to that thermostat! In fact those plugs have been in her since we bought her nearly 3 years ago and I am surprised how good they still look - mind you we're not doing many miles. I was also interested to see if the correct plugs were fitted (she should use the shorter "nose" option) and I was pleased to see the new plugs from S4p and the old ones were the same. Although the OE Fiat branded ones from S4p have Gold coloured terminals! Ooooow! Here's the old No1 and No2 with new ones just ready to go back in:
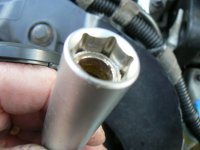
By the way, as those of you with these engines will know, the Fire engine plugs can be a little awkward to get a socket on and slightly more difficult to get new plugs started on their threads. If you're finding they give you problems I can very strongly recommend buying a magnetic spark plug socket. It has a magnetic ring inside the end which is strong enough to retain the spark plug while you are "fiddling! to get it threaded in but not so strong that the socket stays on the plug when you pull away on the extension bar.
So there you are, that's been my day, apart from checking out a broken fence post half way down the garden which gave way last night in the high winds we had. that's 4 or 5 now needing replaced when the warmer weather comes! No rest for the wicked! Now for a nice cup of tea - wonder what's for dinner? Oh, I'm told it's Cornish pasty, sweet corn and half a baked potato - Yum Yum!


