This guide explains how to use your existing (If you have a factory sub) subs wiring loom, to add a pre-amp RCA connection.
If you dont have an exisiting sub you can use your rear speakers connection by either taking the car to bits to get to the speakers directly, or from the back of the head unit its self.
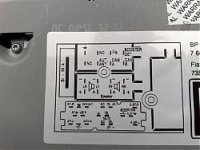
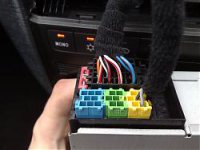
From the above diagram split into the appropriate rear speaker feeds and run a line to the rear of the car.
However for the rest of the guide we will assume that you are replacing the factory sub.
Remove the factory sub by removing the three 5mm torque screws holding the sub in place.
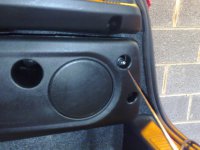
When the AMP is free remove the white plastic block connector from the rear and remove the AMP.
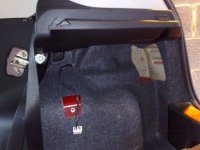
With the AMP removed You can now examine the block connector.
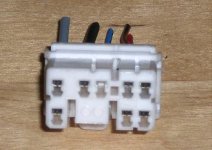
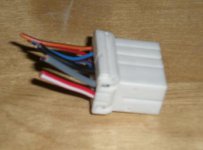
The pins of this connector are as follows:---
Code:-
1 3 4 5 7
+------+----+
|0 0 0 | 0 0 |
|0 +---+ 0 0 |
+--+---+----+
2 6 8
1. Remote 12V+ switched (grey)
2. Continuous 12V+ (red/white)
3. Ground (-) (black)
4. not connected
5. Speaker right - (blue/black)
6. Speaker right + (blue/red)
7. Speaker left - (orange/black)
8. Speaker left + (red/grey)
Using the following addaptor or similar, splice into the left and right speaker feeds and the ground wires. Once completed you should mask off the wires to avoid shorts.
I have also reconnected the plugs original connections to allow me to reconnect the original at a later date, should I decide to sell the car.
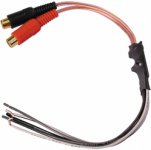
http://www.motor-world.co.uk/show_prod.php?prod_id=12916
You should now have a fully working pre-amp connection to use with your amplifier.
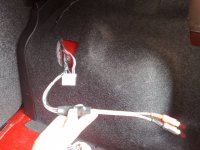
:devil: :devil: :slayer: :slayer: :slayer: :slayer:
If you dont have an exisiting sub you can use your rear speakers connection by either taking the car to bits to get to the speakers directly, or from the back of the head unit its self.


From the above diagram split into the appropriate rear speaker feeds and run a line to the rear of the car.
However for the rest of the guide we will assume that you are replacing the factory sub.
Remove the factory sub by removing the three 5mm torque screws holding the sub in place.

When the AMP is free remove the white plastic block connector from the rear and remove the AMP.

With the AMP removed You can now examine the block connector.


The pins of this connector are as follows:---
Code:-
1 3 4 5 7
+------+----+
|0 0 0 | 0 0 |
|0 +---+ 0 0 |
+--+---+----+
2 6 8
1. Remote 12V+ switched (grey)
2. Continuous 12V+ (red/white)
3. Ground (-) (black)
4. not connected
5. Speaker right - (blue/black)
6. Speaker right + (blue/red)
7. Speaker left - (orange/black)
8. Speaker left + (red/grey)
Using the following addaptor or similar, splice into the left and right speaker feeds and the ground wires. Once completed you should mask off the wires to avoid shorts.
I have also reconnected the plugs original connections to allow me to reconnect the original at a later date, should I decide to sell the car.

http://www.motor-world.co.uk/show_prod.php?prod_id=12916
You should now have a fully working pre-amp connection to use with your amplifier.

:devil: :devil: :slayer: :slayer: :slayer: :slayer:

