Technical Project Paolo

Currently reading:
Technical Project Paolo

Damian - how did you resolve the bonnet not fitting - do you have any photos?
 
Damian - how did you resolve the bonnet not fitting - do you have any photos?


I've not fully yet. A work in progress. It seems to be the catch cocking the bonnet over. A bit of fettling to the catch and hole should solve it. Did you fix yours?
 
No I've not touched this issue - final commissioning of rather complex instruments etc - before MOT - then return it to bodyshop to get them to sort it.
Its the poor shaped pattern part bonnet - they should of checked before painting - so its their problem.....
 
Unfortunately mine is down to the numpty doing the restoration not checking properly before painting...me!
 
Can someone help please? I've been cleaning my engine and as part of this I removed the flywheel. Before I did I marked its position relative to the crankshaft. However my cleaning has removed the mark I put on the crankshaft! How do you put the flywheel on the correct way or doesnt it matter?
 
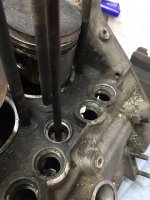
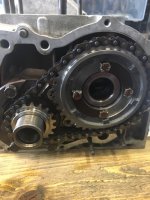
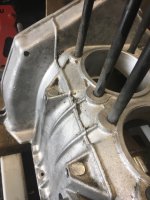
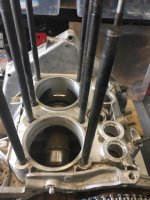
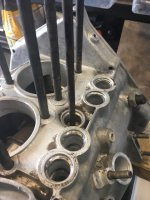
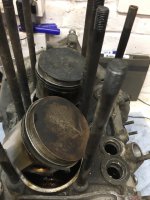
Cleaning engine today and fitted new timing chain and sprockets. What a difference the new chain has made. It was that tight that I could only just get the sprocket on. No sag at all on the chain now. On closer inspection today as I was removing the con rods I found a broken piston ring so that is going to hold up the build of the engine whilst I wait for new ones to arrive. Engine came out quite good considering I only used elbow grease.
IMG_0302.JPGIMG_0301.JPGIMG_0305.JPGIMG_0306.JPGIMG_0307.JPGIMG_0308.JPG
 
Whilst in a perfect world, one would put the flywheel back in exactly the same position that it came off, that would assume that it has never been off before, and if it had, that the previous engine builder was as conscientious as you are! I think that you will find that whilst they MAY have balanced the FLYWHEEL at the factory, the chances that they balanced the whole crankshaft assembly as a 'joined-up unit' is very slim. Don't forget, they were built to a very tight budget! Just put it back clean (take the opportunity to clean up the clutch friction surface with emery cloth) and properly torqued.
It was only Daimler-Benz who could afford to be fantastically finikity--the 300SL engine was run-in on a test-bed, fitted, dyno-tested and then removed, stripped, inspected for wear, rebuilt and re-fitted--on every 300SL built--They guaranteed the engine output to within 2bhp!!
With a new timing-chain fitted you will probably improve the output of the engine (slightly--but they all count) and it will probably run quieter. Have fun.
thumb.gif
smile.gif
 
I agree with you Tom. The only reason I could think to put it in the same place is if it was all balanced. I only asked as the 126 haynes manual says to mark it and make sure it goes back in the same place but the 500 haynes says to just remove and refit. No harm can be done as its only a ring gear and the starter is pre engaged
 
Meant to mention Damian---before you put the timing-chain cover back on, remove the oil-pump and fill it with petroleum jelly (Vaseline)--but NOT, repeat NOT grease. Doing this will give the pump something to suck on and therefore bring the oil pressure up quicker---best thing to do is remove the 'king-lead' from the coil/distributor, remove the spark plugs (or don't put them in until you have done this), turn the ignition on and crank the engine over---when the oil light has gone out, refit the plugs and king-lead--start the engine.
With the sump off, it might be worthwhile carrying out the Abarth mod. to the TOP studs of the exhaust bracket, in the crankcase. Remove the studs and you will see that the holes for these top 2 studs go all the way through the wall of the crankcase. Using a 8mmx1.25mm tap, tap the thread all the way through. Then put machine screws (i.e. thread the whole length of the screw) from the inside--flat washer, spring washer, loc-tite and do them up TIGHT. Make the screws long enough that you can then hold the exhaust bracket on with 2 PLAIN nuts on each stud--1 nut to hold and 1 nut to 'lock' the 1st nut. Do NOT use 'locking' nuts. This mod. (and I assure you, it is a 'pukka' Abarth mod.) means that the top "stud" can no longer pull out.
When you refit the sump, use a 'ruberoid' gasket, and not the cork variety.
thumb.gif
smile.gif
 
After reading you recommend this a few times Tom I am already one step ahead. Pump filled with vaseline
 
Engine getting back together but after I thought I'd finished I went to turn by hand and found I couldn't! I've replaced the chain and piston rings but it shouldn't be that tight. So got to strip it down again and find where the problem is.
IMG_0310.JPGIMG_0311.JPGIMG_0312.JPGIMG_0313.JPGIMG_0314.JPGIMG_0315.JPG
 
Fixed it was a con rod cocked over to one side on the gudgeon pin. God knows how I managed to put it together out of line but not to worry. All turning over nicely now and valve clearances done
 
Phew!! I bet you breathed a sigh of relief when you found out what the problem was! All sorts of scenarios go through your mind. When I was building up the engine for my narrow-boat, I built the crank-assembly 'dry' initially (the crank on these sort of engines goes inform the front (no sump) to ensure that everything fitted OK. Took it all apart and then rebuilt it properly lubricated and all the crank bolts done up with loc-tite (they are BIG bolts) I dropped a 1/2 of one of the main bearings onto the floor, picked it up, cleaned it, re-lubricated it and re-fitted it. With all the bolts up tight the crank would not budge--not one iota!. The ONLY time I have ever thrown a spanner across the workshop--luckily, straight out of the door. I took it all apart (don't forget, all bolts had loc-tite on them and the bolts are tightened and loosened through the side doors of the crank-case---1/2 turn at a time). The cause? a fleck of floor paint had adhered to the BACK of the shell--the paint fleck was more than 3thou thick and had forced the shell onto the journel and locked the crank. Take my word for it--I breathed a MIGHTY sigh of relief when I discovered the problem--all I then had to do was clean the back of the shell and clean out all the old loc-tite.
cry.gif
confused.gif

I notice that you have a "Giannini" sump pan---the company are still in existence, and I have some history regarding the company--would you like me to copy it for you?
smile.gif
 
Only have a Giannini sump as its 3 1/2 ltrs and I got a good price on this compared to the neutral or Abarth ones. Thanks for the offer Tom but no need to copy the info
 
Heres something I've never noticed before. I have 2 rocker covers 1 from my old 500 and 1 from the 650. They send the oil when filling to different sides of the engine! Dont know which is which but I'm using the the black one.
IMG_0317.JPG
 
I think you have a 500 cover there. If you recall my case on the D engine rebuild where I changed the single valve springs to double springs. The original cover failed to fit as the bracket in the cover that allows the oil to flow was too wide.
I had to remove it and turn it around so that it was on the opposite side to the springs.
Make sure the one you use doesn't hit the springs.
 
Looking at them I think the black one is the 650 one as its doesn't have the extra plate on the 2 corners. For some reason on the 500's they added these and it prevents the air flow through the 2 corners of the head on the side of the fan.
 
Back
Top