Technical Project Paolo

Currently reading:
Technical Project Paolo

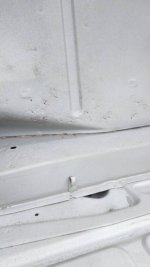
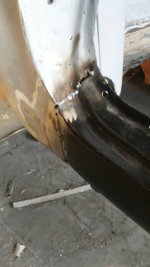
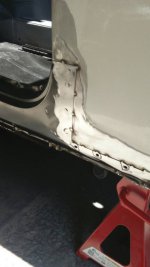
The other thing I found a pain Tim are the metal clip strips that hold the wire loom and pipes in place especially over the wheel arches. They get in the way and if you're not careful you can end up cutting your hands on them. I also thought that come paint time they would also become a pain. Decision made, I cut all mine off. I'm going to weld in some big end fasteners and then attach the wire loom with aluminium p clips. Should look for a neater job I hope?
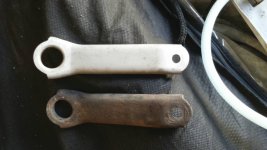
 
If that is the only bad bit on the bonnet and the current fit is good, I would first try to weld and fill.
I haven't seen the replacements but I expect that they don't quite have the definition and solidity (relative term with the 500 bonnet:eek:) of the originals.
I think I may be slightly mad but I brought back to life a bonnet with damaged edges against the scuttle and similar holes to yours.
_JAN8081 by peterthompson, on Flickr
 
Too late Peter, new bonnet ordered. Old one is going to become an ornament on the garage wall
 
Decided to get the shell shot blasted so hopefully next week this will get done. Trying to get welding and respray done by mid June! Been shot blasting front suspension bits today. A before and after picture below
 

Attachments

  • 1429358483791.jpg
    1429358483791.jpg
    64.6 KB · Views: 54
Just got the body back from shot blasters and the inevitable filler has disappeared and shown a few holes I didn't realise where there! I think it's looking like 2 front outer wings, battery panel and front panel. The area I dont have a clue about is the rear bulkhead. I'm assuming these aren't available?
Has anyone repaired these and can offer some advice?
Overall not too bad (certainly not as bad as Peter's latest project) and I'm pleased with the results especially the underneath. Good price too, £160
Damian
 

Attachments

  • 1431168347750.jpg
    1431168347750.jpg
    43.3 KB · Views: 52
  • 1431168363485.jpg
    1431168363485.jpg
    33.9 KB · Views: 49
  • 1431168374025.jpg
    1431168374025.jpg
    53.6 KB · Views: 55
  • 1431168389554.jpg
    1431168389554.jpg
    37.3 KB · Views: 61
  • 1431168402911.jpg
    1431168402911.jpg
    54.4 KB · Views: 65
  • 1431168426544.jpg
    1431168426544.jpg
    33.1 KB · Views: 65
  • 1431168450424.jpg
    1431168450424.jpg
    46.8 KB · Views: 56
Damian,
is that still bare metal? if so I would get a coat of etch primer over all of that quickly before it gets surface rust on it. Otherwise you will probably need to have it blasted again once your metal work has been completed.
Rear bulkhead panel is not available.
Is it just pit marks? has it gone into holes? if possible I would just mig weld the holes, sand off the heads and then a thin skim of filler. You don't really see this panel as the engine bay usually is coated in stone chip, unless you are going smooth and shiny.
Its not nice when things like that get uncovered, but better to find out now than later. I bet the wife is not too pleased!
 
My next job is to clean out the blast media, panel wipe it and primer it Sean. It's very tiny holes on the bulkhead so I think I'll go with your suggestion. My problem is I know nothing about welding and panel work so I never know what's repairable and what needs replacing. Before I go splashing out on new panels I need to get the guy who's doing the welding to have a look and he can advise me.
Kerry doesn't know yet but she's got every faith in me getting it done. It's just going to take longer and cost more!
 
After shot blasting is it necessary to rub down the metal prior to priming? Or does the primer take out the roughness of the surface?
I need to get primer on to stop rust but I don't want to be rubbing it all down again at a later date
 
Well the money pit continues!
Yet another big order gone into Leo van der Laan ( I reckon I've paid for his summer holiday this year) and I've still got the welder and then the big one (respray) to come!
Good job the mechanic doing all the work is cheap
Once the order arrives can concentrate on getting all the suspension parts back to new at which point all the panel work should be done. Should be in for respray end of June (I hope)
 
Got one side of the car 95% repaired today, just got to do a patch on the wheel arch. Long old day in 35c heat but very rewarding. Got to flush and trim all the welds still but very pleased with the result. My welder used a different technique to how other people have done it but he assures me it will be strong. Do the other side in a couple of weeks time when he's free
Damian
 

Attachments

  • 1436028693776.jpg
    1436028693776.jpg
    39.3 KB · Views: 61
  • 1436028714365.jpg
    1436028714365.jpg
    56.1 KB · Views: 66
  • 1436028741765.jpg
    1436028741765.jpg
    42.2 KB · Views: 64
  • 1436028754738.jpg
    1436028754738.jpg
    44.5 KB · Views: 63
  • 1436028790245.jpg
    1436028790245.jpg
    41.3 KB · Views: 70
  • 1436028807726.jpg
    1436028807726.jpg
    50.4 KB · Views: 77
  • 1436028817589.jpg
    1436028817589.jpg
    47.7 KB · Views: 78
  • 1436028829302.jpg
    1436028829302.jpg
    41.1 KB · Views: 87
Looking good Damian.
thumb.gif

Always nice feeling when you see new metal being welded in. Things start looking neat & strong. A really good basis for building a nice little car that you can be proud of and know that's its all solid beneath the paintwork.
Interesting way of doing the joint on the 1/4 panel. Personally I would do a few more welds on the edge of the sill as when you fill that over, a lapped joint can have a tendency to move under stress & bumps etc and the last thing you want is for the filler to crack your lovely new paint.
cry.gif


Keep up the good work
 
I was thinking the same Sean the weld on the front of the sill looks like maybe the metal popped through under the heat of the gun. I would definately try and get a bit more of a joint there but other wise like Sean said Damian it's nice to get new metal on there.

I hope you sat back with numerous cups of tea to admire the work afterwards with a smile on your face?:D

Tony
 
Damian, I would ask your guy to slow down. Ideally he should at least cut down that join at the sill to rear quarter with an ultra thin cutting disc, clamp it with intergrips and then weld it continuously.
Tony is right; it's popped out a bit and Sean's right that it might not stand the test of time. I just think they might be being more diplomatic than me and that you might actually be asking us for an opinion in a roundabout way.
There is also a gap in the welding at the front of the sill. I would put in more plug welds at the flanges.
These criticisms might be unfair as we are seeing the job half done but that "different technique" isn't really the way to weld structural bodywork even going by the standards for the MOT.
It will work and look acceptable when filled but I would bite the bullet at this stage and ask your welding man to address these concerns.
On the positive side, he does seem to be adjusting the repair panels so that he is removing only the essential amount of the original bodywork.
Fiat 500F 1969 Peter Thompson by Peter Thompson, on Flickr
 
Last edited:
I was being diplomatic Peter! I don't claim to be the worlds best welder but on first looking at the pictures I was a little concerned, that as you said, they are not continuous welds.

They look like little spot welds you would put in place first to hold the new panel and then you would expect them to be finished off with a continuous weld to complete the joint. I wouldn't be happy to put filler over the top of those joints as they are at the moment, there really isn't a lot holding the new sills in place. I can't really see in the pictures whether the floor pans have had the same method applied but I suspect they may have?

Tony
 
Thanks for the feedback guys. The front of the sill has been welded more now, that picture was from a work in progress. I will ask him about the sill to rear quarter
 
Wherever the car was originally spot-welded such as the sill flanges or the perimeter of a new and complete panel such as the floors, spot or plug-welding is the correct technique.

Any join in the monocoque shell where there would not have been one originally should be continuous.

Lap-joints and spot or plug-welding is safe but carries an inherent cosmetic risk for the future in non-structural areas...doors etc.

Quite commonly, MOT repairs willl be lapped-on patches, but these should always have a continuous bead which is easier to do when lapped. But when you are conserving a car for the long term the aim is to not have the redundant bits of steel and the crevices and moisture-traps that laps produce.
 
Might be taking things a bit too far cleaning wise. Shot blasted front suspension and fitted new bushes. Then I didn't want to put some dirty washers next to my nice new bushes so out came the dremel and I sanded them clean. I know you can buy new but what the heck. Please tell me I'm not the only one?
Just gonna spray them with zinc galvanise now!
 

Attachments

  • 1436378958917.jpg
    1436378958917.jpg
    29.9 KB · Views: 33
  • 1436378971045.jpg
    1436378971045.jpg
    26 KB · Views: 33
  • 1436378980825.jpg
    1436378980825.jpg
    33.9 KB · Views: 45
Back
Top