

(First post in this forum and first attempt at a guide so please go easy on me ") )
)
After seeing a guide on here about how to install a Carputer and create the fascia panel, I decided to give it a go. However I couldn't afford the touchscreen, or the computer, so I opted for a £25 delivered 7" screen from China on eBay, and use one of the 'video out' connections from my HU to display music/movies etc on. I was going to do this, then put my HU under my seat or in the boot somewhere, until after some googling discovered the HGT centre console (No idea it existed, new to Punto's and cars in general for that matter). Bought one off eBay for £20, and decided to hook it all up. So heres how I did it for anyone else who wants to, seeing as I couldn't find a guide on Google anywhereeee. I'm sure there are different and probably better ways to do this, but hey, I just wanted it done
Equipment needed:
- HU (obviously)
- HGT Centre Console (or not if your handy with the fibreglass)
- Connector blocks (I used 24)
- Spare wire
- Screwdrivers, Wire strippers etc
Step 1:
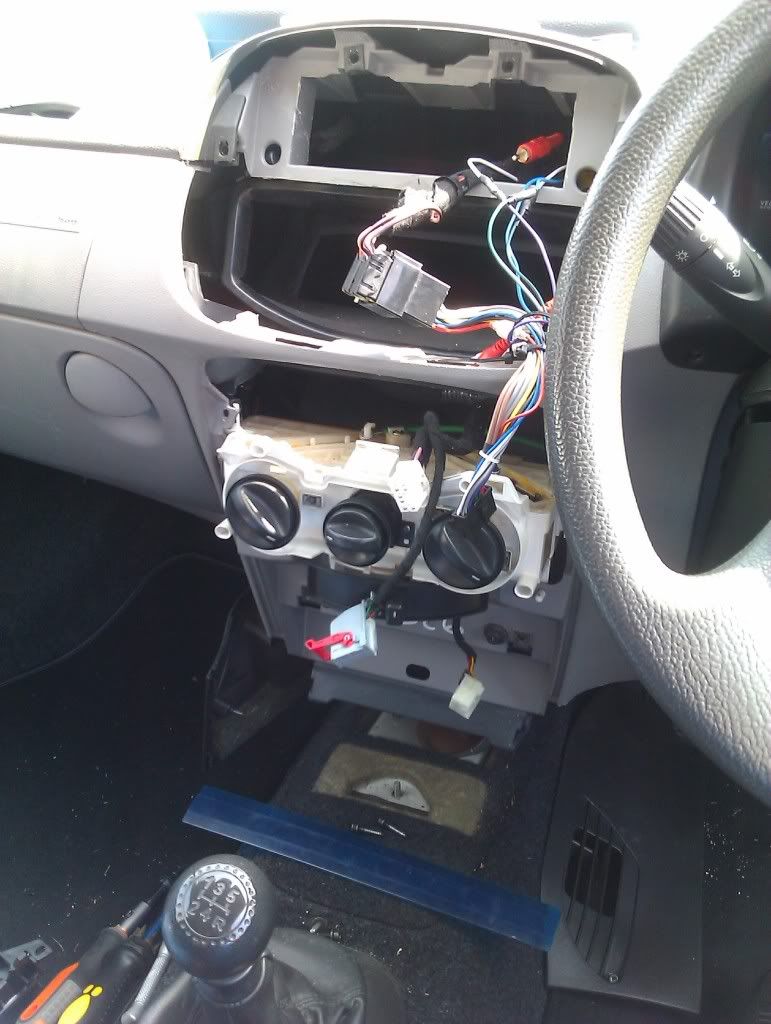
First of all you want to remove; both front footwell vents, centre console, switch panel and upper heater vents, aswell as your HU. You should be left with this:
Step 2:
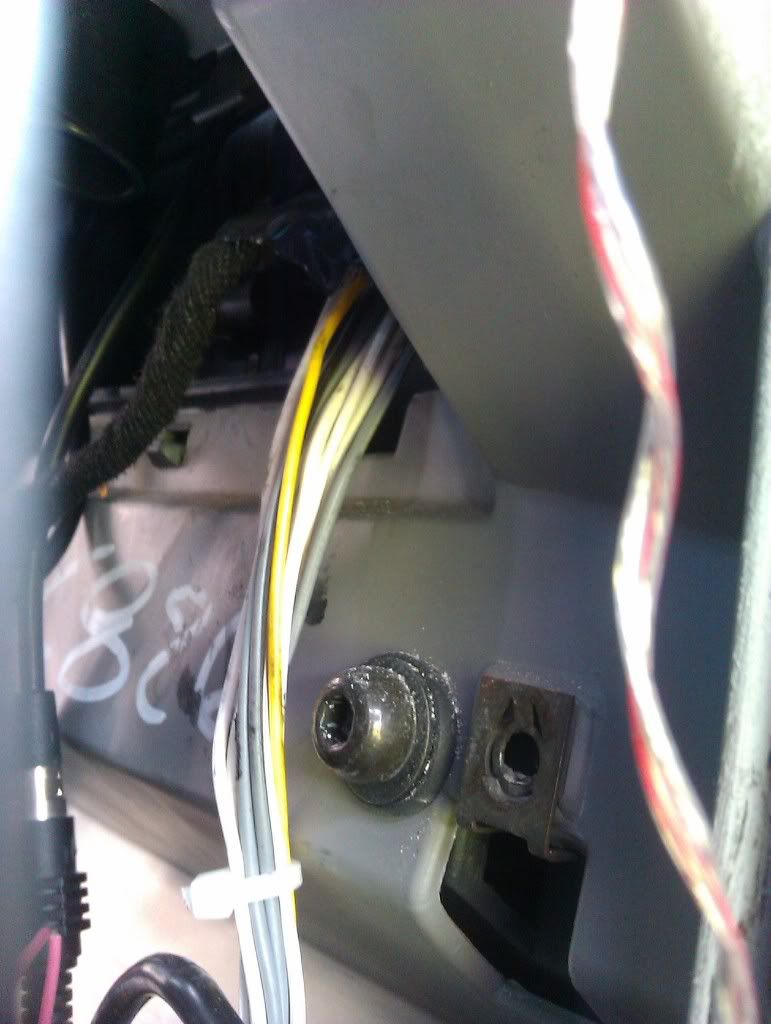
Now as you can see, the wires are never gonna reach down there, so they need extending. I took the adaptor for my RipSpeed HU and snipped all the wires about halfway. I decided to xtend the adaptor instead of the built in ISO Connector incase I ever want to remove it. Strip both end that you snipped. Now, take your connector block (mine needed 12 wires extending and they come in blocks of twelve) and cut your spare wire in to about 2' long lengths all stripped and ready, this way you have a bit of play when you thread the wires. Now the tricky part. If you look down from where the heater vents were, you should be able to see the back of heater dials made of white plastic, with a small gap behind it. Yep you guessed it, wires are going down there. push one connector block down there as far as you can, then reach your other hand up behind the grey plastic of the dash, you should just be able to grab it and pull it through, hopefully the pictures below will help:
The veiw from the top:

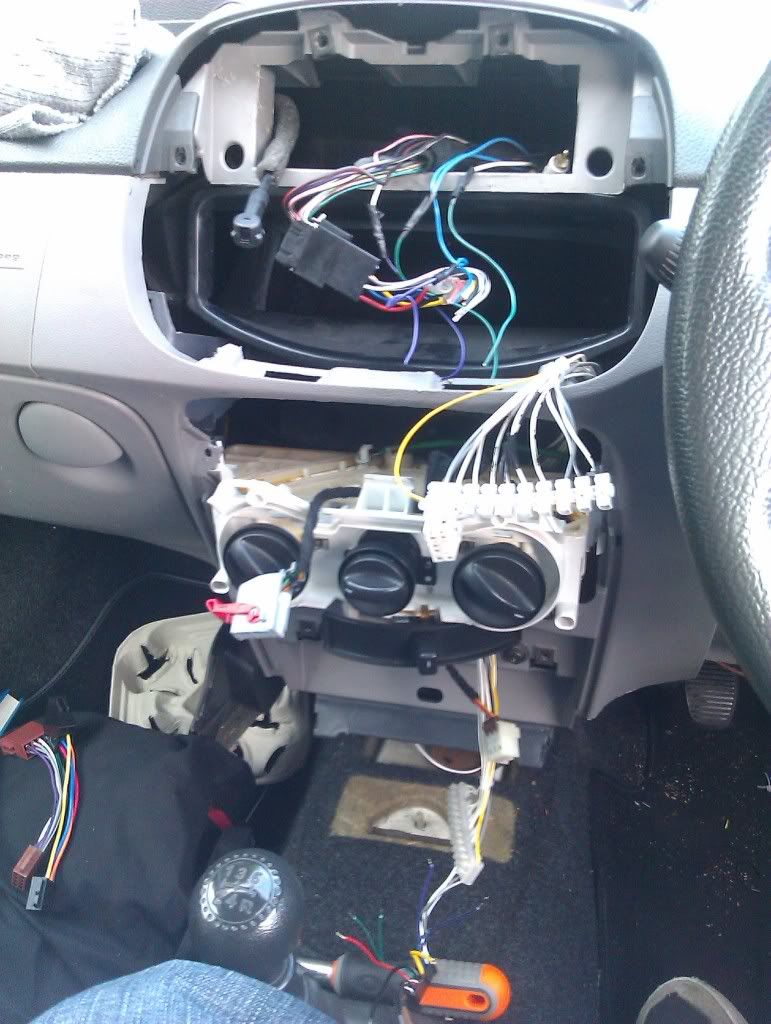
And the view from the bottom:
And then you should have something like this:
Step 3:
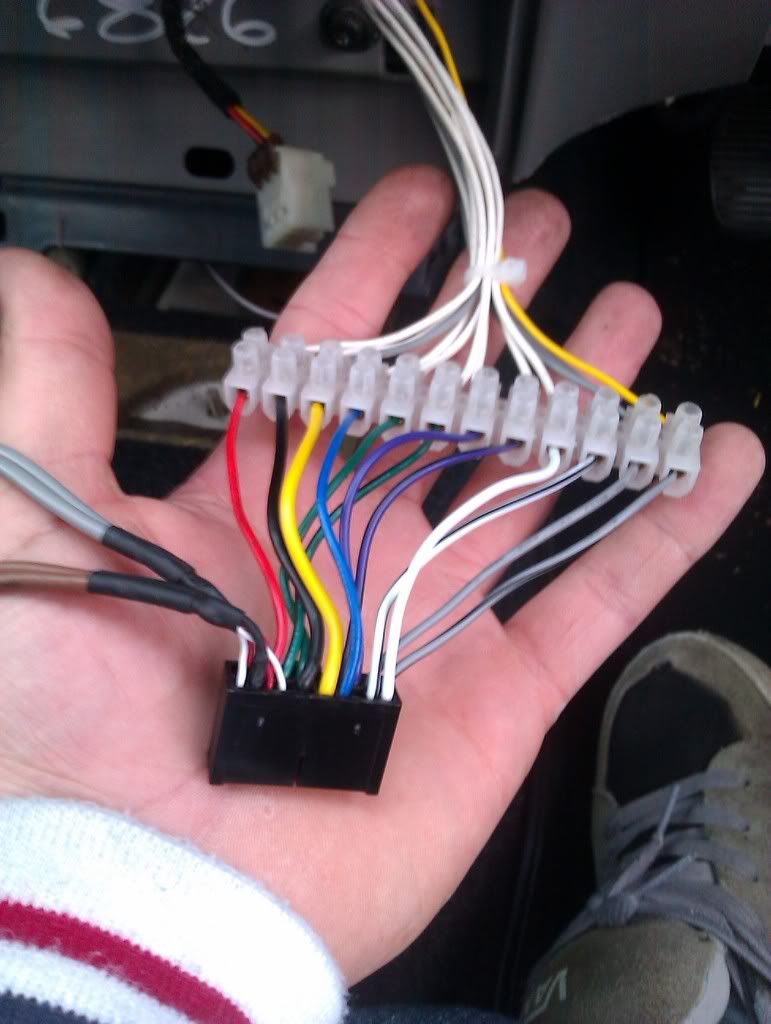
After the tricky bit comes the easy bit Just connect up all your wires, making sure they matched. I used one yellow wire at one end of the connector block, connected that up at both ends, then did the rest across the block sequentially. Easy Peasy:
Step 4:
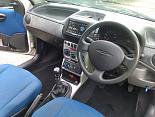
Now just re-fit your centre console and side vents, plug in your HU, shove it in and there we have it, done. At first, mine looked like this:
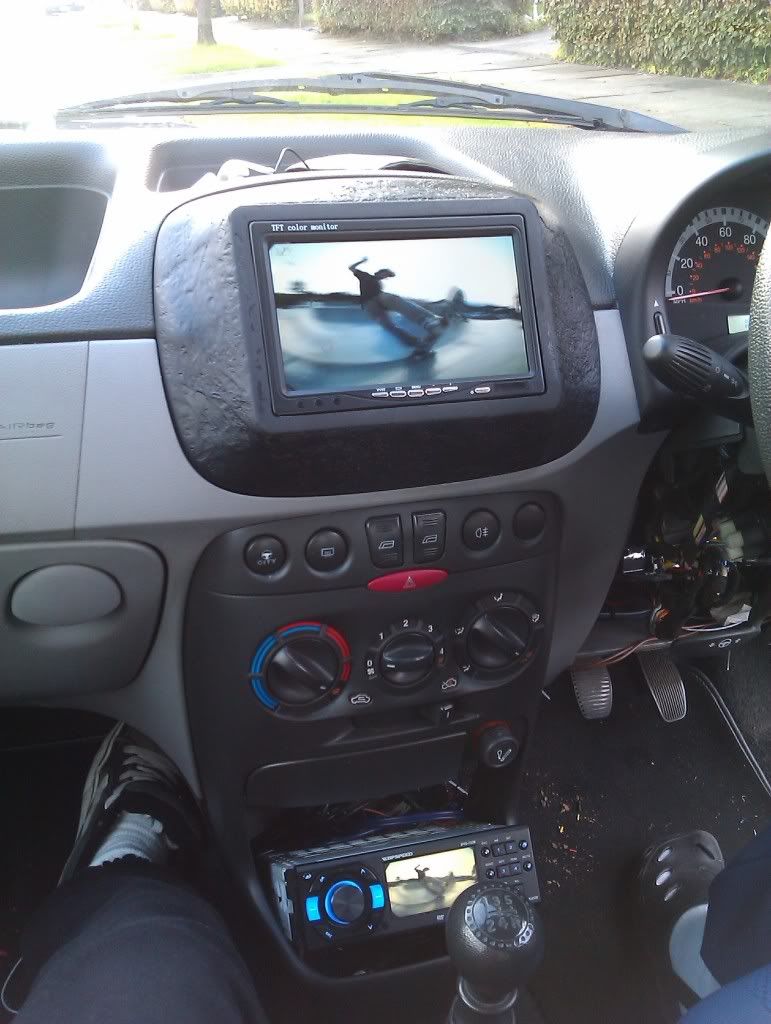
I just took the cup holders out the original console to accomodate the HU, I was going to build a fibreglass surround and smooth it all in, then just went for the HGT Console, so heres the finished product, including new console, gear knob, and switch panel:

Thanks for reading, hope this helped someone out there
)After seeing a guide on here about how to install a Carputer and create the fascia panel, I decided to give it a go. However I couldn't afford the touchscreen, or the computer, so I opted for a £25 delivered 7" screen from China on eBay, and use one of the 'video out' connections from my HU to display music/movies etc on. I was going to do this, then put my HU under my seat or in the boot somewhere, until after some googling discovered the HGT centre console (No idea it existed, new to Punto's and cars in general for that matter). Bought one off eBay for £20, and decided to hook it all up. So heres how I did it for anyone else who wants to, seeing as I couldn't find a guide on Google anywhereeee. I'm sure there are different and probably better ways to do this, but hey, I just wanted it done
Equipment needed:
- HU (obviously)
- HGT Centre Console (or not if your handy with the fibreglass)
- Connector blocks (I used 24)
- Spare wire
- Screwdrivers, Wire strippers etc
Step 1:
First of all you want to remove; both front footwell vents, centre console, switch panel and upper heater vents, aswell as your HU. You should be left with this:
Step 2:
Now as you can see, the wires are never gonna reach down there, so they need extending. I took the adaptor for my RipSpeed HU and snipped all the wires about halfway. I decided to xtend the adaptor instead of the built in ISO Connector incase I ever want to remove it. Strip both end that you snipped. Now, take your connector block (mine needed 12 wires extending and they come in blocks of twelve
) and cut your spare wire in to about 2' long lengths all stripped and ready, this way you have a bit of play when you thread the wires. Now the tricky part. If you look down from where the heater vents were, you should be able to see the back of heater dials made of white plastic, with a small gap behind it. Yep you guessed it, wires are going down there. push one connector block down there as far as you can, then reach your other hand up behind the grey plastic of the dash, you should just be able to grab it and pull it through, hopefully the pictures below will help:The veiw from the top:
And the view from the bottom:
And then you should have something like this:
Step 3:
After the tricky bit comes the easy bit
Just connect up all your wires, making sure they matched. I used one yellow wire at one end of the connector block, connected that up at both ends, then did the rest across the block sequentially. Easy Peasy:
Step 4:
Now just re-fit your centre console and side vents, plug in your HU, shove it in and there we have it, done
. At first, mine looked like this:
I just took the cup holders out the original console to accomodate the HU, I was going to build a fibreglass surround and smooth it all in, then just went for the HGT Console, so heres the finished product, including new console, gear knob, and switch panel:
Thanks for reading, hope this helped someone out there