Im
Confusing myself — why is it important to slacken the cam sprocket here? I know the manuals are telling me to
First one of these I did I was wondering exactly the same thing so don't feel you're "thick" not getting your head round it. Which is not to say i don't have the odd moment of absolute stupidity!
The cam timing is important because the designer of the engine will have spent a great deal of time and effort deciding exactly when the best time is for the inlet and exhaust valves to open and close to produce the engine performance and economy characteristics he's trying to achieve. If the valves don't open and close exactly when they should in relation to the positition of the pistons in their bores, which is a function of the turning of the crankshaft, then the engine won't function exactly as the designer requires it to so performance and/or economy will suffer. Not so long ago both the cam pulley and crank pulley were keyed to their shafts which, if production was perfect, produced perfect cam timing. Problem was that production variations (tolerances) crept in and this produced problems like keyways not being in exactly the right place on the shafts etc. so, because the pulley can only be fitted so it engages with the key, the timing will now be suboptimal. I've built a very few performance engines and one of the things you spend a lot of time on is "dialing in" the camshaft. On these older engines - BMC "A" series for example as found in the old Mini - you can vary the exact position of the cam pulley by using "stepped" woodruf keys. It's complicated and involves DTI gauges, degree wheels and the like so I'll go no further. However, if you eliminate the key altogether then, with the retaining bolt slightly loose, you can spin the pulley to any position on the shaft and, when correctly aligned, lock the two together - pulley and shaft - simply by doing the bolt up very very tight. Now can you see why they want the bolt slackened? because it allows the pulley to move independently to the camshaft. The correct crankshaft position and camshaft position are brought about when you install the crankshaft locking "dumbell" tool and the camshaft locking plate with the angled blade which slots into the back end of the camshaft. At the same time you will have fitted and tensioned the new belt thus ensuring the top pulley is in the position it needs to be in when the engine is running - In other words the belt is fitted and tensioned so in the same position it will be when the engine runs and both crankshaft and camshaft are timed in relation to each other as the designer specified. Once the cam pulley bolt is then fully tightened the cam pulley is locked to the camshaft itself - it drives the camshaft just by the fact it's done up so damned tight! I worried a lot about this practice when I first encountered it because if it's not tight enough the pulley could spin on the camshaft and throw the timing out resulting in pistons and valves having a "party"! However it's now common practice, in fact the wee 3 cylinder engine in my Ibiza, and now the Scala I replaced it with, have not just "free running" cam pulleys but also the crank pulley too!
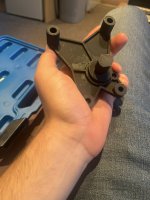
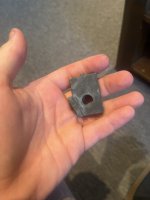
Some years ago, when I first came across these "free running" pulleys I ran into the "problem" that they are usually very tightly done up so difficult to undo. Don't even think of undoing or tightening them with the locking bar tool still engaged in the back slot of the cam, it's very likely it'll break off some of the cam and that's a big problem on later engines as the cam timing sensor reads off the back end of the cam. There are flats on the camshaft itself you can use a spanner on to stop it rotating. I did a lot of thinking and arrived at the conclusion that maybe there were two main reasons why it's designed like this. 1) to accommodate any variables when fitting a new belt - maybe due to variation in belt dimensions? and 2) simply to always ensure the timing is absolutely spot on.
I thought about this for a while and wondered exactly how much variation there is between belts so rang up the very helpful people at Gates (my favourite belt manufacturer who I've had contact with before). The answer was pretty much nil - the belts are produced to very tight tolerance so realistically the variation between one belt and another is nil. Ok, that's good. Then I thought, the remaining "Elephant in the room" regards the timing which, if we accept that the belts are manufactured to such a close tolerance that variation between belts is effectively nil, boils down to the pulley being correctly timed to the cam last time the big retaining bolt was slackened. This then lets us conclude that if the belt cahnge you are doing is the engine's first belt change then the timing is going to have been done in the factory so is almost certainly correct. If it's the second or later belt change or, if for any reason you may suspect someone has slackened the cam pulley bolt, then you must conclude the timing may not be correct.
The relevance of all this is that, if you can be sure the timing is correct, there's no need to slacken the cam pulley retaining bolt (and risk all the possible problems of dealing with slackening and tightening it) Remember the new belt can't be fitted with both cam and crank locking tools in place unless you either slacken the cam pulley bolt which allows the cam pulley to rotate enough for the teeth to engage or, simply, without slackening the cam pulley bolt, remove the cam locking tool, and turn the cam pulley (and therefore the cam itself) slightly clockwise until the teeth can be engaged. In both cases then tightening the tensioner completes the operation although the cam pulley bolt, if you slackened it, will need to be retightened before trying to turn the engine over or start it.
I've thought a lot about posts people have made about how they've ended up with a mistimed engine with poor running after trying to change the belt themselves and it's pretty obvious that what's happening is that people are buying the timing tools and turning the engine until the cam and crank locking tools engage. If both tools line up then this both confirms the valve timing is correct and locks the engine in this position. What needs to be appreciated is that this locks the crank and cam in this position with the belt FULLY TIGHTENED under the influence of the tensioner. If you feel the "drive side" of the belt - that is the run of the belt from the cam pulley around the water pump to the crank pulley - you'll find it's "tight as a drumskin" Of course you'll be able to get the belt off after you slacken the tensioner but you've absolutely no chance of getting enough tension on the new belt with just your hands (or any other way I can think of) to get the belt to engage correctly with the pulley teeth unless you turn the cam pulley about half a tooth clockwise. Or slacken the retaining bolt, but I'm trying to avoid doing that here.
So, to sum up, how do you change a belt on a later FIRE engine with out slackening the cam pulley retaining bolt?
Assuming you've got the front of the engine prepared, so cam cover off, engine mount removed, (jack with small sheet of plywood on saddle to spread the load placed under the sump to support the engine), aux belt removed (by the way, always just fit a new one of these when doing a cam belt unless you've fitted a new one recently and all the belt guards stripped away.
1) turn the crankshaft until both crankshaft and camshaft locking tools can be engaged, I would install the crankshaft "dumbell" first and then see if the cam locking bar drops into it's slot on the cam. Sometimes it helps to leave the little top bolt out of the dumbell tool so you can "wiggle" the crankshaft if the cam locking tool doesn't just drop in. However that wee bolt has to be able to be screwed in once you've got the cam bar in it's slot otherwise it's telling you the timing is "off" and then you are going to have to slacken the cam pulley bolt and do the whole official procedure.
2) If the locking tools are slotting in nicely then you've just confirmed that the cam timing is as it should be and you don't need to slacken the pulley bolt - hurrah - so
3) slacken the tensioner and remove the old belt, tensioner and water pump. I'd always do a water pump on any engine where the water pump is part of the belt drive train. Water pumps do tend to fail unexpectedly on any engine due to seals failing and letting coolant get into the bearings. If the pump is part of the cam belt drive train and it fails it will let the belt go slack or maybe come off altogether which can ruin the engine. So I'm not prepared to play water pump Russian roulette and just fit a new one every time. If using silicon sealant then let it cure over night before refilling the coolant. You can still complete fitting the new timing belt though.
4) Loosely fit the tensioner assembly and clean out the usual "crud" from around the crank pulley. At this point I like to mark the crank and cam pulleys with a spot of tippex and also on the engine casing opposite these spots so that I can line everything up again if needed. Start fitting the belt by feeding the new belt around the crank pulley with the teeth fully engaged. Now stuff a bit of rag or anything suitable, a small socket maybe? between the belt and the wee bit of aluminium under the belt so the belt stays in place and feed it round the water pump pulley, again fully engaging the teeth, and then on up to the cam pulley. Oh dear, the teeth on the belt won't properly engage with the cam pulley teeth. This is no wonder as the pulleys are positioned as they were with the old belt fitted and the tensioner fully tensioned. You're not going to get the belt on like this, and this is where folk get it wrong. They find that simply by letting a very small amount of "pull" off the belt the next tooth back the way will be very happy to drop into engagement and the fitting of the belt can be completed. Even the tensioner can be tensioned (cam locking tool should be removed before tensioning) However, if you've done this, you'll notice (or maybe miss noticing) that the cam pulley rotates slightly anticlockwise as you tighten the tensioner? This is because you've fitted the belt one tooth retarded! and this is what causes all the problems.
So what should you have done? Well, all was going well until you found the belt couldn't be kept under tension and still be made to line up it's teeth with the cam sprocket. So you let a wee bit of slack develop in the belt until the next tooth could be made to line up and now you've got the engine one tooth retarded. If you set the tensioner and tighten it up in this position, then rotate the engine two crankshaft revs and try to refit the timing tools you'll find the cam locking tool won't go into the slot with the dumbell locking up the crank. What you need to do is, when you found the belt wouldn't engage with the cam pulley, remove the cam locking tool and rotate the cam CLOCKWISE ever so slightly until the belt teeth do engage. Don't let the belt slacken, you just want the next tooth to line up, it's only about half a tooth out! Then finish fitting the belt round past the tensioner and adjust the tensioner. This time, although the top pulley may move slightly as you apply tension with the tensioner, its such a small amount you may miss it easily. So now the belt is fitted and the tansioner tensioned. Turn the engine two revs of the crankshaft clockwise, refit the dumbell and you'll find the cam locking bar drops into it's slot very nicely.
Reassemble all the other bits and pieces - engine mount, cam cover (with new gasket and O ring seals and a wee bit of sealant in the corners to stop it leaking) belt covers etc etc and you're ready to go. I like to start the engine before putting the belt guards back on just to check the belt run looks right - they mostly seem to run towards to back edge of the cam pulley by the way, this is controlled by the flanges on the water pump pulley so there's little you can do about it. Don't try starting it with the can cover off as there's a drilling at the front of the head which is the oil supply for the cam and it'll give you an impressive fountain display if the cover is left off!
I've done a number of them like this and know it's done this way in at least a couple of the wee garages around me. I asked around and two things emerged
1) none of them slacken the camshaft pulley bolt
And
2) more interestingly and significantly none of them find they ever get problems with the EML illuminating and then subsequently having to do a Phonic wheel relearn. This is exactly what my experience has been too. Leave that cam pulley bolt alone and, of course, fit the belt correctly, and the EML doesn't light off!
I know this "unofficial" way of doing these belts has attracted interest and comment before so I'm interested to see what you good people come back with this time - a await your wise deliberations with great anticipation.