General Dans 1368 cinq

Currently reading:
General Dans 1368 cinq

First catch, the metal water pipe that comes from the water pump is different to the cinq. You can just make out that it has another connection that pretty much goes into the radiator fan blades. Bearing in mind theres no way the engine is coming back out to again, should i cut the pipe off and block it off or should i swap it with a cinq one and hope it comes off and goes back on easily?

Heres a pic of what i mean:

P210610_20_03.JPG


Oh and while im on, heres a pic of the engine all bolted in level

P190610_19_48_02_.JPG


And a nice pic of the manifold while its still shiney, shame about the rest of the engine, but will clean it eventually.

P190610_20_50_01_.JPG


And a pic of the cinq arm fitted to the stilo gearbox, so you all know what i was talking about.

P190610_19_47_01_.JPG
 
Bit done this eve.

New Radiator fitted with punto gt fan switch in it.
Fan attached to radiator (catches exhaust manifold slightly so may grind down part of the bracket, will see)

GSR radiator hose cut and hose joiner fitted with the intention of using this to add a water temp sensor into as its completely out of the way under the bumper, so should look tidy, plus i do not trust myself tapping the thermo. Was just checking that i could still tighten either side of joiner at the time. ;)

P220610_18_51.JPG


Driveshaft cups removed from cinq gearbox and fitted onto stilo box. To remove i just used a screwdriver either side and a light tap with a hammer. To put cinq on i put a piece of wood over the end to ensure even contact and knocked in with a hammer. In the pick you can see the cinq cups all cleaned up and degreased and the cinq speedo and worm drive.

P230610_19_42.JPG


Finally managed to get the worm from the stilo. After undoing the bolt on the side, the rest of it pulls out, the whole of the plastic bit as pictured:

P250610_21_58.JPG


New water pipe ordered from fluffy 55217638 £31.50
along with a stilo thermostat 46523118 £13.11
and an exhaust manifold gasket 46526271 £4.43

Water pipe fitted, so that solves that prob. The water pipe is the 3rd revision and has a triple style washer. Straight fit. I used circlip pliers to pull the old rubber seal out. Worked nicely. Heres the difference:

P250610_11_52.JPG


ARB painted with hammerite as chalky looked absolutely amazing and inspired me:

P240610_16_59_01_.JPG


Thats about as far as i got, so still have soooo far to go. lol

Also checked the mpi strutbrace clears the 1.4 inlet manifold and seems to have plenty of space. :slayer:
 
Thanks Jeremy. Was good to see your cinq in the real too, really stands out and love the look of the rasied bonnet. (y)

Had a bit of a scare this week as the sump plug was not a 1.4 and fluffy seemed to think it was a 1.2 :eek:, but engine code (eventually managed to read it) is 1.4, so must have been fitted with a different sump at some point.

Started moving on to more confuzling parts. I see most people have removed the charcoal canister. Can i just join the 2 blue cables that run next to the fuel supply and return as all they seem to do is flow through a sensor then through the canister. Do i still need this sensor?

Which is the fuel supply and return as apparently left is supply. Left as in where you see it come into the engine bay in the grey piping?

Also where the hose comes out of the collant hose comes out of the heater matrix, one goes to the 4 way pipe next to the radiator and the other i haent quite worked out. It splits into 2, so the smaller one goes to the expansion tank and the larger into the head next to where the coil packs will be? Can somebody correct me.
 
yeah just disconnect / blank off the canister things.

not sure if you'll need to keep it connected on your setup or not, i binned mine.

you are correct with the water pipe ideas
 
  • Thanks
Reactions: Dan
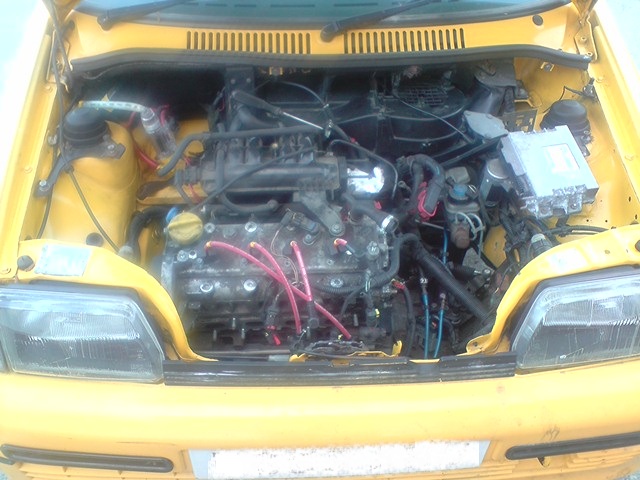
Engine cleaned up a bit.

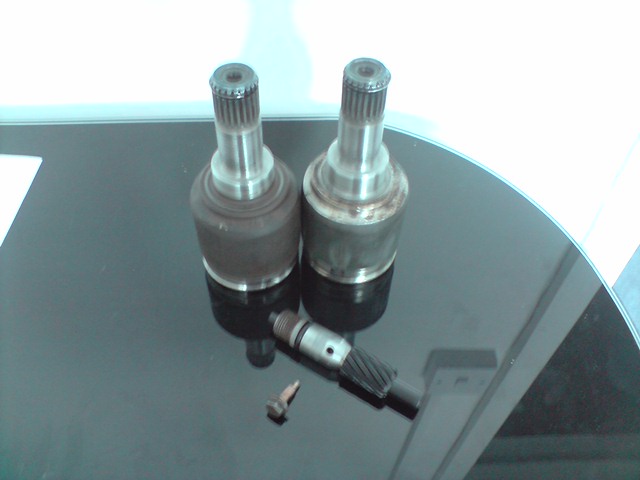
Drive shafts connected up onto the cinq cups. All new CV boots fitted. Decided to remove the rubber shock absorber on the o/s driveshaft rather than take the joint off. Proved quite stubborn but easier than removing the joint i believe. New hub nuts fitted and staked in.

The camber bolts have been fitted and set to maximum on each side.

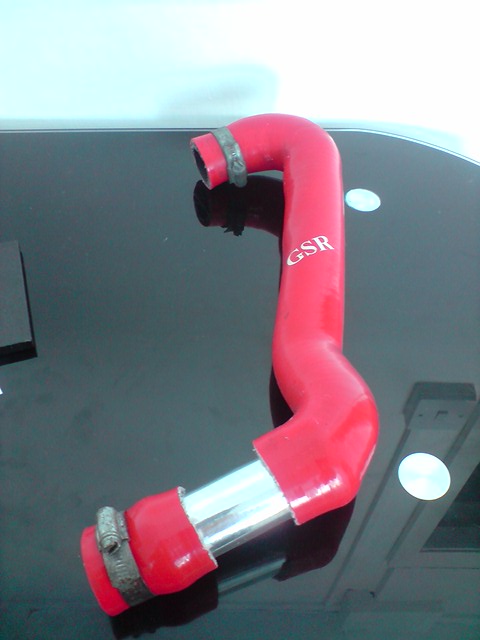
Decided that i am going to have the coolant tank where the battery was and make a basic bracket to the strut top as shown:

P070710_19_15_01_.JPG


I still need to trim the GSR hose once the poosition is finalised as slightly too long. I also need to decide which way to run the bottom tank hose as its very tight going down by the mount. Tempted to go over the top of engine as Aaron seems to have done, but ruins the engine bay styling slightly.

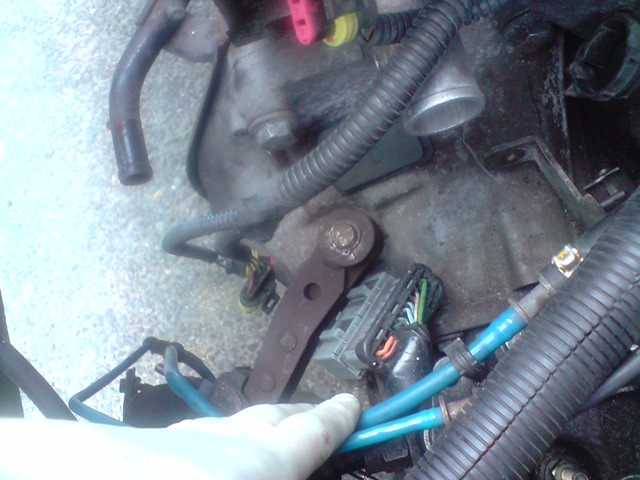
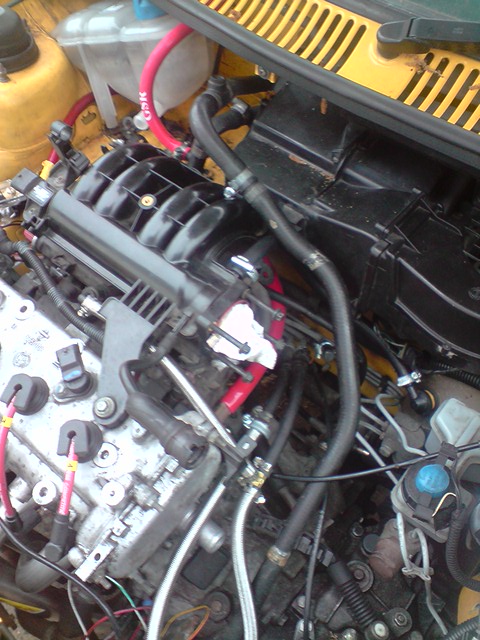
FPR Connected up with stainless steel braided hosing. Am going to mount the FPR on the headlight bolt as its in the perfect location (as soon as i can get the 8mm bolt from the stupid black hole below the headlight) Shown below:

P070710_19_14_01_.JPG


You can also see that ive finally taken all the stilo wiring out. Not sure why i left it all in place before fitting, but oh well.

Tidied the battery cabling slightly, but still need to finish off.

In this pic you can see the fun im going to have with a throttlebody to fit as its 4 holes all 8cm apart, so dont think any existing TB's will fit. Have ordered a metal plate 20mm thick to make a spacer from when i decide which TB to use. Think i may just use the bravo one i have sat here.

P070710_19_32.JPG


I have removed the stilo injector wiring and put on the fiat punto sporting connectors. Fits perfectly and makes the wiring at the correct end next to the pressure sensor according to the loom, although will still need extending. :rolleyes:

Hoping that wiring wise they should be fine. :confused:

Oh and after tightening the sump plug as was leaking. found the hole to be stripped. So see my other thread in stilo section to see what im going to do, which is remove sump, fit oil temp sender while its off, drill out the hole and fit larger plug with a hydraulic washer as they seal better at a lower tension apparently.

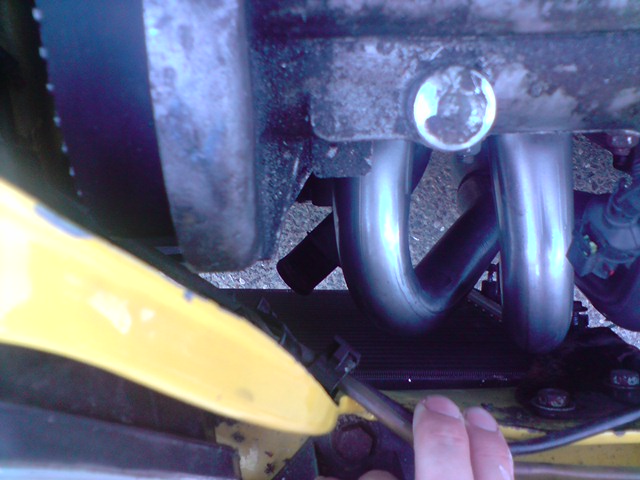
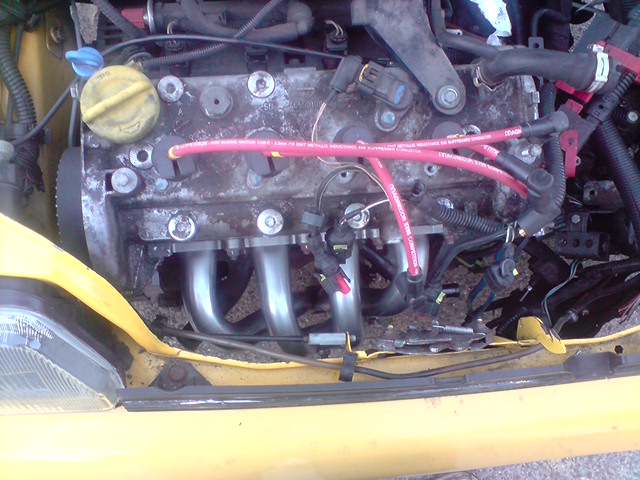
Lambda put into manifold ready to connect.

Charcoal canister removed. Hose into cannister was already disconnected and return has been capped off next to the bulkhead.

New servo hose connected up.

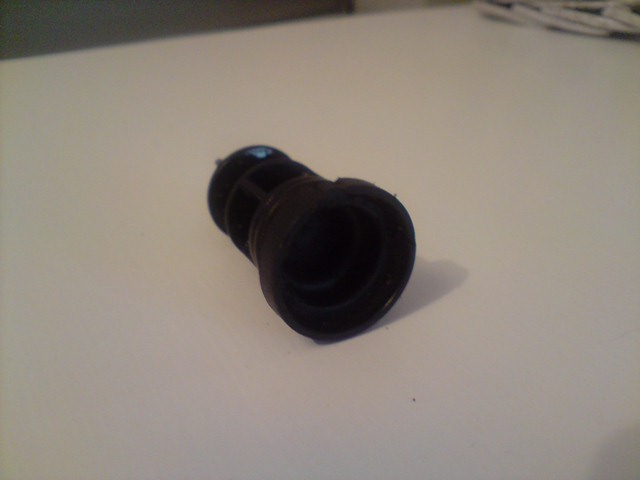
Does anybody know what the thing inside the inlet manifold is and what it does; It has a hose going into one end and out of the other????

Dan
 
yup yup, demon tweeks sells the adaptor plugs to fit the temp sender for like £8 or so. IF you have different sender to temp and pressure then best to get two. (in the 8v, ut has 2 blanked off plates)

Ming
 
looking good, is the thing in the inlet manifold a purge solenoid for the charcoal canister? pics?

where you have the FPR - that might get in the way of the induction.. check that ;) I have mine back toward the brake fluid res.

If you have the sump off, then i would fit the temp sender in there - it gives a better more stable oil temp being in there.
 
I love the way you answer all my q's. Your like my fairy god mother. :slayer:

Will have the temp sender put on sump when its off then.

Yeah i think the thing inside is something for canister going off of the 2 different types of hoses either end, so i should be fine removing it. Brilliant.

Have mounted the FPR on the bolt to the left of the headlight on a bracket, so quite a way further over than pictured. It also pushes the fuel hose tidily next to the thermostat. Induction fits snuggly. May need to wrap the top radiator to thermostat hose to stop scrubbing.

Have also re-routed the heater matrix pipe with the bleed valve in it so it goes below the inlet manifold out of sight.

Started making a bracket for the coolant tank.

Finally getting a punto sporting coil pack bracket tanks to Whitz. (y)
 
STILO to PUNTO - MAP sensor connections

Right. Hopefuly this will help anybody using the punto sporting ECU wanting to use the stilo inlet manifold with the MAP sensor built in. This took absolutely ages of begging for diagrams and lots of diagram tracing etc, so hope it will help somebody. :p

PUNTO
Pink/Black (pin 14 - 5v out)
L.Blue/Black (pin 31 - air temp input)
Black (pin 16 - Ground)
L.Blue/Yellow (pin 32 - MAP input)

STILO
L.Blue/Red (pin 26 - 5V out)
Grey/Red (pin 55 - air temp input)
Grey (pin 7 - MAP ground)
White (pin 6 - MAP input)
 
Last edited:
  • Thanks
Reactions: arc
Back
Top