General 500R Restoration

Currently reading:
General 500R Restoration

Such is the emotional roller coaster that is Italian car ownership. Once it is all sorted, you'll have a little gem :)

Chris

That's right.. :D i could guess that a good night of sleep would would make me feel better, but i wasn't expecting to wake up for a fresh snow blanket outside. Couldn't be happier right now! :D i love driving in the snow! :slayer: :D
 
After today's session these are the last parts missing to come out. This first photo is all the oil the brakes had. Even my bike has more.. That might be the reason for them not to be working.. Public holiday here tomorrow, I'll try to get all these out aaand clean the garage a bit.
Questions: how to remove the pedals (clutch and brake)? How to remove the mirror?
12509155_10205470181134898_3483316841904225183_n.jpg

12507319_10205470200015370_5551057813609451071_n.jpg

12400576_10205470227576059_161914711952793619_n.jpg

12417838_10205470232416180_8093087323401343320_n.jpg

12509411_10205470243896467_6619873302682587080_n.jpg

12401027_10205470244856491_3366355838902615976_n.jpg

11215061_10205470248416580_3135795920118955440_n.jpg

12509577_10205470256896792_8639025061198912343_n.jpg

1909972_10205470270297127_9185414527056549597_n.jpg

12507359_10205470274697237_5594208065550049897_n.jpg
 
Mirror is 7mm bolt and is a bit of a faff
Brake and clutch pedals bolted to master cylinder 13mm socket will see it off
You can get bushes for the pedal box and beware that the plunger for the brake master cylinder isn't too worn
 
Thanks for the hints! I've seen the bolt on the mirror but thought it would be for the light. :)
All parts will be checked for replacement before reassembling the car. ;)
BTW, what's the size of the bolt under the horn button? My 19 is too small for that. 21, maybe?
 
News! The rear part is ready for body check - meaning: I've removed the suspension, brakes and swing arms. Another rusty finding goes to the zone around the right support for the jack, which is all rotten around it (oh, well..)..
Although, I'm needing some more advice: I was trying to remove the steering column and steering box, following the manual, but I'm stuck. They say I should start by the steering column, by removing the screws on it, from inside the car. They mention a lock plate at the bottom of the column which I can't find, but I removed the screw that should be holding it. The column does move a little up and down, but doesn't really come out. Any hints on this?
Then I tried to take the steering box, and on the manual its said I should remove the self locking screw that holds the pitman arm but.. No luck with that one either.. It's locked in place. I've put some wd40 on it, but it won't move any bit. Any hints on that too?
Thanks!
 
Steering column:
remove the nut & bolt holding the column to the dashboard.(13mm)
remove the bolt on the bottom of the steering column (13mm)
Tap a screwdriver in the slot of the clamp and the bottom of the steering column, this will open the joint and with a good pull you should be able to remove the column.


Steering box:
there are 2 swivel joints on the pitman arm. Undo the nuts and you will need a splitter tool to break the joints to remove them.
From the same side of the bulkhead you will see 3 13mm nuts, 2 at the top 1 at the bottom. Undo these and you can then pull the steering box out.


Pedal Box:
undo the 3 brake pipes going into the master cylinder.
remove the brake light switch cable & the reservoir hose.
undo the 2 13mm nuts and then the master cylinder will come off.
from the inside you will need to detach the clutch cable and release the brake return spring.
Then undo the 3 13mm bolts. 2 at the top, 1 at the bottom.
The pedal box will then come out with a pull as the felt gasket behind it may stick a bit.
 

Attachments

  • IMG_4040.JPG
    IMG_4040.JPG
    460.7 KB · Views: 38
  • IMG_5488.JPG
    IMG_5488.JPG
    599.5 KB · Views: 36
Wow! What a detailed answer! Great detail, thanks! I'll give a try to the steering column still today, about the steering box it'll be a challenge to find that tool in here.. Will see.. Hopefully this week I have this phase done.. ;)
 
If you haven't got a ball joint splitter there are a couple of tricks you can use. Undo the nut until it is at the end of the thread. Hit the ball joint with 2 hammers at the same time 180 degrees apart. This should shock the joint apart. Failing that you can hit the thread up BUT make sure you hit the nut only and not the thread otherwise you will damage the thread
 
I'll have to think about this. There are a couple of threads that are pretty destroyed, as well as all the rubbers, so I was thinking of buying a steering set like this.. Keeping the steering column and box.. So, today I was even considering cutting the rods and set the steering box free.. Would you guys do this or handle it differently?
 
If you are in a real hurry to get It apart, and by the sounds of it the threads are damaged anyway, so you could try Damian's way or just cut the rods. Then you can remove the steering box and wait until you get a ball joint splitter to remove the ends. After that get a new set of rods & joints. Chances are the old ones are worn anyway.
thumb.gif
 
It isn't really a race, I'm not in a hurry, but i want to keep pushing myself on finishing this project. The sooner it's done, the sooner I can have the fun of driving the car and move with other projects.. ;)
Thank you for the advice..
 
Good news! Or well, all the steering, pedals, everything's out.. Only forgot to buy some stronger pliers to cut the brakes tubes to get the pump out. No challenge on that.. :)
This would be all good, if the clues that this car had an accident t in the past, wouldn't get more obvious.. Question: how do I get the panel where the chassis number is written replaced without losing the number? Doyou guys usually cut around the nunber and weld it to the new panel or wht? The panel is a mess, and will probably be replaced too..
The photos:
10264933_10205480331988663_6848301052137489602_n.jpg

12494828_10205480333508701_1770152284681350245_n.jpg

12417948_10205480335348747_7340973795096925262_n.jpg

12373394_10205480338588828_6747447793251038457_n.jpg

12507678_10205480341068890_6140375573209951241_n.jpg

3927_10205480346229019_5094006767397013005_n.jpg

12509832_10205480348549077_5438548517326118796_n.jpg

12418095_10205480351869160_1340520775201552253_n.jpg

12524204_10205480362869435_2534362001933184802_n.jpg

581926_10205480367709556_3301591620331076422_n.jpg

1374964_10205480371349647_2801498679824884320_n.jpg
 
you have a couple of choices.
Repair the panel. Most of it is covered by the tank, however you will see the inside and it will look worse when in a nice shiny colour.
Or fit a new one. This panel is available now. You will need to find someone with a set of stamps to apply the chassis number. It will be easier to stamp it before fitting the panel.
Due to the age of the vehicle, there is a stamped number & a chassis plate attached. In the uk on classic cars you can get away without a stamped number in the body as our cars didn't always have them until early 80's I think. Well I had a 76 mini that I changed the bodyshell twice due to accidents and they didn't bat an eye lid at having no stamped chassis number.
Remember this car is some 40 years old. The fact that its still about is quite amazing! To find a car that age without some accident damage is always going to be difficult. By the looks of it your car has already had a new inner & outer front panel. Nothing unusual there!
 
I didn't know you can get the sloping panel where the tank mounts....interested!
I agree that it's probably, technically unimportant to have the stamped number. But my way would
be to make a rectangular cut around the stamping and to carefully re-weld it into a cutout in the new panel. Welded from the reverse and then carefully ground In, it would look authentic.
This restoration does seem to be hitting some distressing snags, but I can supply photos that would make your car look good, and I'm not on my own with that. :)
 
About stamping it first - leads me to another question: I've seen some stores selling these panels and even the small plates with the number, do you know if they also do the stamping before shipping? I probably will ask them just to make sure.. ;)
I'm thinking of painting the car in ivory, the last I want to see are these bumps all over the place.. :)
I had the same feeling as soon as I looked to the front panel from the inside.. I'm not too worried about the previous accidents, I'm more worried about fitting new panels and keep them all properly aligned. (First timer problems, I guess) :)
Looking forward to this next phase - removing paint and see what really is needing replacement..
 
:D 
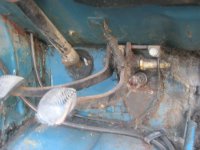
I know my car still looks better than most of the ones you guys start with. I apologize if I am complaining too much about it, but being the first time, every little thing seems like a challenge to me.
I was thinking of cutting the square too, straighten it a bit and weld in place.
Thanks for the advices, you'll be of course being how it goes soon.. ;)
(I apologize too for not quoting answers here but being on the mobile, it doesn't get too easy to post quotes of bits of your answers. I'm hoping to get internet installed at the new house soon, so this will change..)

Oh! And yeah, those panels go around 100 euros if I'm not wrong.. Can post links if you need.

Just got the answer from the store: they sell the panel and plate, but don't stamp them.
 
Last edited:
You can easily get the stamps for the number but it might be impossible if you wanted match the characters exactly. But that's a small detail of patina, not worth the worry:sly:
No-one is going to be annoyed at you going on about the state of your car. It makes those of us who own rust heaps feel less on our own.
Have you bought a welder yet Ricardo? ;)
 
Back
Top