General Franklin Tools & Stilo Rear Bushes.

Currently reading:
General Franklin Tools & Stilo Rear Bushes.

yes, mine did vary between 67.22 mm and 67.43 mm (due to being oval and slightly tapered).
the bore of the axle varied between 66.66 and 67.16 mm.(also oval)
 
Last edited:
Ha! Well it's not as if the thing can escape anywhere and it couldn't possibly be worse than a bush that's gone and all the oil leaked out but some people have said they've been driving around like that for quite some time
 
Last edited:
Not sure if it will be usefull to anyone but just took a photo of one of the bushes I've had machined down and here's some approximate dimensions.

A = 6mm
B = 67mm
C = 66mm
 

Attachments

  • DSC00010.JPG
    DSC00010.JPG
    594.9 KB · Views: 76
Last edited:
Thanks for that. The more information the better. Where is the 2mm lip and what are these "shoulders" measurements that the poster was referring to? Any ideas?

No idea. I saw the same post but was unable to find a 2mm lip anywhere.

My only guess was he ment the thickness of the shoulder? :confused:

"D" in the photo.
 

Attachments

  • 2222.jpg
    2222.jpg
    166.6 KB · Views: 129
Last edited:
Both of my bushes have a small (approx 2mm) ridge just below the lip. I suspect it's formed during the manufacturing process of pressing the lip. This could be what the poster was referring to.

It's height above the main metal body of the bush in minimal. I can just feel it with a fingernail but if there isn't a corresponding rebate or chamfer around the inside of the axle housing, I'll file it off.
-
 

Attachments

  • Bush Ridge.jpg
    Bush Ridge.jpg
    94 KB · Views: 131
Both of my bushes have a small (approx 2mm) ridge just below the lip. I suspect it's formed during the manufacturing process of pressing the lip. This could be what the poster was referring to.

It's height above the main metal body of the bush in minimal. I can just feel it with a fingernail but if there isn't a corresponding rebate or chamfer around the inside of the axle housing, I'll file it off.
-

There was nothing on mine, checked them myself. I'll check my friends bushes Friday and see if his has the 2mm lip. No arrow printed on mine either. :confused:

Could the bushes be manufactured by more than one company? Different companies = different end products?
 
Hi,
Looking at davrens photo of the bush that "lip" is due to manufacturing from where the body of the bush was drawn from a flat blank. It is known in toolmaking as a pinch trim!

Cheers,
 
Could the bushes be manufactured by more than one company? Different companies = different end products?

I suspect they're manufactured by more than one company and by different machines within the companies.

No arrow printed on mine either. :confused:

The arrow lines up with the small cut-out in the end of the bush. You can confirm it by comparing it with a picture of a bush with the arrow.

You can just see the half round cut-out at the 4:30 clock position on the end plate of the arrowed bush, the arrow points exactly in line with the cut-out.
-
 

Attachments

  • Bush End.JPG
    Bush End.JPG
    198.2 KB · Views: 169
  • Bush Arrowed.JPG
    Bush Arrowed.JPG
    59.3 KB · Views: 203
Hi,
Well i have decided to tackle this in a different way!!
I intend to machine the bushes with a clearance of .05mm - .08mm (bear with me!!). I will then use loctite 660 and glue the bushes in.

That looks a very interesting approach - could be the key to the problem, if someone can supply skimmed bushes.
 
That looks a very interesting approach - could be the key to the problem, if someone can supply skimmed bushes.


I had mine machined, reducing the size by 0.15mm. But as the sizes of the bore in the subframe can vary with age and model there is no deffinative size to reduce the bushes to. A DIY approach could be used, lock up a bolt or althread through the bush and then hold it in a drill. While spinning the bush a file or emery cloth could be used to reduce the bush size to a more managable fit. I'm not sure reducing the interference fit to 0 would be a good idea?
 

Attachments

  • DSC00011.JPG
    DSC00011.JPG
    1.6 MB · Views: 201
Last edited:
It appears that there's another Fiat procedure for replacing the bushes. Found this document on an Italian forum, it appears to come from the dealer's online eLEARN. It has the date 27/02/08 on it but that could be just the date it was printed from the online eLEARN.

None of the online translators made a very good job of translating the technical content so I've done my best with it (with Mr Google's help) to make an English version. Both versions are here if anyone can do any a better translation.

There's two more Fiat special tools shown, including a cylinder that fits under the axle housing while pressing the bush in and out (something we don't have so far).

Current prices for the tools are:
2000000200 £5.57 +VAT
2000000300 £4.64 +VAT

I don't understand why they saw the end of the bush off and press it out the 'wrong' way though. :confused:
-
 

Attachments

  • eLEARN Bush IT.pdf
    788.9 KB · Views: 440
  • eLEARN Bush EN.pdf
    392.6 KB · Views: 855
Thanks for that Davren. Damned good translation too(y)

I would think these slightly larger diameter shoulders at each end are the reason for sawing one of them off before dragging the bush through. A bit like a cotton reel, you push it in a bit and saw off that end and then push it through the opposite way
 
YES! :slayer::slayer::slayer::slayer::slayer::slayer:

I replaced the rear bushes on our Multiwagon today.
Took me 5 hours from start to finish but it was worth it, she glides along like a new car now. :D

I took some photo's so I'll upload them later. Davren let me know if they will be of any use for a Guide and I'll email the full resolution photo's to you. (y)
 
Thanks for that Davren. Damned good translation too(y)

I would think these slightly larger diameter shoulders at each end are the reason for sawing one of them off before dragging the bush through. A bit like a cotton reel, you push it in a bit and saw off that end and then push it through the opposite way

But the larger diameter shoulder or lip is only on one end.

The end with (or without on currently supplied bushes) the green arrow has the lip but the rubber covered washer on the opposite end is actualy about 5mm smaller diameter than the body of the bush.

If the bush is pressed in from (say) right to left, then why not press it back out from left to right. Why go the the trouble of sawing the lip off, just so it can be pressed out the same direction it was pressed in. i.e. right to left? :confused:
 
I'm not going to bore you with too many details, just a quick run down of how I did replaced my bushes.

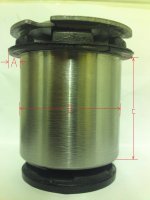
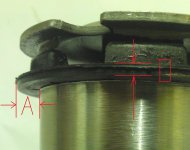
Measured the ride high(important).

I used axle stands under the rear of the car direct onto the chassi and dropped the axle to the floor being carefull not to damage the brake pipes etc.

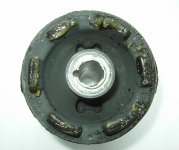
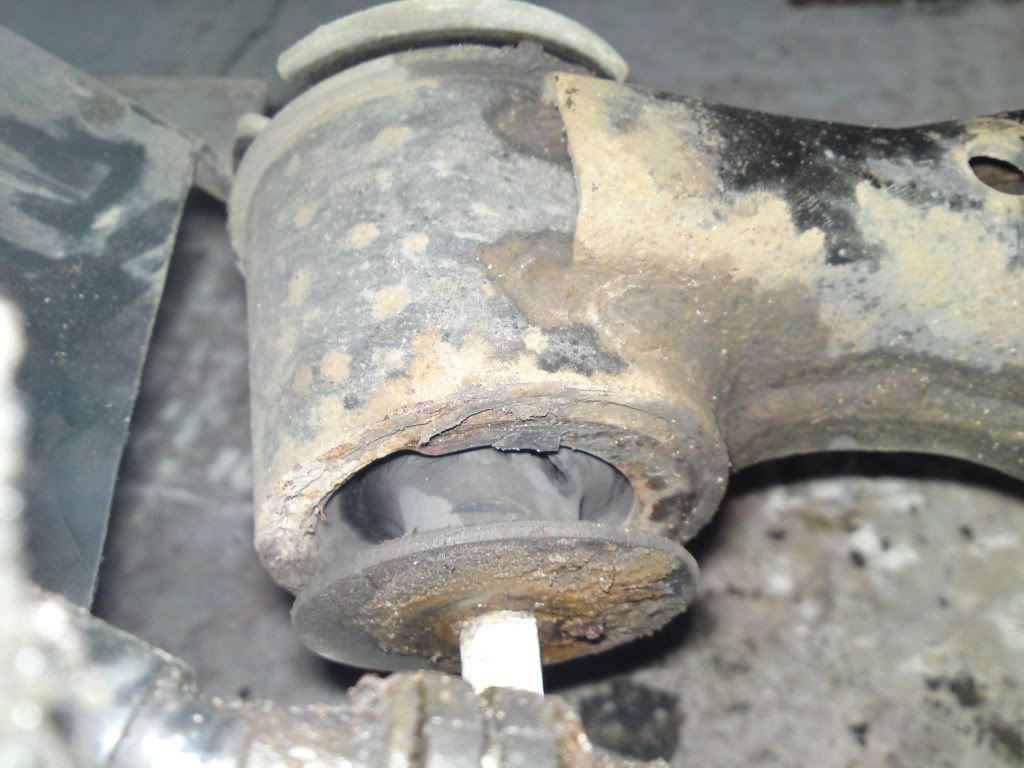
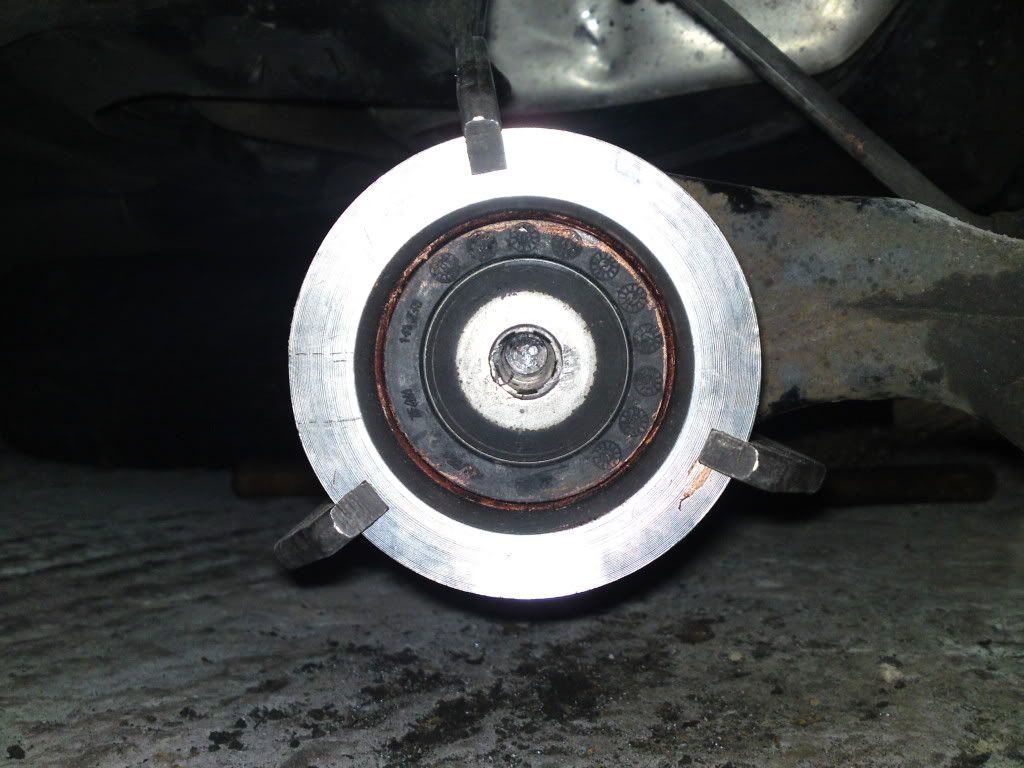
Checked the bushes by inserting the bolt and bending them down so I could see properly. As you can see the near side bush had completely gone and had cracks in it.
1.jpg


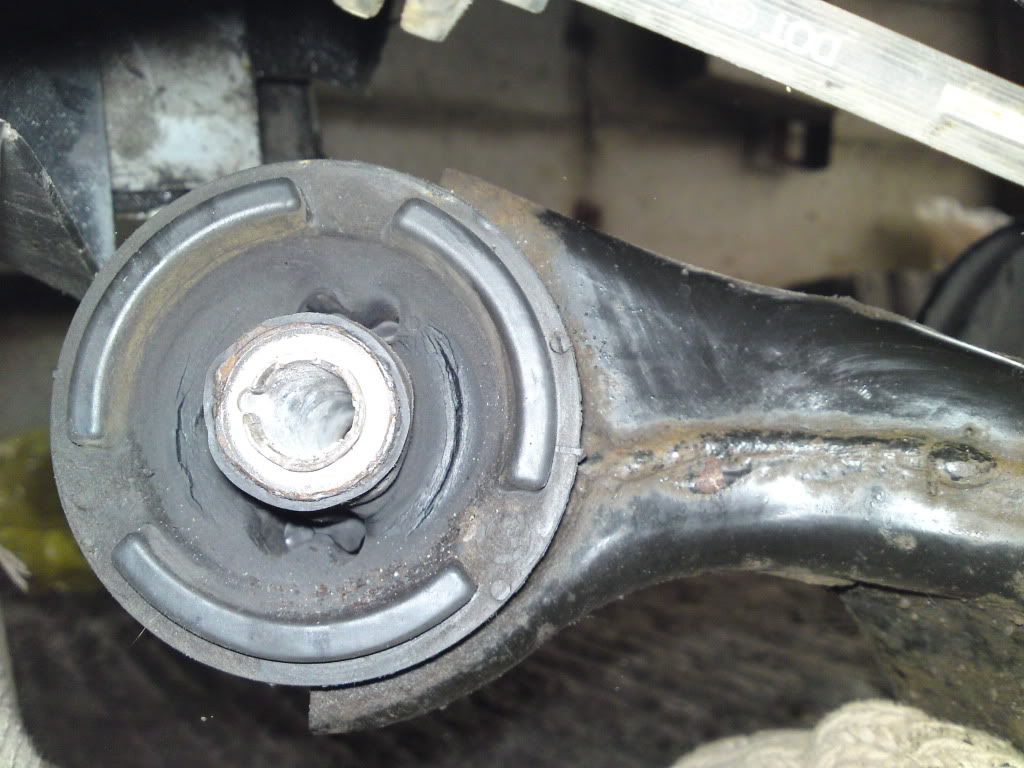
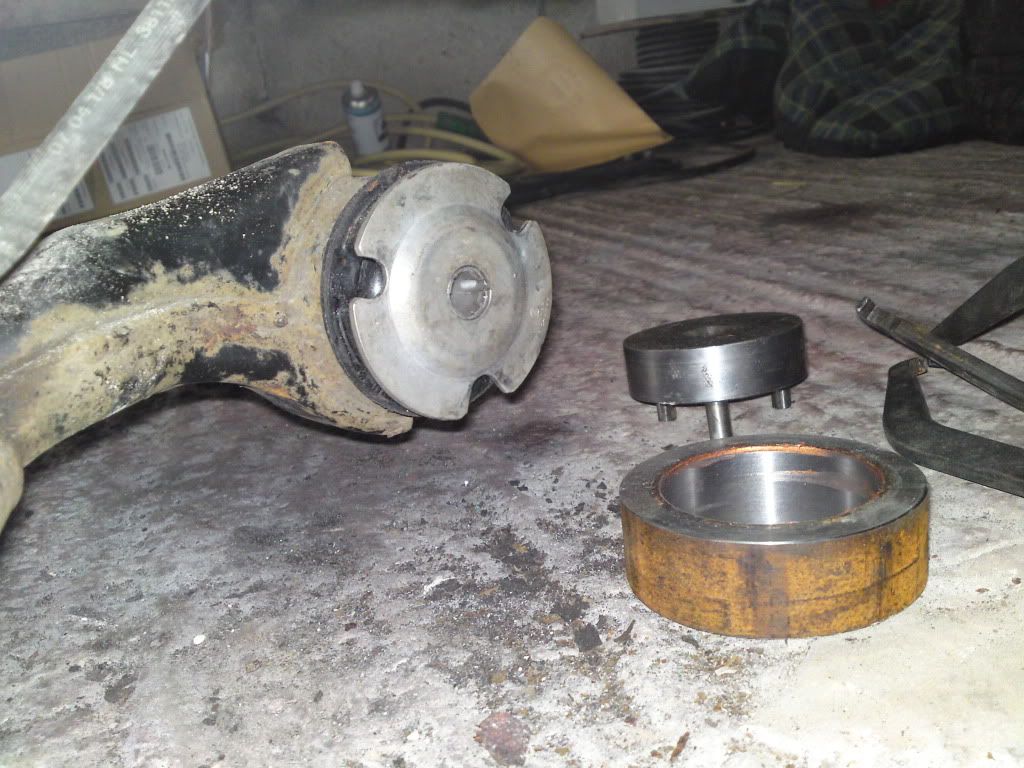
I knocked off the end plates and took photo's of their positions so I could align the new ones the same way.
2.jpg

3.jpg


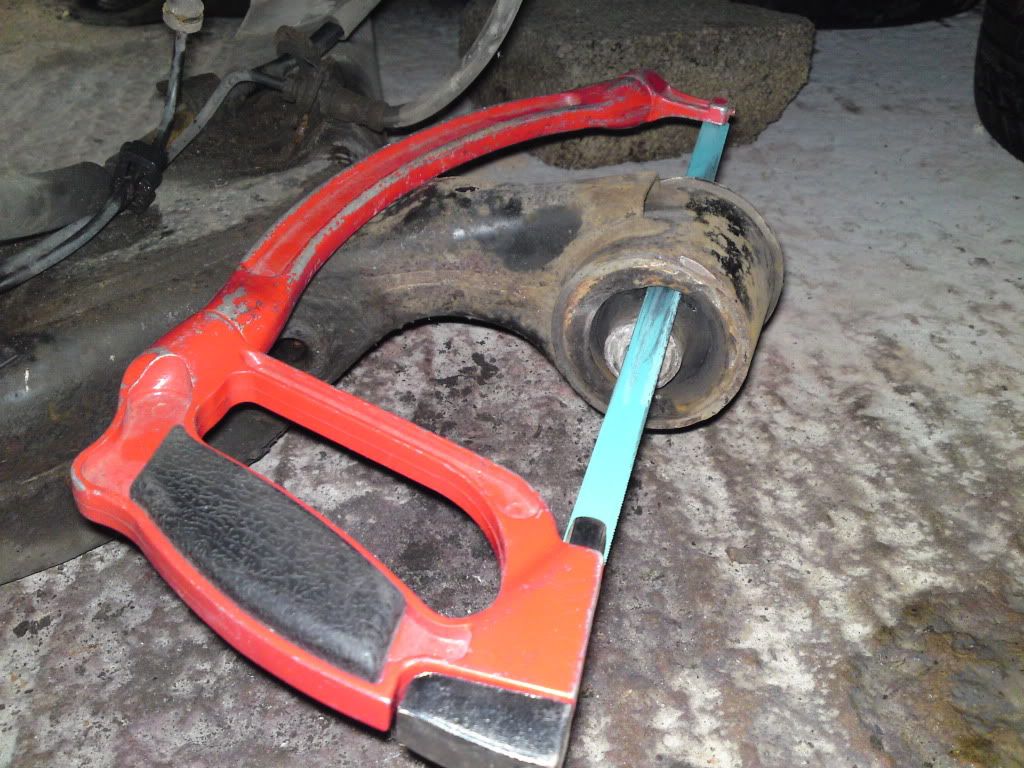
I then cut the center out of the bushes using a hack saw.
4-1.jpg


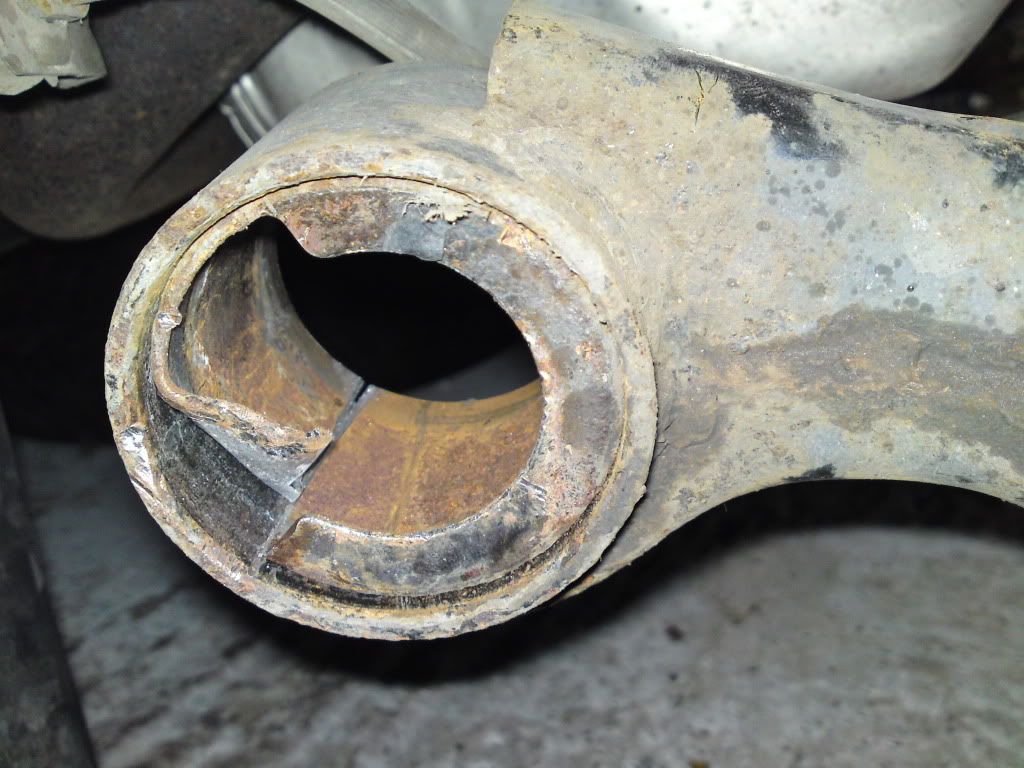
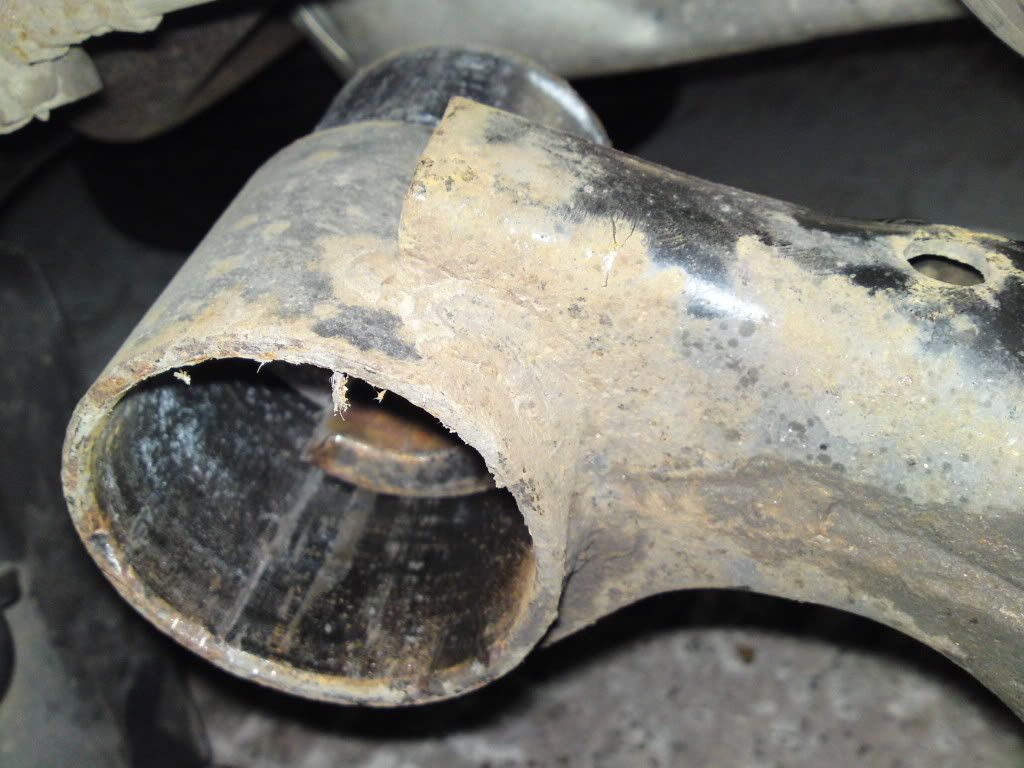
That left the outer shell of the bush so I carefully cut though it with a hack saw and pushed it out.
5-1.jpg

6.jpg


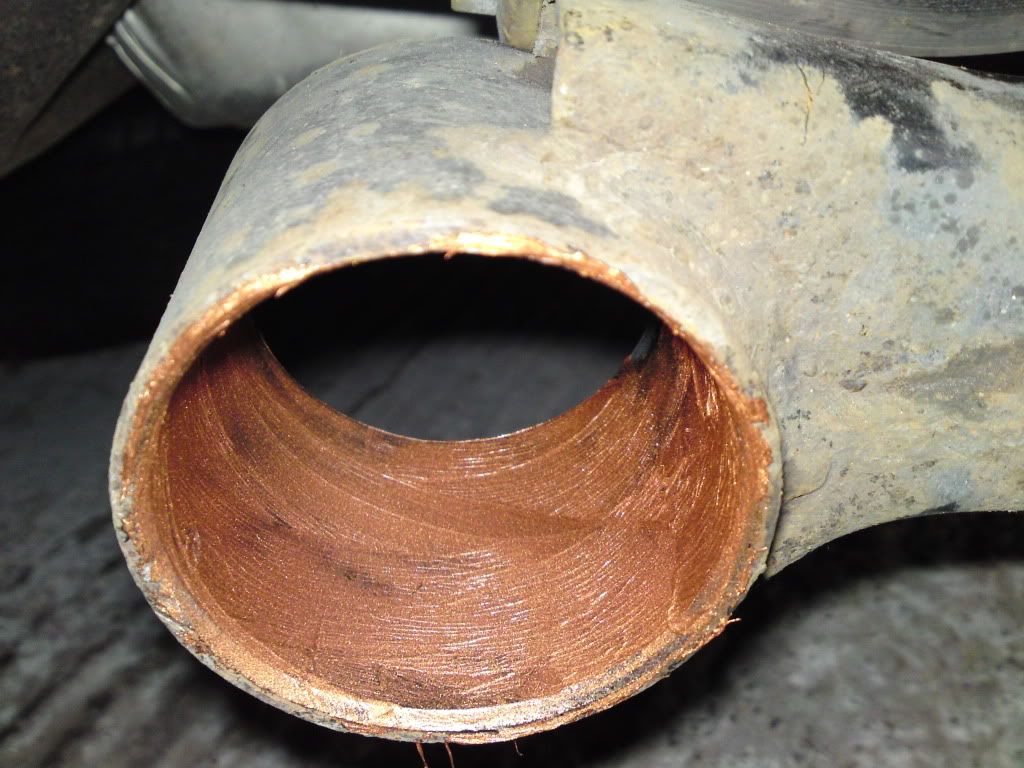
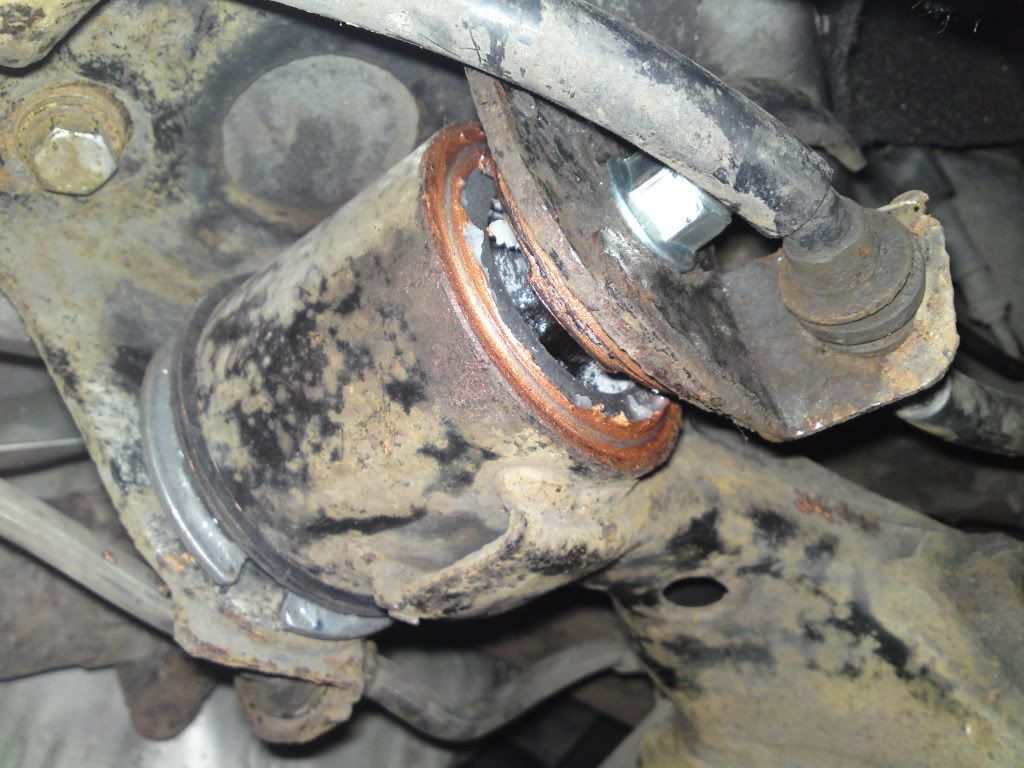
Cleaned up the bore and gave it a thin coat of copper grease.
7.jpg


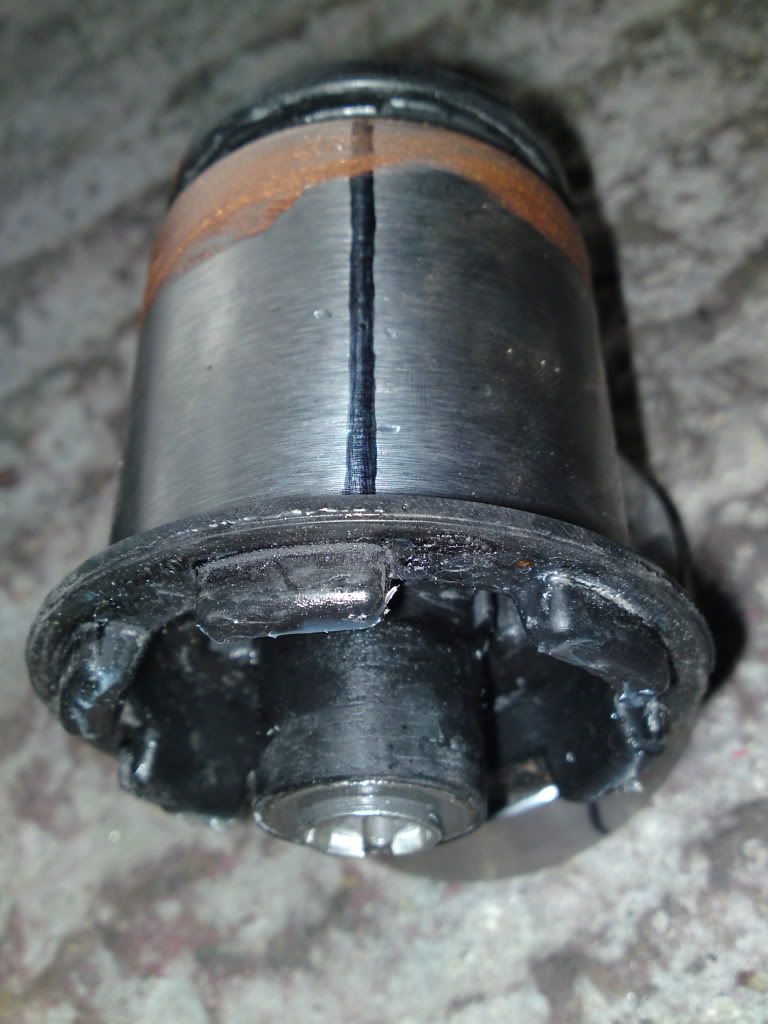
Drawed a line on the bush so I could align it properly with the weld on the axle.
8.jpg

9.jpg


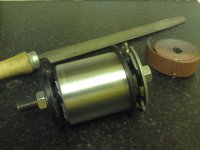
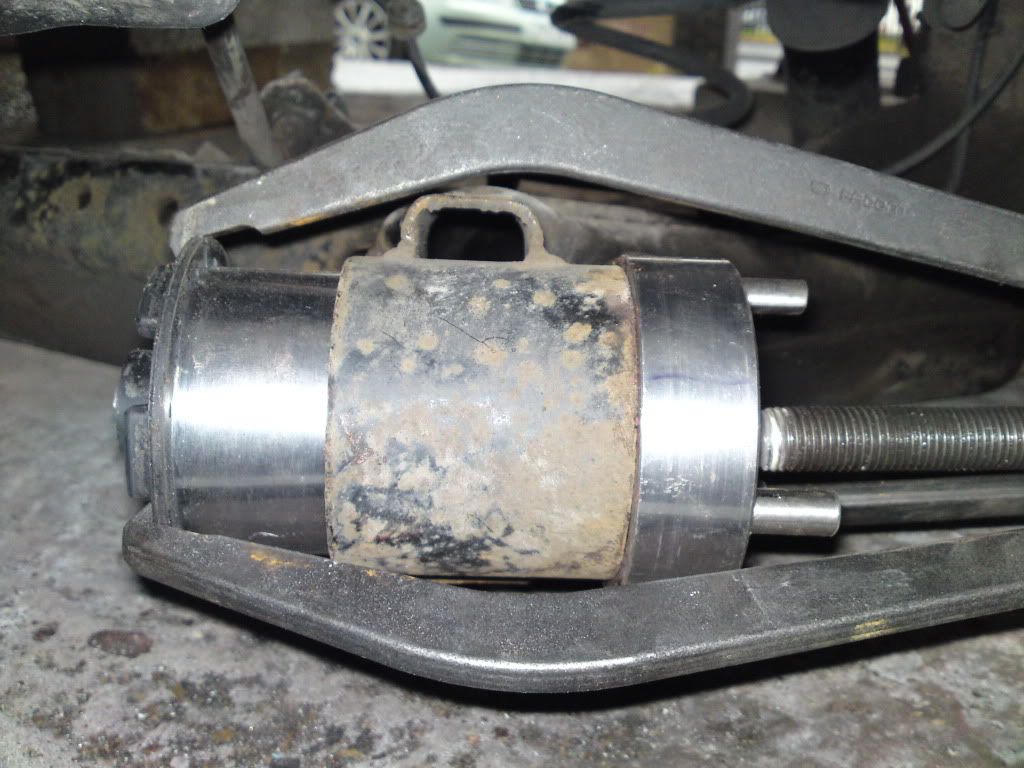
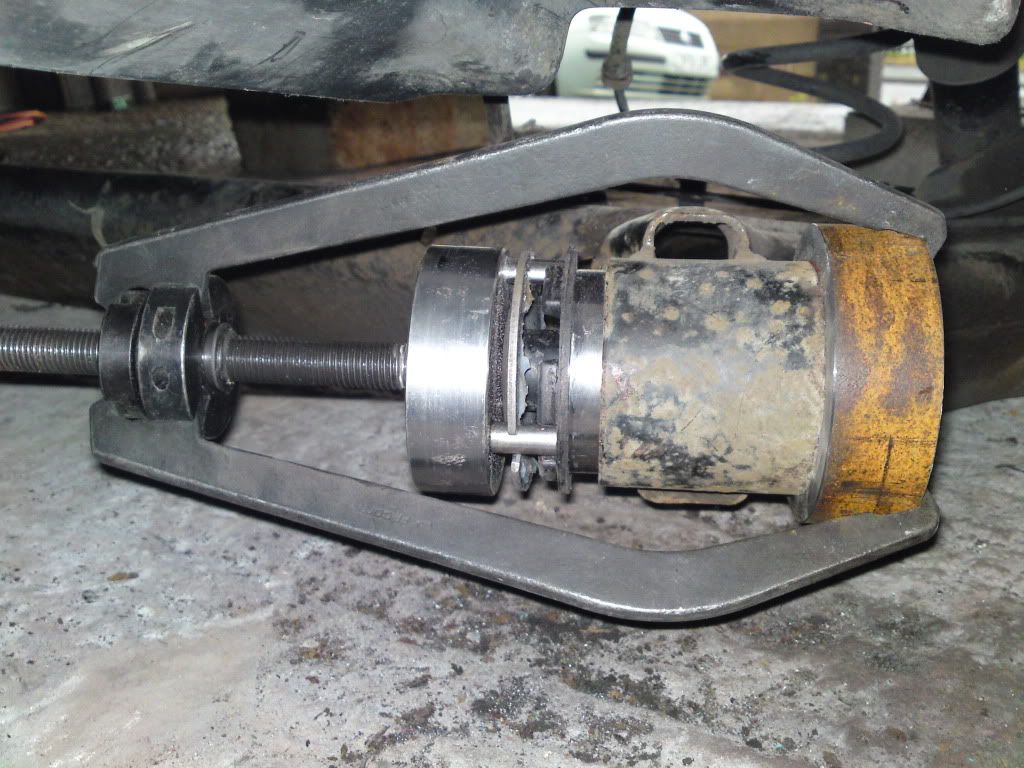
Pushed the bush in using a large bearing puller.
10.jpg


After pushing it in about half way I swopped the bearing puller round and use a large steel ring to give clearence for the rear of the bush and to give better clearence to the bearing puller. Checked I had lined it up properly before continuing.
11.jpg


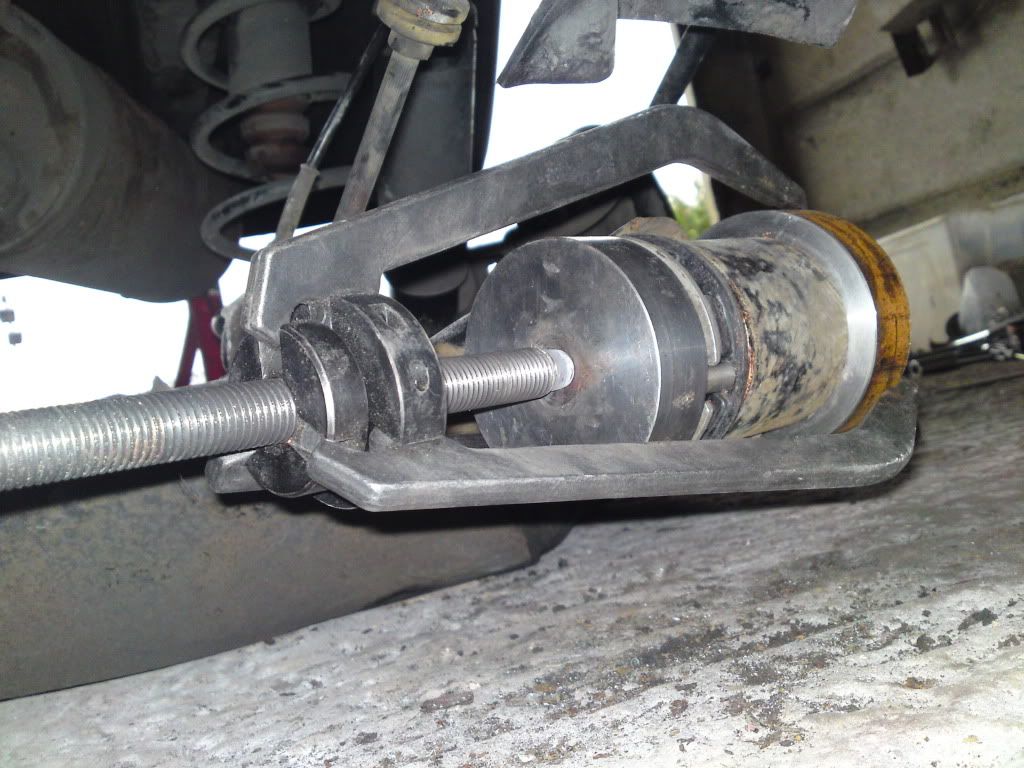
The final push home.
12.jpg

13.jpg


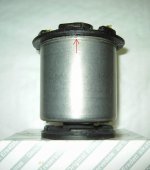
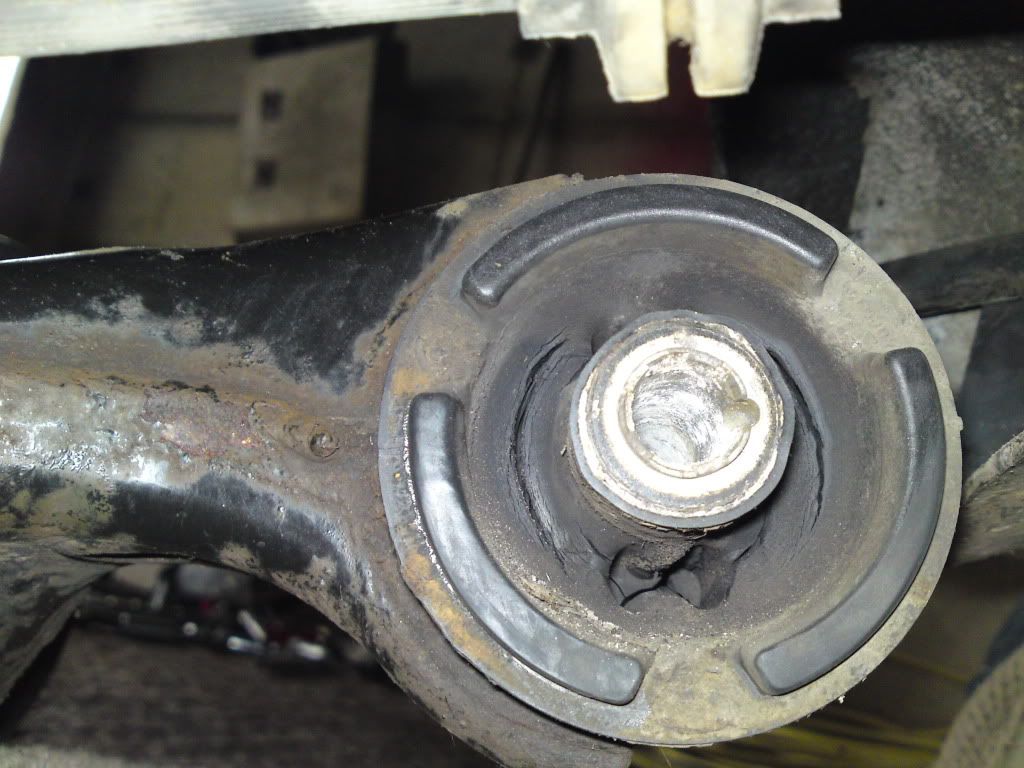
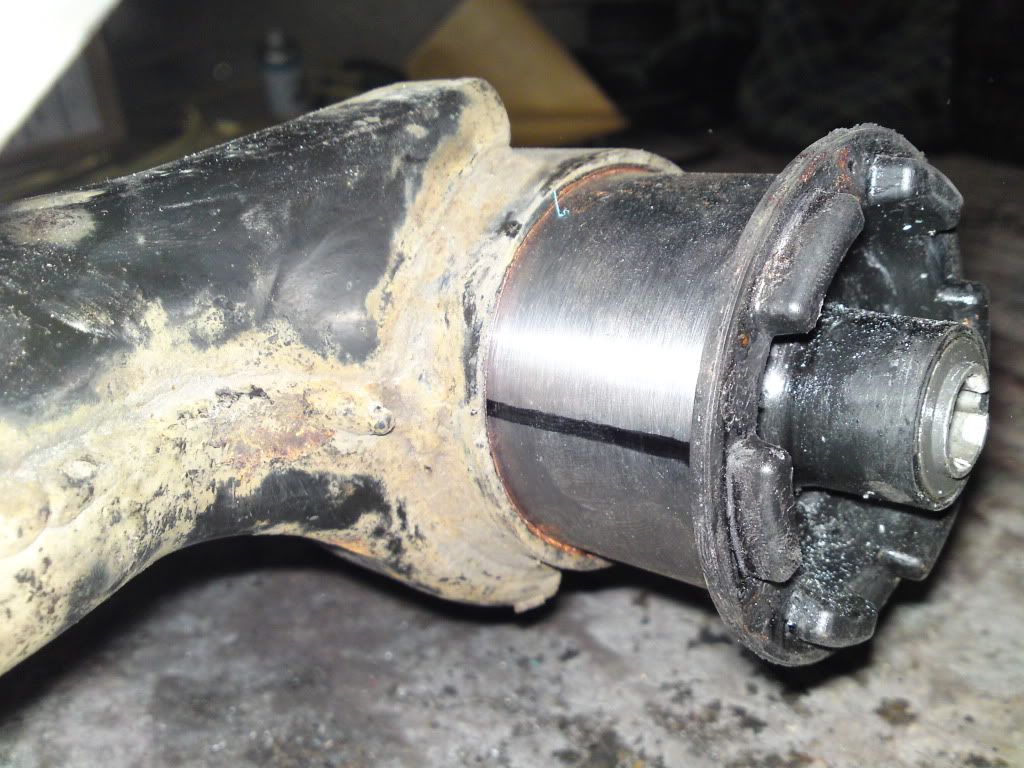
The bush is fully pushed in and correctly aligned.
14.jpg


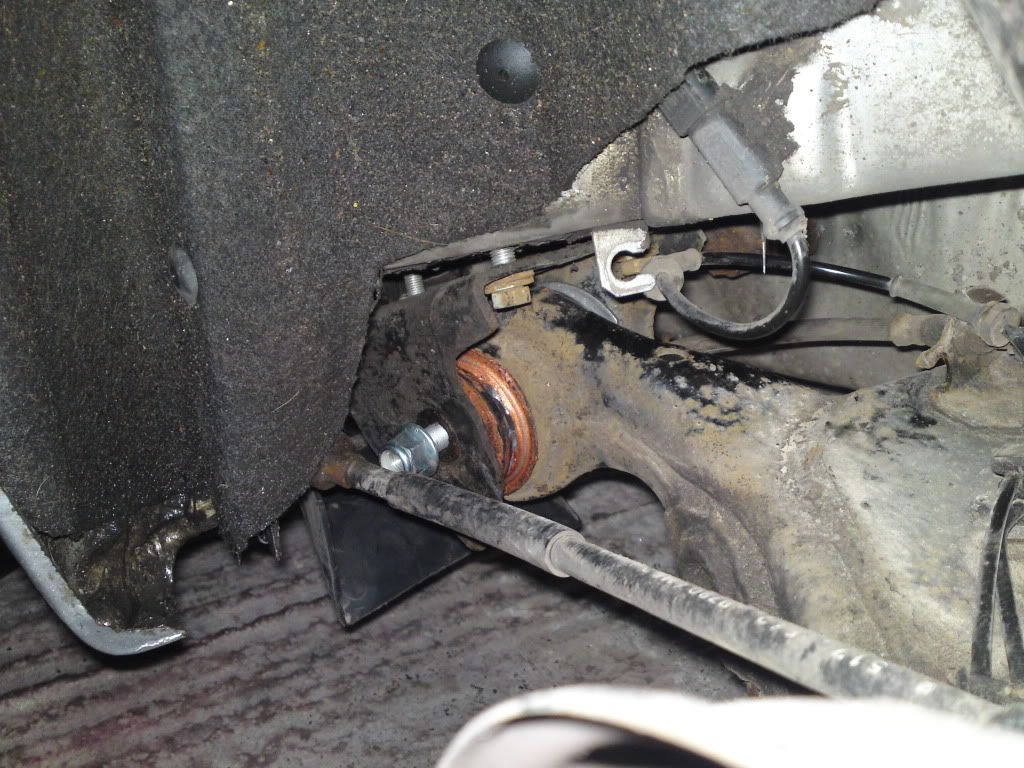
Raised up the axle and bolted it back to the chassi.
15.jpg


Tightened the 8 bolts holding the brackets, clipped the brake hoses etc back in place and then put the wheels back on. Checked the ride high was the same as before and torqued up the bolts that go through the bushes.
16.jpg


Took me 5 hours. Not terribly difficult to do. Reducing the interference fit to a more managable level was the key. I removed 0.15mm from both new bushes but it was still hard work to wind in the bearing puller.

I hope some of you find this helpfull and saves you some cash in the process.
 
Last edited:
Brilliant, Well done. One down, how many more to go?

Did you happen to measure the inside diameter of the axle housing while the bushes were out? Would be interesting to have several people's measurements so we know what variation there is.

Do the mounting brackets only fit to the floor in one exact position or are the holes in the brackets elongated for adjustment?
 
Brilliant, Well done. One down, how many more to go?

Was doing a friends tomorrow. I had planned to use a hydraulic tool to press them in due to him not having his bushes machined down to reduce the interference fit but he popped in to see how I was getting on and has now decided to reduce his too so I'll be replacing his bushes on Sunday now after the bushes have been machined down. ;)

Did you happen to measure the inside diameter of the axle housing while the bushes were out? Would be interesting to have several people's measurements so we know what variation there is.

Unfortunately no, I have a very simple collection of tools, nothing to accurately measure the bore. Sorry. :(

Do the mounting brackets only fit to the floor in one exact position or are the holes in the brackets elongated for adjustment?

The holes in the brackets are not elongated, they do have a small amount of play, 2 or 3mm but thats all. The brackets have to be bolted back onto the axle first, then lift the axle into place at roughly ride hight or you'll have no chance of getting the bolts through the brackets and into the chassi. (y)
 
Back
Top