The Electronics
Thats the more hands on part done, now all is needed is to wire it up and this is where all kits/dials and senders differ.
For my kit, i had a two wire sender, a gauge with 2x+Ve, 2x-Ve/GND, 1xGuage. The instructions were graphical only, and even with an electronics degree, made little/no sense!
I joined the two black wires, joined the two red wires, which left the follwing cables from the gauge, 1x+Ve, 1x-Ve and one temperature input. One of the senders wire goes to -Ve as well, the other goes to the sender input.
Hope you understand what I am explaining
Therefore I needed to find a +12V, and -Ve/GND where the gauge was to be fitted, on the dash for my application. One sender output was connected at the same point as the -Ve/GND and the other sender output went straight into the guage.
On the MPI Sei, the perfect place for this wiring to connect, is in the rev counter wiring, which is already fused by Fiat
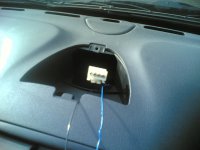
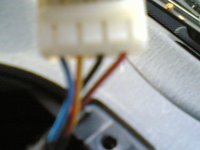
If you observe following pictures, you can see the sender cables, and the Rev counter connector.
The Black Wire is -Ve, connect the gauge and one sender wire to this. The positive gauge wire needs to be connected to another wire!? Which one??!! I can't remember lol, but I don't think it was the red one. A quick check for a +12V with a multimeter will find it for you though! Check its +12v with the engine running, and that its constant 12V regardless of revs.
This ambiguity will actually make the guide more applicable to Cento wiring as well.


Now just mount the gauge and there you go

