What I used
Haelth and Safety
Always wear PPE (Personal Protective Equipment) or at the very least wear a mask when spray painting, you really do need it. Trust me, feeling high from paint fumes is not big and clever.
Stage 1: Battered Rims
Take all rims off the car, you will either need to be able to take the car off the road for a while or have some spares you can put on it for the time being.
Stage 2: Preperation
Stage 3: Primer
Stage 4: Colour Coat
Stage 5: Lacquer
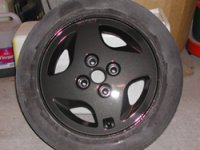
Notice how the lacquer has brought out the shine in the metallic coat.
Stage 6: Enjoy
Some final observations
Enjoy!
Gareth Roberts
- 4 x Used and Abused Alloy Wheels
- Abrasive Pads
- Coarse and Medium Grade Emery cloth
- Masking Tape
- Small Negative (-) Screwdriver
- Very Large Can of Grey Primer
- 4 x 300ml Cans of Graphite Grey Metallic Spray Paint £5.29 a can from Halfords
- 4 x 300ml Cans of Clear Lacquer £5.29 a can from Halfords
- File
- Oilstone
- White Spirit
Haelth and Safety
Always wear PPE (Personal Protective Equipment) or at the very least wear a mask when spray painting, you really do need it. Trust me, feeling high from paint fumes is not big and clever.
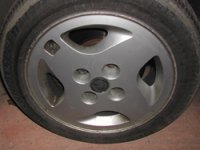
Stage 1: Battered Rims
Take all rims off the car, you will either need to be able to take the car off the road for a while or have some spares you can put on it for the time being.

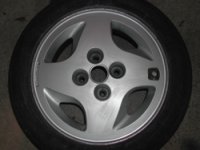
Stage 2: Preperation
- Prise any wheel weights from the wheel with screwdriver, take care not to badly scratch your alloy wheel, and remove the centre cap.
- Clean any dirt and brake dust from the alloy.
- Use abrasive pads to scratch all lacquer from the alloy, if the wheels are in a reasonable condition you do not need to go back to bare metal.
- Use the screwdriver to scrape any oxidisation from the surface of the rim back to bare metal, then blend the bare metal into the alloy coating with the coarse and medium emery cloth.
- I used the medium emery cloth to sand areas I could not get into with the abrasive pads.
- The lips of your rims will probably be the worst damaged, they will be nigh on impossible to get back to new condition. What I did was used the coarse emery cloth on them to sand as much as possible, then rubbed it with an oilstone and ran a file over it to flatten off as many imperfections as I could.
- Mask up your tyres and valves, unless you are getting new tyres then masking doesn't matter.

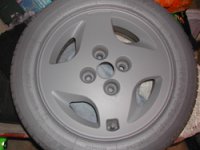
Stage 3: Primer
- Make sure the surface of the alloy wheel is clean and free from dust and grease. If in doubt put some white spirit or similar on a clean cloth and rub it over the whole surface.
- Give can of primer a good shake until you hear it rattle
- Spray a layer of primer over the whole alloy, I find spraying as instructed on the cans gives a good finish.
- Allow 15-30 minutes betweens layers of primer.
- Apply as many layers of primer as you wish, I personally only did 2. Primer will show up imperfections in the preparation of the rims, if you have many imperfections prep the surface again.

Stage 4: Colour Coat
- Again make sure surface is dust free and clean, DO NOT however rub with white spirit, use something like baby wipes or an airline if you have one.
- You may think you should sand the primer coat with wet and dry, I wouldn't bother, if you have a good enough finish on the primer it won't matter.
- Spray a layer over the whole alloy, again follow the cans instructions.
- This time allow longer between coats, upwards of 2 hours to help maintain a good finish.
- Again apply as many layers as you wish, but I only did 2.
- One 300ml can should be good for two coats per 13" alloy wheel, I still had some left in the can after 2 coats.

Stage 5: Lacquer
- Again make sure surface is dust free and clean, DO NOT however rub with white spirit, use something like baby wipes or an airline if you have one.
- Do not sand the colour coat with wet and dry, the quality of the finish will be good enough for the lacquer to take too and you will lose the effect of the colour coat if you do.
- Spray a layer over the whole alloy, again follow the cans instructions. Take extra care with lacquer when applying it, it is paramount to the final finish of the alloy.
- Again apply as many layers as you wish, but I only did 2.
- One 300ml can should be good for two coats per 13" alloy wheel, I still had some left in the can after 2 coats.
- Allow at the very least 24 hours after the final layer of lacquer until you do anything to the rims.
- Remove all masking from the wheel

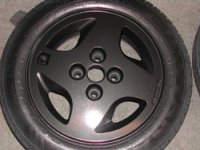
Notice how the lacquer has brought out the shine in the metallic coat.
Stage 6: Enjoy
- Put wheels back onto car
- Get wheels (Retyred if needs be and) balanced. Ask them to put the balance weights on the inside of the wheel, you don't want your new paintwork ruined.
- Brag to your mates about your skills.
Some final observations
- Try and work in a dust free environment wherever possible, it makes for a better finish.
- Working at room temperature (20 degrees celsius) will give for a better paint finish
- This refurbishment took me just over a week of 2-3 hours work a day. Most of it was spent waiting for coats to dry.
Enjoy!
Gareth Roberts

