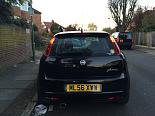
So you may have washed your car or a heavy down pour has happened or nothing at all and you've got into the car, only to reach a turn and when you signal; the canbus bulb error comes up and your indicator goes into overdrive. Hopefully you haven't replaced the bulb just yet as its not necessarily the bulb - it could be a number of things, this guide will be looking at the multi-plug connector into the tail-light. ")
What you need;
- Philips head screw driver
- Something plastic and thin to lodge out the tail light
- Electrical contact cleaner / WD40
- Some fine grit sandpaper, I used 600
- A dry clean rag
- A beverage
For steps that involve checking to see if the bulb is working, you don't have to turn the hazards on every time - you can use the key fob to lock and unlock the car its a lot quicker.
Please note: This is a very simple job, this guide is aimed at people who wouldn't usually carry out car maintenance and hopefully keeps them away from Halfrauds at all costs! Feel free to comment further maintenance steps as I only go as far as cleaning the connections on the multi-plug.
Diagnosis
So we need to work out what is at fault, first off its important to work out what is causing the symptoms. This means removing the tail light and seeing if the bulb has indeed given up the ghost or if something else is at fault. Its very simple to remove the tail light, you need to open the boot which reveals two philips head screws along the inner edges of the light clusters.

Once you've unscrewed these you need to pull the cluster out, its relatively easy you might need to lever the outer side of the cluster out with a piece of plastic. And pop, out the light comes, don't pull it as the multi-plug is still connected.

Just push the bottom of the plug upwards while you pull and it will pop out.
Now to get at the bulb there are a further two philips head screws.

You need to loosen these and then the back of the light cluster will pull off revealing the three bulbs, set the other part of the cluster down you don't need it again until we reassemble.
NOTE: If you are unlucky like me and the rubber gasket between the two halves of the cluster comes apart -
.JPG")
Then you just push it back into the groove using the end of a screwdriver or something similar and it will just seat itself back in. If you cant get the ends to line up you can cut it to fit but its fine to overlay slightly you just need to push the two halves of the cluster together a bit harder when you reassemble it.
The bulb
To check the bulb you want to do a visual inspection at first, if the filament has obviously broken then you know its the bulb but if it all appears to be fine then the next port of call is to swap the indicator bulb over into the side you know to be working. So repeat the process for removal and swap the bulbs.

If it works like it did for me you know for sure it isn't the bulb and it is instead something with the light itself or connector.
If when you swap them the working bulb works in the previously not working tail light then you know the tail light works and you probably just need a new bulb.
The Multi-plug
So now we know the bulb isn't at fault its time to look at the connector itself. The connectors on these lights comprises of four tabs that slot into the multi-plug, these can easily become corroded if water or any liquid gets anywhere near them and can cause problems. With my particular case I noticed there was quite a lot of white corrosion on the multi-plug so I knew this would be a good place to start.

Using some 600 grit sandpaper I ripped a bit off and folded it into a tight card and gave the inside of the multi-plug a quick sanding to clear off any debris or corrosion that could be causing a poor connection.

And then gave it a small squirt of WD40 to clear off anything left from sanding. I let that dry while I turned my attention to the tabs on the cluster that go into the multi-plug.

Give those the same treatment and then wipe away any excess WD40 / electrical contact cleaner ensuring everything is dry before re connecting the cluster.
In my case this fixed my issue. I unplugged the multi-plug once again, reassembled the light cluster and then connected it again before refitting it to the car.

Admire your newfound car maintenance skills, don't pay Halfrauds again!

Remember; This fix wont work in every case but it is somewhere to start, further than this it could be an earthing issue but there are a few threads on earths and grounding points on the fiat forum and obviously anything you cant find i'm sure people on the forum will be more than happy to help.