The tools you will need are as follows:-
Trolley jack. Ramps or axle stands. Hub puller. Socket sets 1/2" aand 1/4" drive. Ring and open end spanners. Torx set. 6mm allen key. Torque wrench. Phillips and pozidrivers. Oil pan.Ball joint remover.
Angle grinder with slitting blade and a nut splitter (optional).
Materials:-
Complete clutch kit.
Gear oil 80W/90 EP.
Crankcase oil seal part no 71718365 (optional).
Gearbox main shaft oil seal part no 40004820 (optional)
Intermediate shaft oil seal part no 40004760 this should be replaced.
Clutch alignment tool. (can be made)
Liquid gasket.
Exhaust sealant.
Preparation
Jack up the front and place on ramps or stands. I chose ramps with wooden blocks placed under the runners at the inside of the jack points because of the slope of the drive. Make sure there is enough room to work under the engine and gearbox.

DRAIN THE GEARBOX !!!
Remove front wheels, battery and tray,air intake,air filter housing, etc.Let the dog see the rabbit.
Some photos, and instructions that I took from tha Barchetta Fiat workshop manual.
.jpg")


I also removed the throttle body to access the starter motor, and also give it a good clean.


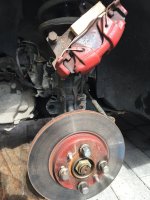
A 6mm Allen key will remove the 12 bolts from the inner CV joints by jamming it against the subframe RH side and gearbox LH side then turning the brake disc slowly to crack them loose.


You must remove the RH drive shaft completely to extract the intermediate drive shaft from the differential using either a hub puller to remove completely or as I did which was to drop the antiroll bar.

Refer to previous Fiat instructions to remove the track rod ends and driveshafts.
Remove the exhaust downpipe,( this is where the angle grinder and nut splitter will come in handy),starter motor and intermediate shaft.
Removal
Make a bracket to fit the engine block.

Make a engine support crossbeam to hold the engine in place when the mounts are removed.

I made this out of a scaffolding board, angle iron , screwed rod, steel plate, etc.
Once fitted and any wiring, gear cable, clutch cable and reaction strut are disconnected, the gearbox mounts can be removed.
You can now pull the engine forward so that the bottom radiator hose is touching the fan. This is a must or you cannot remove or replace the gearbox.

Place the jack under the gearbox and remove the 6 bolts from the bell housing, prise the gearbox off and lower to the ground.

Replacing
I made a flywheel locking key to remove the flywheel and access the crankshaft oil seal which I replaced using lots and lots of liquid gasket (USE PLENTY OF THIS STUFF IT'S A MUST)


I also replaced the gearbox shaft oil seal using plenty of liquid gasket.

The intermediate shaft oil seal is amust to be replaced, although this could be done if it leaks at a later stage.
Probably the easiest part of the job was fitting the new clutch.
 and the reason for that was:-


The metal disc between the two friction surfaces was warping with the heat and causing uneven wear, also thrust bearing was on its way out, etc.
Refitting
Refitting is simply the reverse . Don't forget to top up the gearbox.
Enjoy.