right so fairly simple but if you want to go beyond that.
if you want to led your footwell for example.
(this is off the top of my head but gives you an idea)
make 2 strips from wood,plastic or as i would use
matrix board from maplins
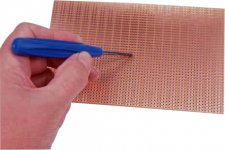
but not the copper based stuff,just plain.
this can be cut,dremeled,sanded etc very easily
the holes are perfect to fit led's into.
so make your 2 strips and push the leds through the board.
leave 2 holes between each led.
it will be explained further down but if you for one resistor per led then bend the leds so they are @ 180o to the board but if its in parallel then either 180o or 90o as it doesnt matter.
make sure you keep the long leg/short legs to the same sides
so you have one row of + and one row of negative
now theres 2 options for resistors here
1 resister per led.
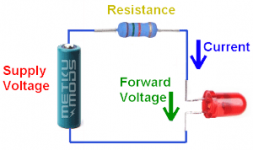
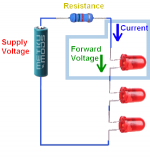
or 1 per strip(in series)
or you can go parallel(not in my example)
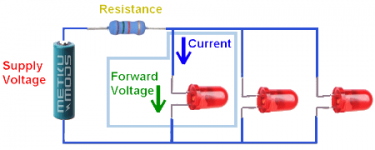
when i do them I do one per led but i like this is its easier to change stuff plus it cut down the amount of resistors i had to stock
if you go for 1 per strip this is wiring in series.so the above resistance calculator will tell you the rated resistor required
so you have your strip with leds inserted along its length
bend the legs out on each LED to keep them in place
now get some single core wire (i use kynar) and solder one complete wire to the negative legs (on the underside of the board)of all the leds's on one board.
repeat for the other one
now if you go for one led per led it gets a little labour insensive
take one resistor and solder to the positive leg of an led.
slder as close to the actual resistor as possible and then pass the other end of the resistor wire through the board to the underside.
repeat fro all the leds.
now solder a wire along all the resistor ends underneath to make the positive connection
if you are doing 1 resistor per board then just solder a wire along all the positive legs like you did for the negative but solder the resistor in after you have soldered all the legs
test each board by passing current from a 9v battery over them(remember they will be brighter in 12v)
if any led's dont work then check the soldering
once its all working i recommend hot glueing the underside and if done with 1 led per led hotgluing between each led.
then its a case of mounting whereever you chose and connecting to a 12v source with a switch if you want.
this pic gives an idea(poor pic and in an xbox though)
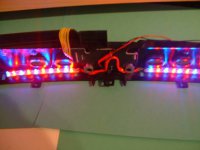
and in a fully assembled state


