

Introduction
Hello all... I am new to this forum and I am in the midst of converting my 1960 600 to electric. I have converted one other classic car to electric 3 years ago (1964 Corvair) and it has been wonderful. The corvair is a convertible and we drive it daily all summer (in the pacific NW). I want a classic ev conversion that will also allow us to drive year round. Thats where the 600 comes in. We are all small car fans in this fam, and this little guy is just too damn cute. I have been working on the car for about 6 months at this point, and now that I have worked out most of the big-ticket items, i thought it was time to share it with y'all.
First off, i know there is alot of controversy about converting old cars to electric. Everyone will have their own opinion on if its the right thing to do or not. I can tell you, for me, its totally the right thing to do, for many reasons. With that... lets get to it.
My goals:
- 120 miles of range
- 75mph top speed
- Safer than it was
- Looks stock
- Can still haul 4 people
- Use it all year
The major parts i plan to use:
- Hyper9 144V AC motor and controller (@ 120hp/180ft-lbs this motor is WAY too big for this car. its a long story, but its what i ended up with)
- (6) Tesla model s battery modules
- Orion2 BMS
- 2.5kW charger
- Early beetle transmission (why? well, they have loads of aftermarket support and they have been used in countless EV conversion with the motor i plan to use. out little transmissions are just too unique and unknown, in comparison).
The major things i needed to figure out right away:
- where can i stash all these batteries?
- will the motor fit in the back
- how will i manage the HVAC? (since i want this to be usable year round)
- how will i upgrade the brakes?
This first couple of posts will get after the batteries and the motor fitment.
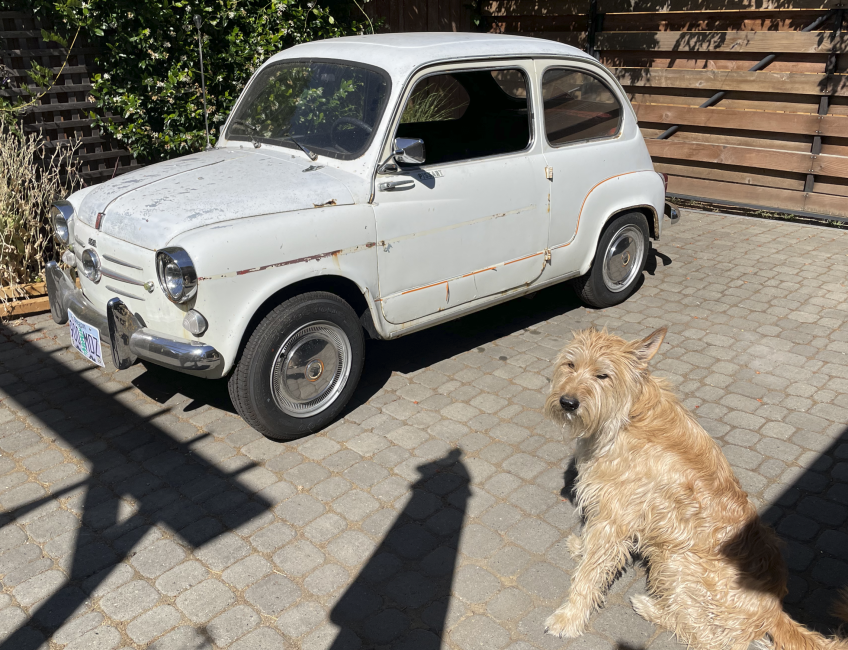
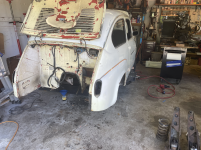
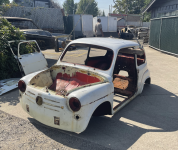
here is the car as bought:

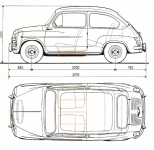
I bought the car in august 2022. Clearly my dog Marty is super excited about all the time i will be spending working on it, rather than going for walks. The car had spent alot of its life at the coast, so the rust is not ideal. This is my first body work project, so I dont expect it to be a show car. When i was planning this conversion, i carefully measured up where and how i could fit the (6) battery modules in the car. Most of the old Fiat conversion (mostly 500s in the UK it seems) use (3) tesla modules and place them under the bonnet and boot. The floors in this car need replacing, so i worked on a plan to place the batteries under the seats, just like modern EVs. It will keep the center of gravity low and give me space for other stuff up front and have storage in the back. Here is some cad exploration: You can see the battery module outline in orange.

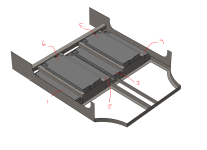
So, according to my rough CAD, i could fit 4 modules across the bottom of the car, and then one additional module under each front seat, between the seat rails. It will lower the floor of the car about 1.25in and raise the seat about 1in. The new seat rails will be on either side of modules 5 and 6. Like this:

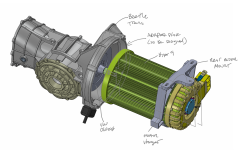
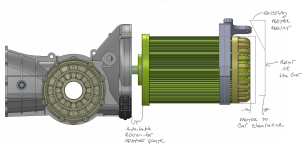
This will give me a voltage range of about 108-151V. The motor and motor controller i chose can support 90-180V, so its just right. Speaking of the motor, i made sure it will fit between the transmission and rear bumper panel. I also found a CAD model of a beetle transmission so i can work on new mounts and adapter plates. Here is how it is coming together:

Note the clearance to the back of the car and how i plan to use the existing motor mount to hang the back of the assembly from. I will also be working on getting the standard transmission mounts adapted to the car, but i am less concerned with that, at this point:

So, now that it doesnt seem totally CRAZY to fit all of this stuff in the car, I got to work taking the car apart, preparing it for a metal dip. Here are some progress pics of the tear down (note the car was originally red):

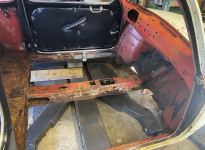
here you can see how rotted the floors were:

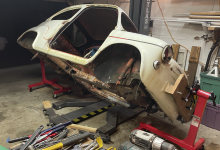
I also built a makeshift rotisserie out of harbor freight engine stands. I cant flip the car over completely, but i can rotate it 90deg either direction.

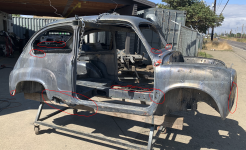
After completely stripping everything off of the car, it was time to haul it to the metal dip shop (in Eugene OR, totally awesome place):

When the car came back from the dip shop, i was heartbroken. i had a big decision to make... it was bad. Really bad. Should i scrap this car? I considered it. I would have to replace nearly everything. Even the doors were completely unsalvageable.

I had to source replacement doors. The only early (suicide) door i found on Ebay was 1000$. If i had to spent 2k$ on doors, this project was sunk. I decided that if i couldnt find reasonably priced doors, i was going to scrap it. Then i discovered Chris Obert down in Santa Cruz CA. He had 16 doors for me to choose from and sells them for 150$ ea. He was kind enough to take a video of each door, reviewing their health and let me choose. it was awesome. the project was back on!
First off, i know there is alot of controversy about converting old cars to electric. Everyone will have their own opinion on if its the right thing to do or not. I can tell you, for me, its totally the right thing to do, for many reasons. With that... lets get to it.
My goals:
- 120 miles of range
- 75mph top speed
- Safer than it was
- Looks stock
- Can still haul 4 people
- Use it all year
The major parts i plan to use:
- Hyper9 144V AC motor and controller (@ 120hp/180ft-lbs this motor is WAY too big for this car. its a long story, but its what i ended up with)
- (6) Tesla model s battery modules
- Orion2 BMS
- 2.5kW charger
- Early beetle transmission (why? well, they have loads of aftermarket support and they have been used in countless EV conversion with the motor i plan to use. out little transmissions are just too unique and unknown, in comparison).
The major things i needed to figure out right away:
- where can i stash all these batteries?
- will the motor fit in the back
- how will i manage the HVAC? (since i want this to be usable year round)
- how will i upgrade the brakes?
This first couple of posts will get after the batteries and the motor fitment.
here is the car as bought:
I bought the car in august 2022. Clearly my dog Marty is super excited about all the time i will be spending working on it, rather than going for walks. The car had spent alot of its life at the coast, so the rust is not ideal. This is my first body work project, so I dont expect it to be a show car. When i was planning this conversion, i carefully measured up where and how i could fit the (6) battery modules in the car. Most of the old Fiat conversion (mostly 500s in the UK it seems) use (3) tesla modules and place them under the bonnet and boot. The floors in this car need replacing, so i worked on a plan to place the batteries under the seats, just like modern EVs. It will keep the center of gravity low and give me space for other stuff up front and have storage in the back. Here is some cad exploration: You can see the battery module outline in orange.
So, according to my rough CAD, i could fit 4 modules across the bottom of the car, and then one additional module under each front seat, between the seat rails. It will lower the floor of the car about 1.25in and raise the seat about 1in. The new seat rails will be on either side of modules 5 and 6. Like this:
This will give me a voltage range of about 108-151V. The motor and motor controller i chose can support 90-180V, so its just right. Speaking of the motor, i made sure it will fit between the transmission and rear bumper panel. I also found a CAD model of a beetle transmission so i can work on new mounts and adapter plates. Here is how it is coming together:
Note the clearance to the back of the car and how i plan to use the existing motor mount to hang the back of the assembly from. I will also be working on getting the standard transmission mounts adapted to the car, but i am less concerned with that, at this point:
So, now that it doesnt seem totally CRAZY to fit all of this stuff in the car, I got to work taking the car apart, preparing it for a metal dip. Here are some progress pics of the tear down (note the car was originally red):
here you can see how rotted the floors were:
I also built a makeshift rotisserie out of harbor freight engine stands. I cant flip the car over completely, but i can rotate it 90deg either direction.
After completely stripping everything off of the car, it was time to haul it to the metal dip shop (in Eugene OR, totally awesome place):
When the car came back from the dip shop, i was heartbroken. i had a big decision to make... it was bad. Really bad. Should i scrap this car? I considered it. I would have to replace nearly everything. Even the doors were completely unsalvageable.
I had to source replacement doors. The only early (suicide) door i found on Ebay was 1000$. If i had to spent 2k$ on doors, this project was sunk. I decided that if i couldnt find reasonably priced doors, i was going to scrap it. Then i discovered Chris Obert down in Santa Cruz CA. He had 16 doors for me to choose from and sells them for 150$ ea. He was kind enough to take a video of each door, reviewing their health and let me choose. it was awesome. the project was back on!
